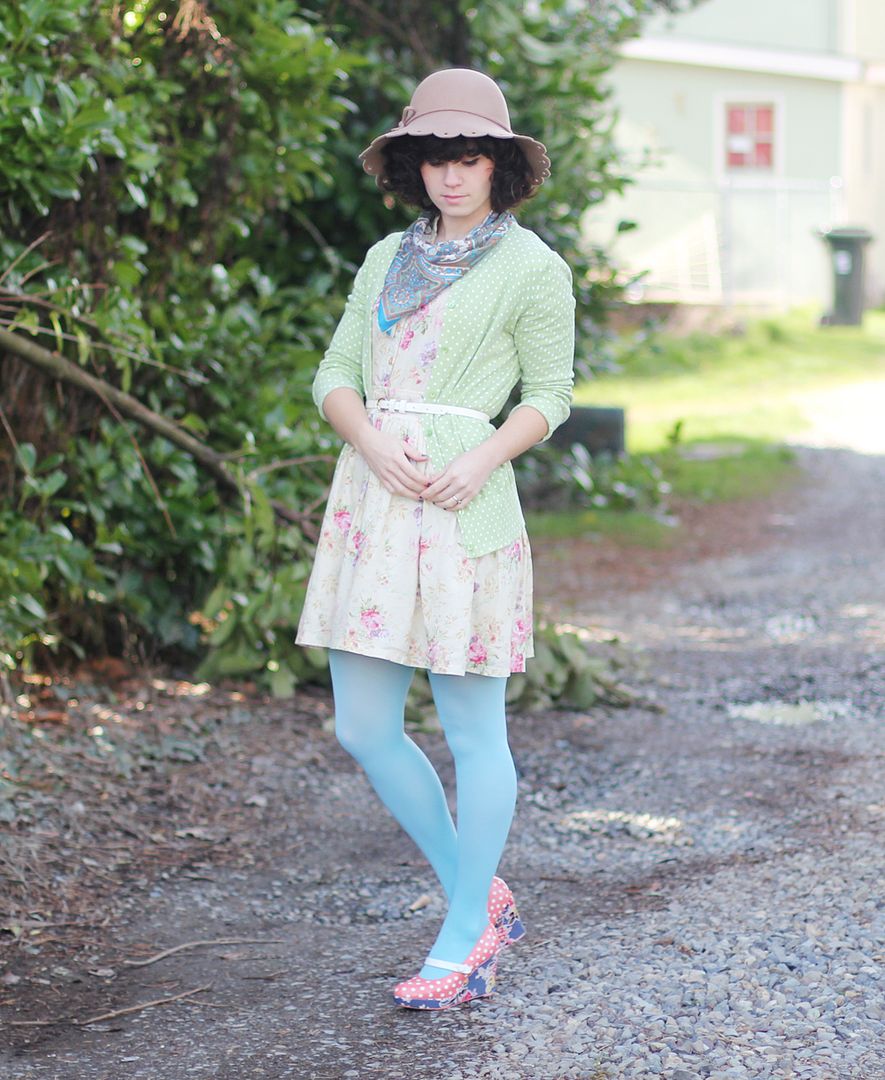
DIY // Polka Dot Floral Wedge
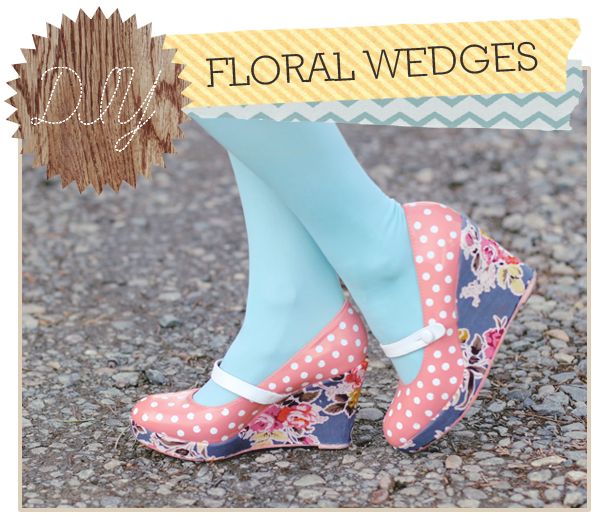
You guys. This is my favorite DIY of all time. I originally just wanted to customize a pair of heels after seeing this picture, thinking that they looked cute and easily DIY-able. Then when I was at the thrift store I found this pair of wedges and, looking for some more shoe DIY inspiration, I was browsing ModCloth's shoes and found this pair of heels, and I immediately decided that I was going to DIY them. I mostly just intended this DIY to be of the floral wedge, but since I had thrifted black shoes, I needed to fix the black part to match the cute floral portion of the shoe, so this is kind of a two part DIY. The floral part is much easier and simple (and probably more long-lasting), and the polka dot part is a bit harder, more time consuming and I'm not sure how durable it is. So, you can choose to do either parts of this DIY, or both!
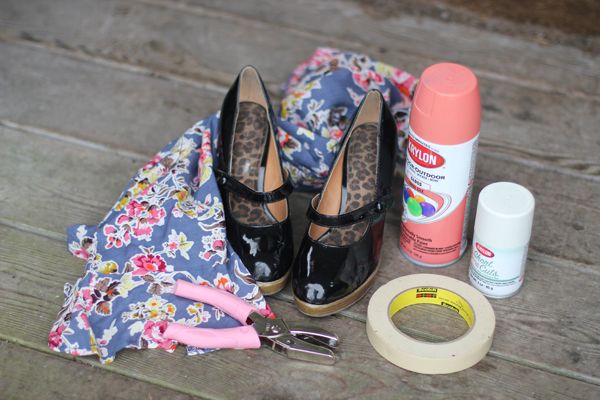
What you'll need:
For polka dot portion-
White spray paint
Another color of spray paint
Masking tape
Hole punch
For floral wedge portion-
Floral fabric
Tacky glue
X-acto knife
Clear nail polish
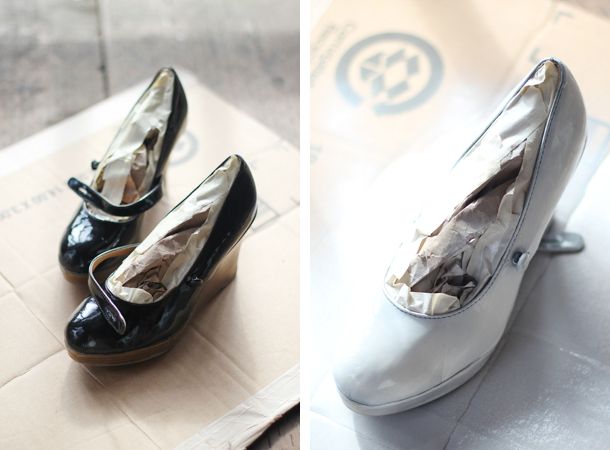
For the polka dot portion, you'll want to clean the part of the shoe you'll be spray painting to ensure the paint sticks as well as possible. If you don't want spray paint to get inside the shoe, fill it with newspaper and put masking tape around the inside edges. I didn't mask off the wedge part of the shoe because I figured I'd be covering it with fabric anyway, but if you don't want to do that part, go ahead and mask off the wedge (or if you want the wedge part to match the shoe, go ahead and spray it too!). If you have black shoes like mine, it'll probably take a few coats to cover the black. Follow the directions on the spray can to determine how long to wait in between sprays.
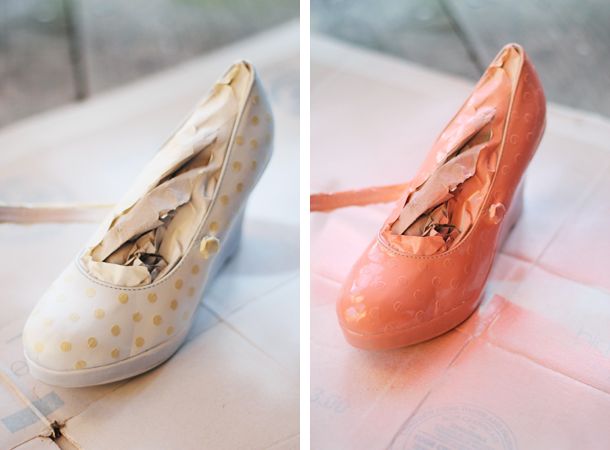
Now comes a lot of time intensive and tedious work: making the polka dots. To make the polka dots, I used a hole punch to punch little circles out of masking tape. If you do this, you have to make sure the sticky side of the masking tape ends up on the punching part of the hole punch, not the inside of the hole punch (where all the holes get stored until you empty it out). The masking tape circle will stick to the puncher and you'll have to peel it off with an X-acto knife or something similar. This takes a long time. If you can find circular stickers somewhere, that would probably be WAY easier, but I couldn't find any circular stickers that were the right diameter for the polka dots I wanted.
Make sure the masking tape dots are pressed down well, so the spray paint doesn't get under them. You're dots might not be perfect (mine weren't), but it's hard to tell that they aren't perfect when they're on your feet! I wanted my little strap and button to be contrasting in white, so I also masked those off before spraying my second color. You'll probably need a couple coats of your second color.
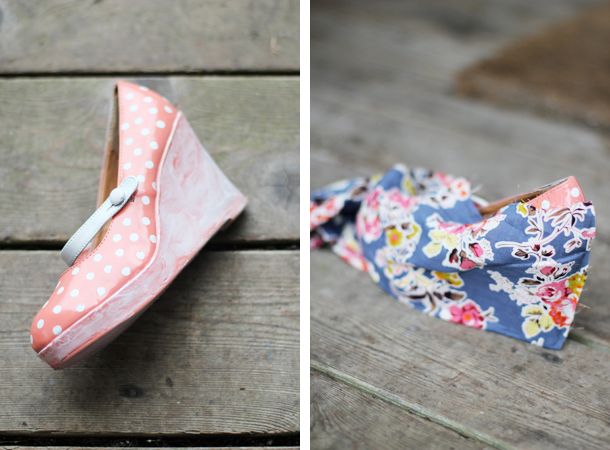
Now, for the floral heel! Do one side at a time, so you don't get glue all over your fingers. Cover one side of the wedge with tacky glue. Once I applied the glue, I spread it around with my finger to get an even coat. You'll also want to make sure the glue gets onto the ridge where the wedge heel meets the shoe.
Lay the fabric onto the glue and smooth out any ridges or bumps and make sure the fabric is all pressed down. Make sure to press the fabric into the little ridge where the shoe & wedge meet. You can either wait until one side is dry and done before doing the other side or go ahead and do the other side as soon as the first side is all glued on, just repeat the same process. I overlapped the fabric a bit in the back so the seam wasn't as noticeable.
Wait until the glue is completely dry before cutting off the excess fabric. Take your X-acto knife and carefully cut along the bottom and top of the wedge. I cut a few millimeters from the bottom, and at the top as close to the meeting of the wedge and shoe as possible. You might need to glue some edges down a bit more after cutting. I wanted to make sure the bottom edge didn't fray, since it's down closest to the ground and most likely to become frayed, so I took some clear coat nail polish and just painted it on at the bottom edge.
There ya go! Fancy, adorable heels! Like I said, I'm not too sure how long the polka dot spray painted part will last (especially on my shoes, which were made of a shiny patent material to begin with), so I'll probably wear these shoes sparingly and definitely not in inclement weather, but I love them so much! I'm excited to thrift more shoes and do some more DIY-ing! I have a lot of glitter paint left over from the wedding begging to be used in some kind of DIY and I think that might be part of a shoe DIY...
