

10 tips for taking beautiful photos of your home

If you’re an interior designer, proud homeowner wanting to showcase your decor, or just wanting to improve your interior images for instagram, here are a few of my tips for snapping the best shots of your interiors! A couple of these tips will relate specifically to DSLR shooters, but most are applicable to anyone— even those of you using your phone camera to capture your images!
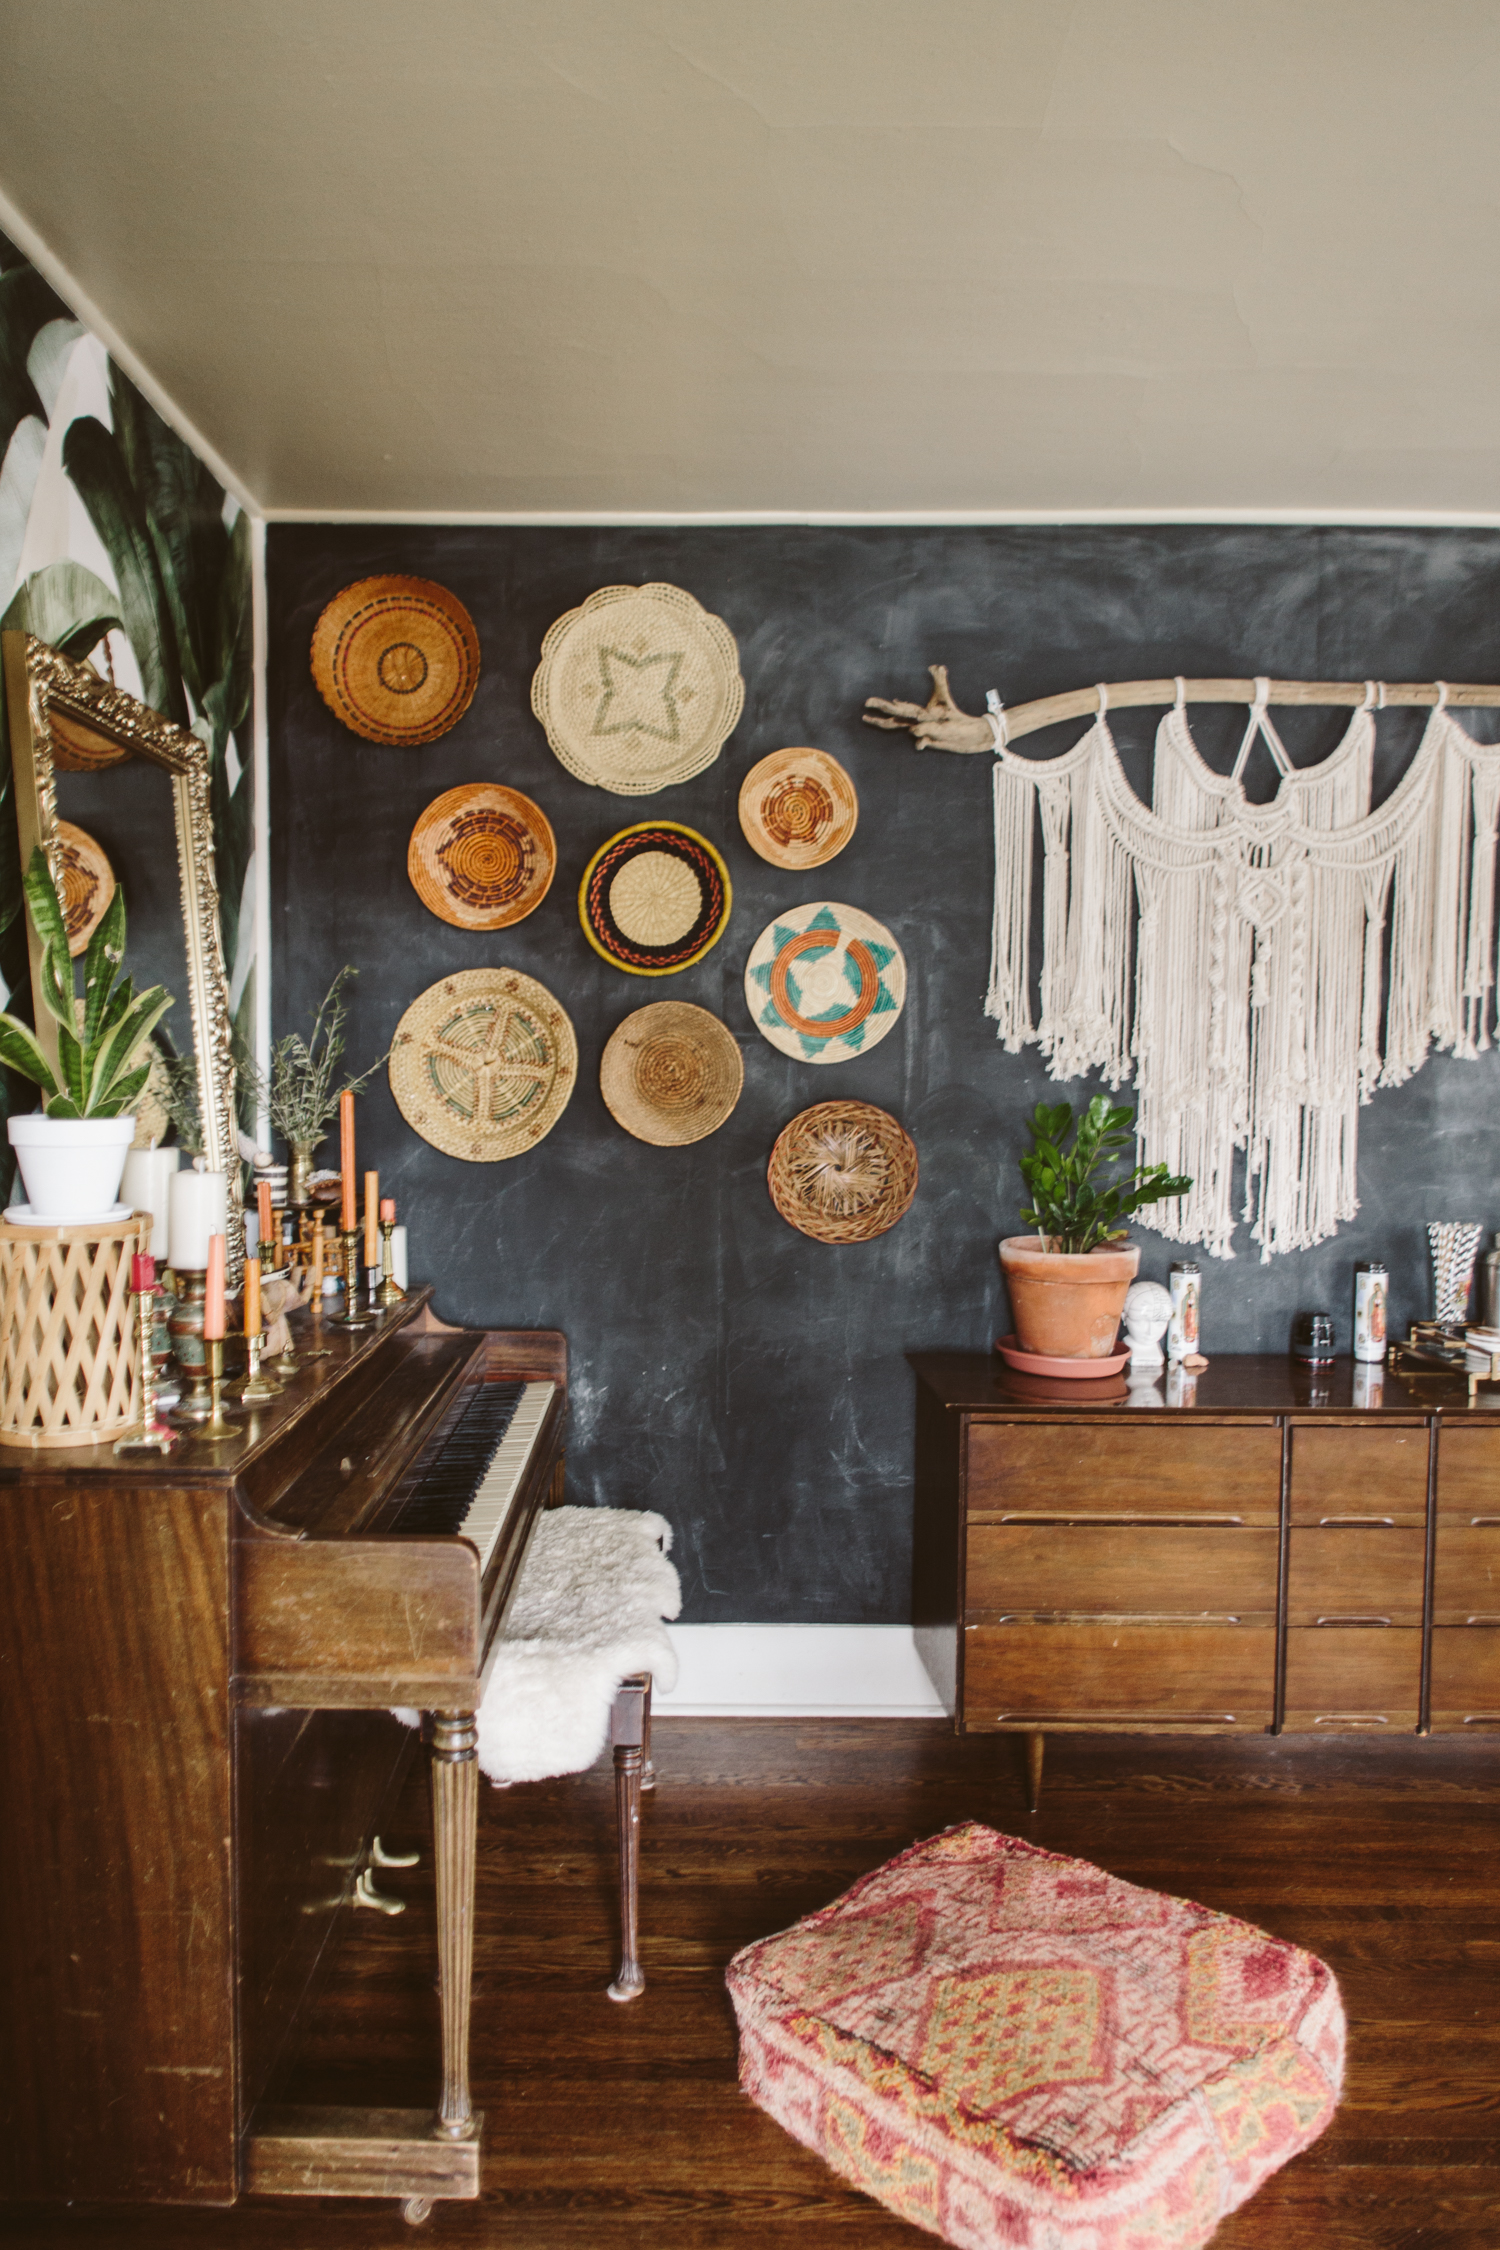
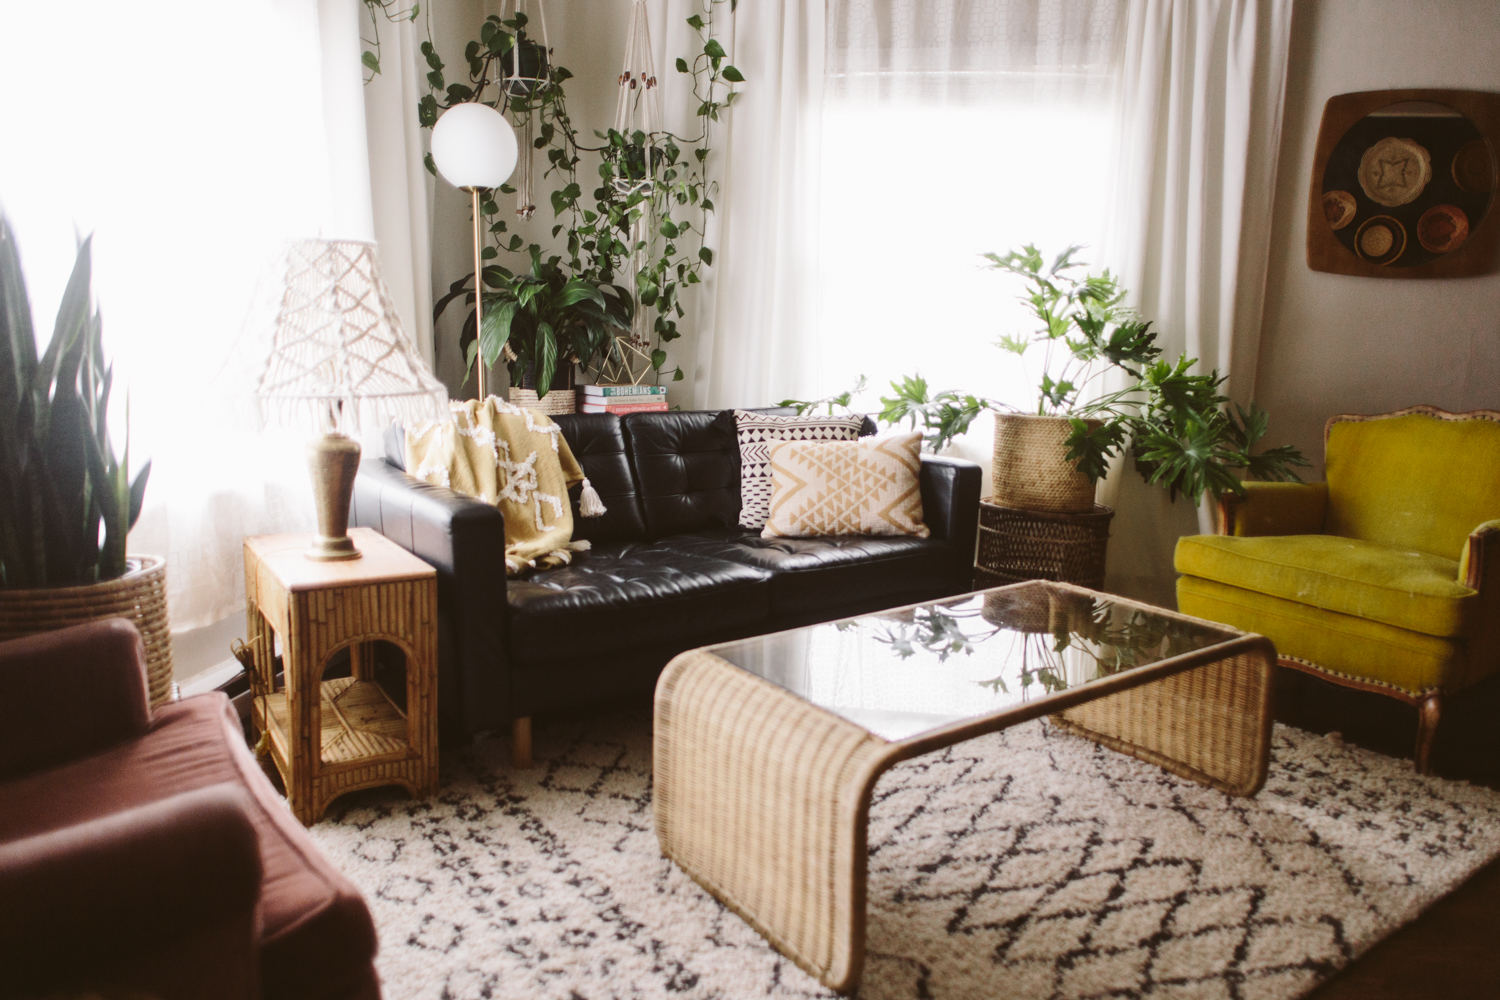
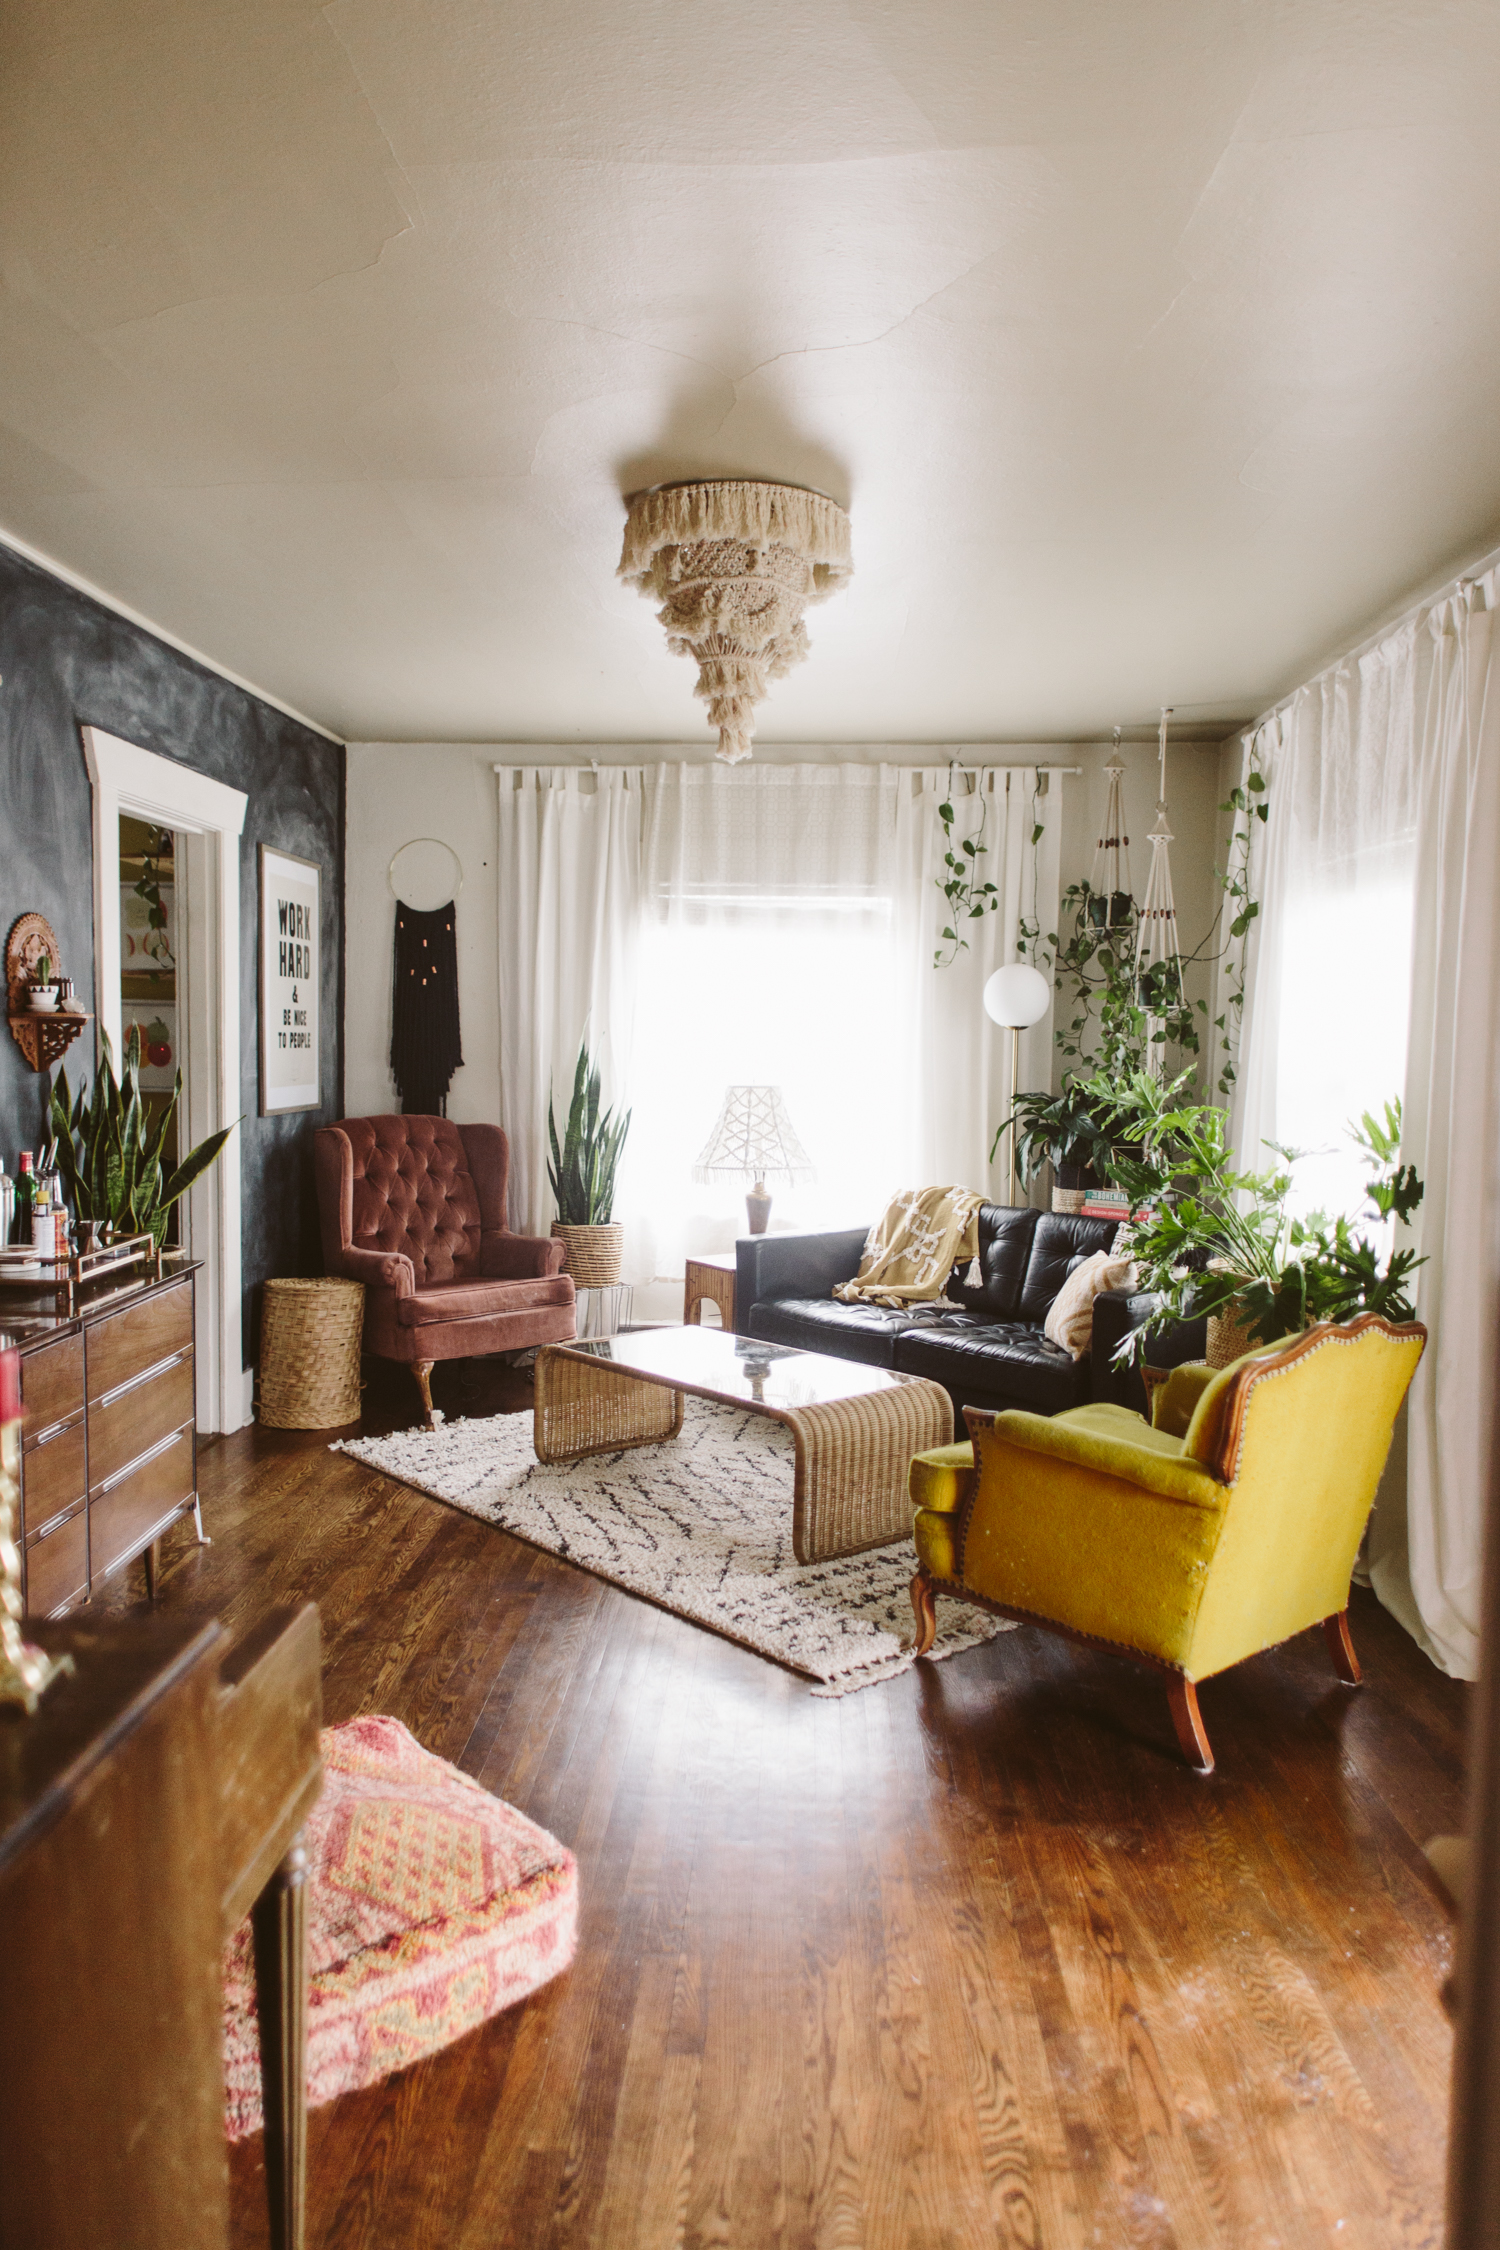
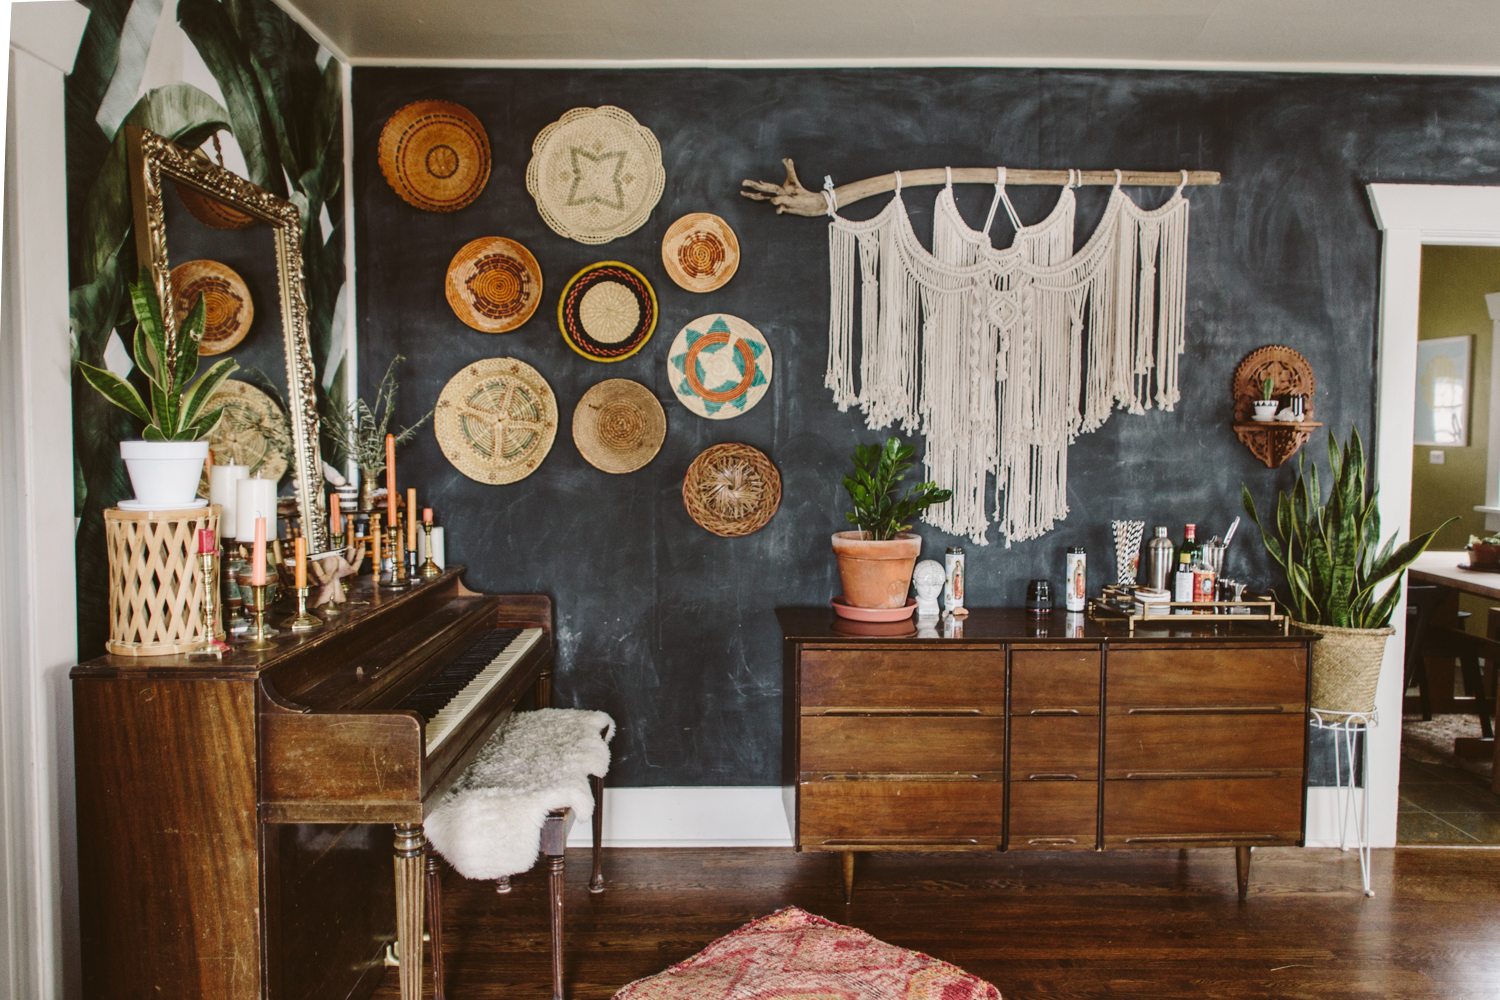
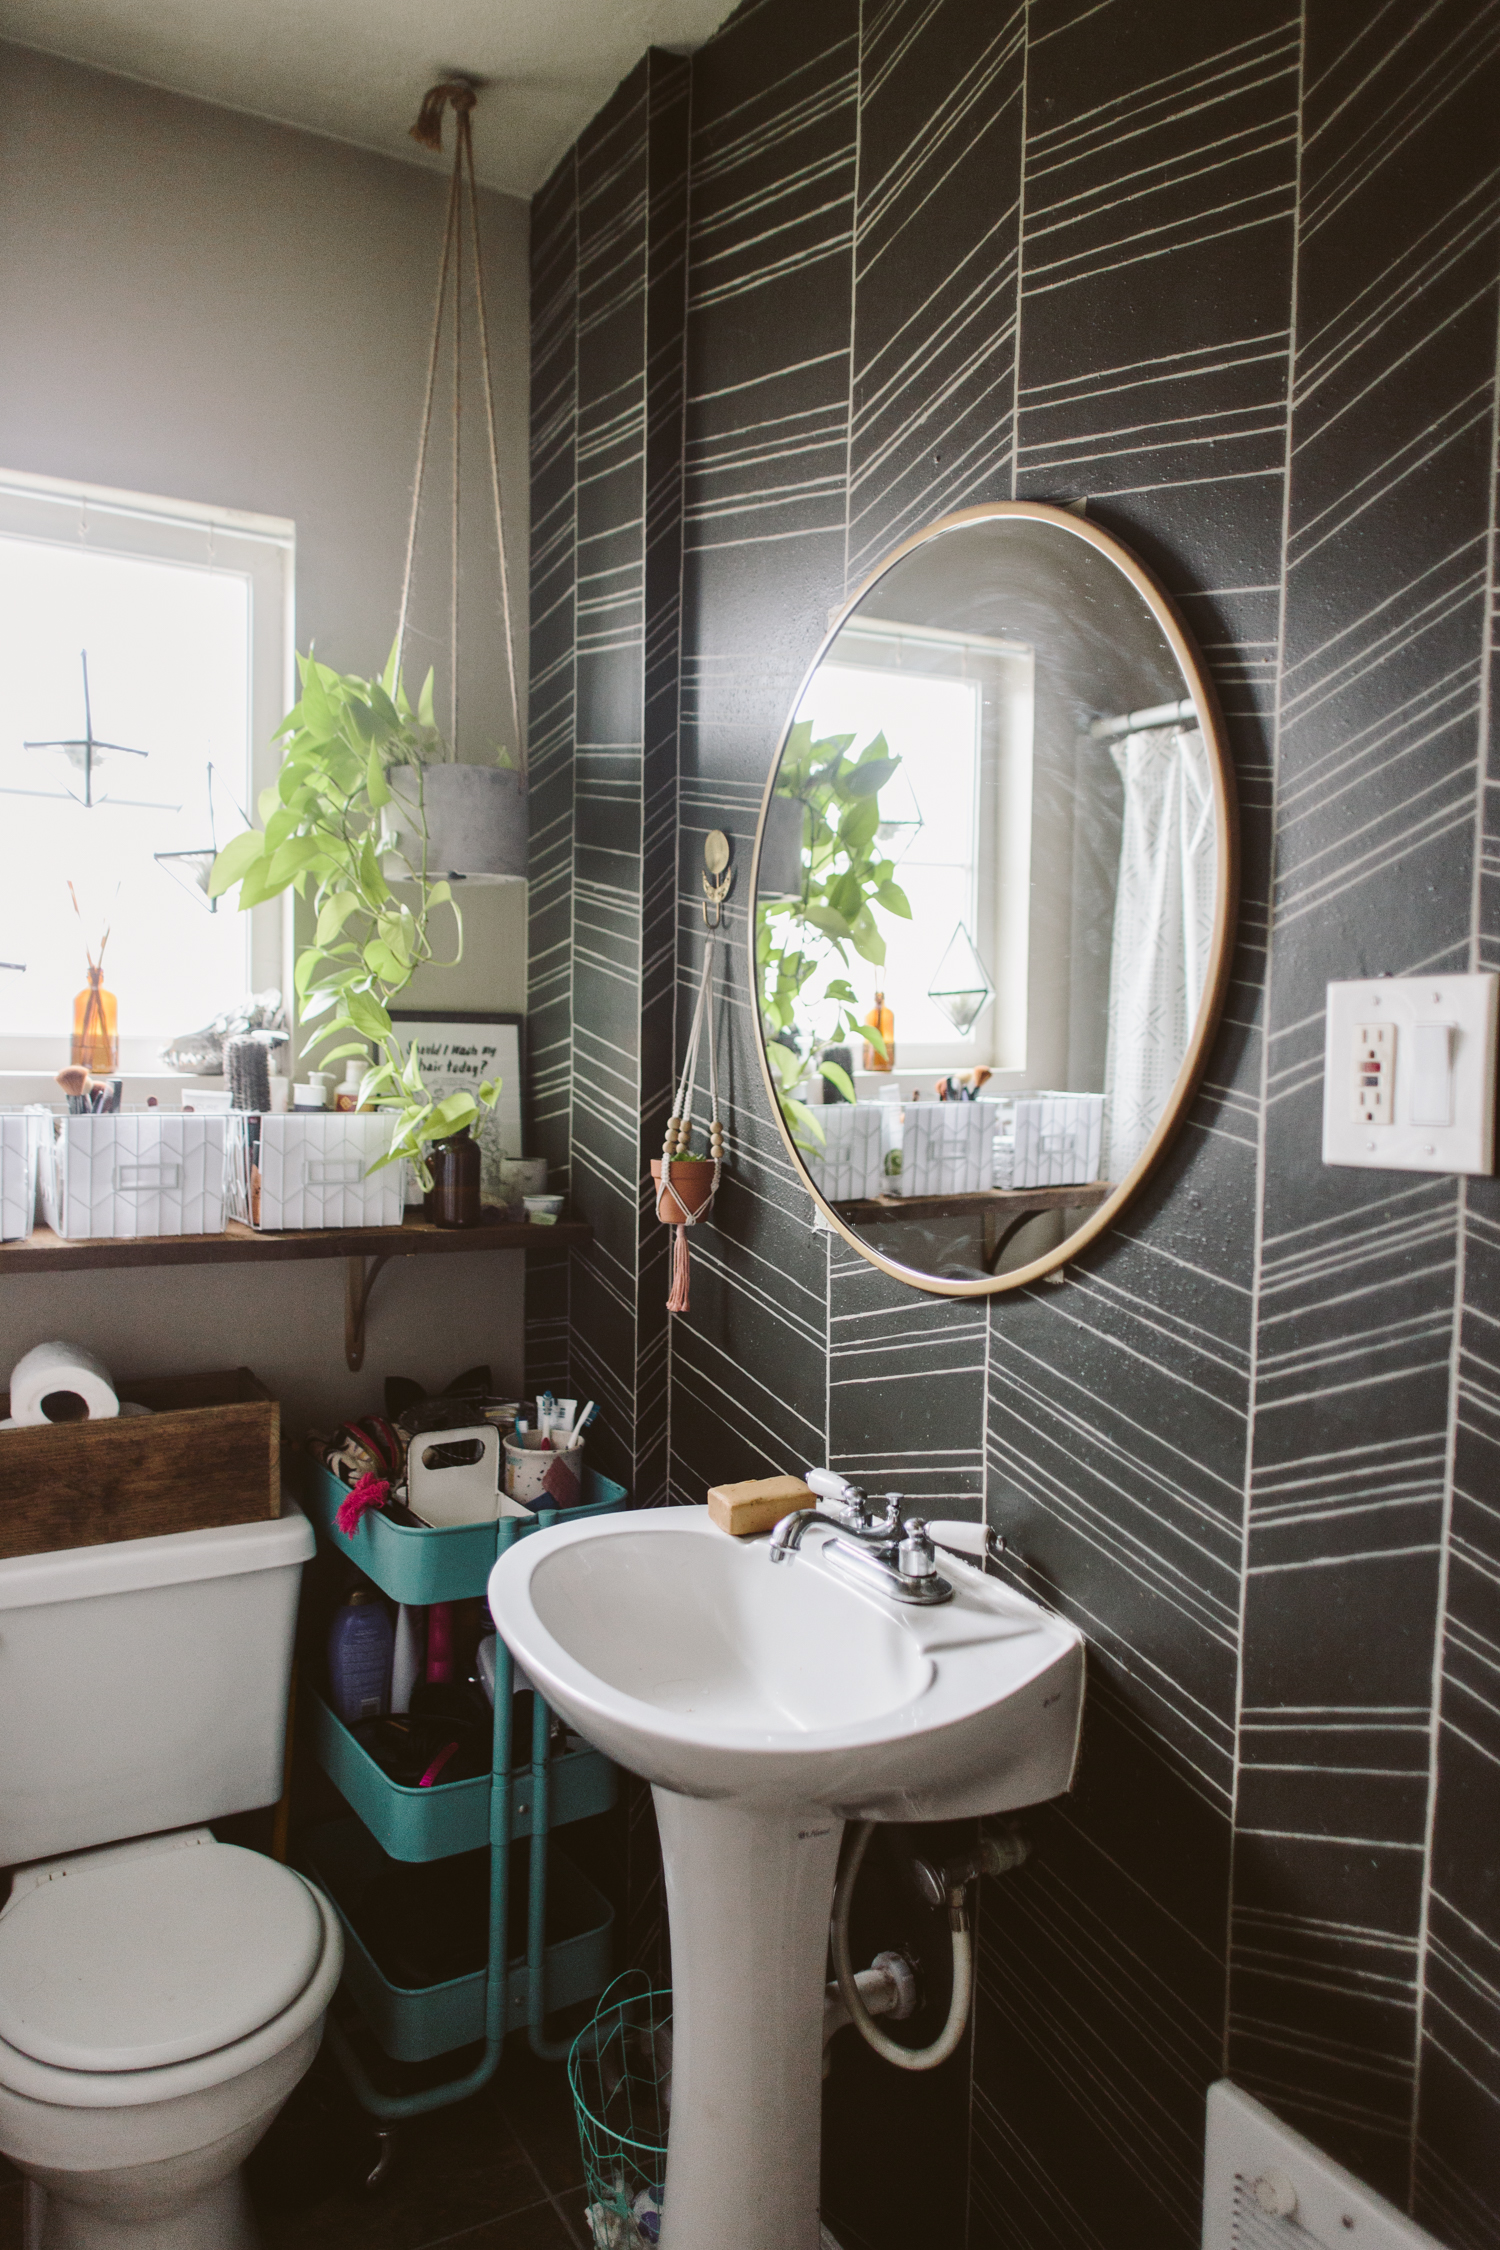
01/ SHOOT STRAIGHT-ON TO WALLS
So basically: when you’re shooting, shoot directly at a wall, not diagonally towards a corner. This isn’t a rule, I shoot into corners all the time, but I do love the clean, straight lines of a straight-on shot. If you scroll through these photos you’ll notice almost all of them are directly facing a wall. There’s just something aesthetically pleasing about the perspective lines of a straight-on photo. Again, this can be a personal preference thing, but I notice that many of the photos I like and that are popular on Instagram or in magazines follow this guideline.
02/ ADD A HUMAN ELEMENT
These photos in this post in particular don’t do the best at showcasing this tip, but it is one thing I like to do, and find that I enjoy in other people’s photos. Put people (or pets) in your photos! My Corgi makes it into a lot of the photos I take of my space and I love how she adds a little bit of realness to the photo. I also enjoy putting myself in the photo (standing at the counter cutting fruit, making the bed, playing with my son) just to give a lived-in feel to my images. We do, after all, actually live here! It can be harder to set up, and getting a toddler to cooperate for photos might be more of pain than it’s worth sometimes, but I try to do it when I can.
Even if you can’t get an actual person in your image, you can at least give some kind of staging that alludes to people’s existence, haha. Maybe have an orange sliced up on a cutting board with a knife laid beside it when you take photos of your kitchen. Or a book cracked open with a cup of coffee and a scone on your coffee table when shooting your living room. Just little evidences of human life peeking through your photo.
03/ USE NATURAL LIGHT
Most of our indoor lights have a very warm, orangey tone, so when lights are on they can tend to tint everything orange. I prefer my images to look as natural as possible in order to get an accurate depiction of paint colors/upholstery etc, so I’ll turn off all the lights and use only window light. If you are a whiz at off-camera lighting and feel comfortable lighting your space that way, by all means!
Because turning the lights off in your home will often mean your space is a lot more dim than usual, you’ll probably have to put your camera on a tripod so you can use a long exposure in order to get the correct exposure in your image.
You can also open doors that aren’t in the photo in order to let light in from other rooms or outdoors. I’ll often open my front door when taking photos of my living room because it lets in way more light BUT! I have to put a white sheet over my door because it’s painted orange, so that orange color gets cast onto my space unless I throw a sheet over it. Light can do funny things like that, so just keep an eye out for funky shadows or weird colors getting cast onto your space.
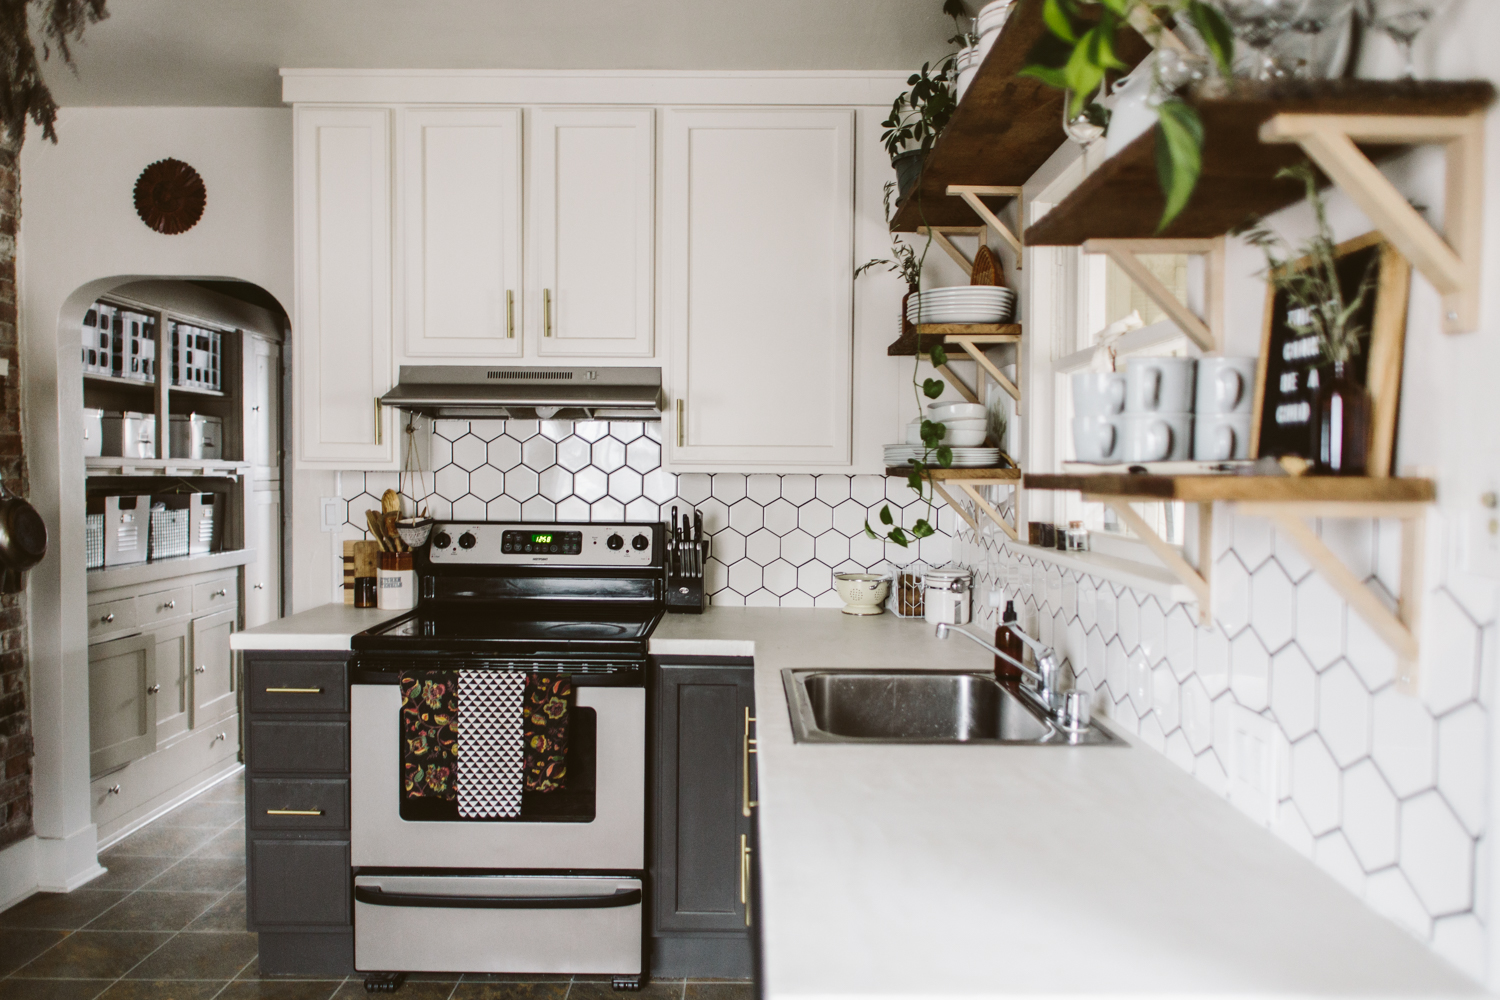
04/ CLEAN UP CLUTTER
This one is kind of a personal preference depending on how “real” you want your images to be, but I do like to take photos of a space that has odds and ends and clutter tucked away. It helps put the focus on the design elements on the room and draws the eye to the areas you want. For example, my kitchen counters house waaay more stuff in my daily life than is shown in these photos, but I wanted to show the concrete counters and backsplash tile. With coffee makers and dish drying racks all over the counter, it’d be harder for the viewer to focus on those design elements. This can also apply to stuff like cords and remotes. Just tuck ‘em away for the shoot!
05/ MOVE STUFF AROUND
This might be considered “cheating” but I do it a lot. Move design elements from room to room! I definitely do this most with plants. I don’t have as many plants as I’d like in every room of my house, so I’ll usually do a little bit of plant musical chairs, adding plants to the room I’m shooting. You can also do this with stuff like throw pillows, blankets, etc. Since you’re not showing your entire house in one image, you can fudge a little by borrowing stuff from rooms not shown in the photo you’re taking. Tricksy!


06/ USE A WIDER ANGLED LENS
I don’t like to get too crazy, if you have too wide of a lens it can distort things and start to look fish-eyed. The widest I’ll use is a 24mm lens, which seems to be a good lens, especially for shooting smaller spaces. I like to use a 50mm for shooting details, and a 35mm is a happy medium between 50 and 24mm.
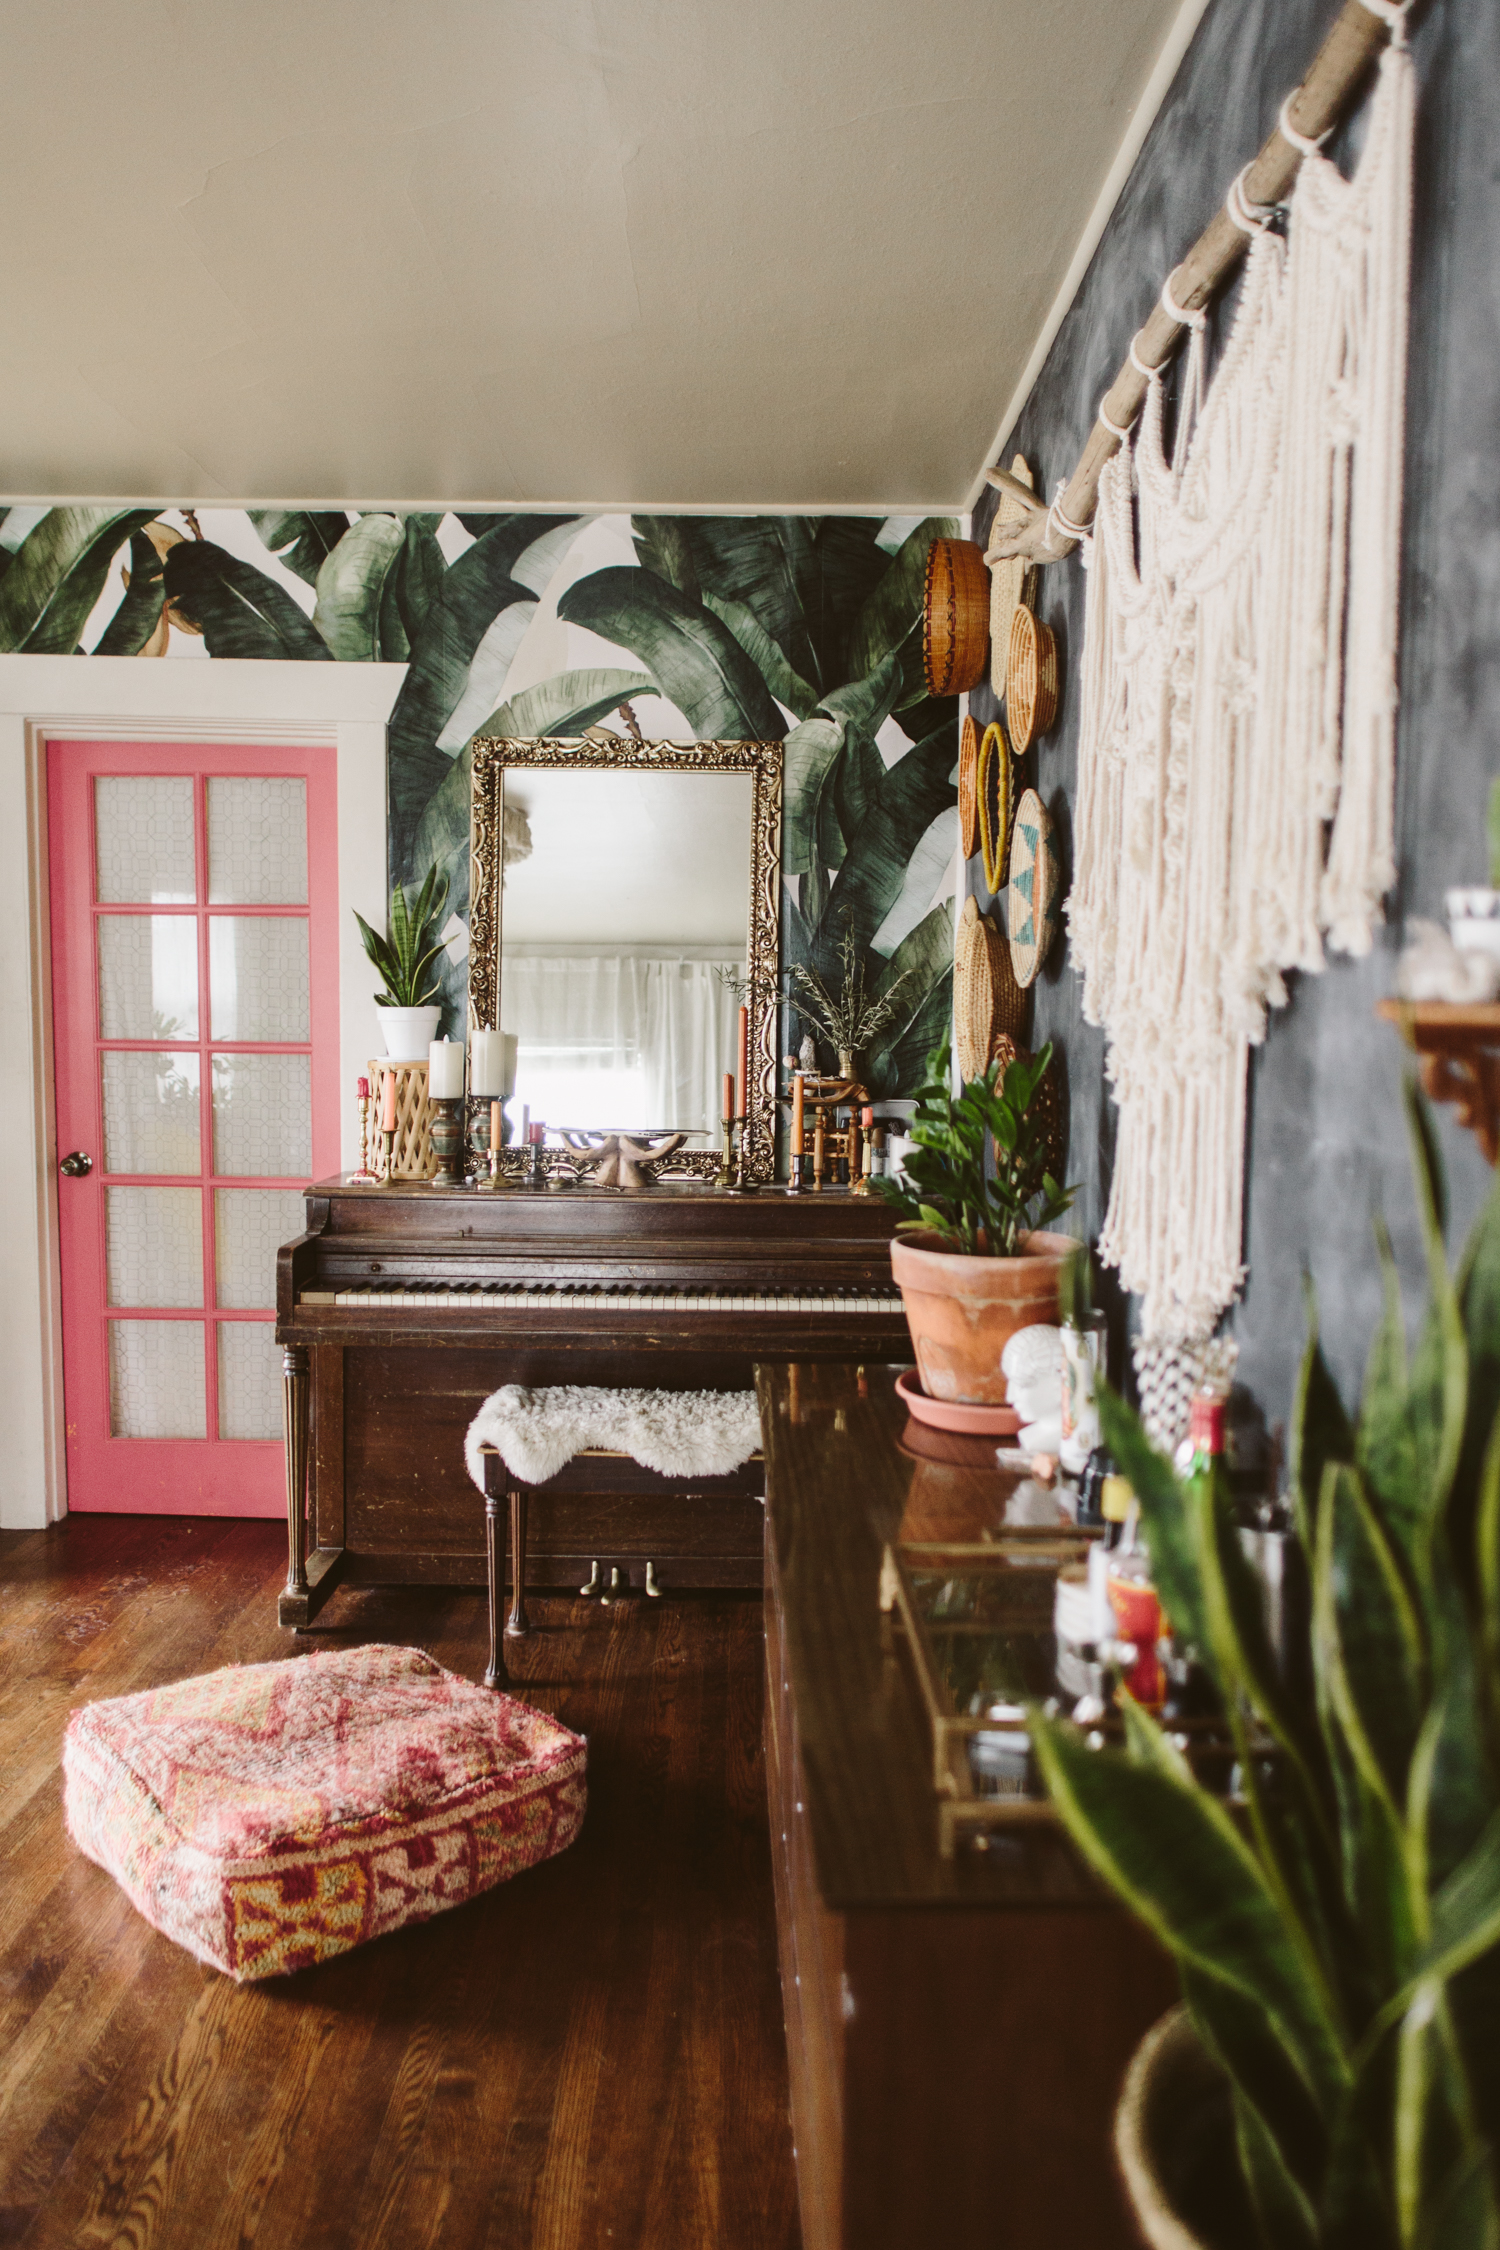
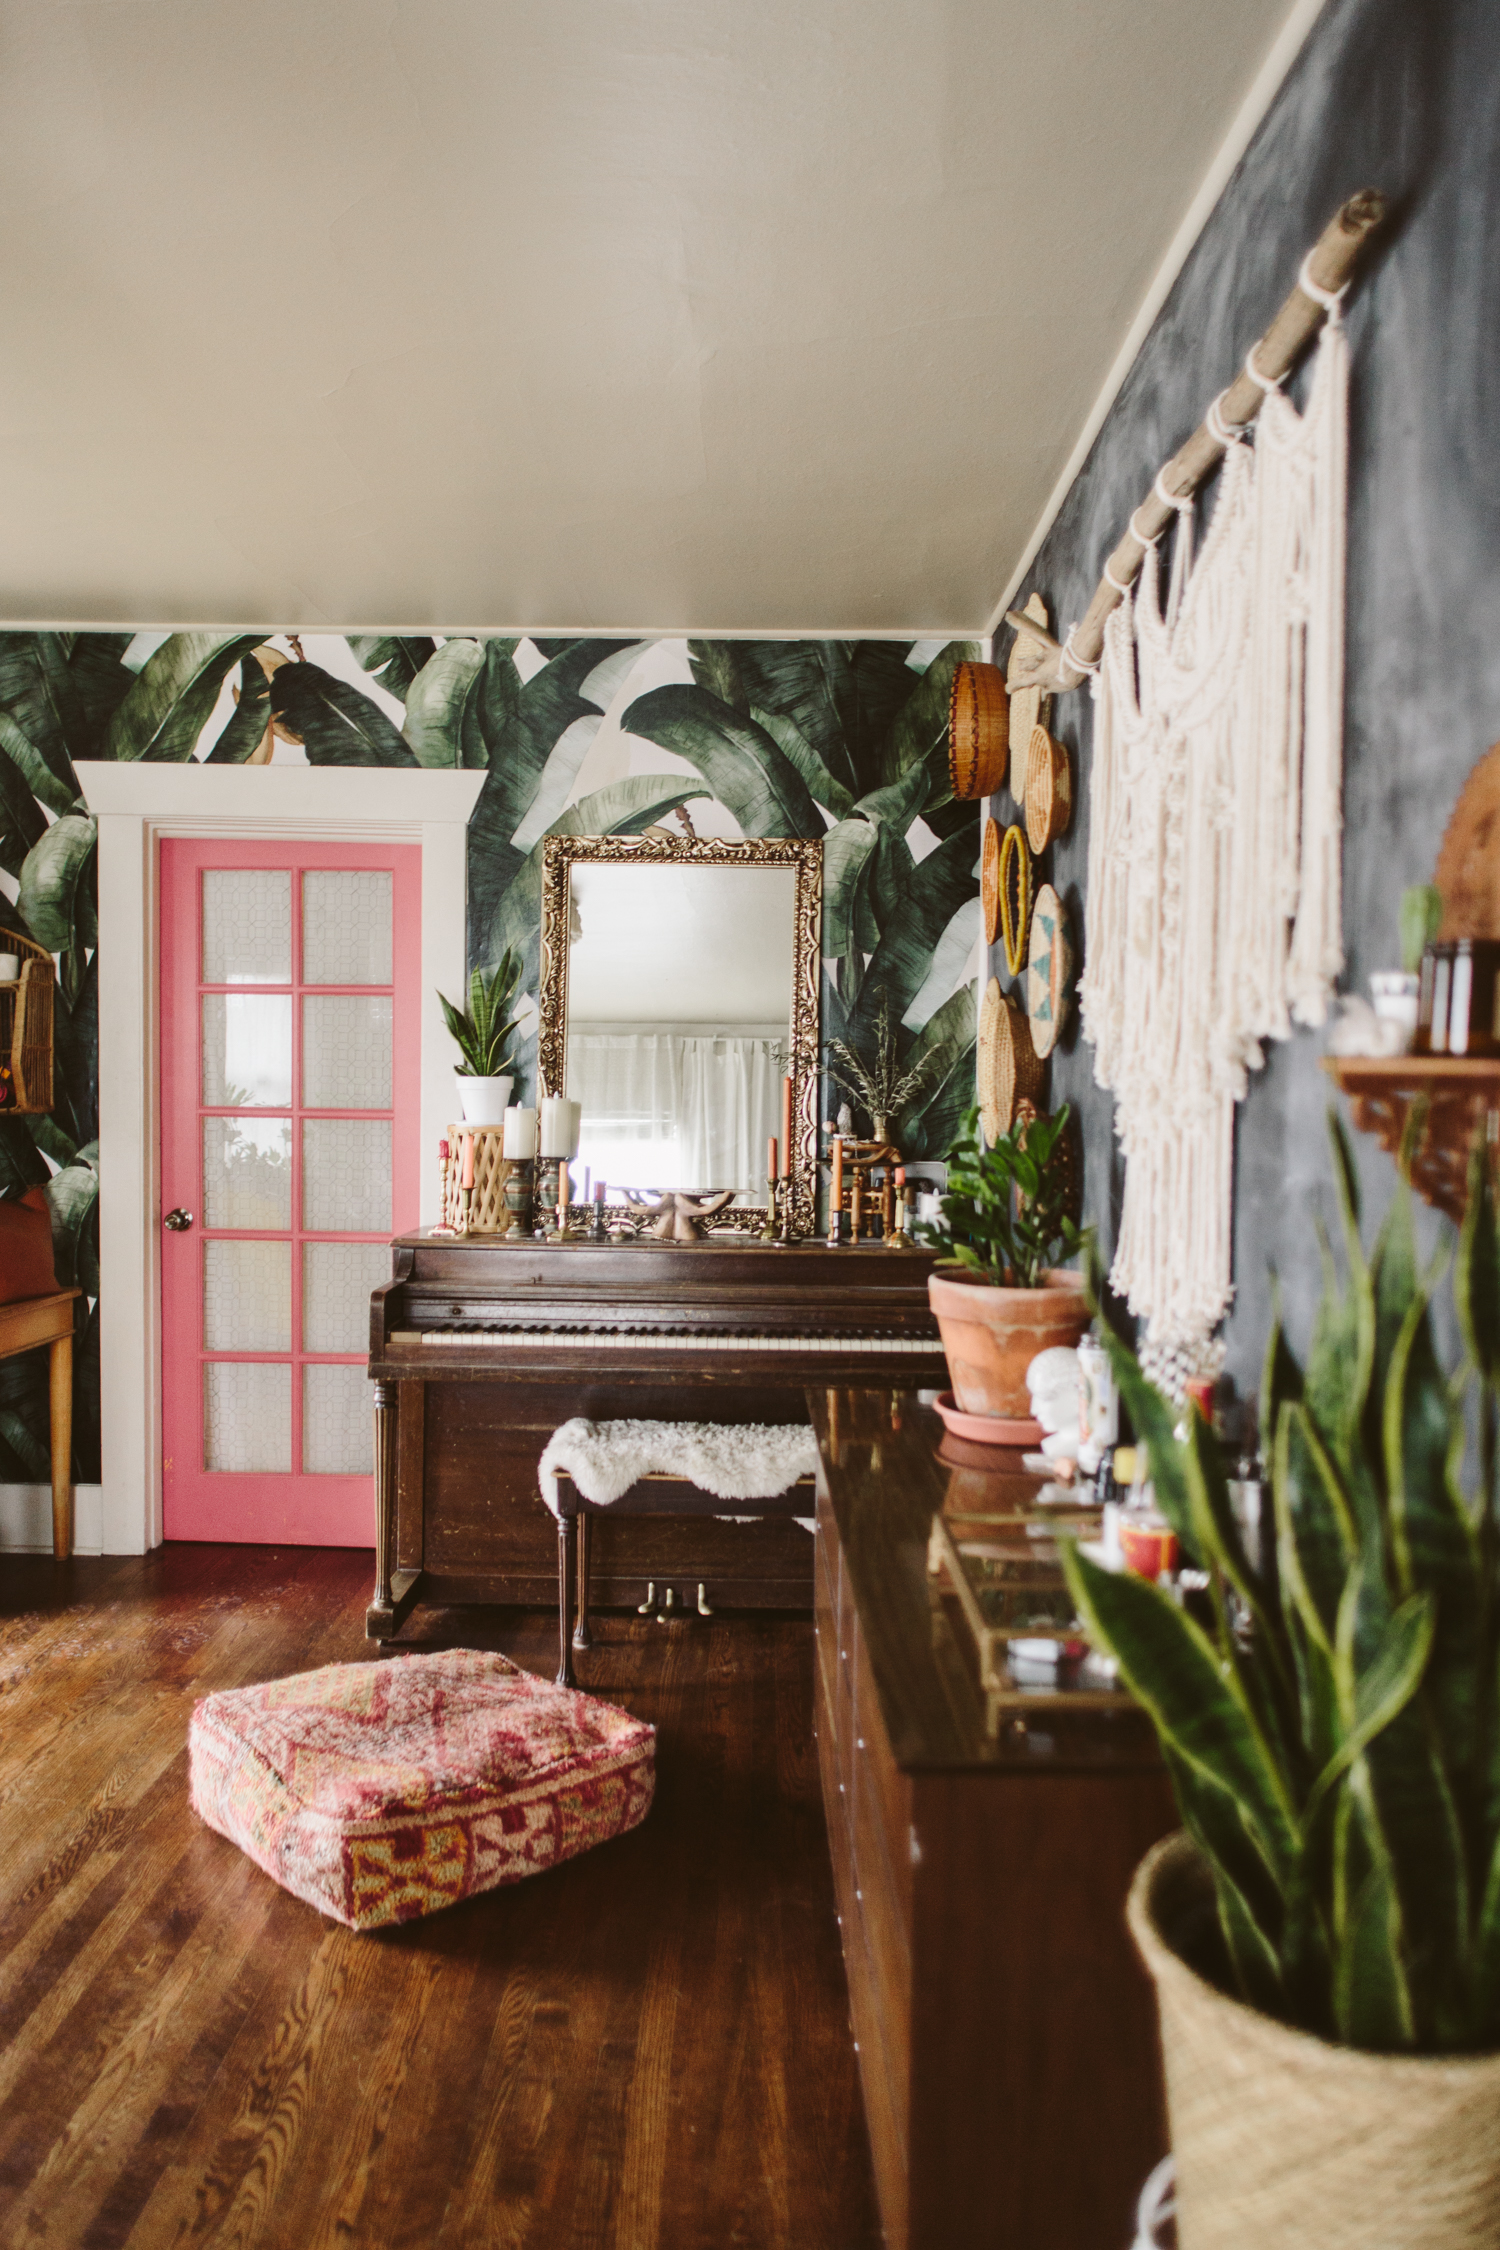
07/ SHOOT THE BIG PICTURE
I’m all about a nice vignette (I mean, c’mon, I spent a while styling that shelf!) but people like to see the big picture. If you have a small space, it might mean you have to step into the doorway of the neighboring room in order to get far enough back to fit your room in frame. See that pink door in my living room? In order to get a full shot of my entire living room I have to use my 24mm lens and then be standing about a foot into that doorway to get the shot. In order to shoot my tiny bathroom, I’ve climbed into the very back corner of my shower in order to get the shot. Whatever works!

08/ DIFFUSED LIGHT IS YOUR FRIEND
I do enjoy the occasional harsh sun, shadowed photo, but in general, it’s best to shoot at a time of day when the sun isn’t beaming directly into your windows and casting a bunch of really harsh light. A partially cloudy day makes for really wonderful light (though here in the PNW we can get too many clouds and it’s almost too dim to shoot some days)
09/ MOVE STUFF OUT OF YOUR WAY
Sometimes you want to get just the right shot, but the arm of a chair is getting in the shot. Don’t be afraid to scoot things out of your shot. When you’re shooting, look at the image you just took on the camera’s screen and make sure there’s nothing peeking into the shot that’s distracting the eye.
10/ SHOOT RAW
This one is a little more technical, and you might not have the right photo editing software to edit raw images, but shooting in raw (instead of jpeg) makes it way easier to correct things like over or underexposure. Most DSLR cameras have the option to shoot raw, you just have to scroll through your settings to select the raw option. Again, this one is a little more techy, so if you’re not super comfortable with your camera or if you don’t have software that can work with raw image files, don’t worry about it!
For editing, I like to use Lightroom for my “big camera” images. When it comes to phone images, I always edit using A Color Story app. They’ve got lots of filters, and you can combine, tweak and save your filters too so you don’t have to repeat all the steps you take every time to achieve a cohesive look on your photos. Another app I’ve used in the past for photo editing is Afterlight.

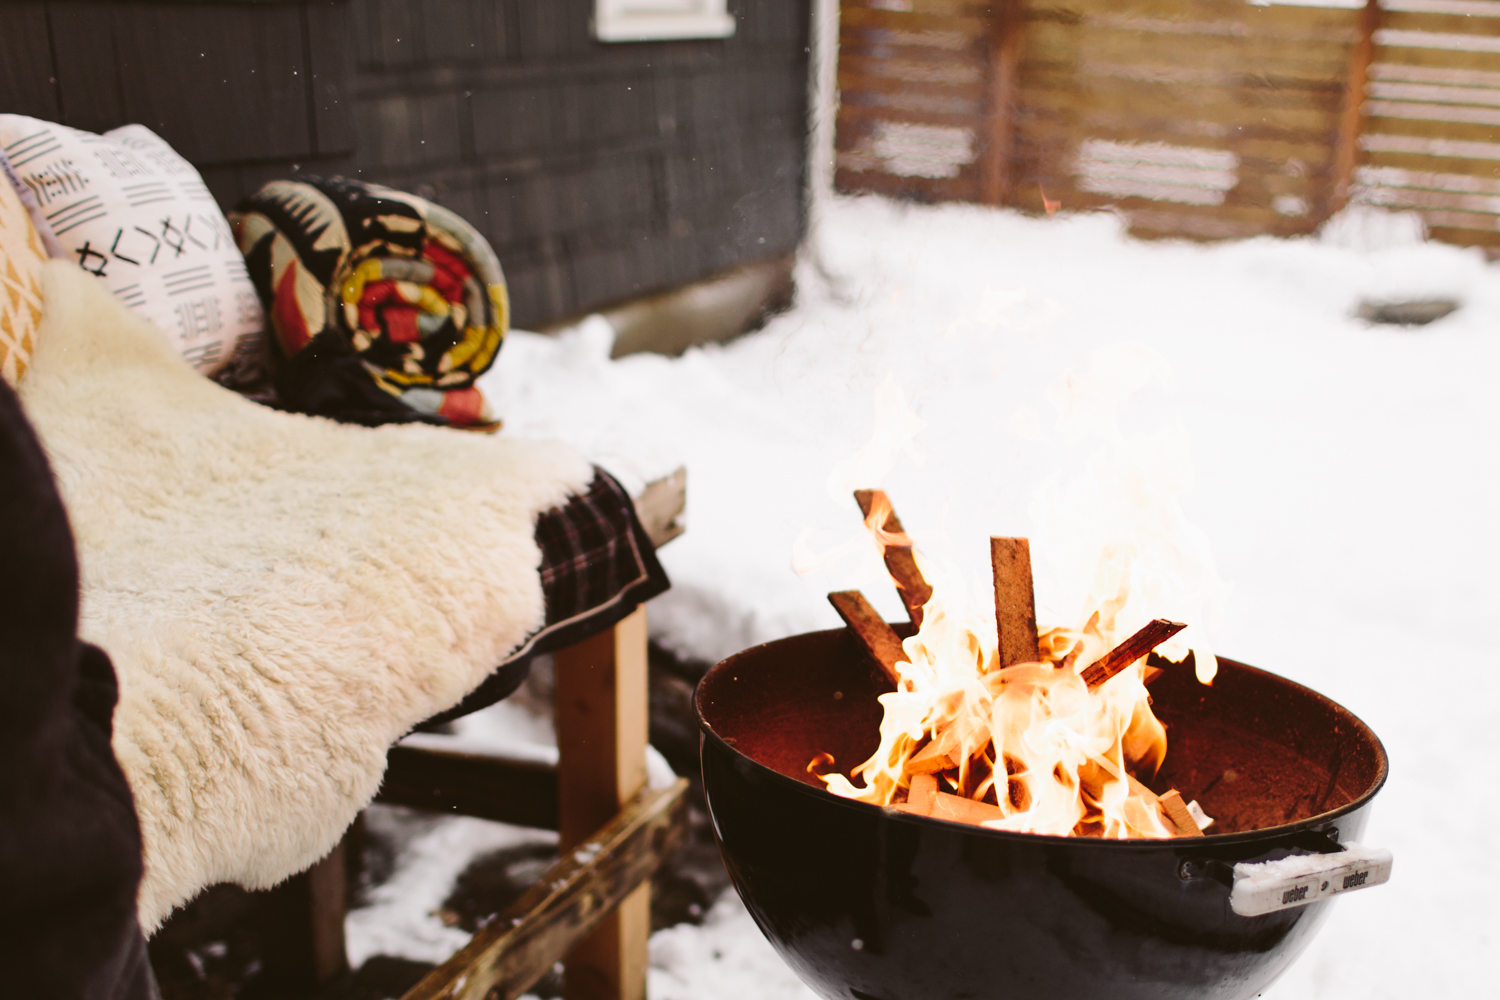
snowmageddon in style
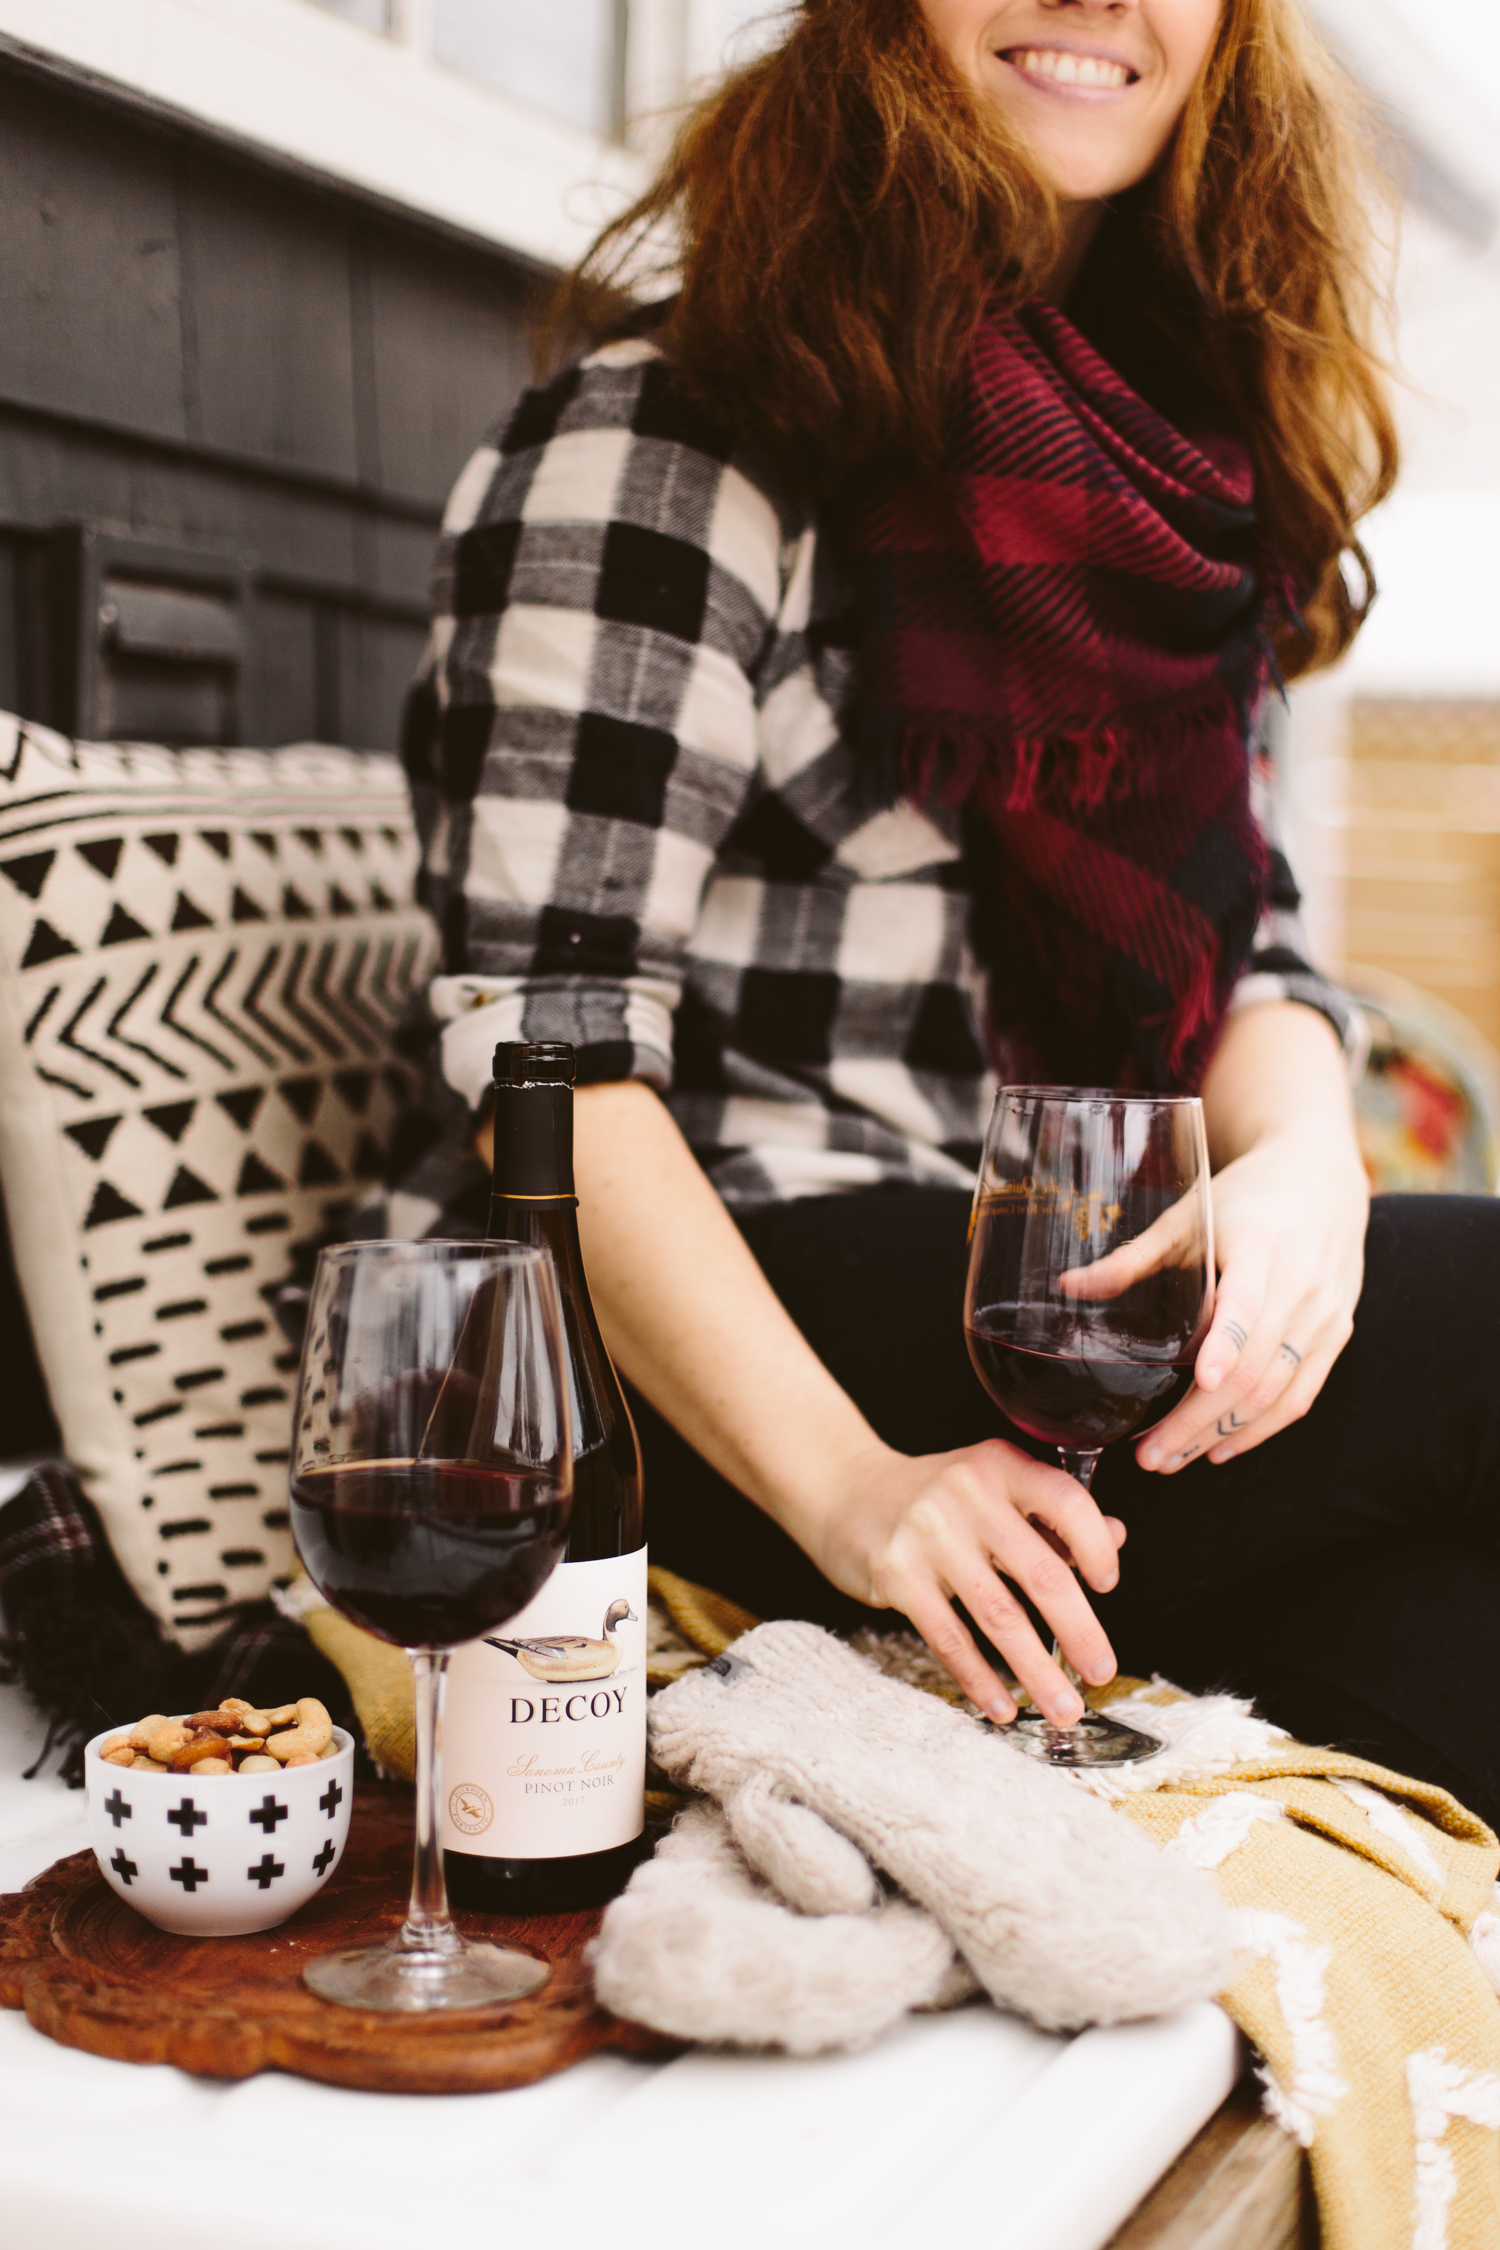
Thank you Decoy for sponsoring this post.

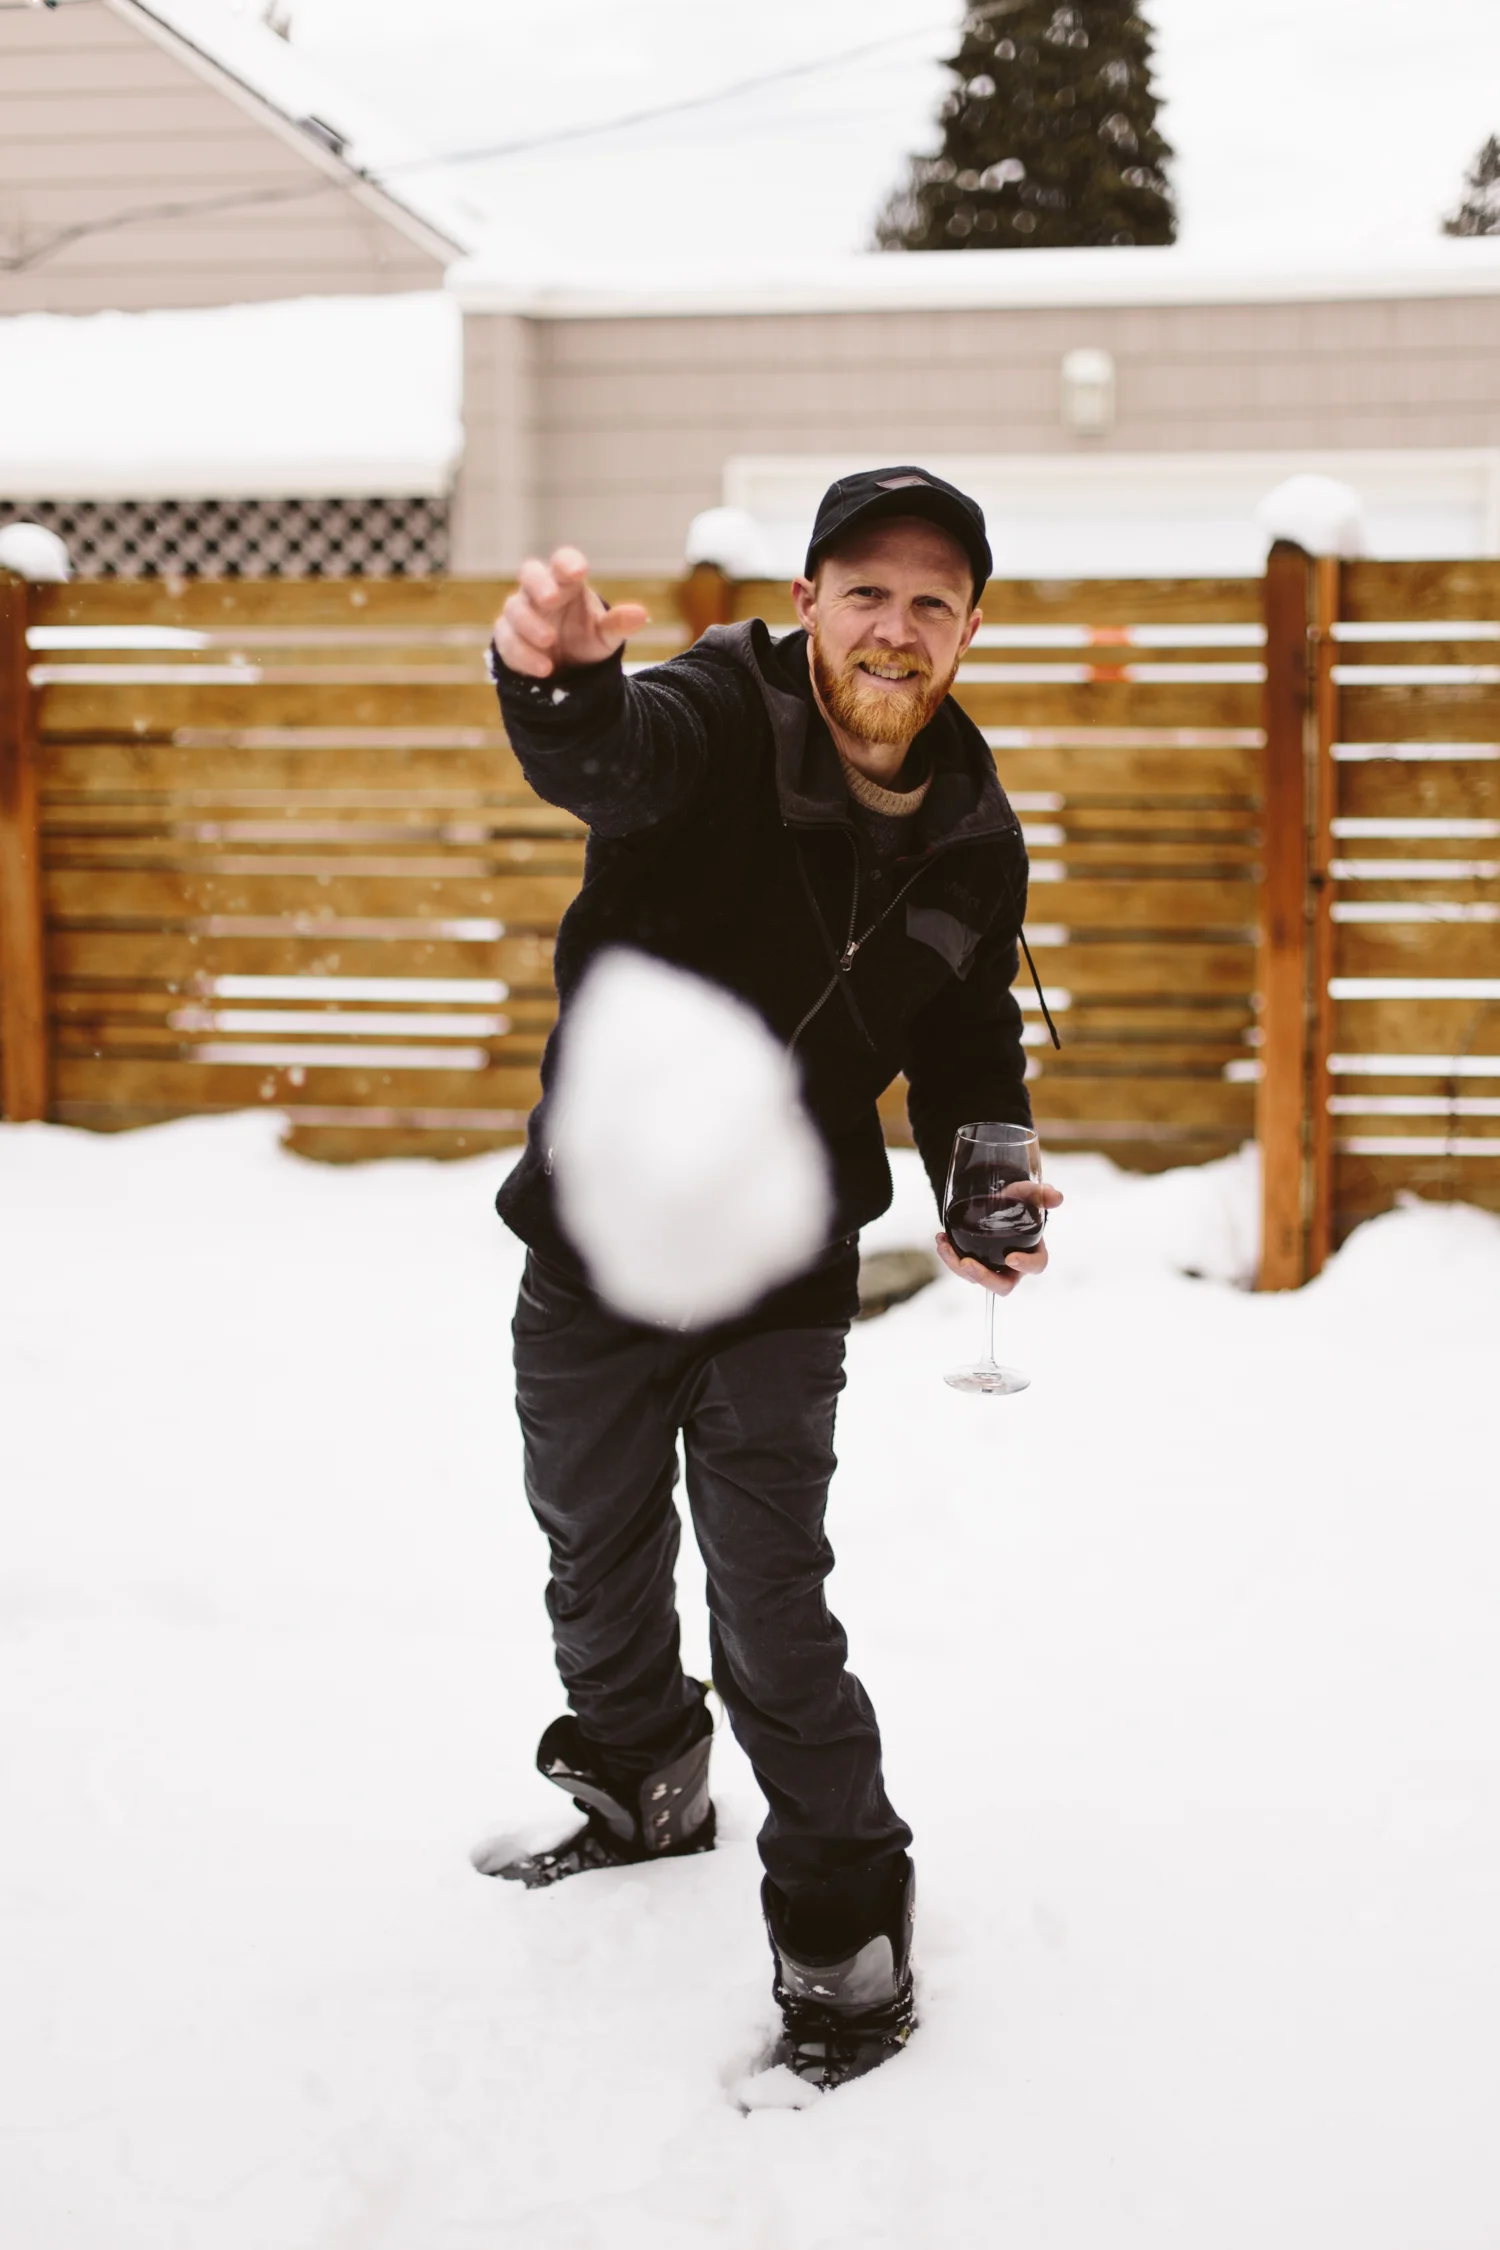
Seems like a lot of the US is experience some kind of winter snow right now and the Pacific Northwest is no different! We’re apparently experiencing the biggest snow event since 1996, though as a girl who grew up in Alaska, this just feels like any average winter growing up! I love the PNW, but I’ve always missed snowy winters, so getting a little (well, some might say big) dose of snow this week has been super fun! Even with all the roads being a mess and the stores being sold out of shovels and road salt and sleds, nothing makes me more happy than a snowy winter.
We lived on a large hill that sloped down to a lake when I was growing up, so we had countless days of sledding and ice skating during the long (well, short actually) Alaskan winter days. I remember getting super excited during the winter olympics and forcing my parents to time us while we sledded down our “bobsled” hill, and every once in a while we had enough people to do a little 3 on 3 hockey game on the lake. My birthday was always smack dab in the middle of winter so I’d have sledding parties and then everyone would pile indoors, shed all their snow gear, and fill up on cake and ice cream. So yeah, you could sayI kind of like the snow, haha.
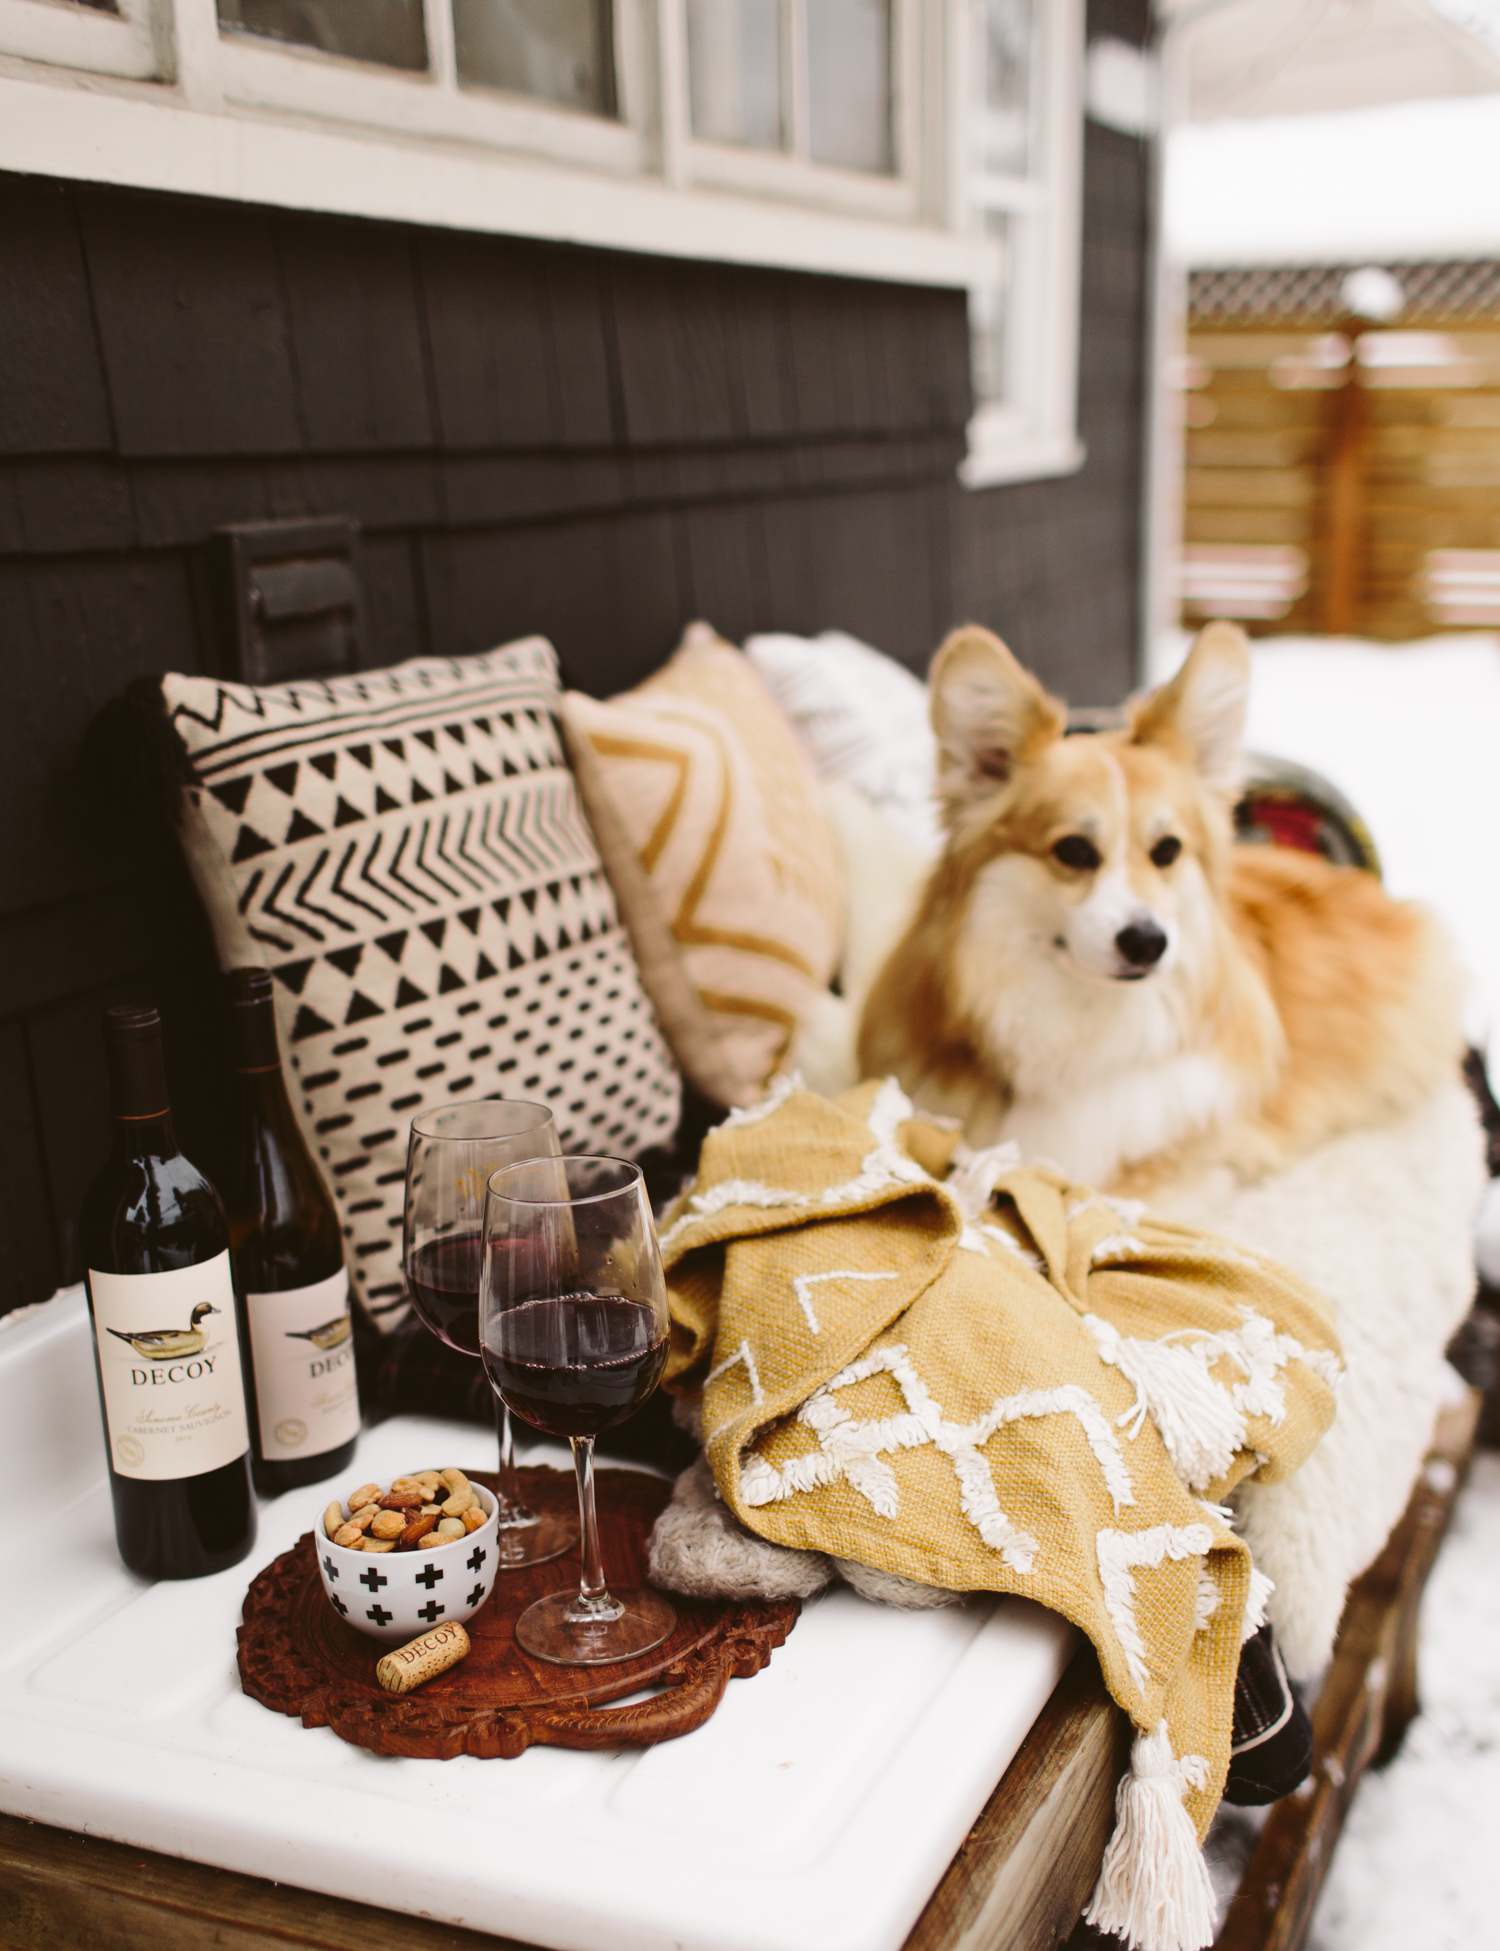
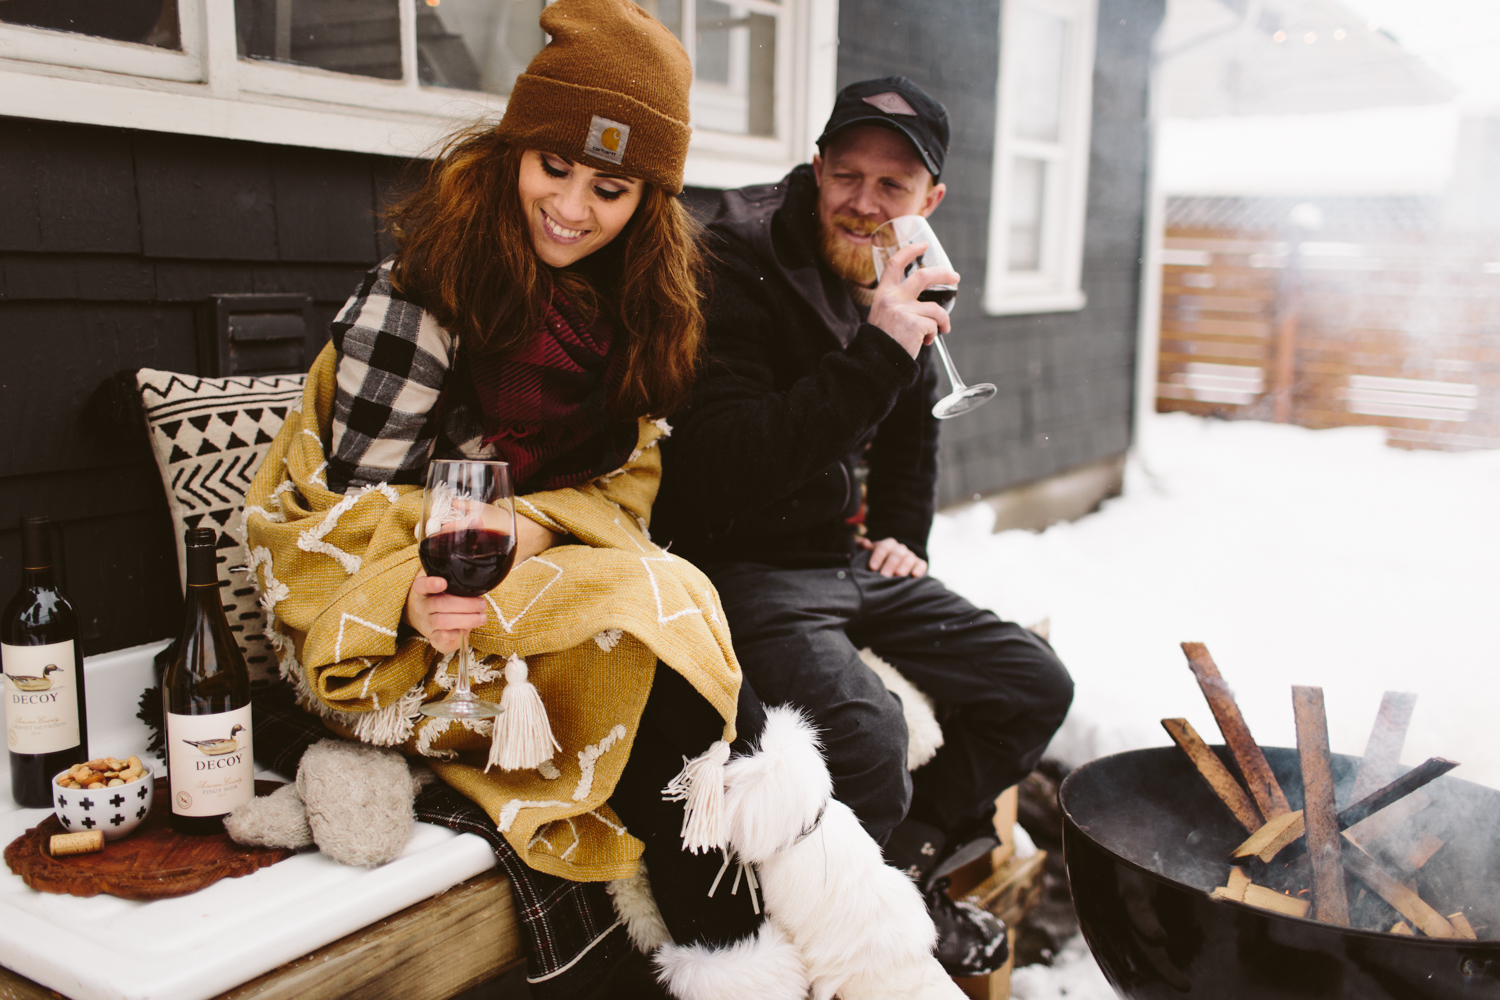
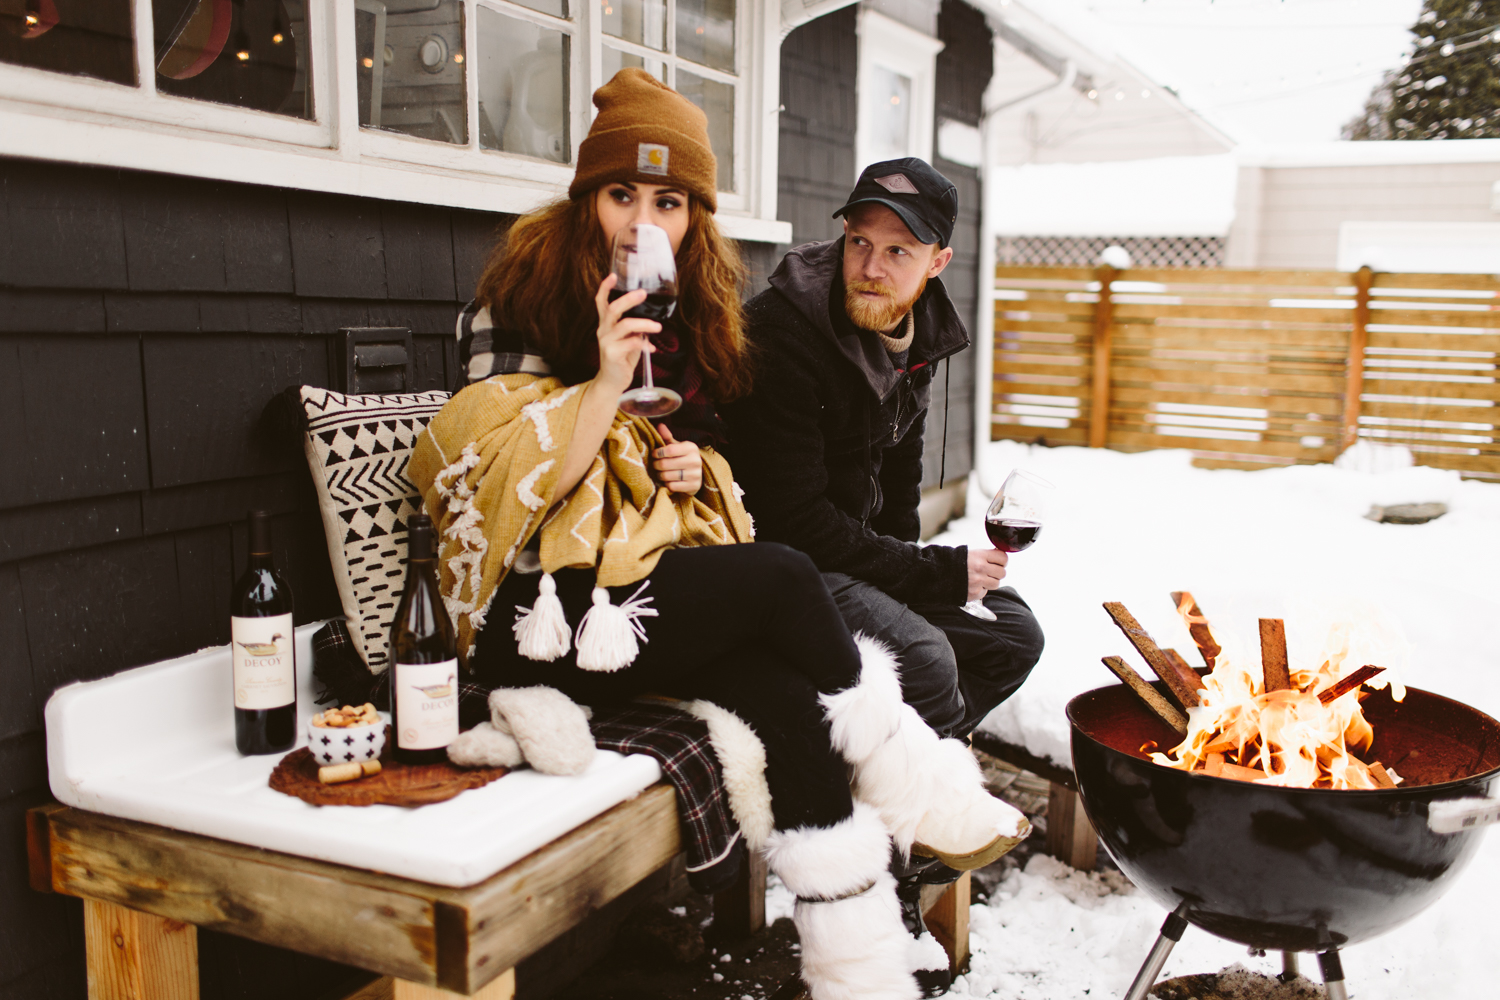
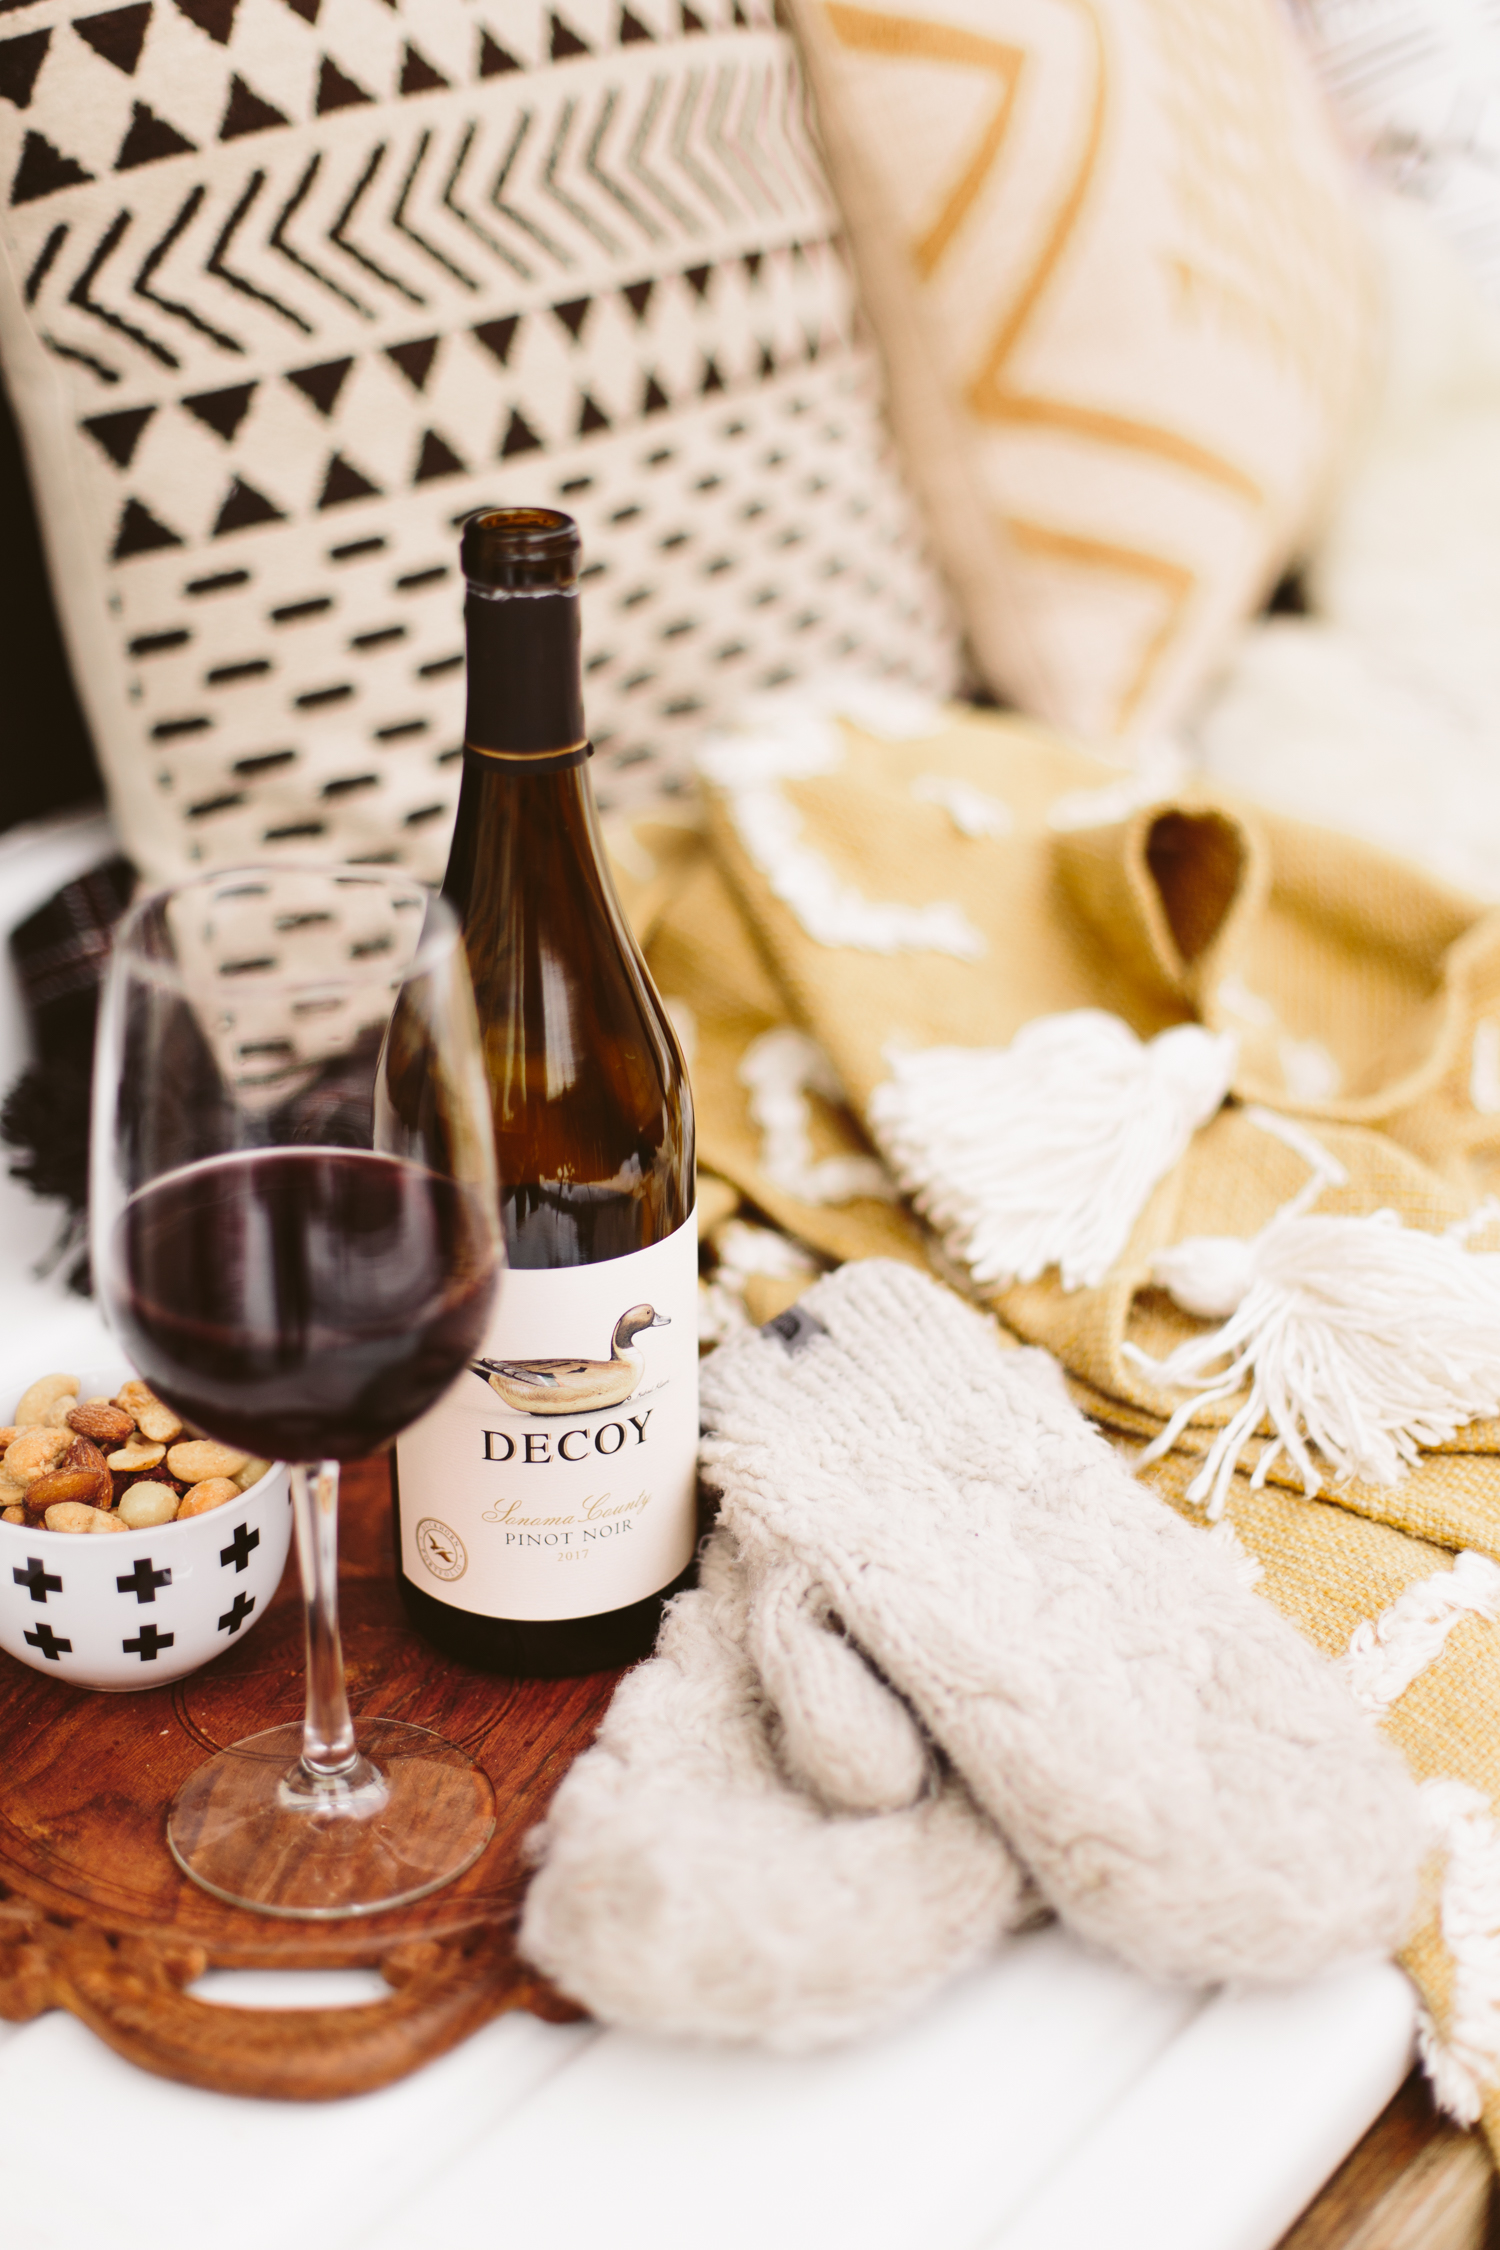
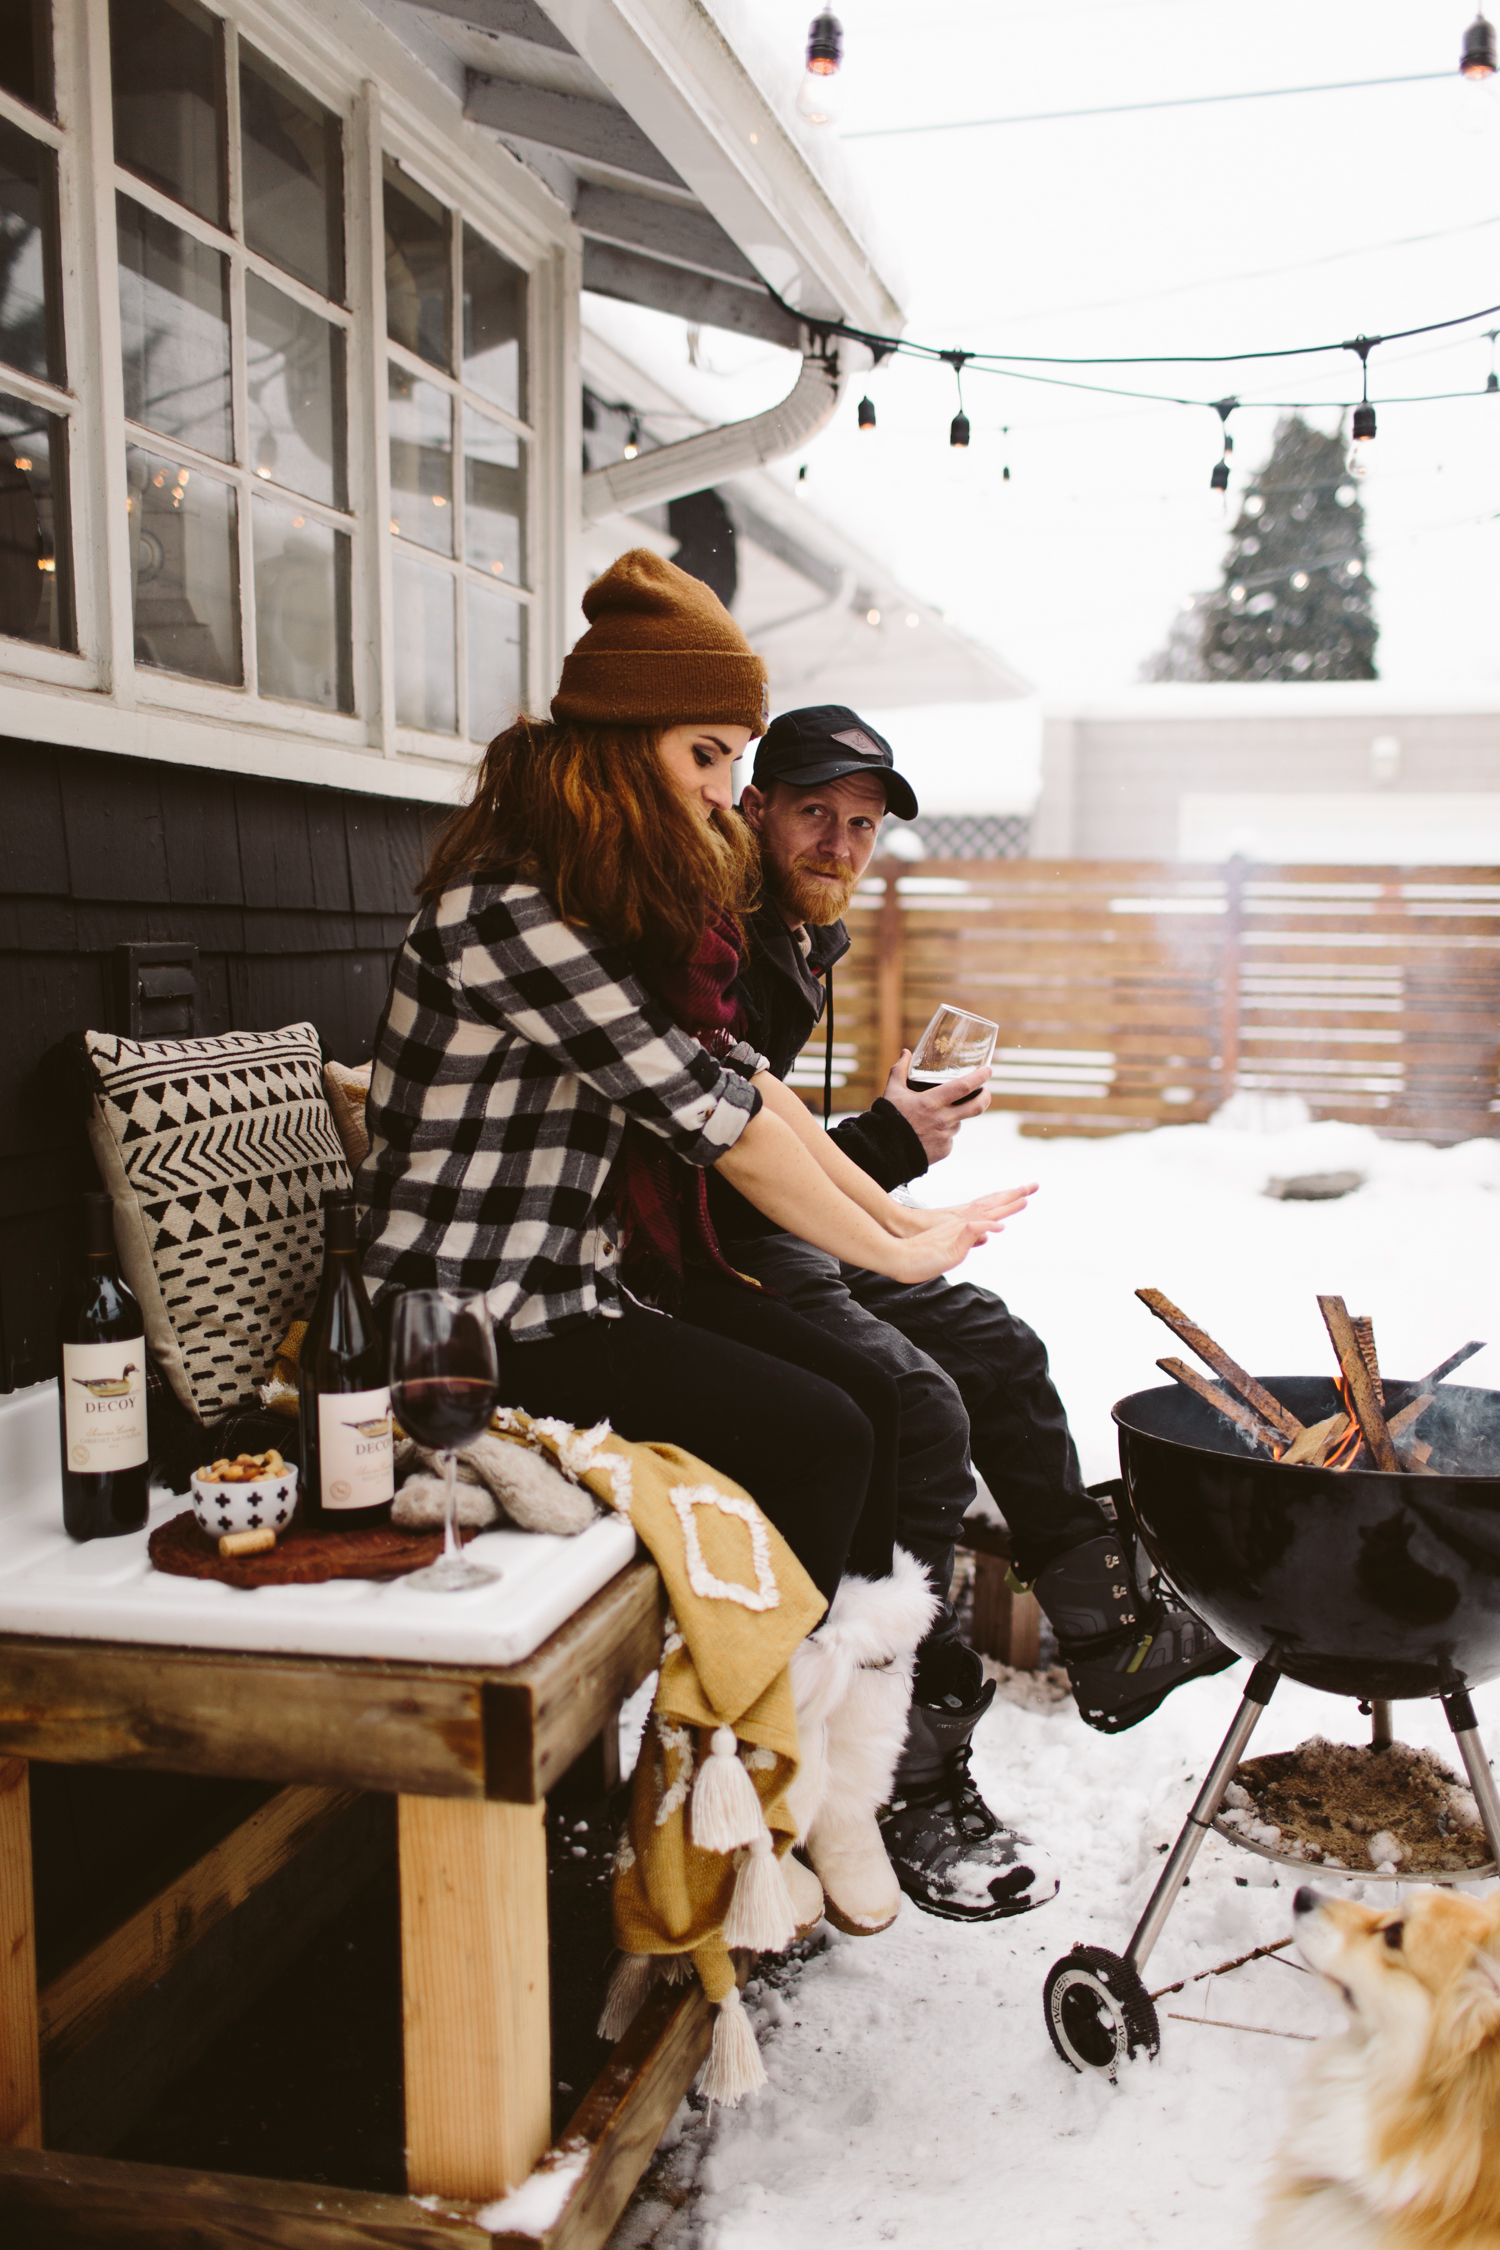
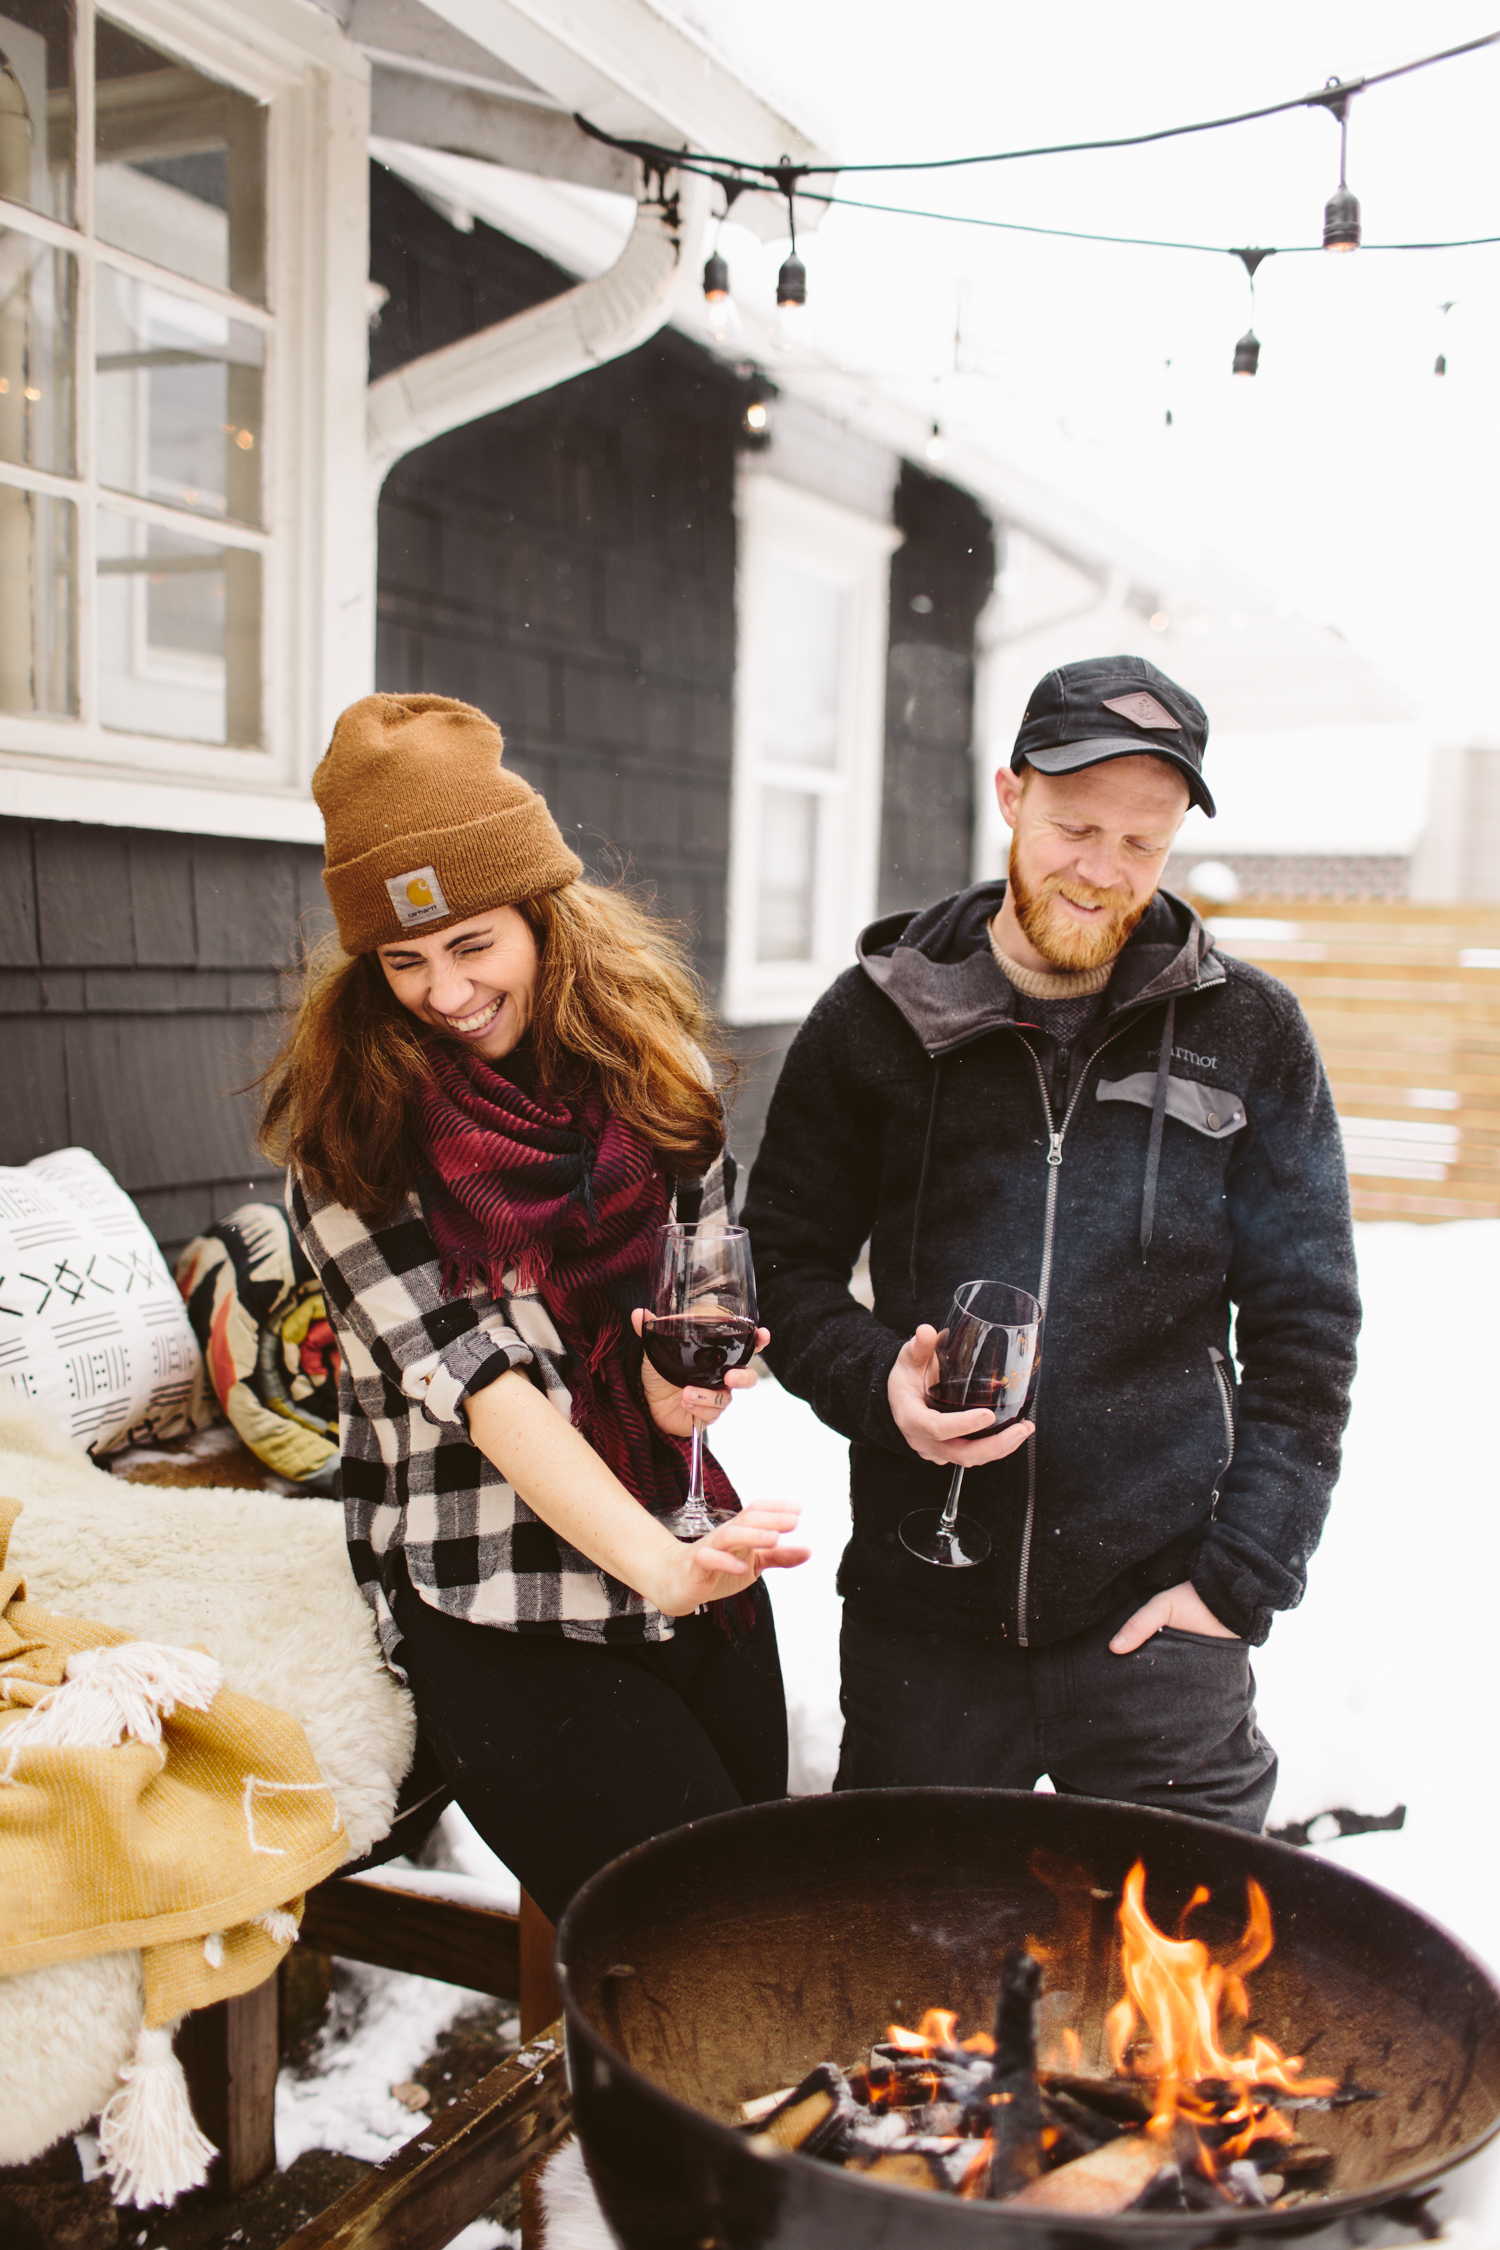
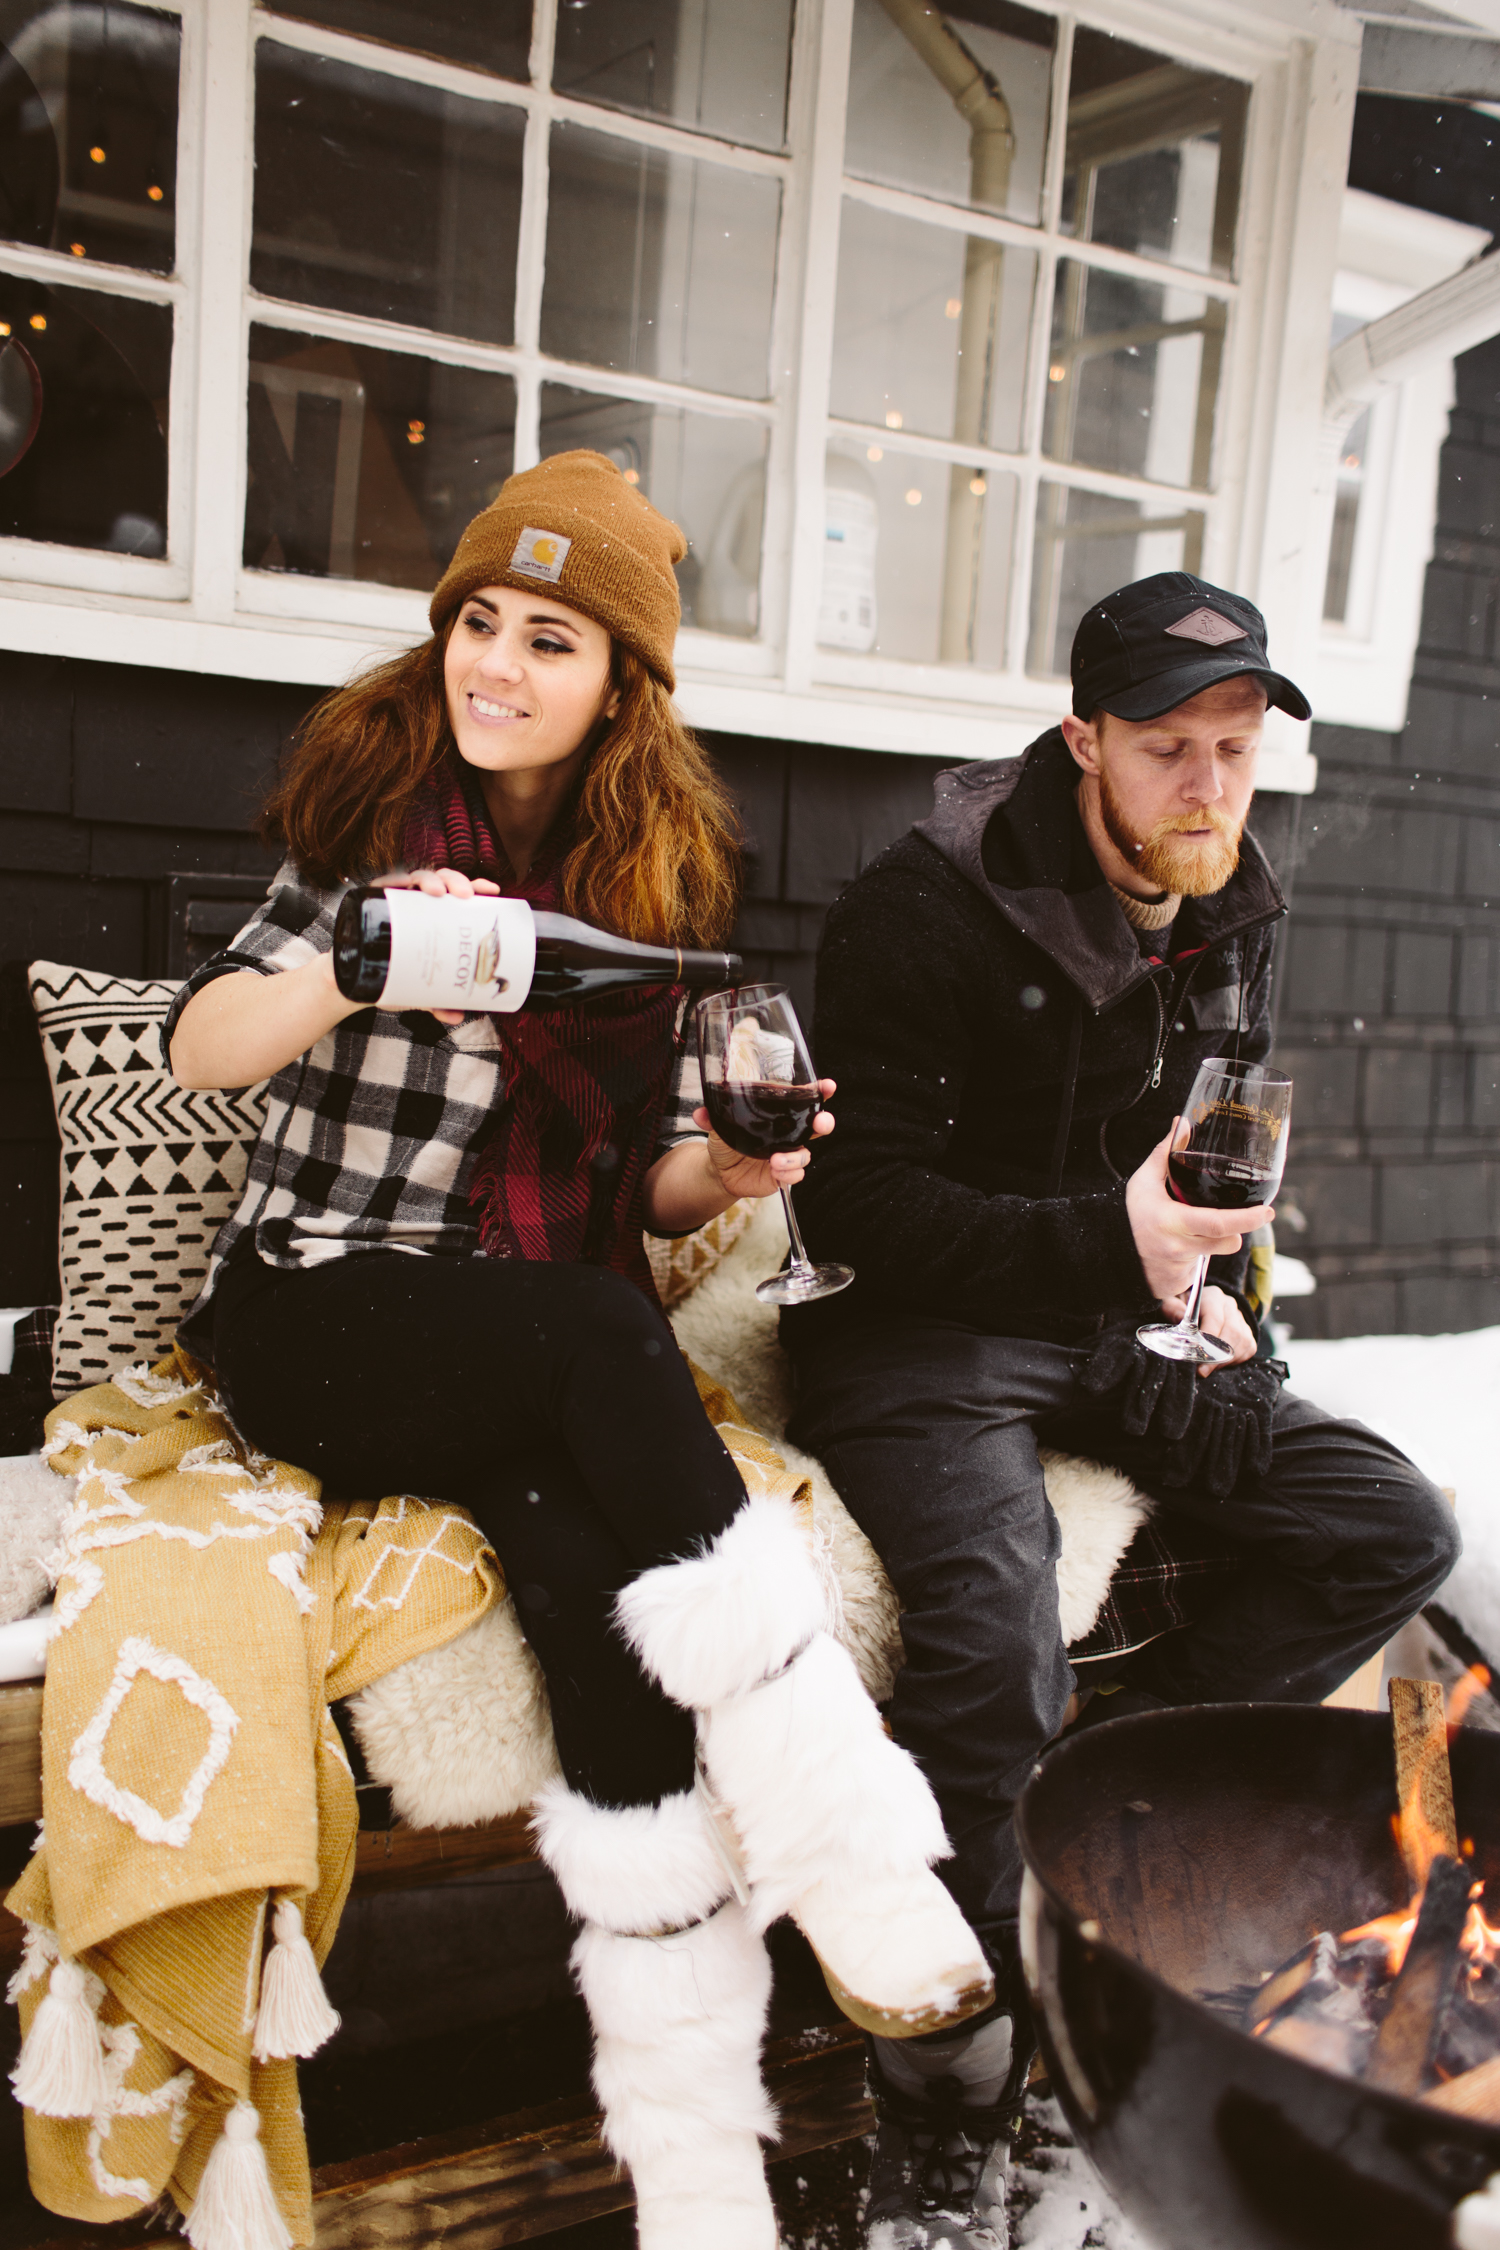
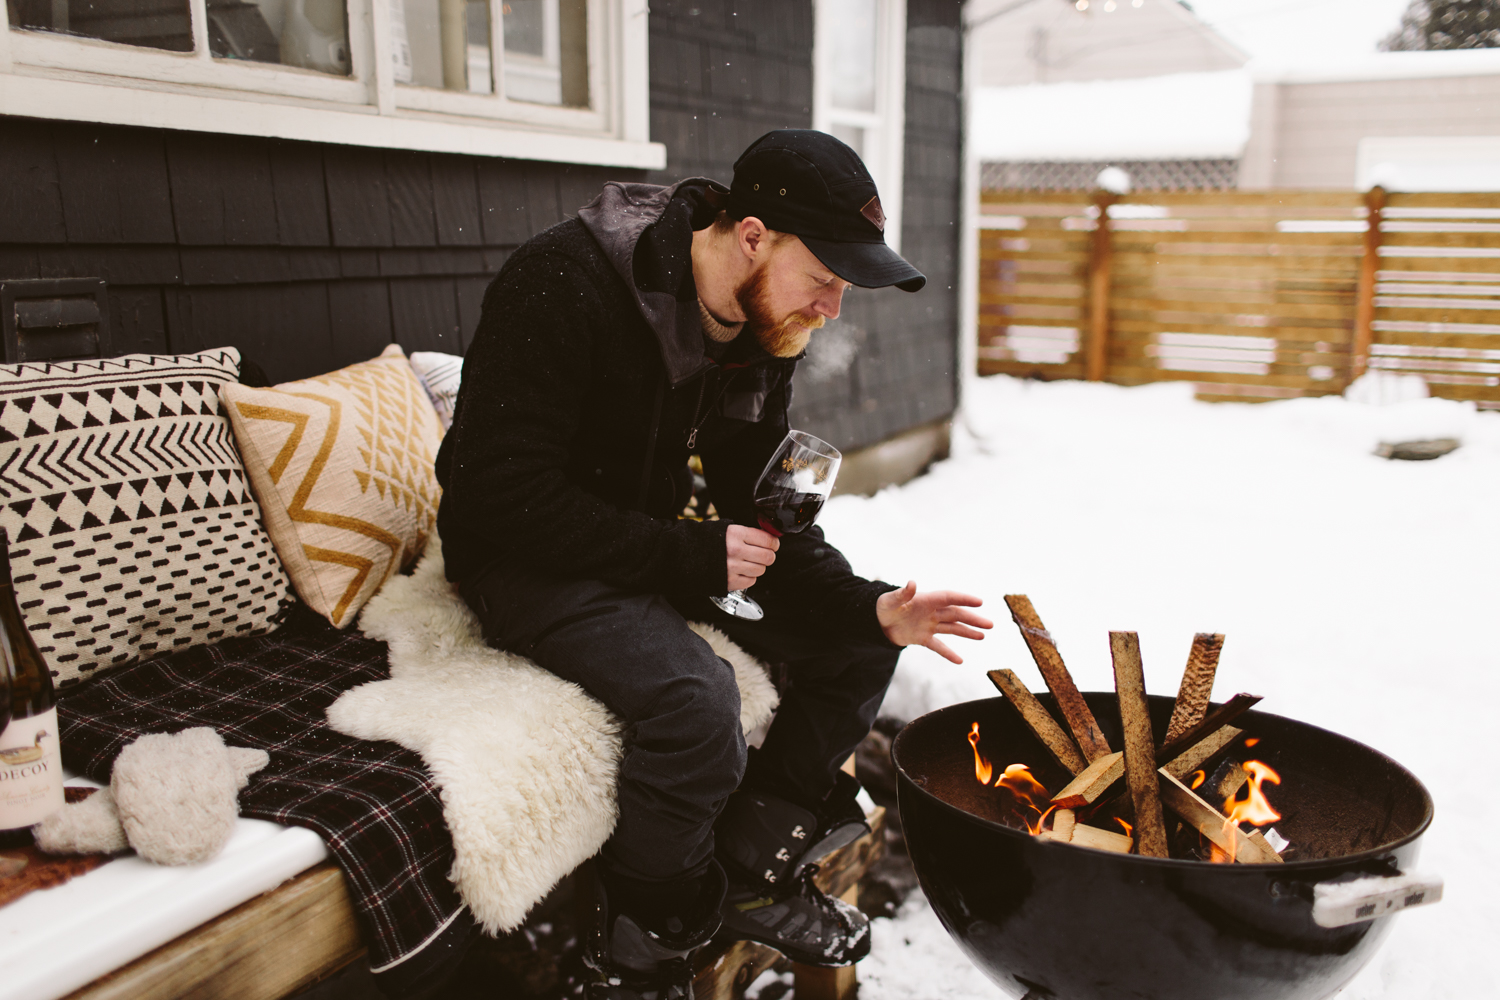
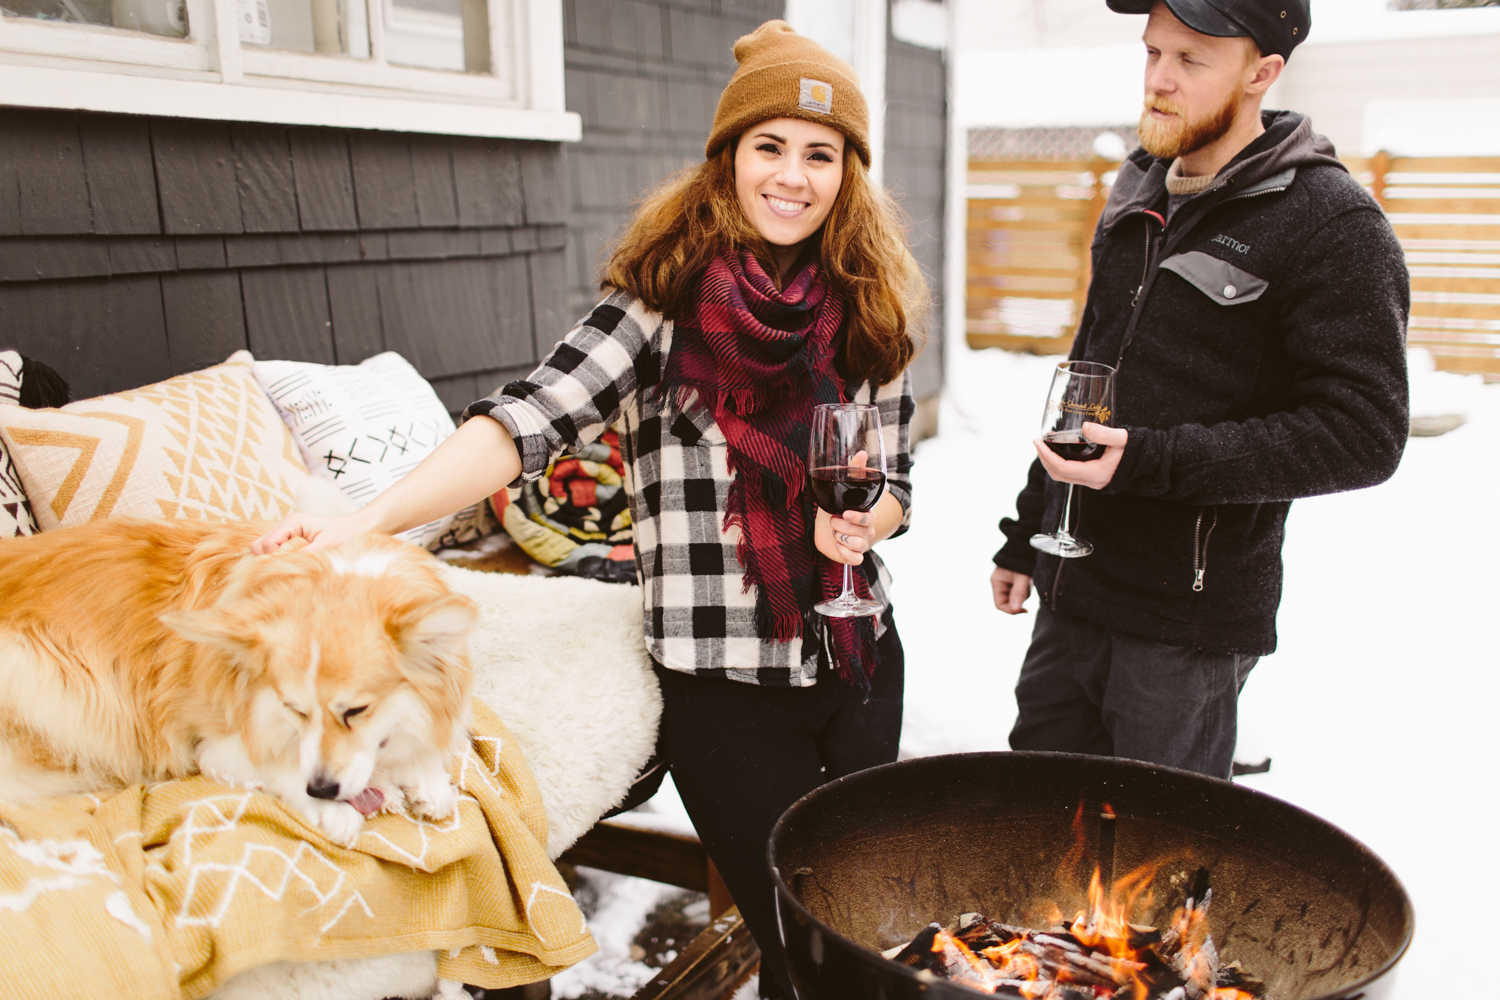
Here in the Seattle area we have to hit up the mountains and the ski slopes for any kind of snow fun, but Dan and I bundled up for a little backyard après-ski fun, while Dusty zoomed around enjoying the flurry of flakes. Luckly I had some Decoy wine on hand to unwind with, so we sipped on some Pinot Noir and Cabernet Sauvignon while keeping warm by the fire. Some wine, my sweet love, a snow day, and a fire to warm up by, I think I found my perfect wine pairing right there.
You can unwind with Decoy, find your perfect pairing, and pick up a bottle of your own by checking out the Decoy Wine Finder here!
Tacoma isn’t used to the snow, so on Saturday we ended up down at Wright Park where someone had created a facebook event for the “ultimate snowball fight” and holy cow, it felt like we were in a Christmas movie or something! Hundreds of people gathered and then all at once, the crowd roared and a huge snowball fight broke out! People were sledding everywhere, snowmen were popping up here and there, and the vibe of the entire city felt like it was buzzing with excitement and childlike glee. Of course by Monday it looked like most people were over the snow, based on all the exasperated social media posts, but we bundled up and walked to a coffee shop to enjoy what might be the last of the pretty snow before it warms up and starts raining, turning the city into a brown slushy mess.


Hi, I’m Liz
I'm an artist, writer, designer, DIY renovator, and … well basically I like to do all the things. If it’s creative I’m probably doing it. I’ve spent over 30 years voraciously pursuing a life steeped in creativity and I wholeheartedly believe creativity and joy are inextricably linked.
Read more…


Explore The Archive
- January 2025
- December 2024
- August 2024
- July 2024
- May 2024
- April 2024
- January 2024
- December 2023
- October 2023
- September 2023
- July 2023
- June 2023
- May 2023
- April 2023
- March 2023
- February 2023
- January 2023
- December 2022
- November 2022
- October 2022
- August 2022
- June 2022
- May 2022
- April 2022
- March 2022
- November 2021
- October 2021
- August 2021
- July 2021
- May 2021
- January 2021
- November 2020
- October 2020
- September 2020
- August 2020
- July 2020
- June 2020
- May 2020
- April 2020
- February 2020
- January 2020
- November 2019
- October 2019
- August 2019
- July 2019
- June 2019
- May 2019
- April 2019
- February 2019
- January 2019
- December 2018
- November 2018
- October 2018
- September 2018
- August 2018
- July 2018
- June 2018
- May 2018
- April 2018
- February 2018
- January 2018
- November 2017
- September 2017
- August 2017
- July 2017
- June 2017
- May 2017
- April 2017
- March 2017
- February 2017
- January 2017
- December 2016
- November 2016
- October 2016
- September 2016
- August 2016
- June 2016
- May 2016
- April 2016
- March 2016
- February 2016
- January 2016
- December 2015
- November 2015
- October 2015
- September 2015
- August 2015
- July 2015
- June 2015
- May 2015
- April 2015
- March 2015
- February 2015
- January 2015
- December 2014
- November 2014
- October 2014
- September 2014
- August 2014
- July 2014
- June 2014
- May 2014
- April 2014
- March 2014
- February 2014
- January 2014
- December 2013
- November 2013
- October 2013
- September 2013
- August 2013
- July 2013
- June 2013
- May 2013
- April 2013
- March 2013
- February 2013
- January 2013
- December 2012
- November 2012
- October 2012
- September 2012
- August 2012
- July 2012
- June 2012
- May 2012
- April 2012
- March 2012
- February 2012
- January 2012
- December 2011
- November 2011
- October 2011
- September 2011
- August 2011
- July 2011
- June 2011
- May 2011
- April 2011
- March 2011
- February 2011
- January 2011
- December 2010
- November 2010
- October 2010
- September 2010
- August 2010
- July 2010
- June 2010
- May 2010
- April 2010
- March 2010
- February 2010
- January 2010
- December 2009
- November 2009
- October 2009
- September 2009
- August 2009
- July 2009
- June 2009
- May 2009
- April 2009
- March 2009
- February 2009
- January 2009
- December 2008
- November 2008
- October 2008
- September 2008
- August 2008
- July 2008

VISIT THE SHOP


PRIVACY POLICY & DISCLOSURE
We are a participant in the Amazon Services LLC Associates Program, an affiliate advertising program designed to provide a means for us to earn fees by linking to Amazon.com and affiliated sites.