

Living Room Before + After

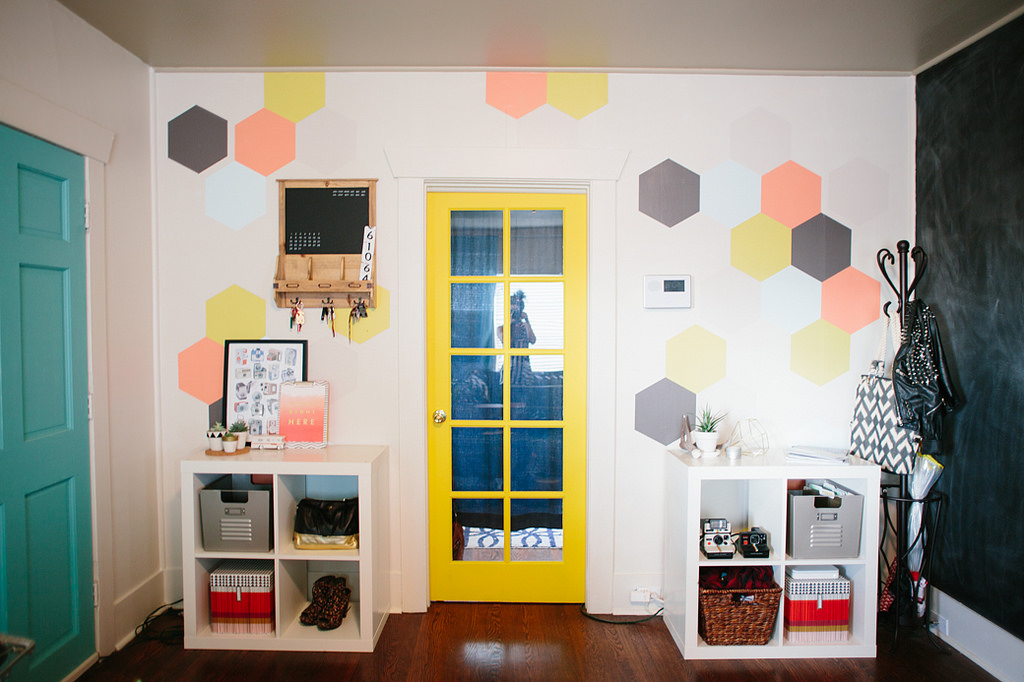
As I'm working on setting up our living room this time around, I'm looking back at the different ways I've arranged it in the past to get inspiration. This arrangement is pretty close to what I'm thinking of riffing on. Since our front door opens right into our living room I like how the back of the couch creates a more defined "entryway" space. This time around I'd like to get a sectional that does that same thing, so I can have that space definition, but also have a cozy living room with a couch that wraps around.
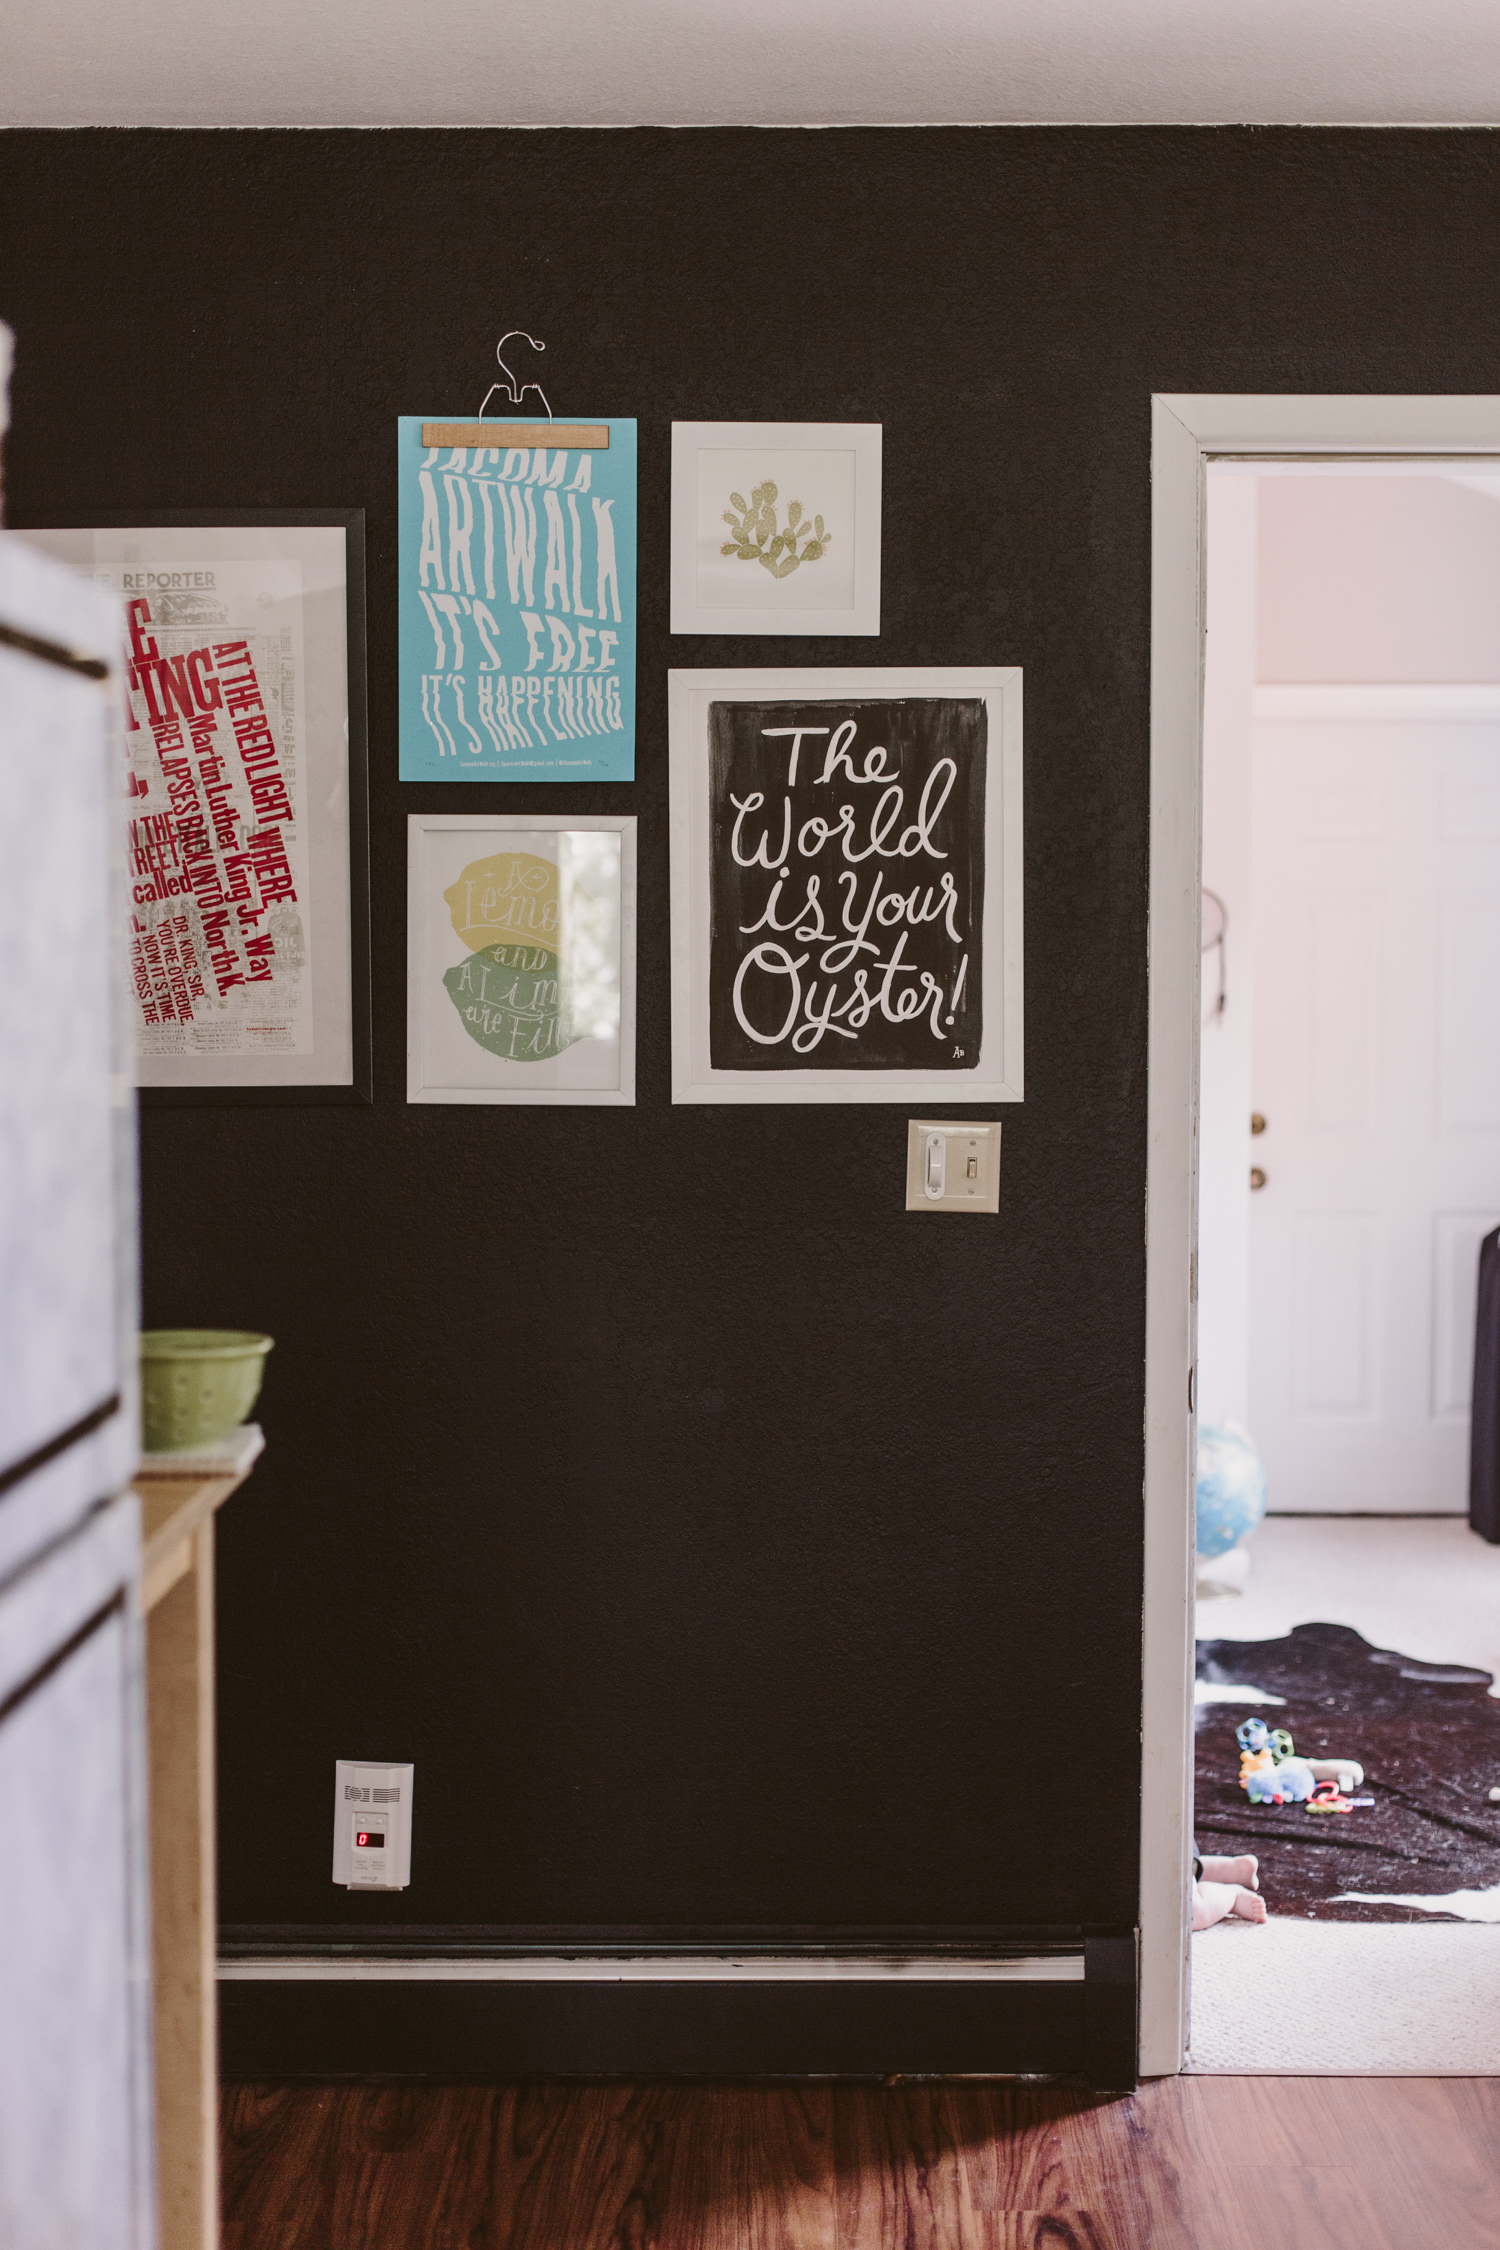
The before pictures were what the house looked like when the previous owners had staged the living room. I painted all the walls and trim white, except the big wall I ended up doing in a black chalkboard finish. I love how a chalkboard wall adds a ton of drama, but the chalk treatment gives it texture and lightens it up a bit.


One thing I learned a while back was that hanging your curtains from ceiling height, versus window height, will make your room feel taller, and since this space isn't terribly large, I wanted to do everything I could to make it feel more spacious.


I love a colorful door, so I painted the inside of our front door a fresh teal blue. And I painted the neighboring french door that leads to our office space a bright yellow! If you want to paint a door, don't bother grabbing a full quart of paint, just get one of the paint tester size containers. You'll have more than enough to paint a full door or two!
I painted this hexagon mural wall a couple years ago and while it was fun at the time, I kind of hate it now and am looking forward to reimagining this wall. I've got a few ideas mulling around in my head that will add functionality to a part of the room that isn't used super well currently.

I'm really looking forward to reimagining this space again and sharing the re-styled room with you guys when I get her finished!

Kitchen Remodel Plans!

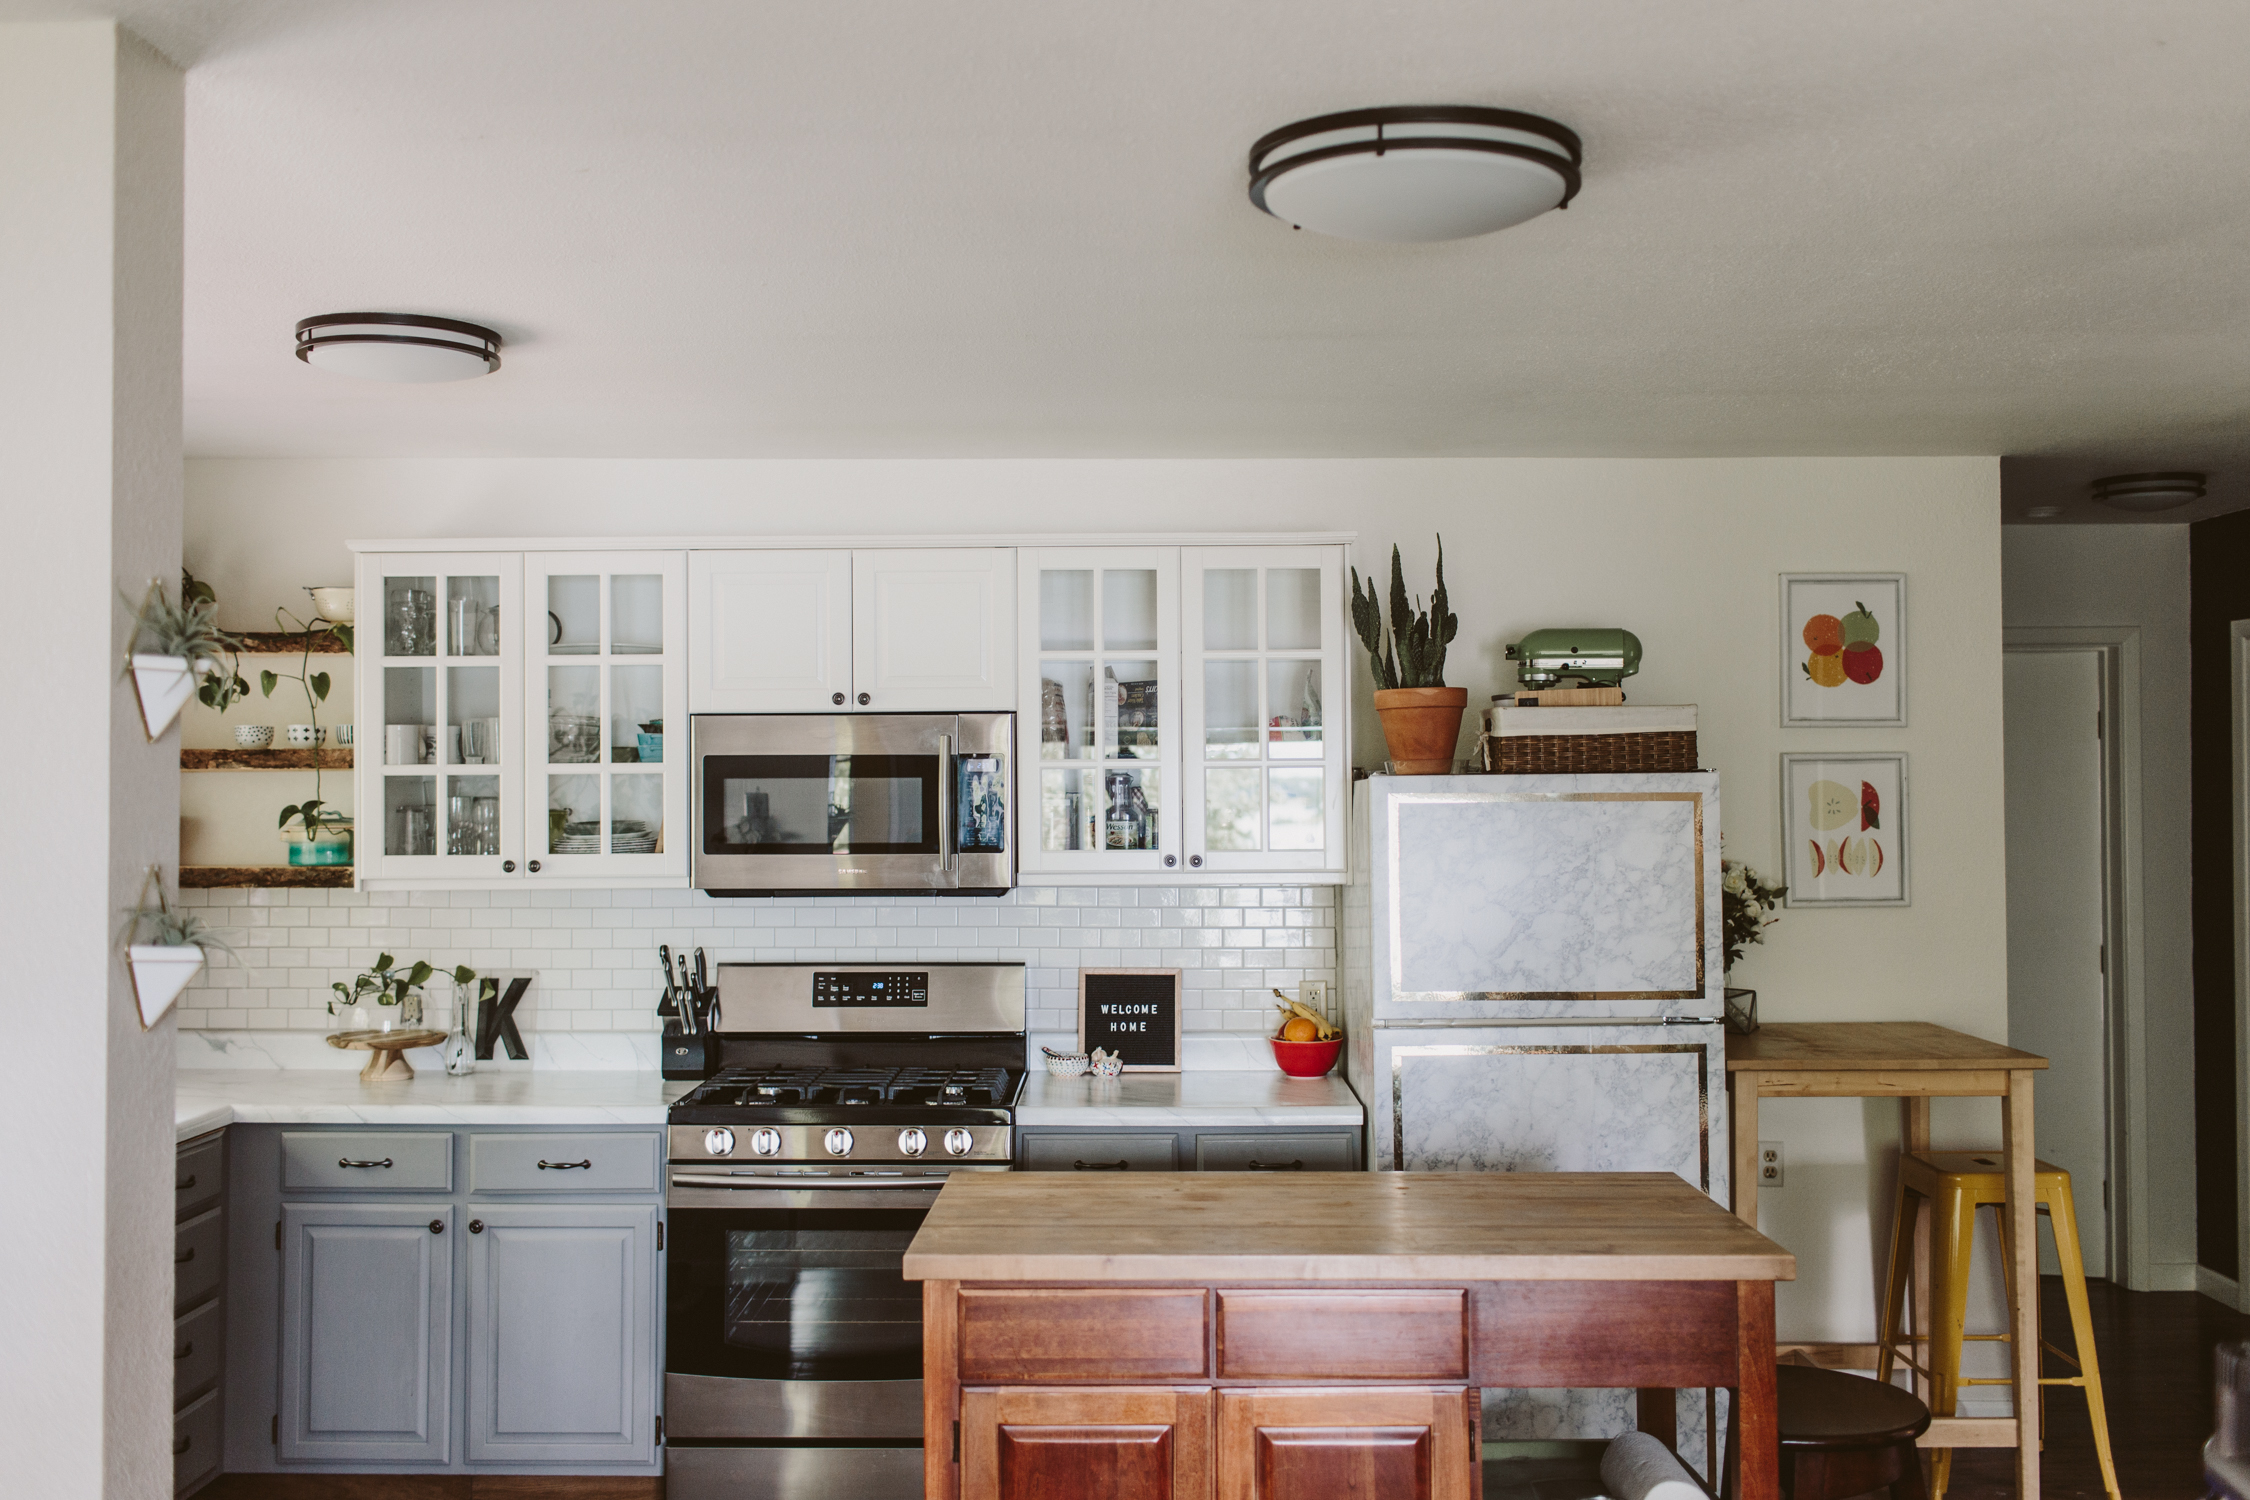
The Anchorage apartment kitchen remodel just got me even more excited about refreshing our current kitchen. I've spent many a restless night remodeling this kitchen in my head. Ideally we'd open up the wall between our kitchen and living room to give things a bit more of an open concept feel, but we don't really feel like spending a ton of money on doing a big fancy remodel on this house's kitchen. She's a small, modest house and dumping a ton of money into a kitchen remodel isn't' going to increase our resale value enough to offset the cost of actually doing it, so we're going to keep thing simple, i.e. not knock any walls down.
This kitchen was new-ish when we bought the house. Our best guess is that someone bought the house to flip, or was trying to renovate it and ran out of money. The inside had new paint, refinished hardwoods, and the kitchen was new, but the exterior was horrendous (like, my insurance company refused to insure the house because of it horrendous). So it's a quasi-cheap flip kitchen. The surfaces are all nice enough, but with a few tweaks here and there, this kitchen could be a fresh and modern space.
The plan:
- Take down the upper cabinets on the sink wall and replace with open shelving. Honestly, most of our upper cabinet space is just wasted space. I'm too short to even reach 70% of the shelves, and we've got a built-in around the corner that can house the stuff that lives in them now.
- Paint her white. I do love me some chartreuse, and having a bright colorful kitchen was nice, but I feel ready for a clean slate. I'm sure some pops of bright color will find their way into my styling, but for this new look (and for resale, I hear chartreuse kitchens aren't most buyer's fave), white is gonna do the trick.
- Tile that backsplash. Goodbye nasty, weird, brown Formica backsplash. I want to do square tile instead of the usual subway tile to give a little bit of a new take on a pretty played out (though still gorgeous) look. I'm sure white subway tile stock won't be dropping for some time, but I'm excited to try something a little different. For a bit of texture, I'm going to do dark grout instead of white.
- Walnut butcher block counters. The counters are the same brown-ish Formica as the backsplash, and I'm so SO excited to get rid of them and replace them with beautiful wood counters. I love a butcher block countertop.
- Paint the old cabinets and give them some modern hardware. The remaining uppers on the stove wall will be painted white, and the bottom cabinets will be a dark charcoal. None of the cabinets currently have any knobs or pulls (which is actually super annoying, but also great for keeping your baby from opening them), so I'd like to install some in a brass finish to add contrast.
- We also might get a new sink, but that's not a must-have, but if we do, it'll probably be a white ceramic sink, second hand from a local building material re-store.
Hopefully everything will go smoothly, but this process will likely take a while, since I'll be trying to get this done with a toddler (do you start calling them toddlers when they start... toddling? Cuz Jack is only 10 months but he's toddling like crazy, soooo baby? toddler? I digress). I think the first thing I'll start with will be painting the bottom cabinets because I don't have to do any demo to get that done. Wish me luck! I'll keep you guys updated.


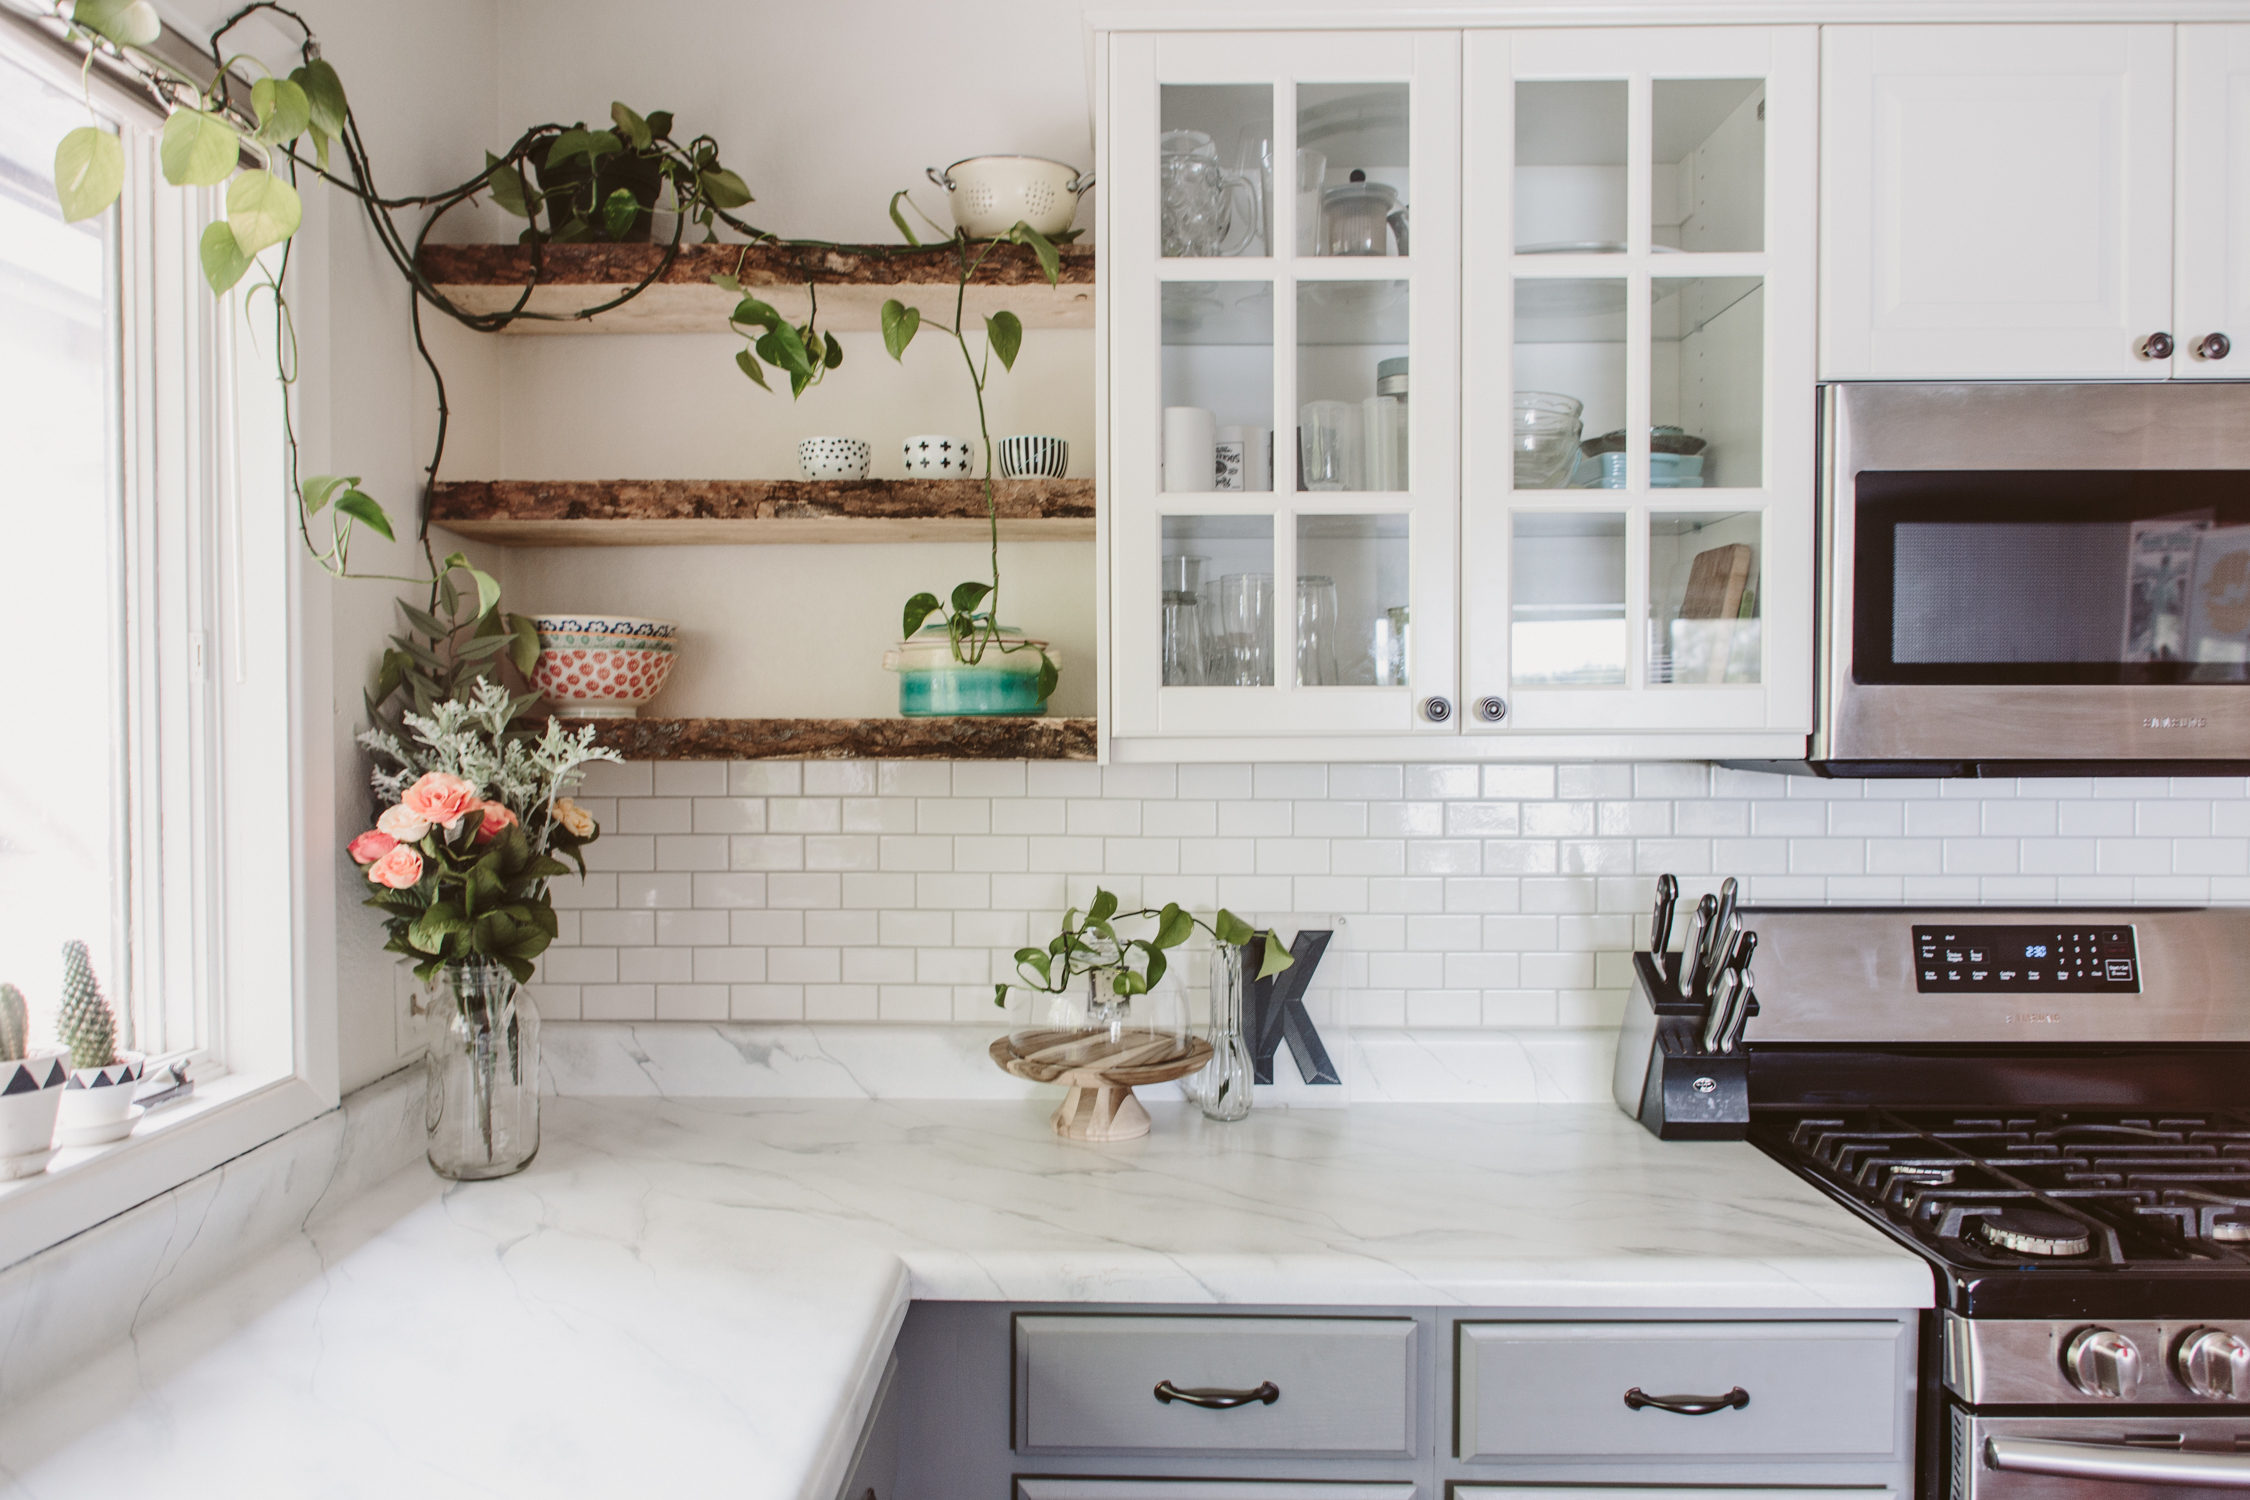
Our Apartment Kitchen Remodel

I'm gonna tell you guys something a little heartbreaking, right out of the gate. This kitchen is now completely demolished. We finished this remodel in June and by August, this apartment was totally gutted by the new owners. Moment of silence. Okay, now lets get to it.
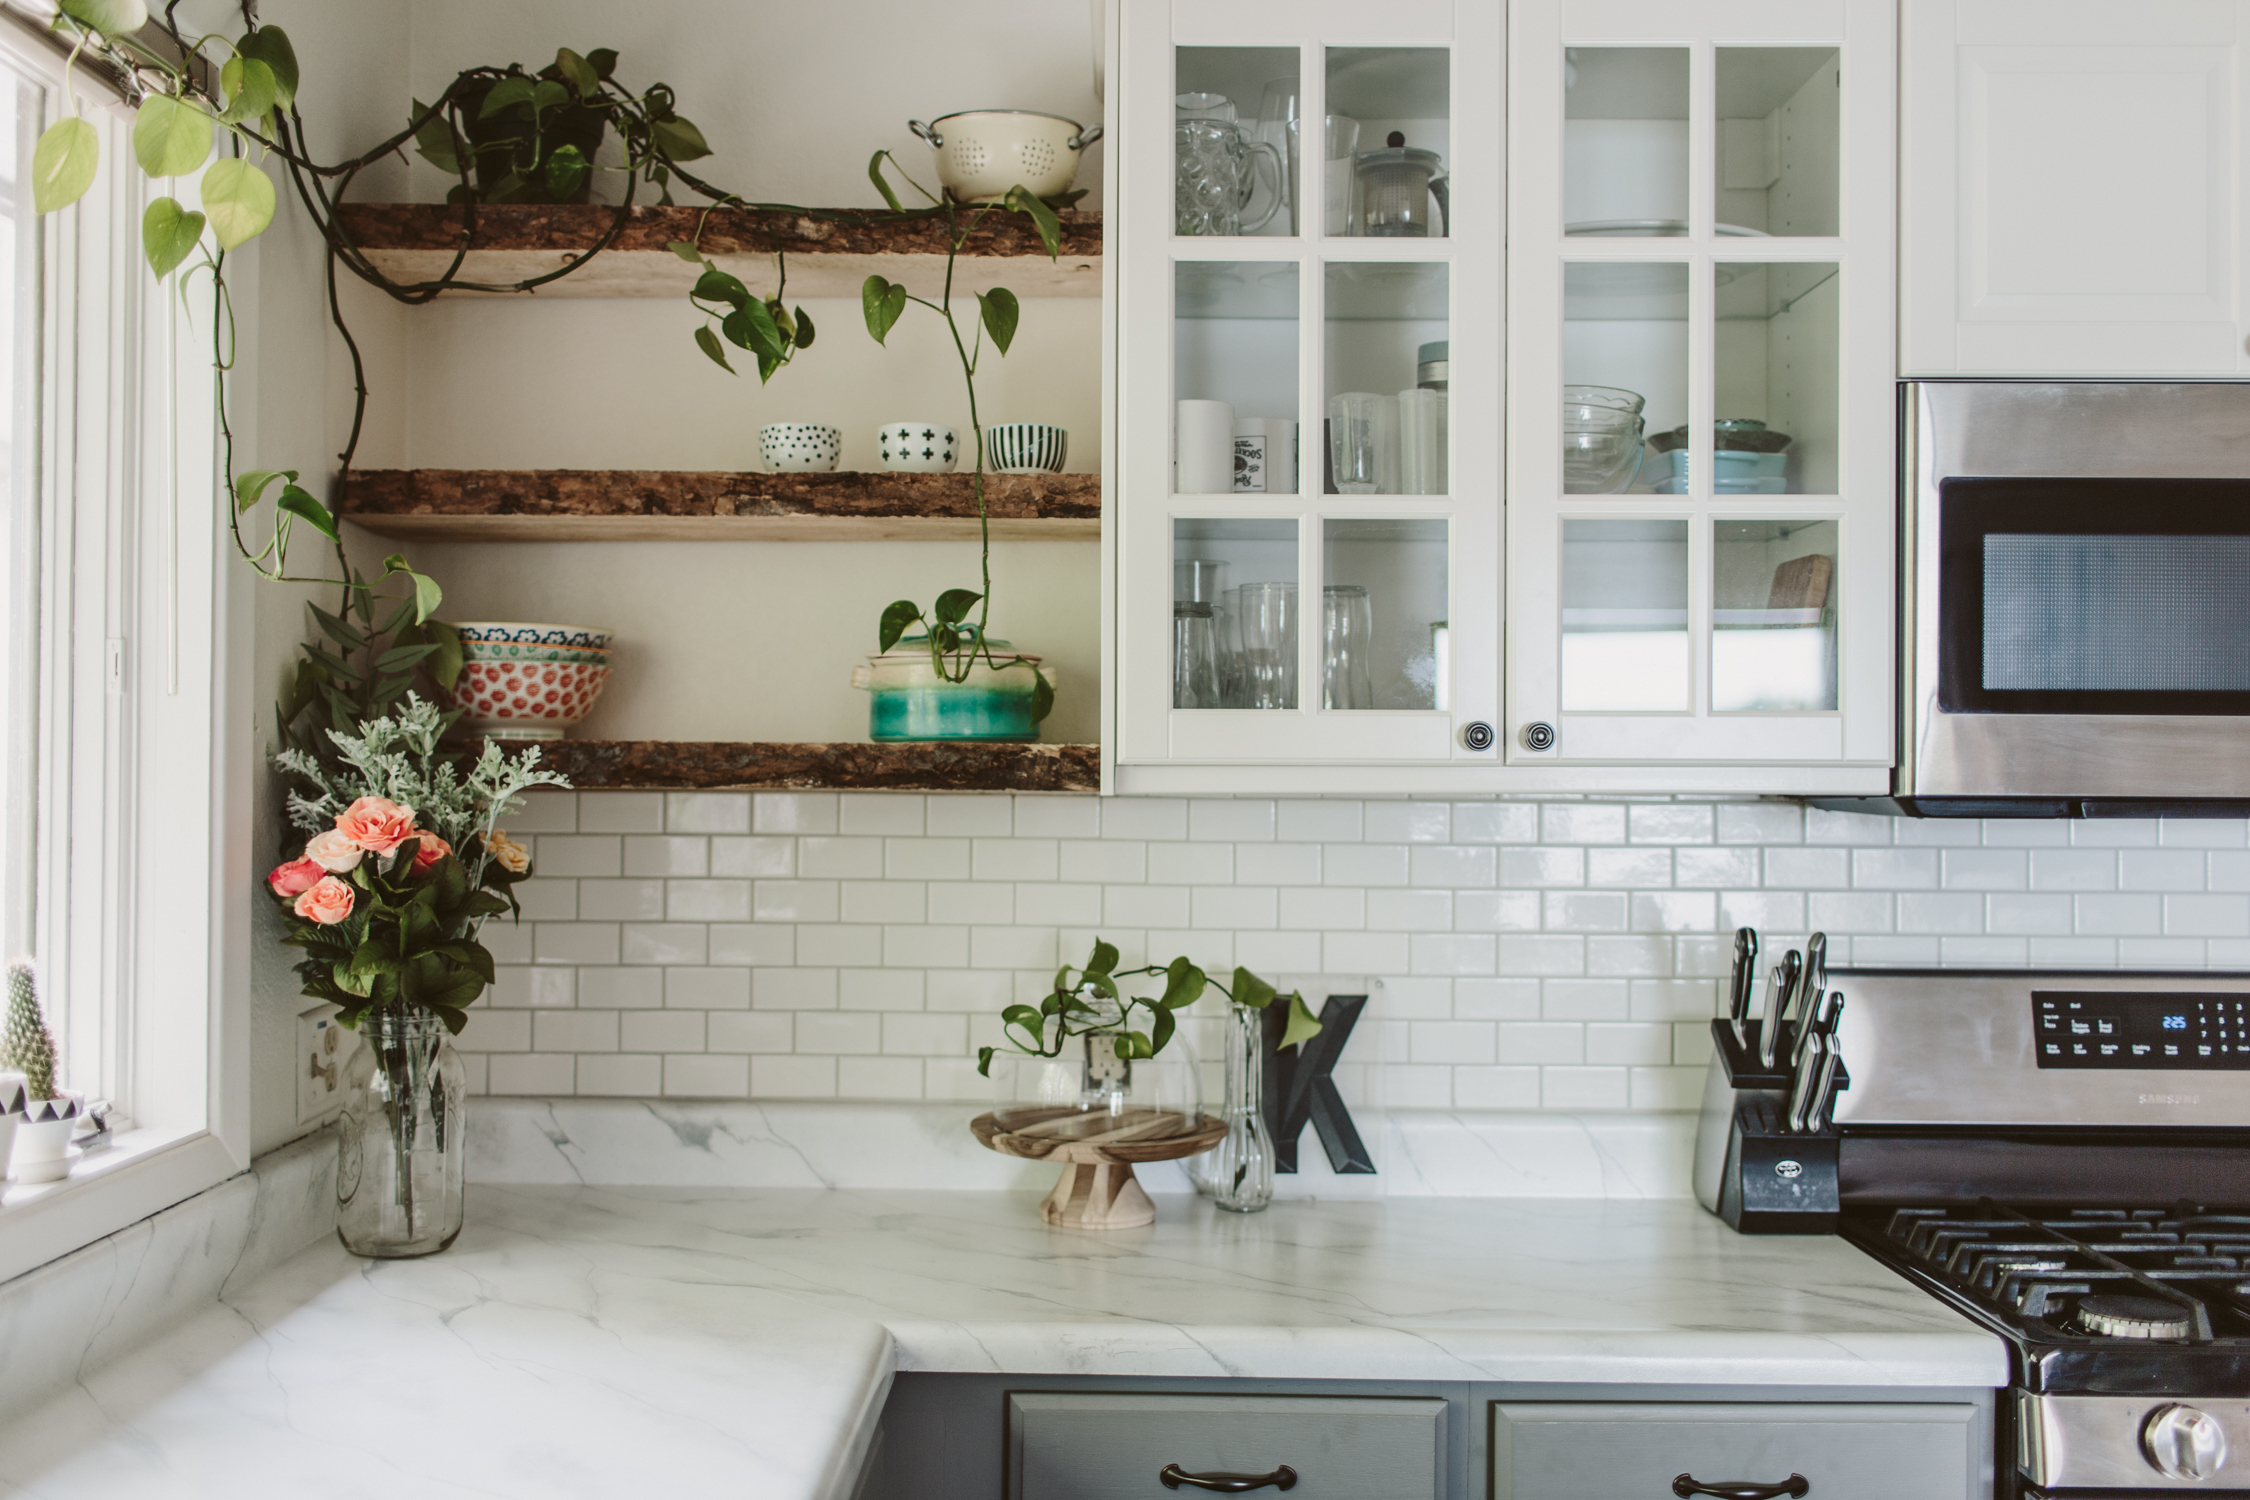
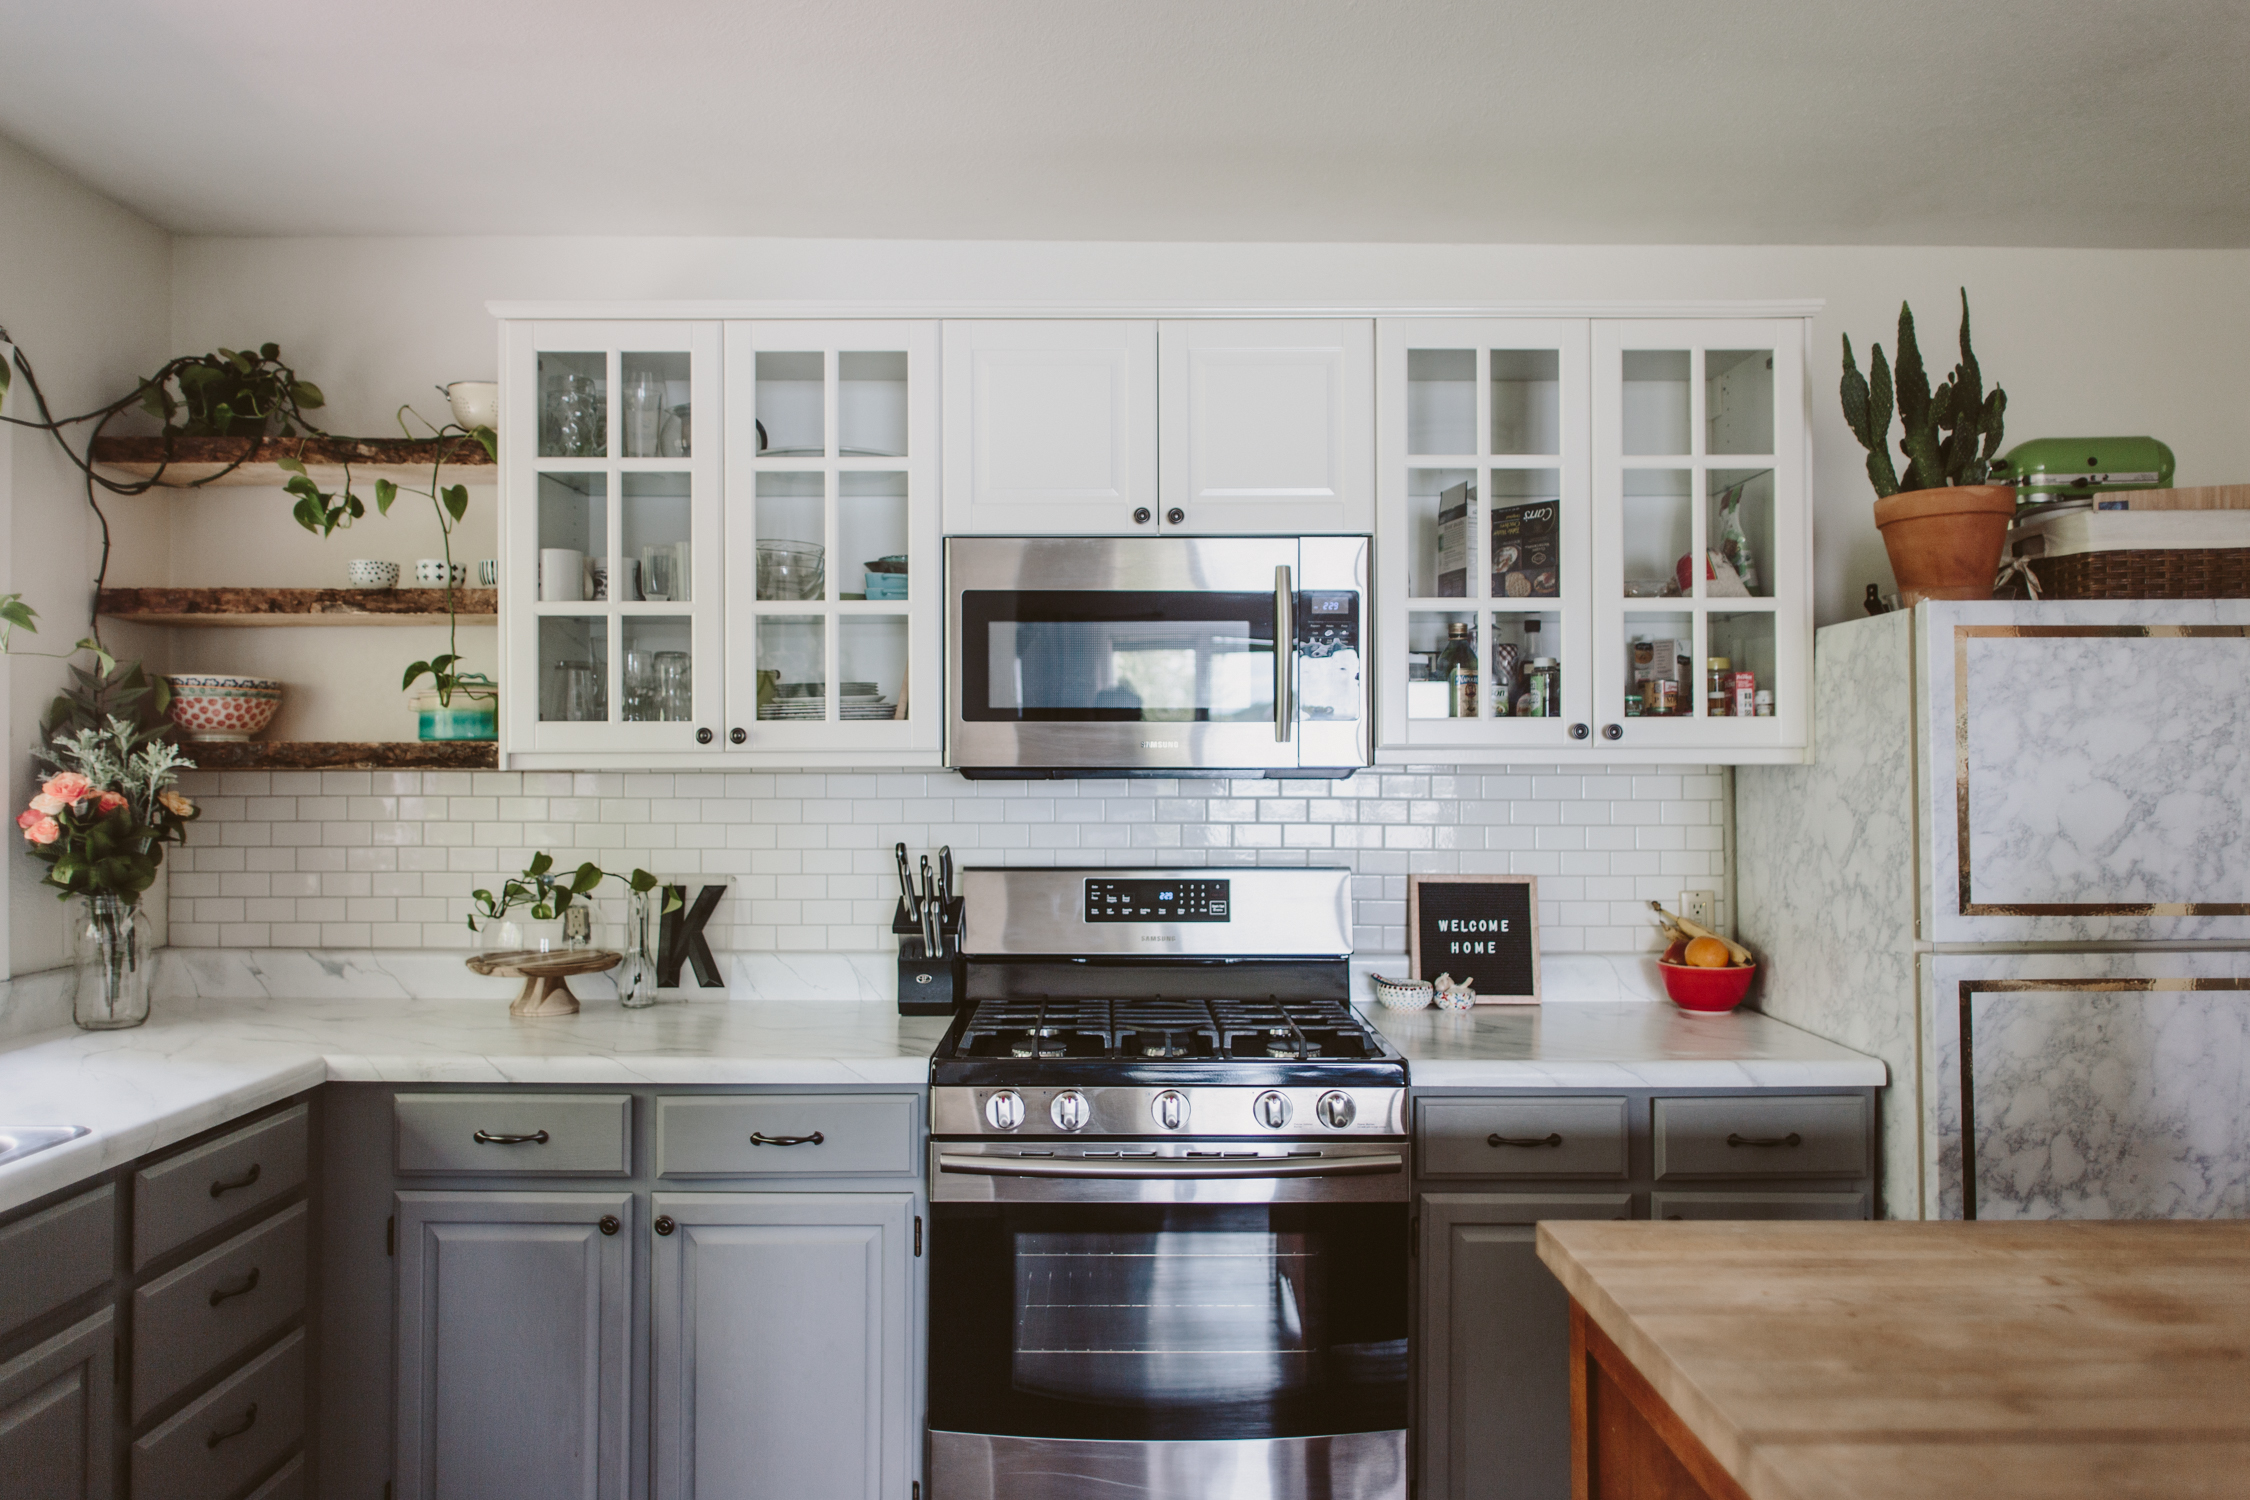
This apartment was above the garage of the house I grew up in, so I've been familiar with the space for many years. It's seen a few small remodels, mostly paint, and a few years ago my parents put in new vinyl wood flooring. Nothing about it was super special. The cabinets were cheap, the countertop was dingy off-white formica, and the sink was designed with a sloped bottom so any time you set a glass in there it tipped over.
We didn't want to spend a lot of money, so we didn't want to gut it and have to install new cabinets, counters, and fixtures. We saved lots of money by DIYing a few things.


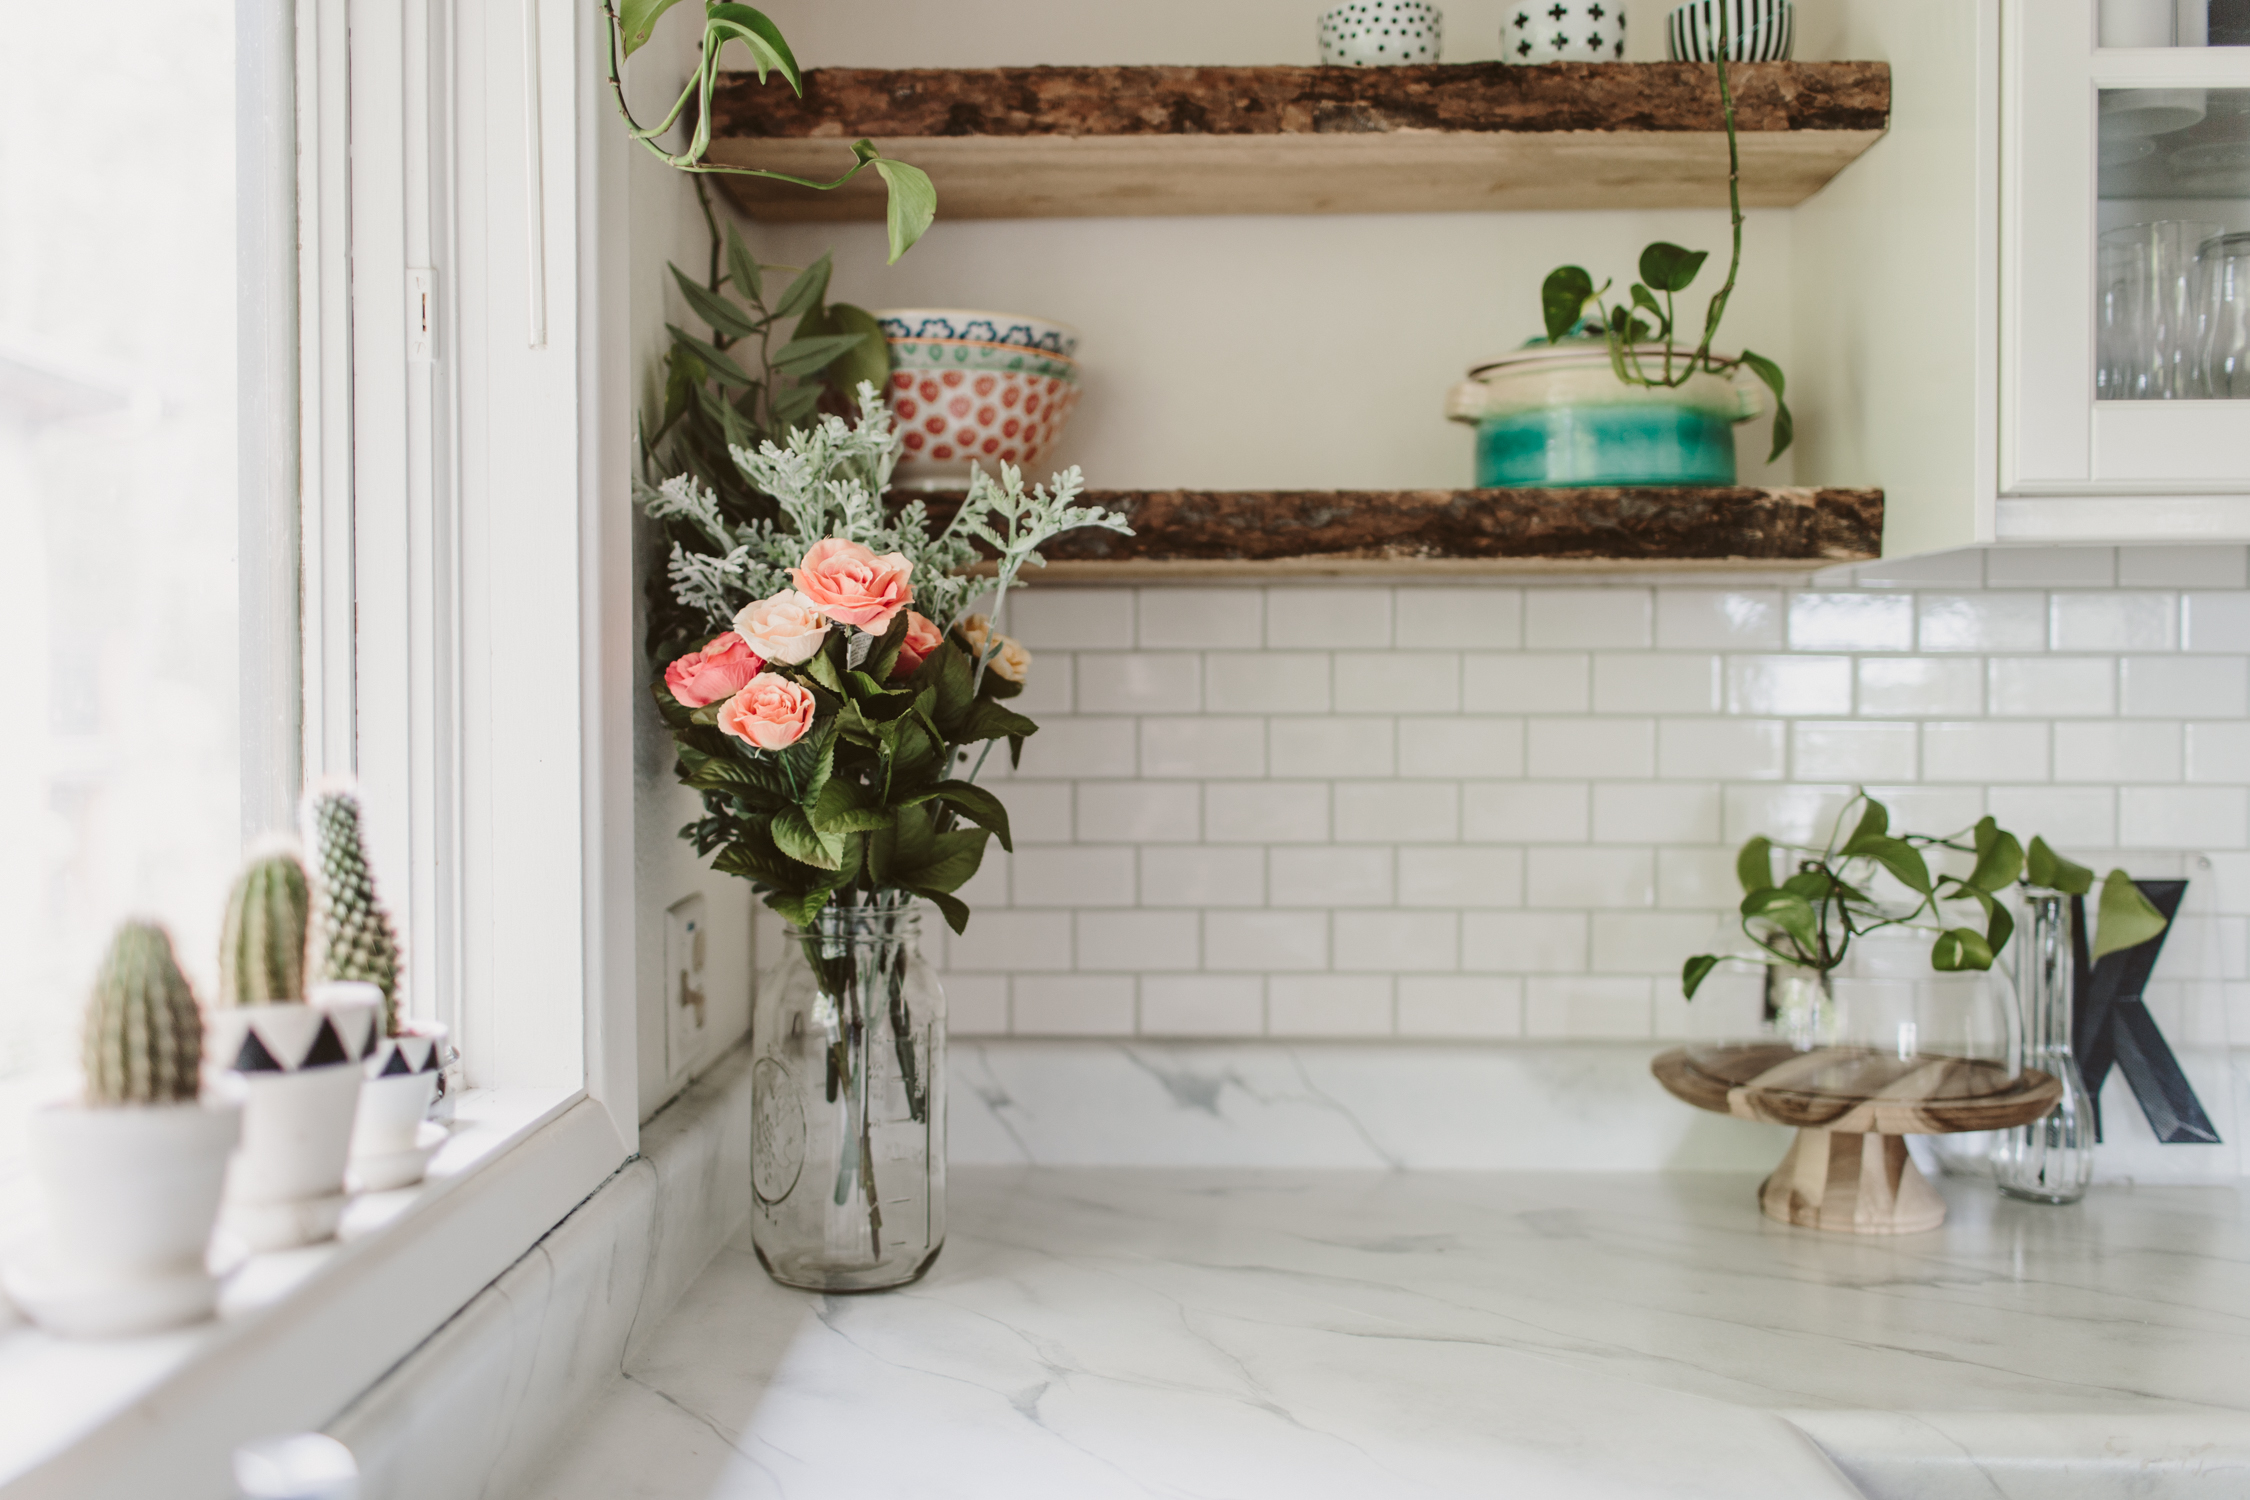
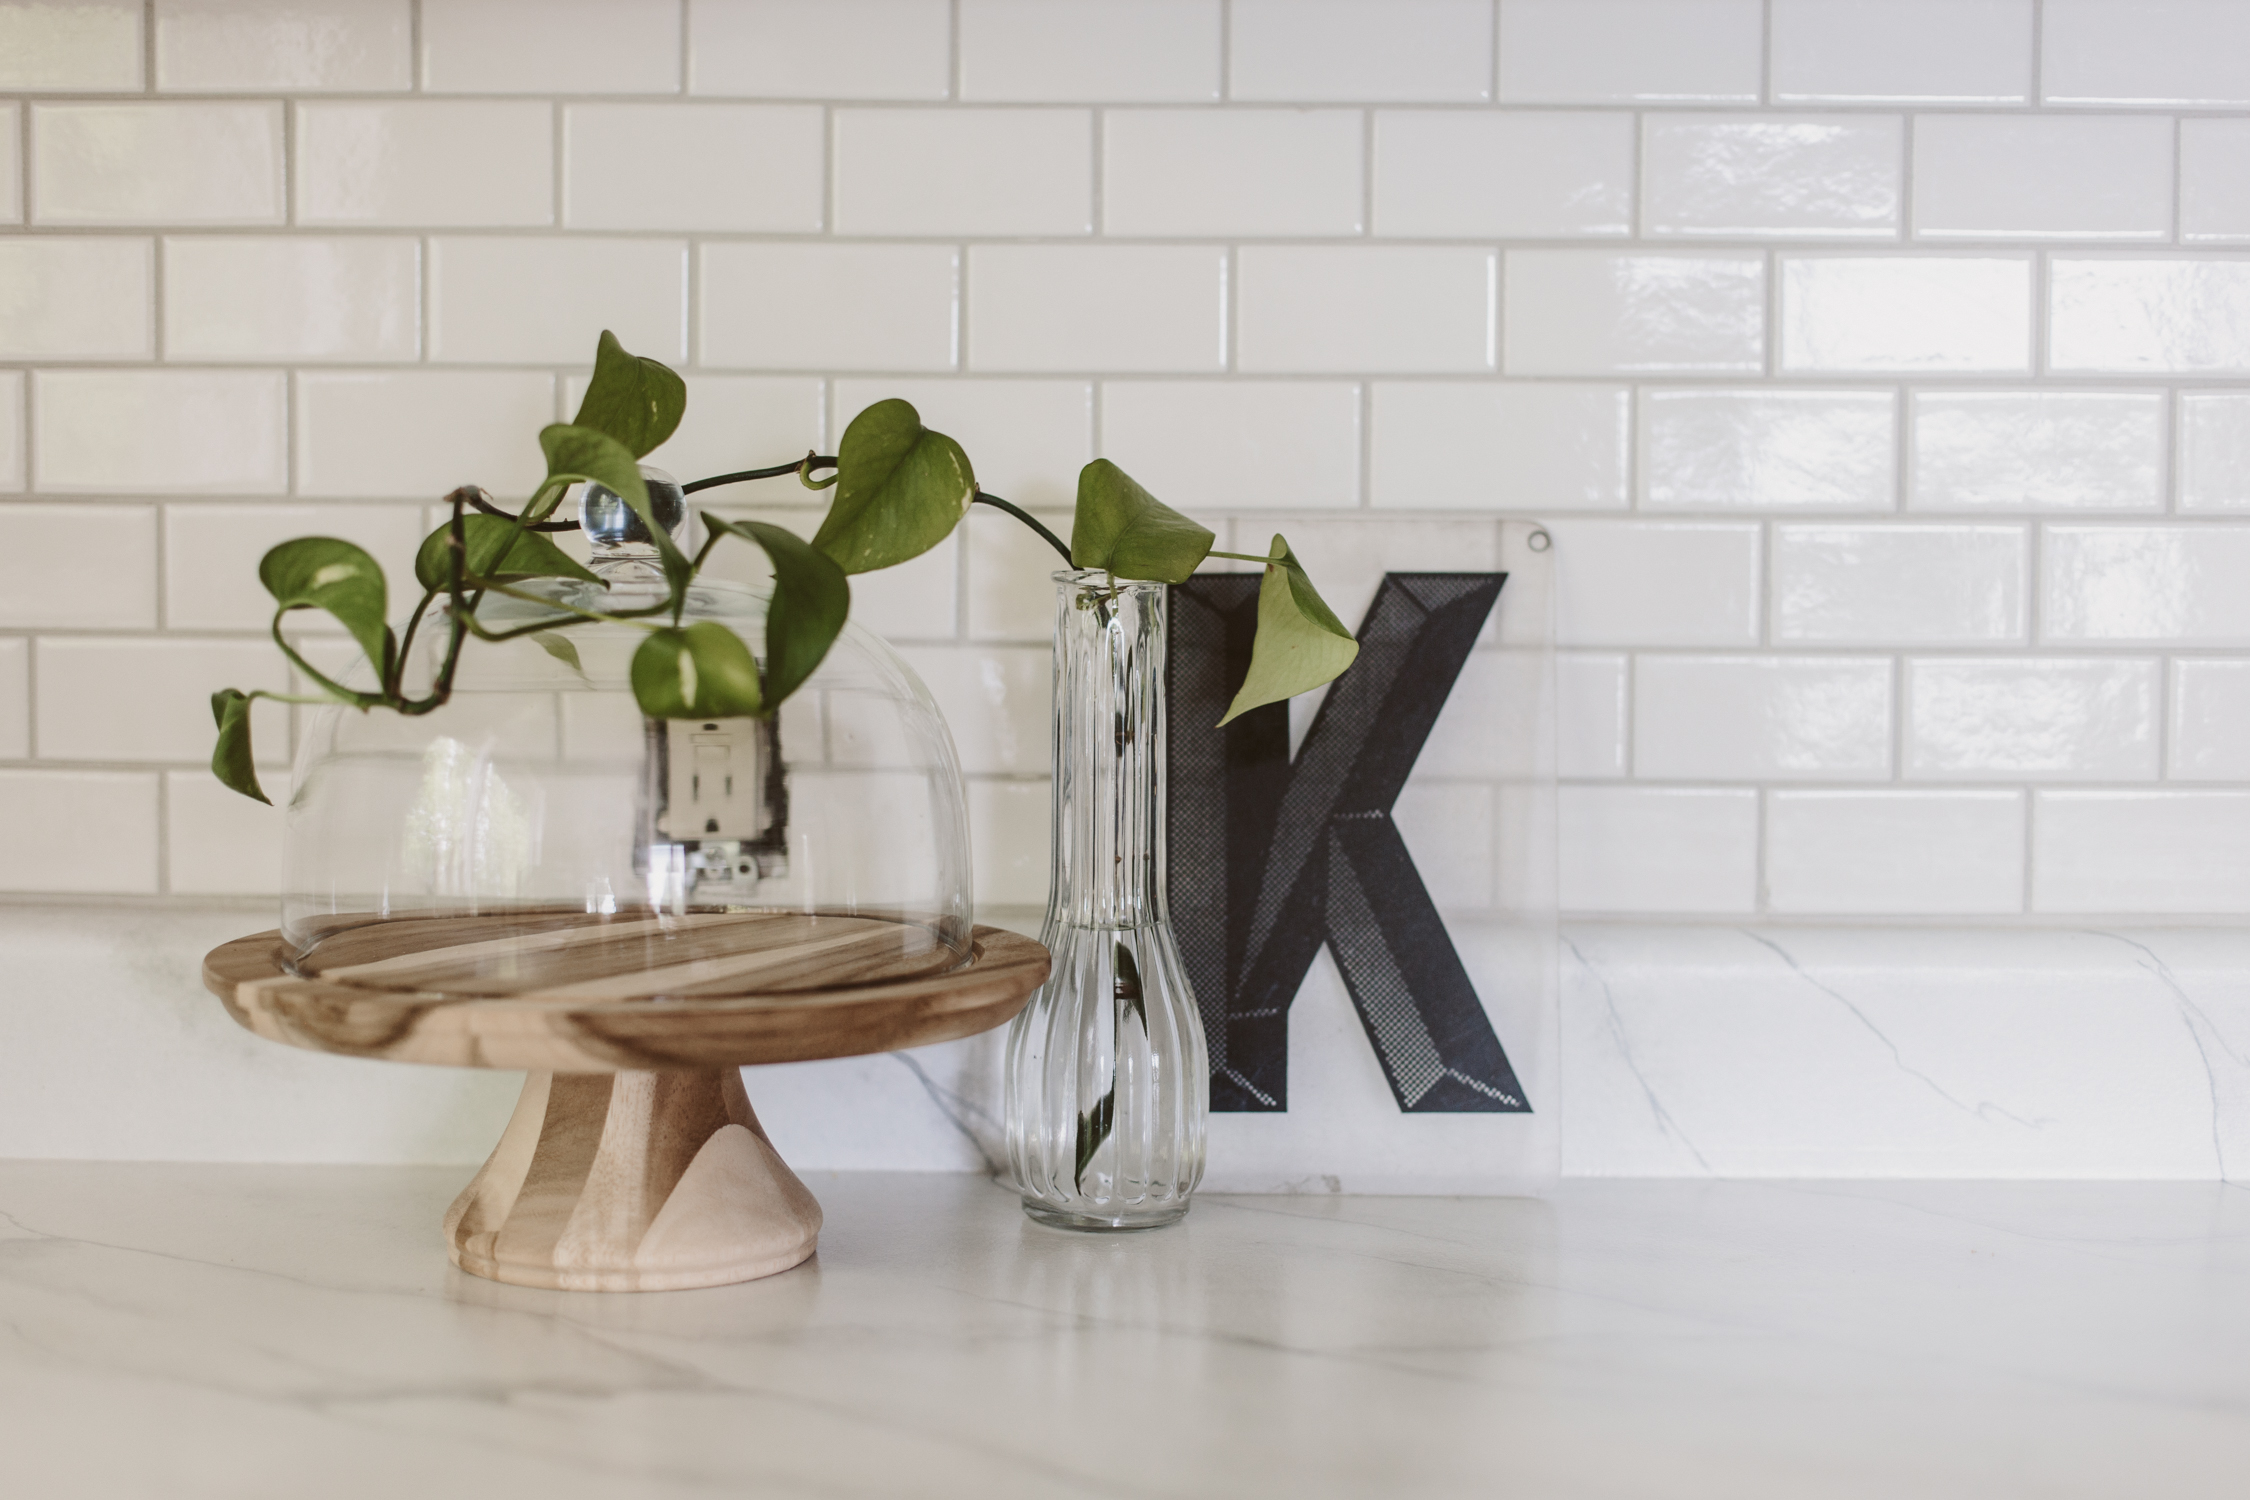
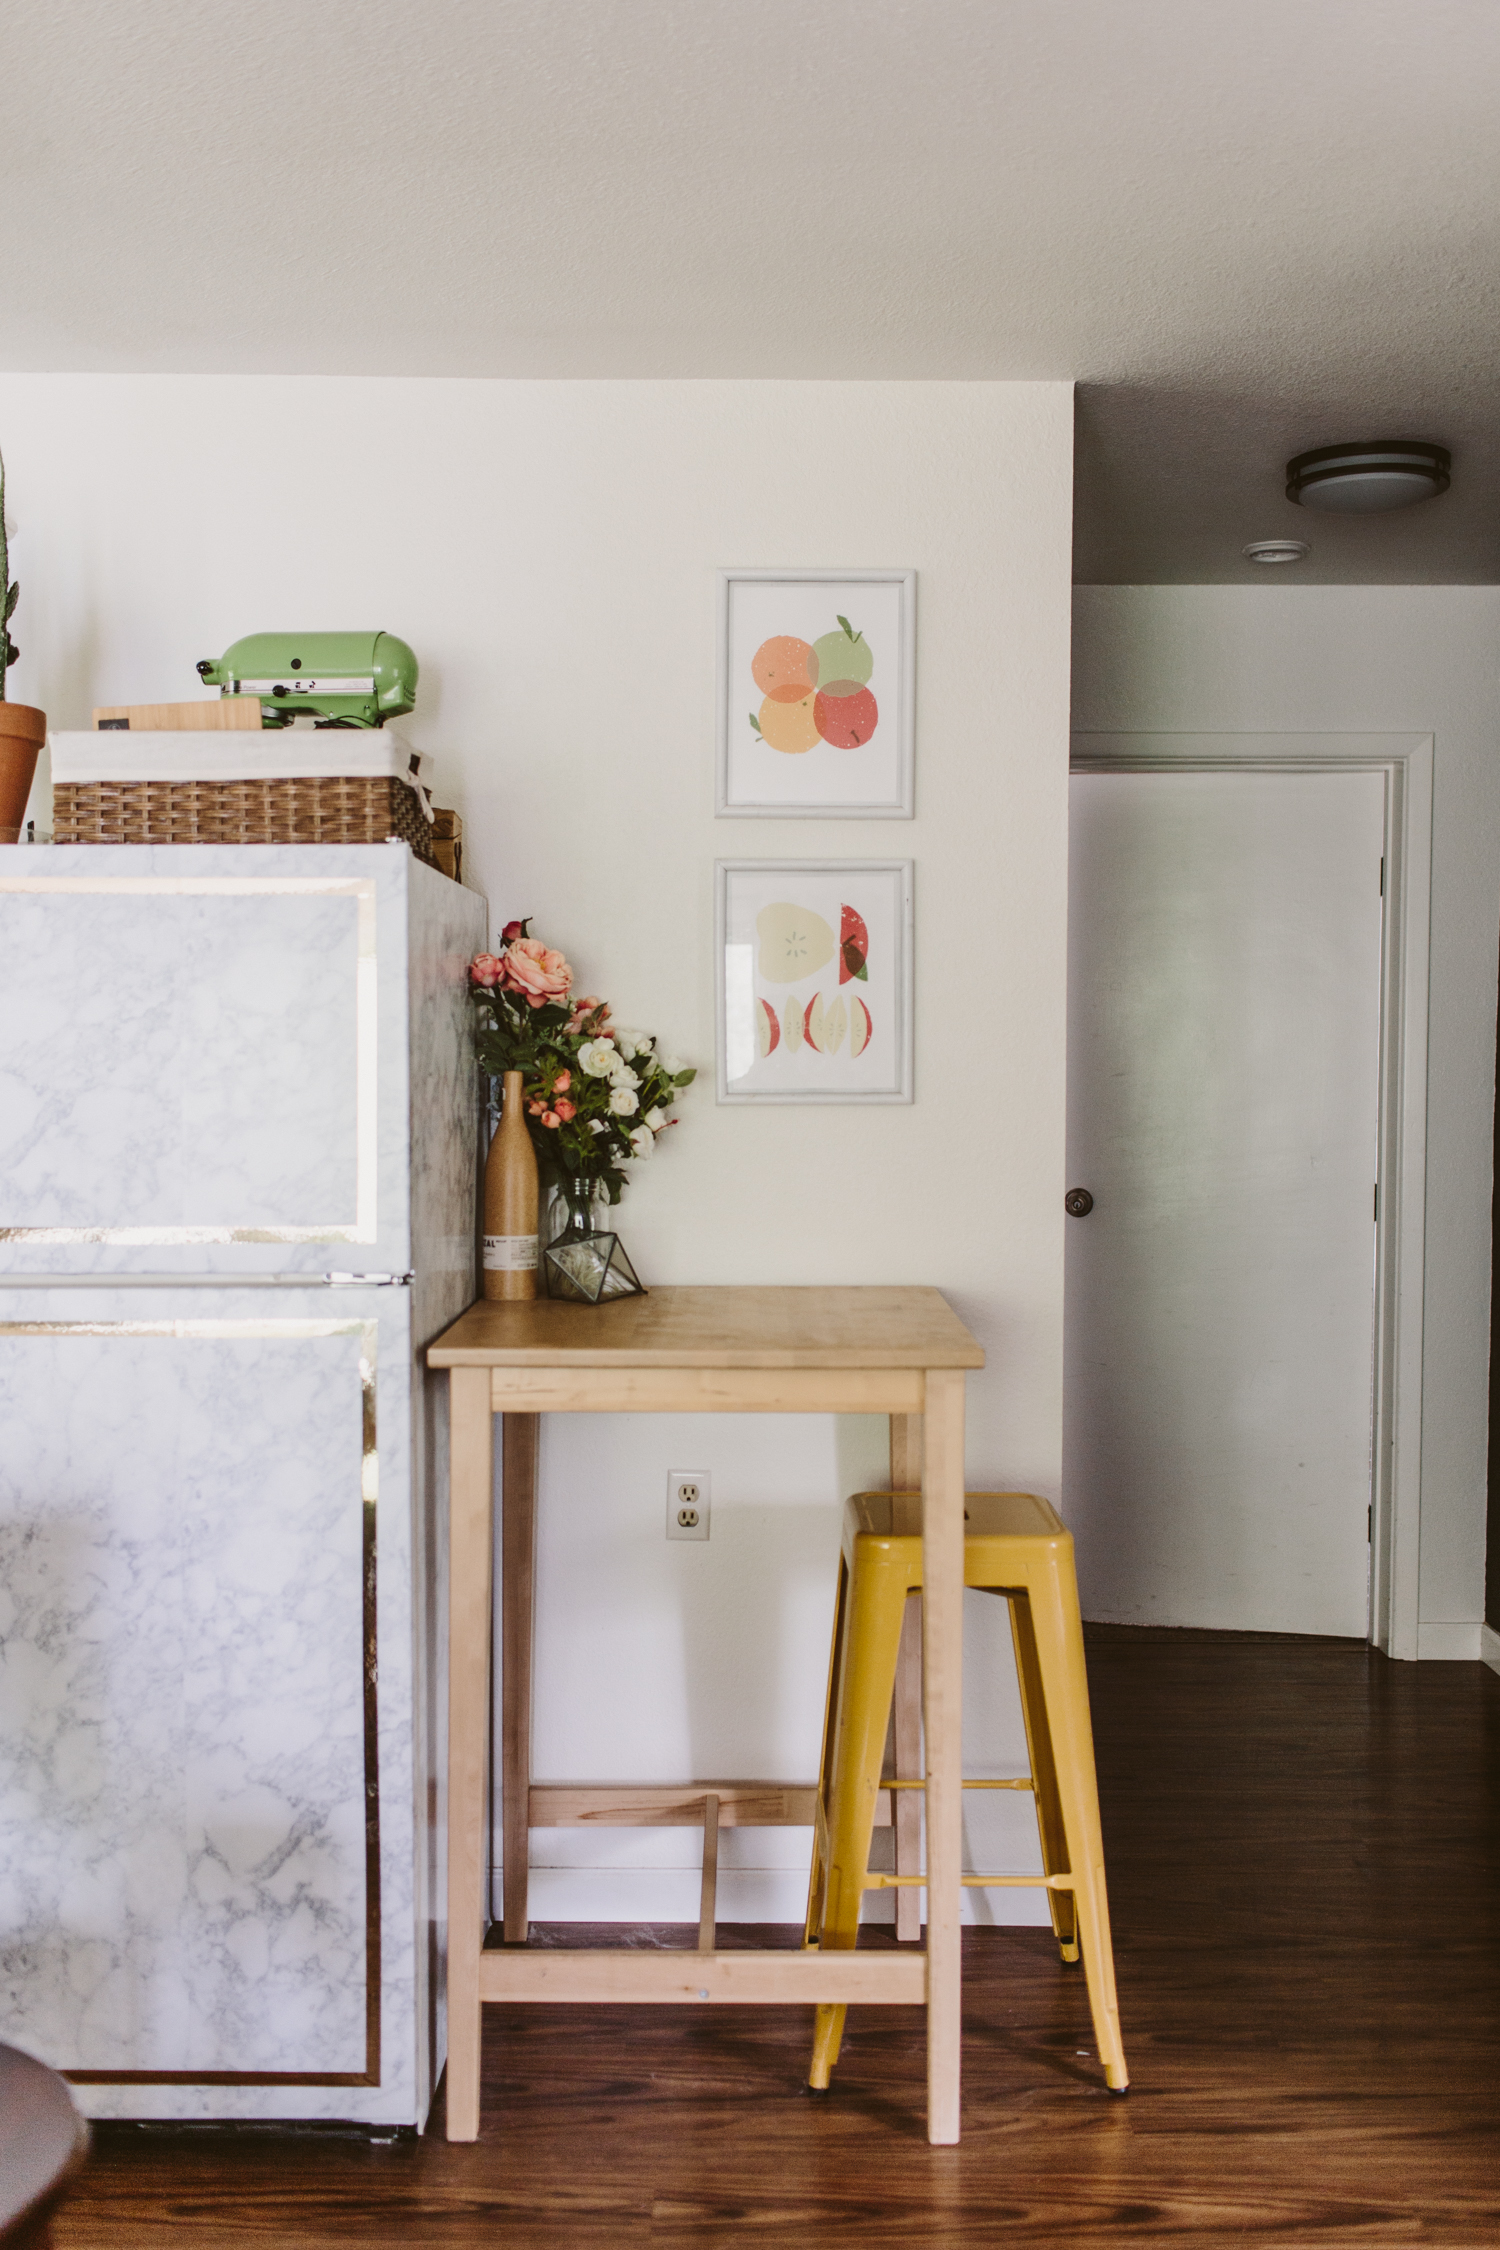
The biggest DIY was the countertop. We wanted something fresh and clean, but doing real Carerra marble was way too spendy for this space, so I decided to paint the countertop with a faux marble instead. You can peep that DIY here. I will say that it's a good way to get the look, but it wasn't the most durable. It definitely would stain if you left anything like coffee or wine on the counter for too long, and if you scratched it too hard, it'd scratch the paint off. If you're wanting something to hold you over while you save money for the real deal, it's great for that, but I'm not sure it's the best for a long-term solution, especially if you do a lot of cooking and like coffee and wine *raises hand*.
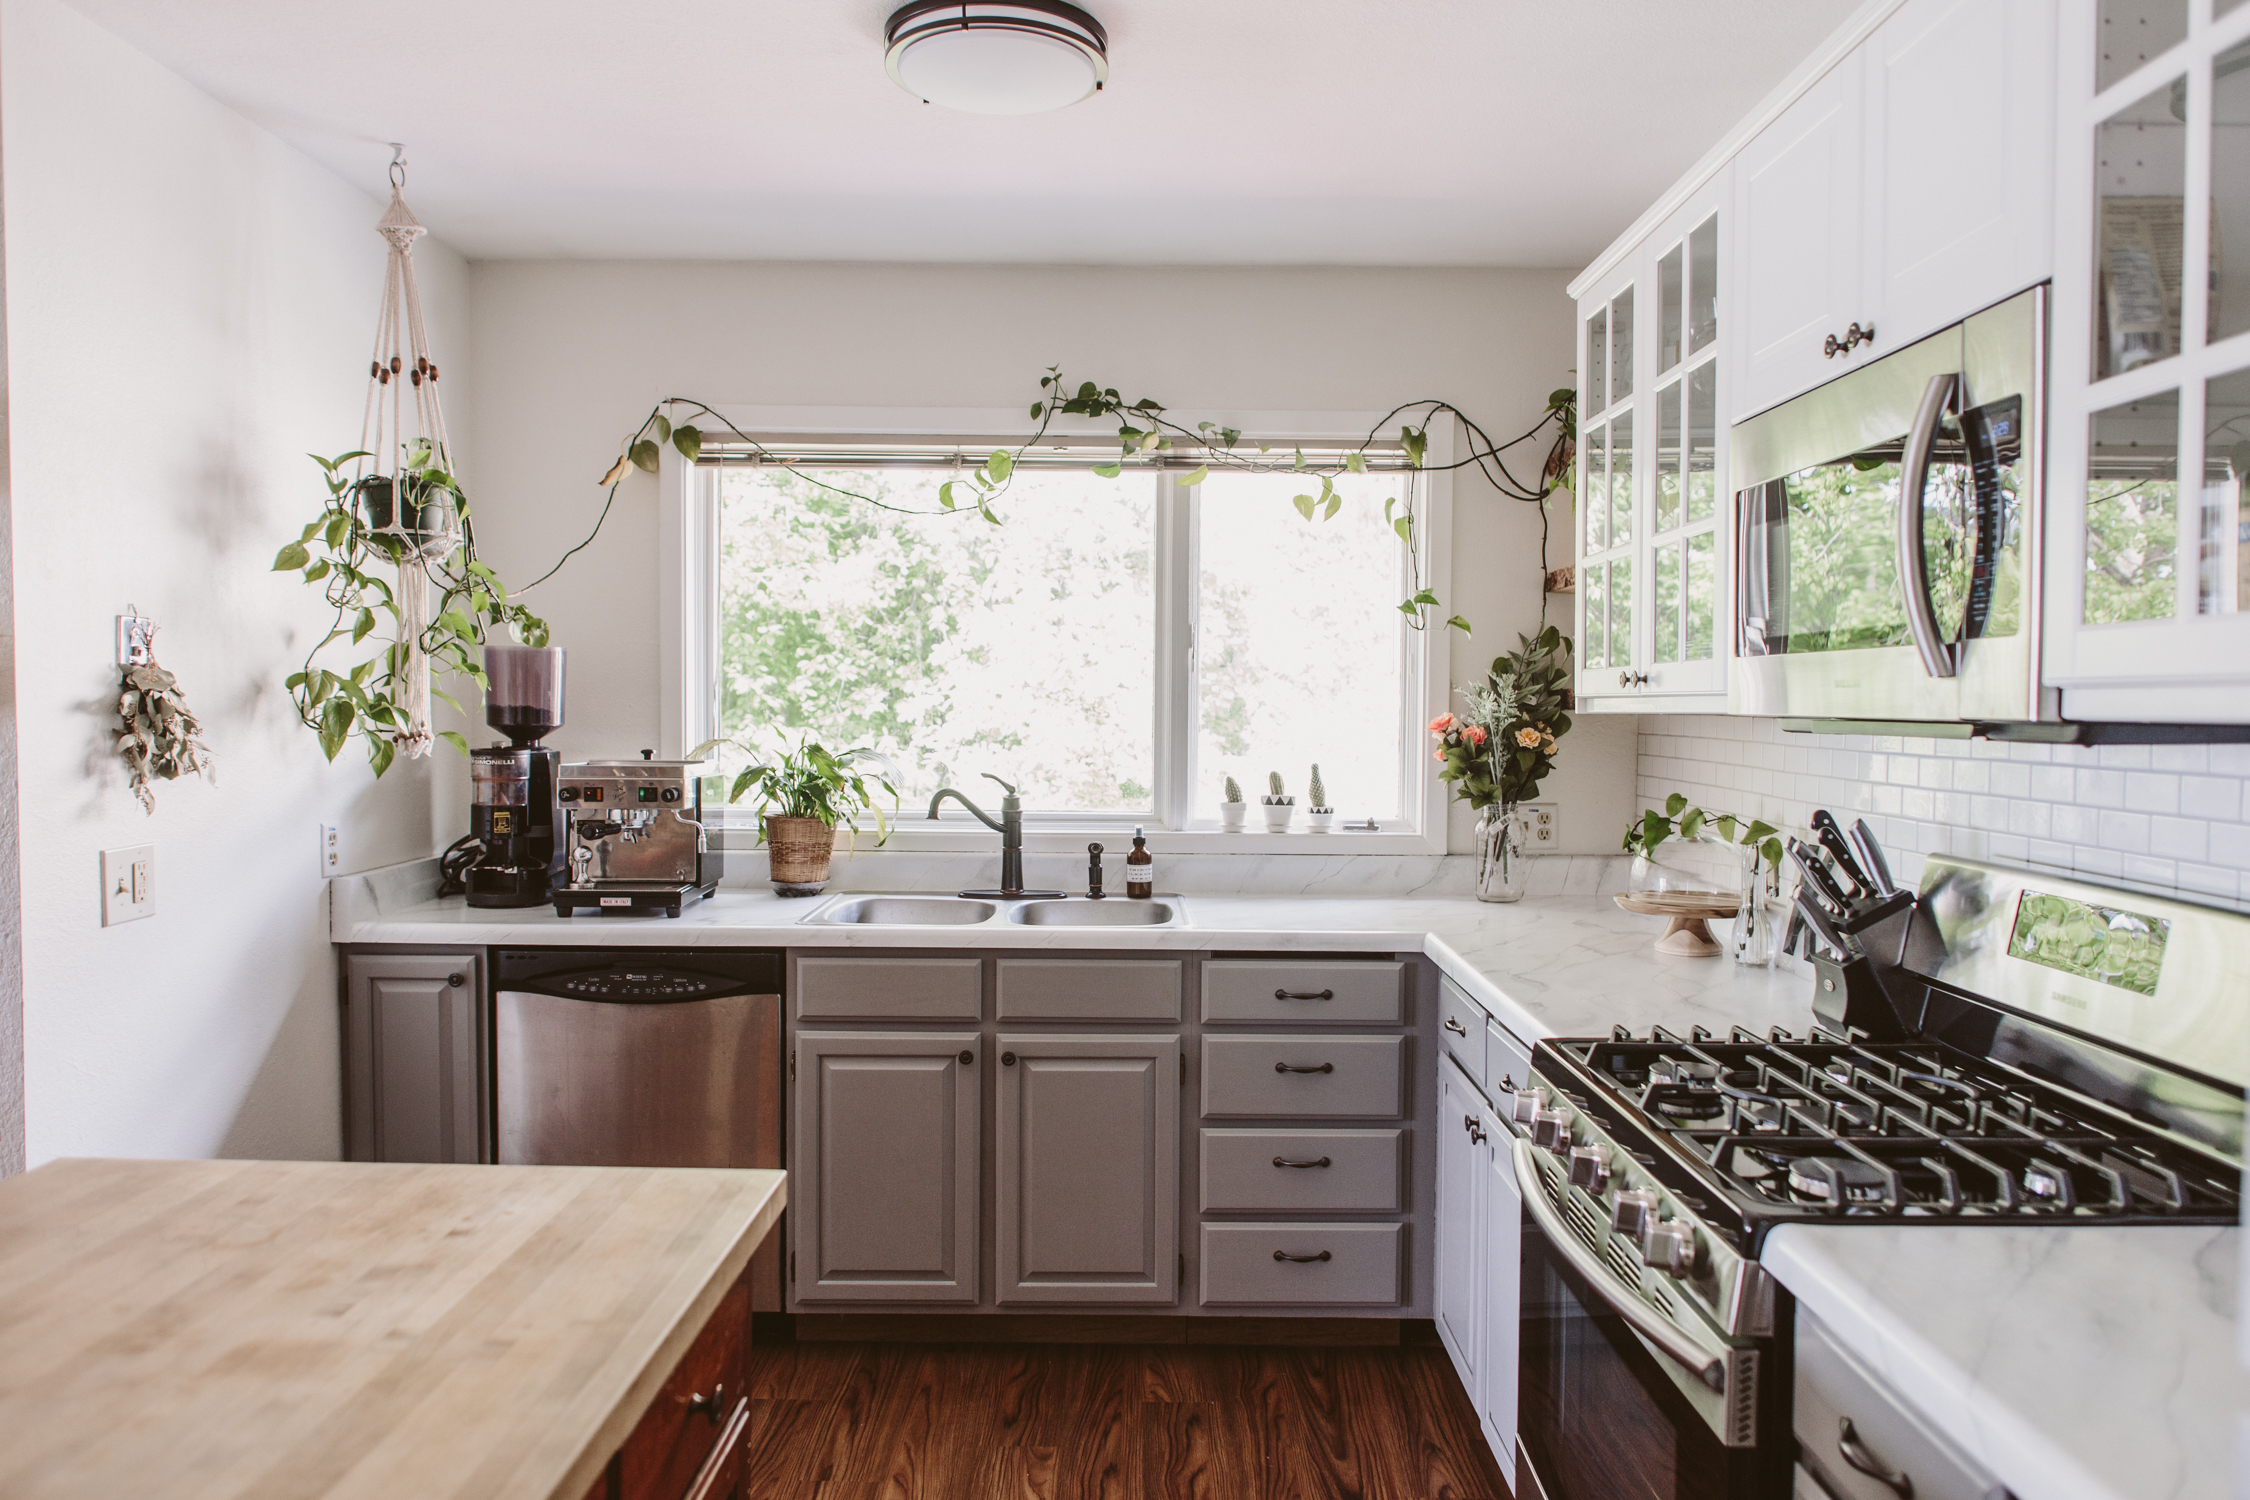
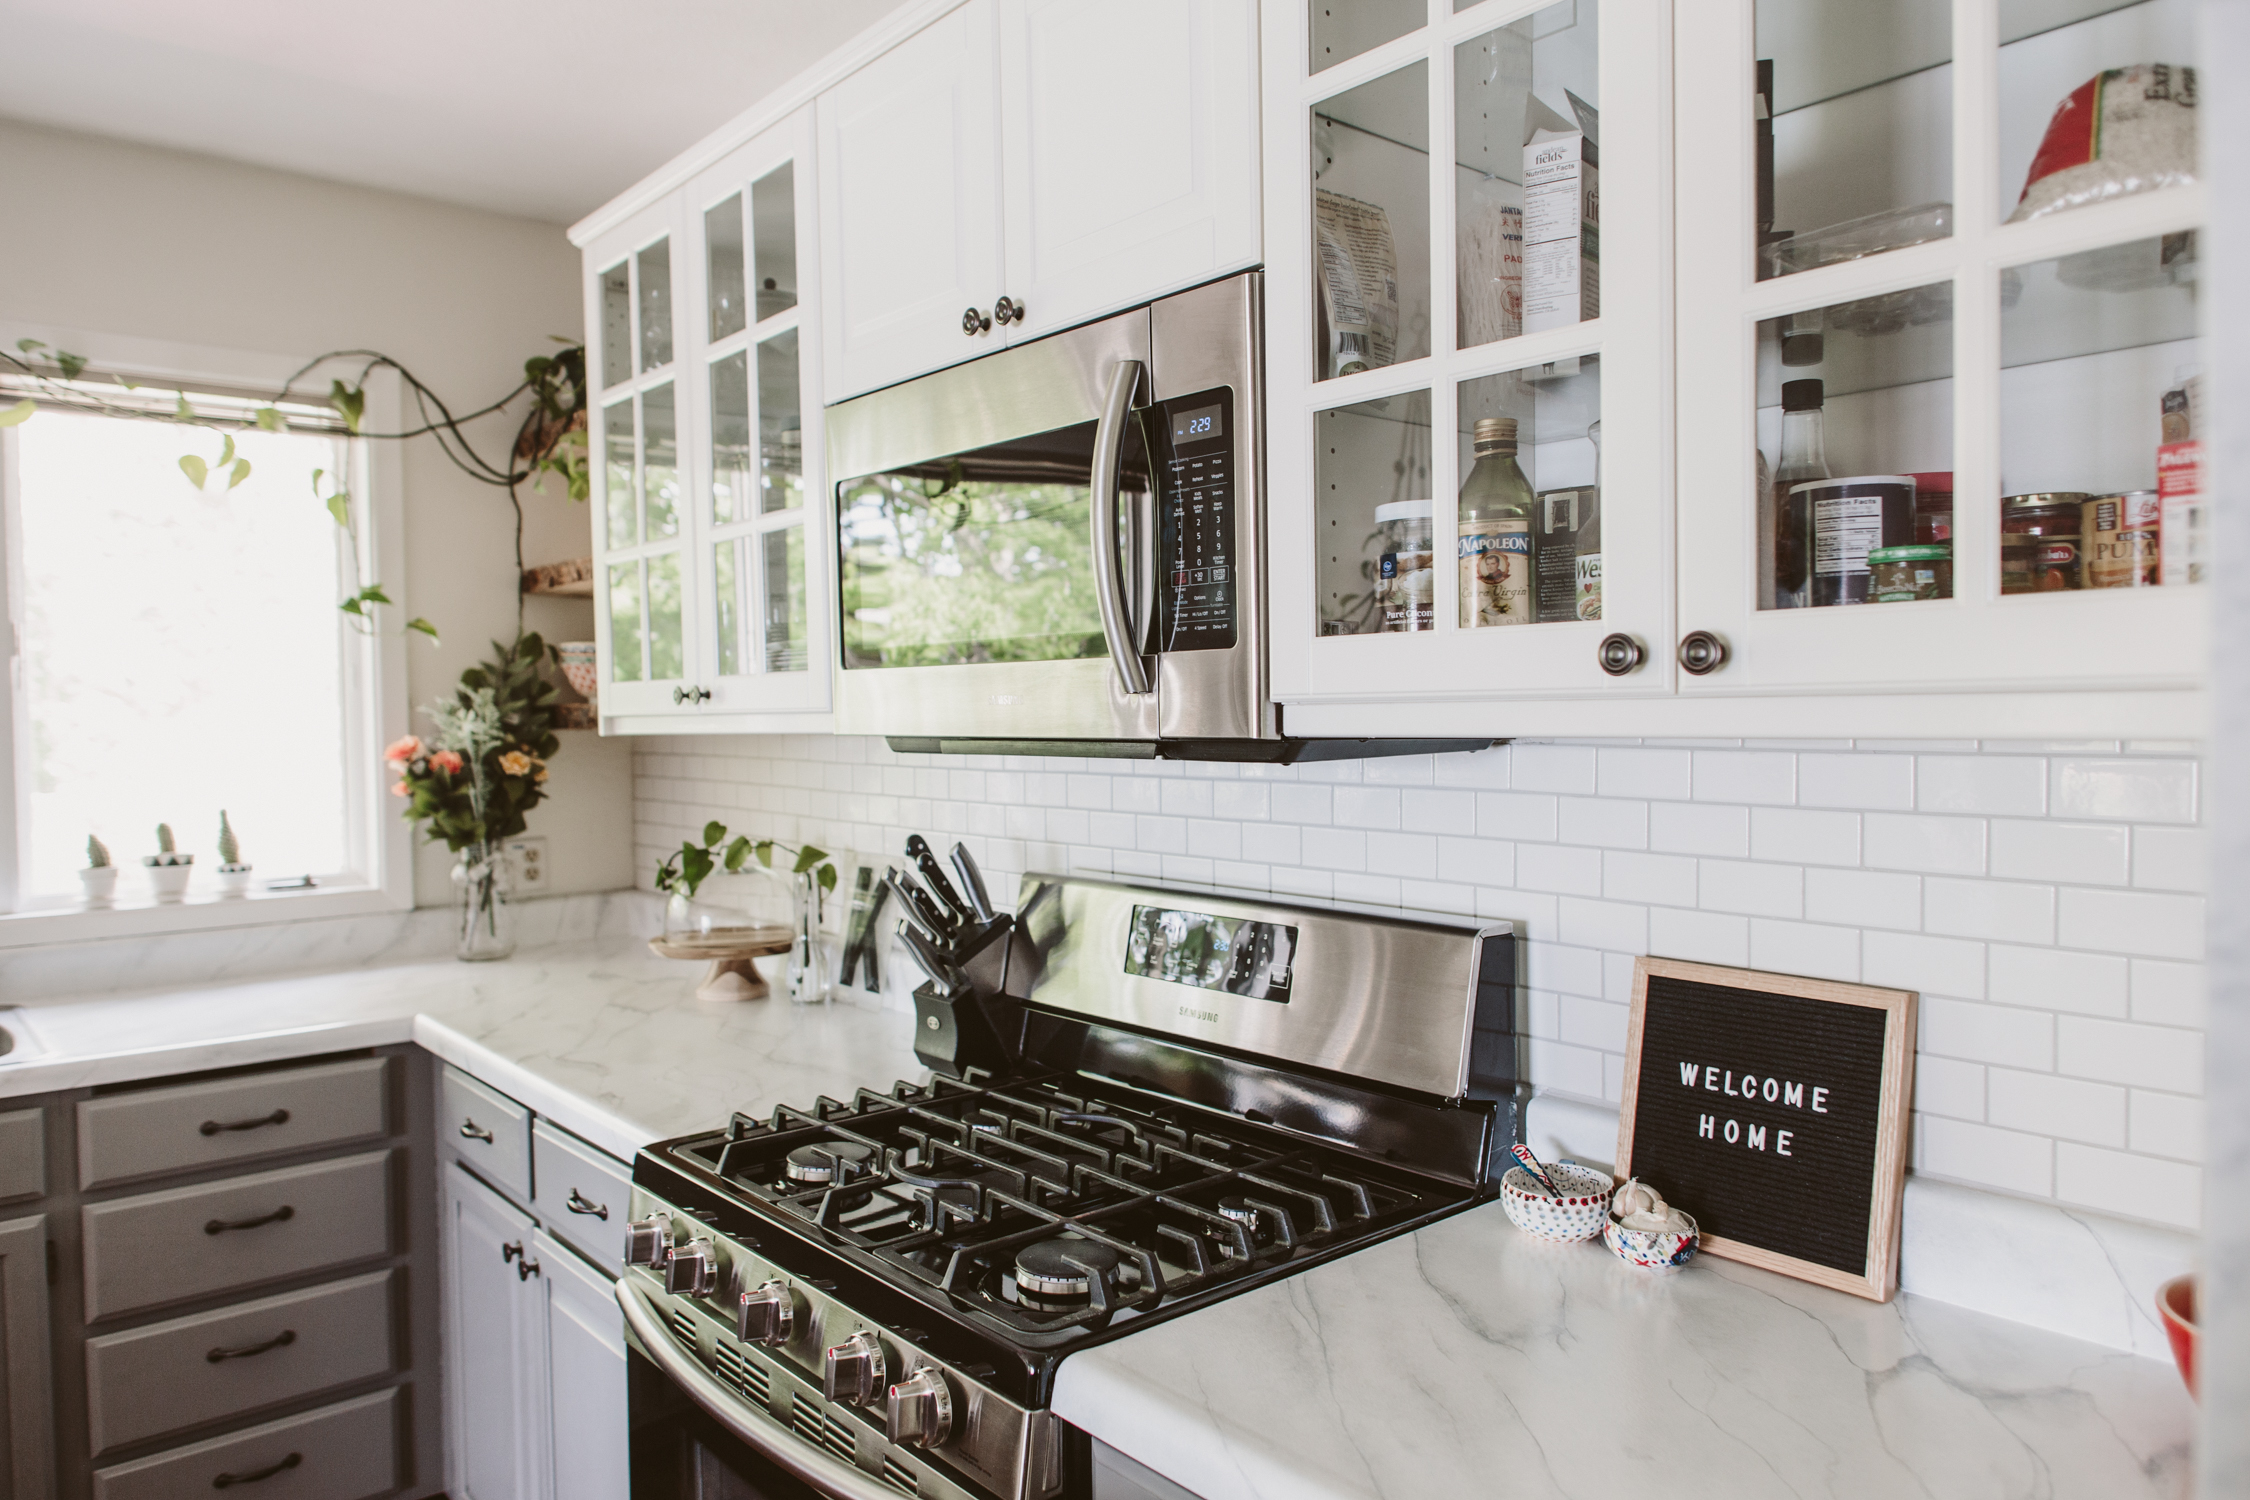
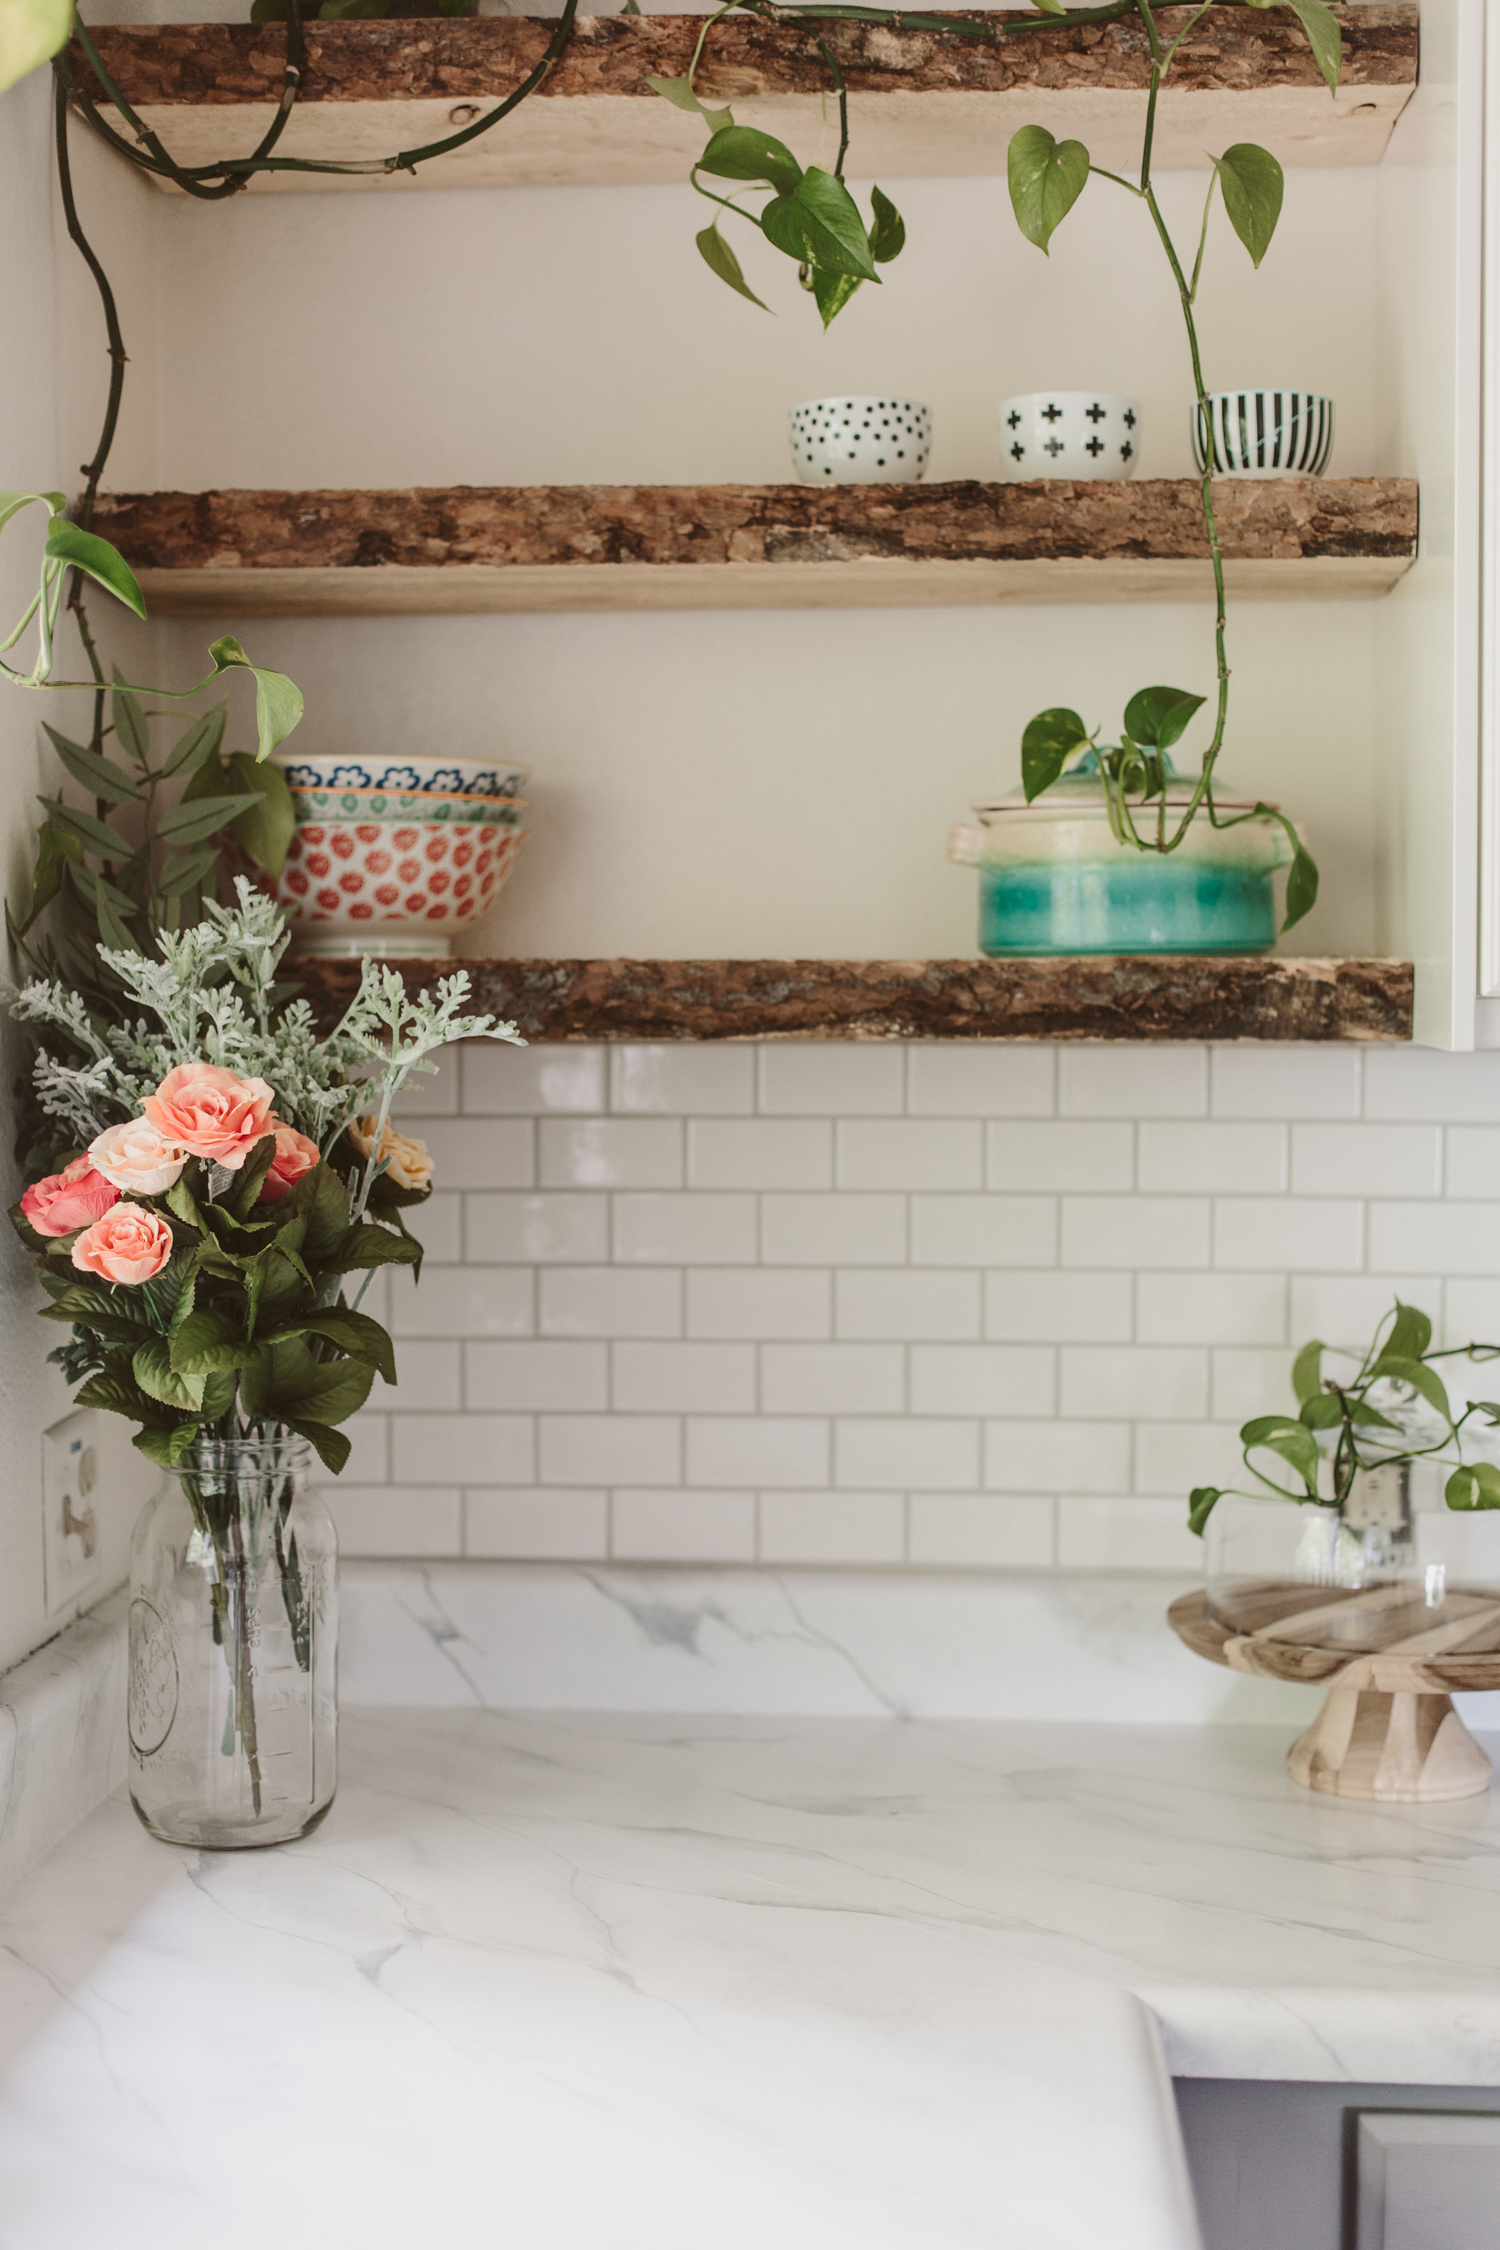
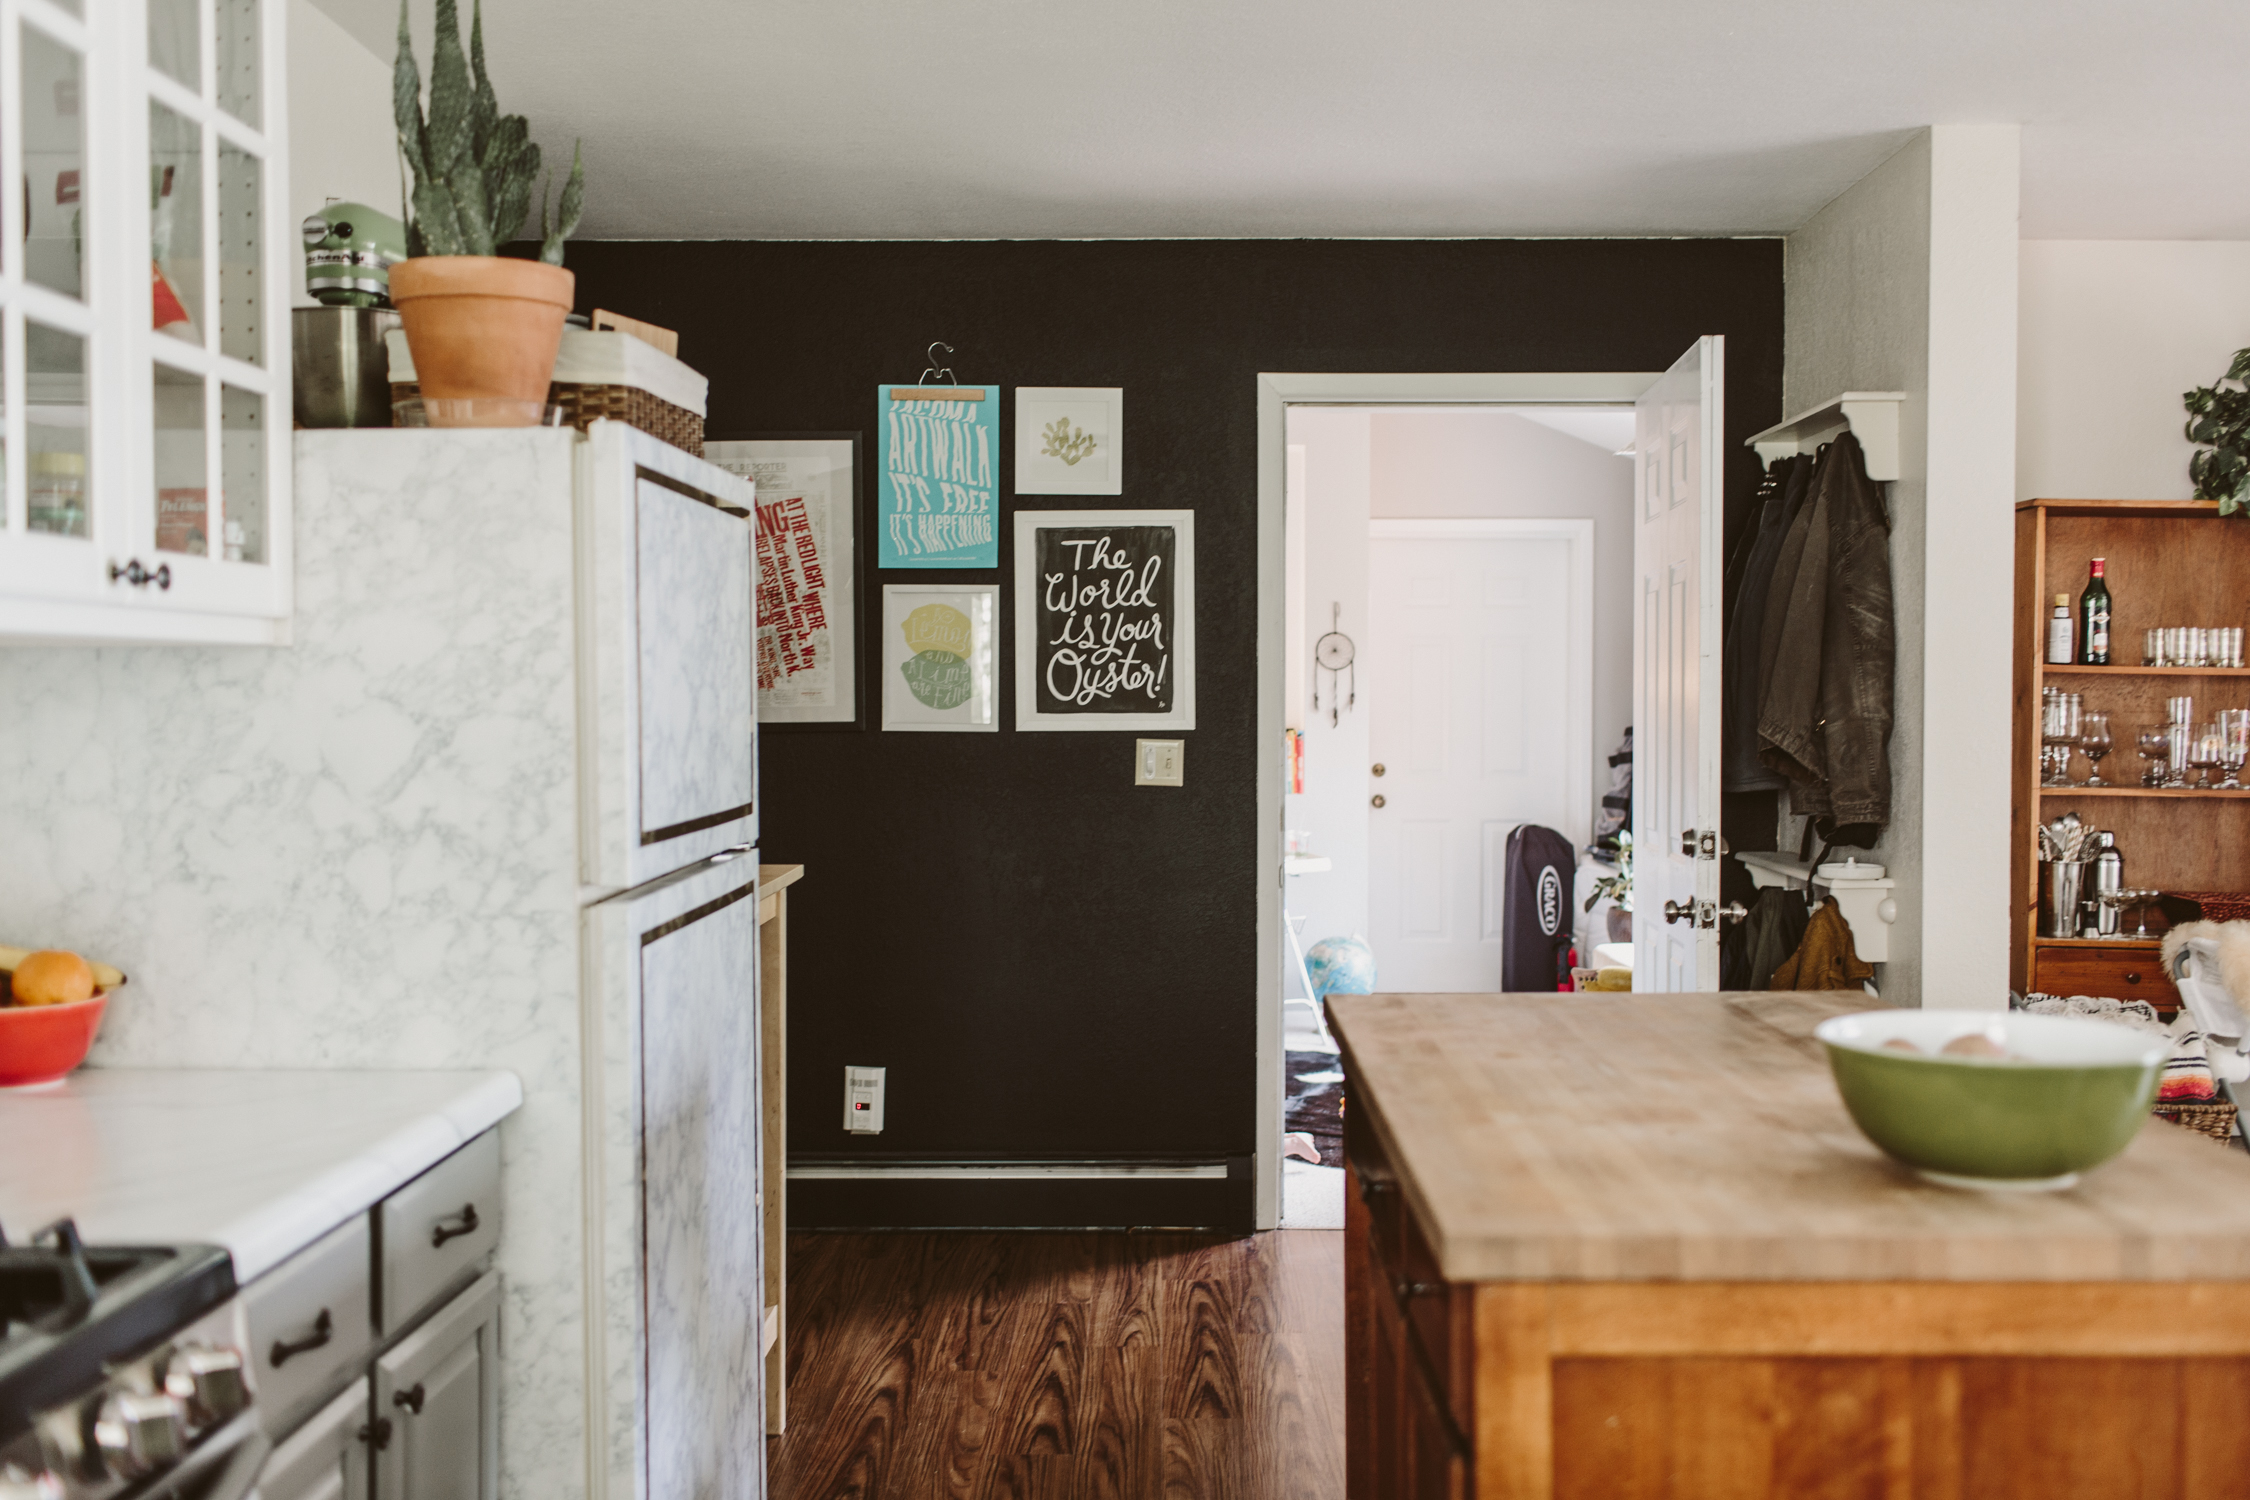
We ended up keeping the lower cabinets and painting them grey, and then we replaced the uppers with Ikea cabinets. That ended up being more expensive than for those of you near an Ikea because they had to be shipped to Alaska. The open shelving was DIY. My dad went to a lumber yard and bought a 20ft plank that had an unfinished edge. He chopped it into the three pieces for the shelves and installed it. We also DIYed the subway tile backsplash. I had never done tile before but I was excited about how straightforward it was. I'm looking forward to doing more tile work!
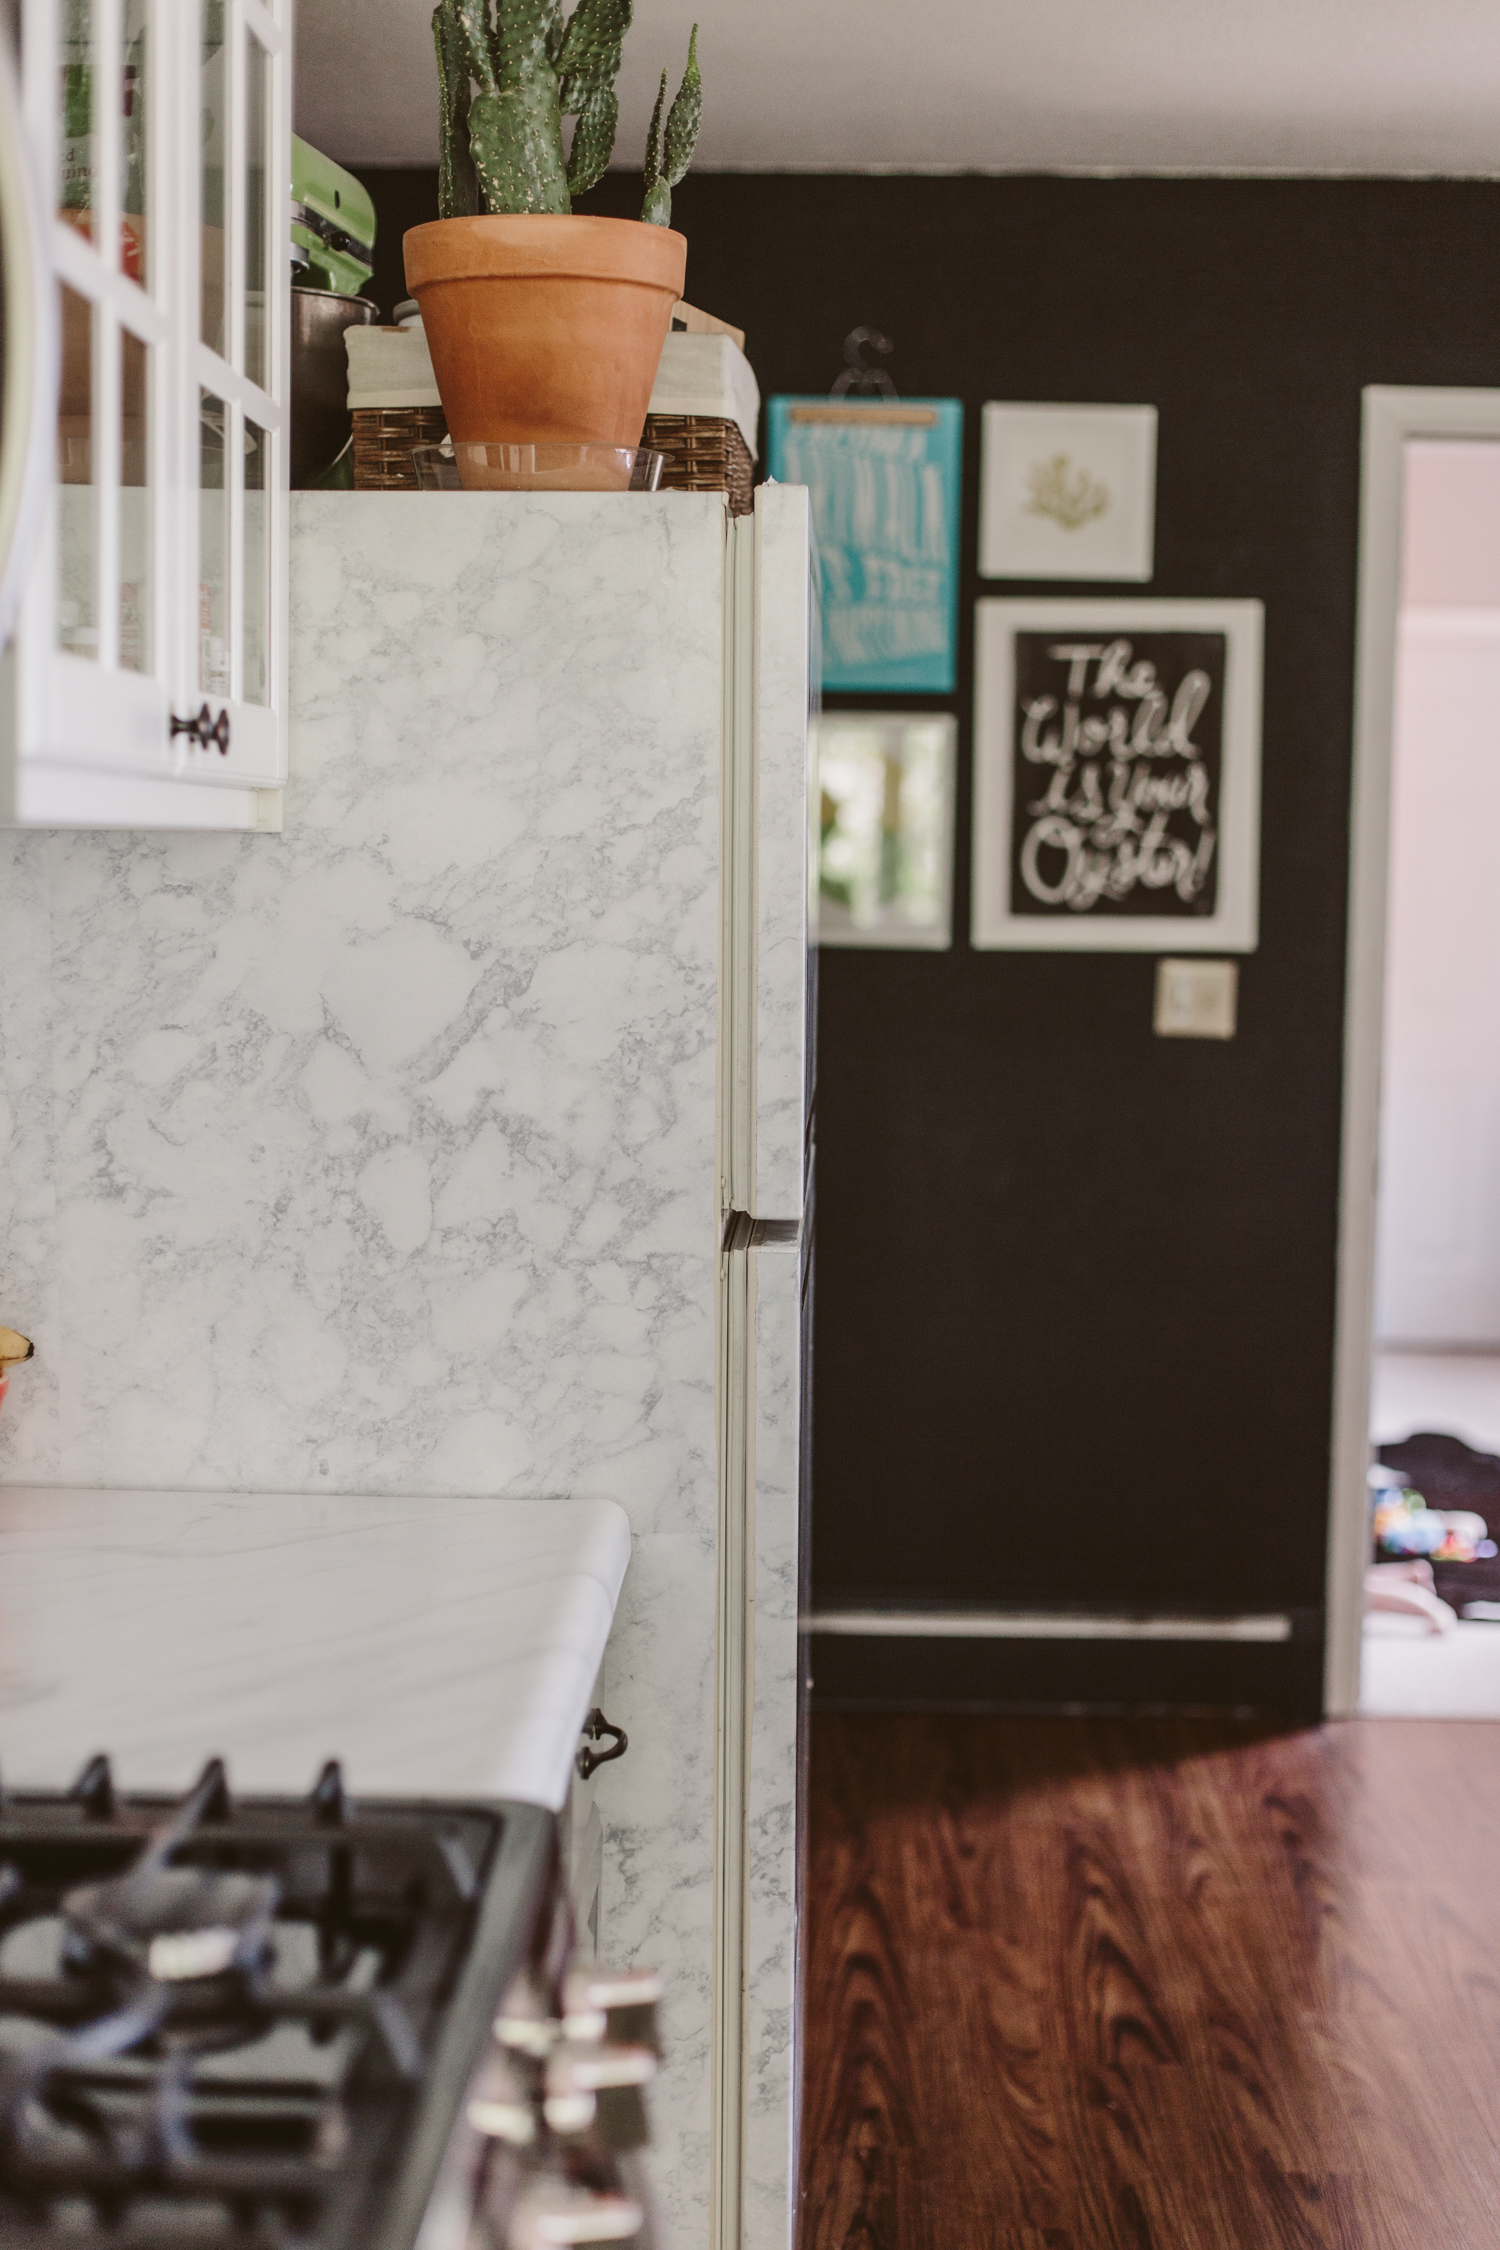
The other super easy, dirt cheap DIY was the fridge. It was an ugly old ivory fridge, and I just covered it with marble contact paper and gold tape. It's a pretty durable and quick way to freshen up a fridge without having to drop hundreds of dollars on a new, fancy one. I've put contact paper on every fridge I've ever had (faux wood contact paper on one, chalkboard contact paper on another, and marble on this one!). I love how it gives an eclectic and unique look to an appliance that's usually boring.
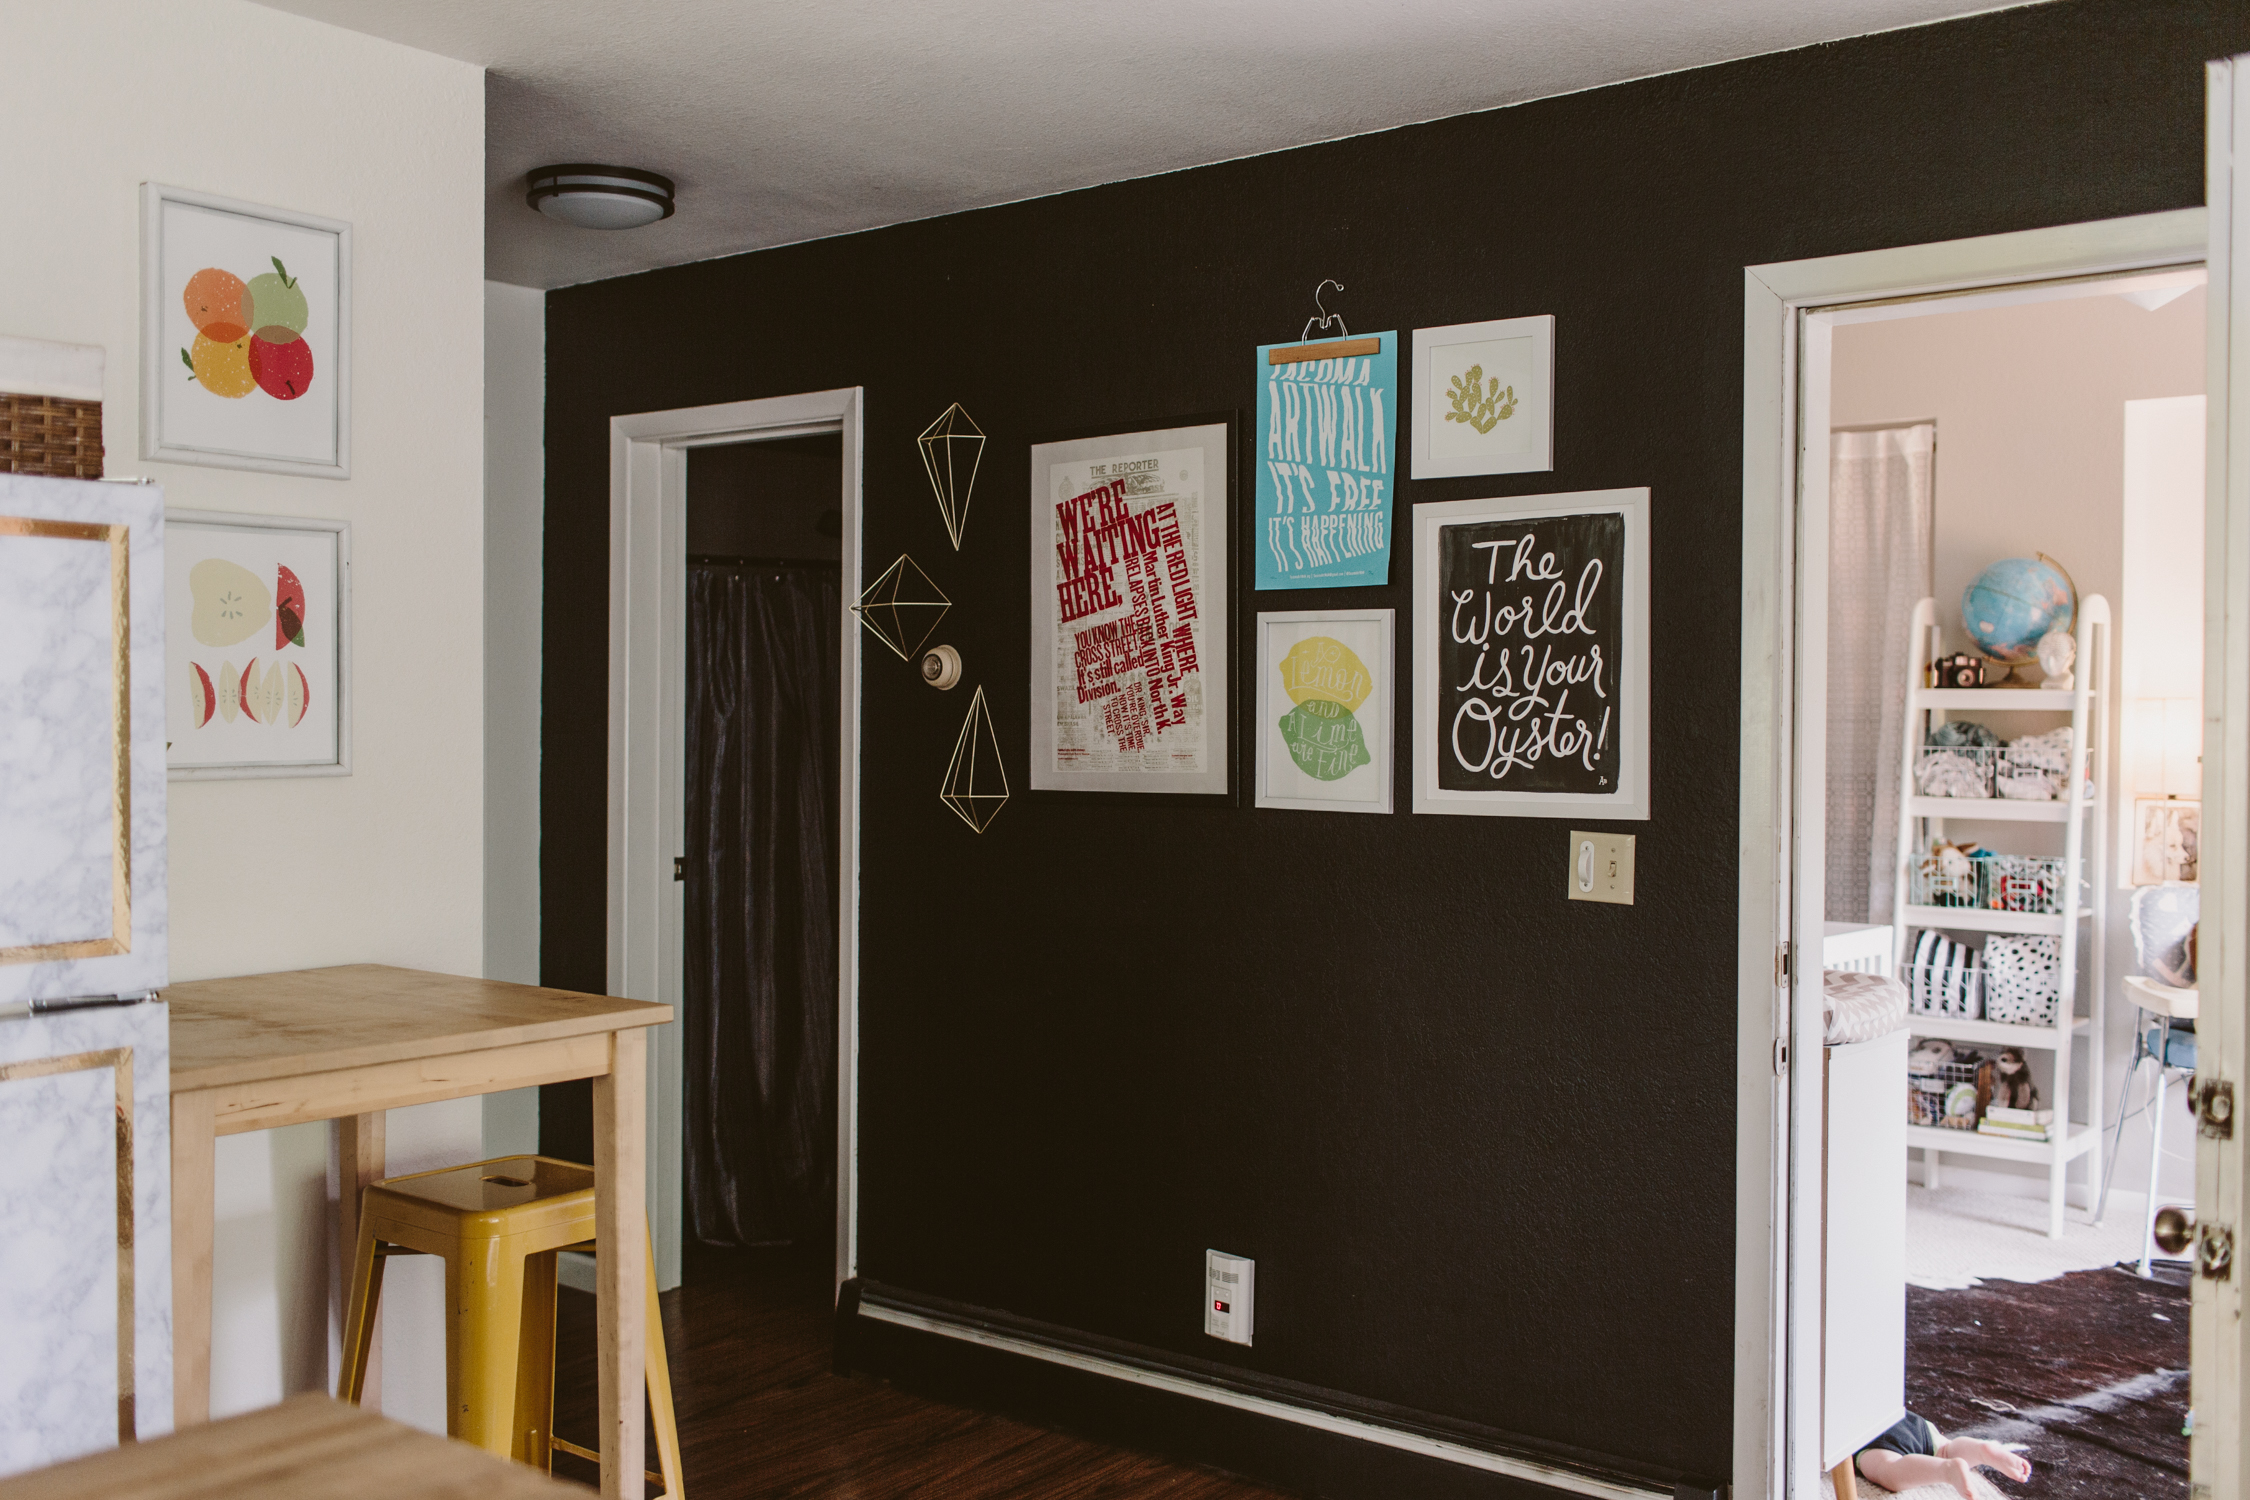
We also painted the room white, and I popped a chalkboard wall in there on the right side (though I never actually put any chalk on it, so it's just a black wall).
There were definitely things about this space that I would've done differently, had the situation been different. Knowing that it got destroyed shortly after we finished it makes it easier to feel okay about not doing it 100% the way I really wanted to. We are planning our current kitchen remodel and I'm excited to be able to do it exactly how I want (and also not have to pay out the ass to ship things from Ikea).
If you have any questions about this remodel, hit me up in the comments!


How to cut your own bangs

Bangs. We love em. Then we immediately hate them. But then maybe we love them again. No, we hate them. Let's be real, bangs are a commitment. A serious one. The grow out period can be a huge pain in the ass if you decide you hate them. But if you're ready to take the plunge and are willing to go against the advice of, well, almost every one out there, I'm here to empower you. Are you ready to cut your own bangs? Hell yeah you are. Now let's break the rules and DIY that ish.
Obviously this comes with a warning, which is: not many people will advise you to cut your own bangs. I've been cutting my own hair and my own bangs for many years, so while I'm no licensed hairstylist, I feel super comfortable wielding a pair of scissors near my hair. I also have curly hair, which is rather forgiving in the haircut department. My methodology of hair cutting has always been one that is for big, curly hair, so it may or may not work for you if you have a different hair texture. That being said, I feel like my way of cutting bangs could definitely work for hair that isn't my same texture, but, you know, use your best judgment.
Here's how I cut my bangs:
1. Separate the section of hair you want to cut into bangs. I typically do a triangle shaped section with the point near my crown. This will determine how thick your bangs are, so the bigger chunk of hair you grab, the thicker your bangs will be. You also may want to take into consideration how thick your hair is, since the hair you take away to be bangs will no longer contribute to your hair's overall thickness. Once you have your bangs section separated, tie back the rest of your hair to keep it out of the way.
2. Flat iron your sectioned hair. This may not be 100% necessary for some of you, but since I have curly hair, it is. Most hair stylists will cut hair (and bangs) wet, but since my hair is curly and poofy, I prefer to cut my hair with it's poof and texture intact so I know how things will look. When my hair is wet, it's way more limp and longer than it is when it's dry, so if I cut it limp and long, it gets shorter and poofier when it's dry and the cut doesn't look anything like it did when it was wet. I never cut my hair wet, so this is just a personal preference.
3. Rough in the shape you want. I typically do bangs that are on the long side and are tapered longer on either side. Since I have curly hair I sometimes will wear my bangs with their natural curl and they appear much shorter when they're all crimped up in their natural curl. Keeping my bangs as long as I can handle helps me style them curly (without them looking like I have a tiny 'fro on my forehead). When roughing in the shape, leave the hair longer than you want it to be when you're done. You just want to get the general shape, then we can go back and perfect the shape. Remember, you can always cut shorter, but you can't cut longer. Always err on the long side, if you live in your bangs for a few days and decide you need them to be shorter, you can always go in and give them a little trim.
4. Make sure that both sides are the same length and hit your face at the same spot. Then, from the middle, you can use your fingers to pull the hair down and match lengths as you trim down towards the longer sides (if you're doing a tapered bang like mine. If not, just use your fingers to pull the hair down and match the lengths of each piece you cut to the piece that you previously cut).
5. Instead of cutting perpendicular to the hair, cut at a slight upward angle. Unless you're looking for a super blunt looking bang, a la Sia. It'll be a little slower going because you're cutting fewer hairs per snip, but you'll get a much better, more natural looking cut than if you just go straight at it.
6. If you need to, you can go back in with the flat iron to give your bangs the shape/curve you want them to have to help you finalize your cut as you snip in your final shape.
7. Again, I'll advise you to cut them slightly longer than you might want, and then live in them for a day or two. Unlike going to a salon, you don't have to have your bangs absolutely perfect when you're done. Since you're the one cutting them, you can go back in at any time to edit them. I cut mine a little long and I've been living in them for about a week and I feel like I probably need to cut a few millimeters off so they're perfectly out of my eyes.
Fringe upkeep is just a matter of repeating that final trim process when your bangs get too long! And make sure you have a decent pair of scissors. Of course, this is coming from a girl who used to cut her own hair with paper crafting scissors back in college. You can grab a nice pair of scissors from a beauty supply store, or even sometimes the beauty section of a store like Walgreens or Target.
Be patient with both the process of cutting bangs, and with getting to know your new cut! Bangs can be a big change and it can take a while to get use to how to style them and wear them. Have fun!


yucca brevifolia

Soaking in the last rays of vitamin D down here in Joshua Tree before diving into the life of grey before me in the PNW. We are all very thankful for the grey, though, after fires ravaged (and continue to ravage) much of the northwest. I'm sure many Portlanders never felt so thankful for rain in their lives.
This dress is ultra non-nursing-friendly, so I didn't wear it very long, but I couldn't resist throwing it on for some photos. I found it new-with-tags at the thrift store for a few bucks and it's oh so comfy. One day when I don't have to expose my boobs every few hours I'll rock this dress for a full day. For now, it only gets to live in an outfit post.
hat + shoes : urban x change | dress : thrifted (designer: lou & grey)


Shop the Post


Hi, I’m Liz
I'm an artist, writer, designer, DIY renovator, and … well basically I like to do all the things. If it’s creative I’m probably doing it. I’ve spent over 30 years voraciously pursuing a life steeped in creativity and I wholeheartedly believe creativity and joy are inextricably linked.
Read more…


Explore The Archive
- January 2026
- July 2025
- May 2025
- January 2025
- December 2024
- August 2024
- July 2024
- May 2024
- April 2024
- January 2024
- December 2023
- October 2023
- September 2023
- July 2023
- June 2023
- May 2023
- April 2023
- March 2023
- February 2023
- January 2023
- December 2022
- November 2022
- October 2022
- August 2022
- June 2022
- May 2022
- April 2022
- March 2022
- November 2021
- October 2021
- August 2021
- July 2021
- May 2021
- January 2021
- November 2020
- October 2020
- September 2020
- August 2020
- July 2020
- June 2020
- May 2020
- April 2020
- February 2020
- January 2020
- November 2019
- October 2019
- August 2019
- July 2019
- June 2019
- May 2019
- April 2019
- February 2019
- January 2019
- December 2018
- November 2018
- October 2018
- September 2018
- August 2018
- July 2018
- June 2018
- May 2018
- April 2018
- February 2018
- January 2018
- November 2017
- September 2017
- August 2017
- July 2017
- June 2017
- May 2017
- April 2017
- March 2017
- February 2017
- January 2017
- December 2016
- November 2016
- October 2016
- September 2016
- August 2016
- June 2016
- May 2016
- April 2016
- March 2016
- February 2016
- January 2016
- December 2015
- November 2015
- October 2015
- September 2015
- August 2015
- July 2015
- June 2015
- May 2015
- April 2015
- March 2015
- February 2015
- January 2015
- December 2014
- November 2014
- October 2014
- September 2014
- August 2014
- July 2014
- June 2014
- May 2014
- April 2014
- March 2014
- February 2014
- January 2014
- December 2013
- November 2013
- October 2013
- September 2013
- August 2013
- July 2013
- June 2013
- May 2013
- April 2013
- March 2013
- February 2013
- January 2013
- December 2012
- November 2012
- October 2012
- September 2012
- August 2012
- July 2012
- June 2012
- May 2012
- April 2012
- March 2012
- February 2012
- January 2012
- December 2011
- November 2011
- October 2011
- September 2011
- August 2011
- July 2011
- June 2011
- May 2011
- April 2011
- March 2011
- February 2011
- January 2011
- December 2010
- November 2010
- October 2010
- September 2010
- August 2010
- July 2010
- June 2010
- May 2010
- April 2010
- March 2010
- February 2010
- January 2010
- December 2009
- November 2009
- October 2009
- September 2009
- August 2009
- July 2009
- June 2009
- May 2009
- April 2009
- March 2009
- February 2009
- January 2009
- December 2008
- November 2008
- October 2008
- September 2008
- August 2008
- July 2008

VISIT THE SHOP


PRIVACY POLICY & DISCLOSURE
We are a participant in the Amazon Services LLC Associates Program, an affiliate advertising program designed to provide a means for us to earn fees by linking to Amazon.com and affiliated sites.