
poached apples


(recipe via epicurious)
6 medium Gala apples (about 3 pounds), cored from bottom, leaving stems on
1/2 lemon
1/2 gallon apple cider
1 cup packed light brown sugar
1. Peel the top third of each apple and rub peeled part with lemon half. Put apples in a large 5-quart pot and add cider and brown sugar.


1 cup chopped pecans
2 Tbsp granulated sugar
1 Tbsp unsalted butter, melted
1 large egg white, lightly beaten
1. Preheat oven to 450°F with rack in lower third.
2. Stir together all ingredients with a pinch of salt, then spread out on a baking sheet. Bake, rotating sheet halfway through, until golden, 5 to 6 minutes.
3. Transfer to a rack and loosen nuts, then cool (nuts will crisp as they cool).
Whipped Cream
1/2 cup chilled heavy cream
1 1/2 Tbsp granulated sugar
1 Tbsp dark rum
1/4 tsp pure vanilla extract
1. Beat cream with sugar, rum, and vanilla using an electric mixer until it just holds soft peaks.
2. Drain apples (you can save the poaching liquid for another use), and put an apple on each plate. Sprinkle with candied pecans and some cinnamon sugar. Dollop cream next to each apple and for extra decadence, drizzle caramel sauce all over!

submit your project!


How to submit your post:
 Send 4-6 of your best photos of the project/tour/tutorial/recipe you'd like featured to me at partnership@delightfully-tacky.com. Please include your name, your blog or business link and a short description of your project, tutorial, recipe, or home! If your post is a good fit I will e-mail you back within one week requesting more images and the full post instructions (if it's a project, recipe, or tutorial) or with interview questions about your space (if it's a home tour). Photos should match quality and look of photos currently on Delightfully Tacky (no vignetting, heavy filtering, text, etc). Projects should be unique and not previously posted on any other sites.



homemade ketchup + fries


3 garlic cloves, crushed
1 yellow onion, chopped
1/2 c apple cider vinegar
4 tsp salt
1 1/2 t ground pepper
1/4 tsp allspice
1/4 tsp ginger
1/8 tsp cayenne pepper
1/2 cup dark brown sugar
2 tbsp molasses
1. Heat the olive oil in a heavy pot. Add the onion, stirring occasionally until nice and caramelized. Add the garlic and cook down a bit, stirring making sure it doesn't burn.
2. Next add the vinegar to de-glaze the bottom of the pot and then add tomatoes and all of the dry spices. Cook for 20 minutes.
3. Using an immersion blender (or blend in a blender or food processor in batches), puree your tomatoes until smooth. stir in brown sugar and molasses. Cook for an additional 20-30 minutes until slightly thickened.
4. Let the ketchup cool and transfer to bottles or jars with air tight lids. Keep refrigerated for up to 2 weeks.


1/4 cup Olive or Canola Oil
Sea salt and/or smoked salt
1 tsp garlic powder
3 cloves garlic, minced
1-2 sprigs fresh rosemary, roughly chopped
1. Preheat oven to 450 degrees. Chop potatoes into a long, thin matchstick shape.
2. Line two baking sheets with foil or parchment paper, if using foil, spray with non-stick. Add your matchstick-cut potatoes and drizzle with the oil, salt, pepper and garlic powder. Toss to coat.
3. Spread fries a single layer, spaced so they aren’t touching too much. This will help them get crispy and evenly baked. Bake for 25-35 minutes, flipping at least once so they bake evenly.
4. 10 minutes before your fries finish baking, heat a small saucepan over medium heat and add 1-2 Tbsp olive oil and the minced garlic. Saute, stirring frequently, until just slightly brown and aromatic. Remove from heat and set aside.
5. When the fries are finished, remove from oven, sprinkle again with sea salt, and drizzle the garlic on top. Add the chopped, fresh rosemary and toss to coat!

peach huckleberry rustic tart


his weekend I was at the most gorgeous wedding and the bride and groom had pies for dessert instead of cake, and all the pies were made by friends and family. I helped make a couple key lime pies along with some other friends and it was the first time I made key lime pie! I saved the recipe so I'm going to try it again someday. I like how people are getting more creative with their wedding desserts than just the standard tiered cake.
I made these little tarts last week before I left for the wedding. They're a great size for sharing with a friend, or for slicing into wedges and serving as a bite size dessert at a party. The leftovers saved really well in the fridge too, and were a delicious treat for breakfast!
Peach Huckleberry Tarts
Galette Dough
1¼ cups all-purpose flour
1 tbsp sugar
¼ tsp table salt
8 tbsp unsalted butter
¼ c ice water
1. In a medium bowl, whisk together the flour, sugar and salt. Cut the butter into flour mixture using two knives or a pastry cutter, until butter is in small pieces.
2. Add ice water and stir with a fork until the mixture starts to stick together in a mass. Form the dough into a ball and split in two.
3. Shape each piece into a ball, wrap in saran wrap and chill for at least 30 minutes and as long as overnight. You can pre-make the dough as well and freeze it to use later!
Frangipane
¼ cup almond paste
2 tbsp sugar
2 tbsp butter at room temperature
2 tsp rum
1 small egg
In the bowl of a stand mixer or food processor, combine almond paste, sugar and butter. Beat until combined, then add rum and egg and beat until smooth, or until only small lumps remain.


To make the tart:
Dough
Frangipane
1 peach, sliced
1 cup huckleberries
pinch sugar, pinch salt
1 tbsp butter, melted
1 tsp sugar
parchment paper
1. Toss peach slices and huckleberries with the pinches of sugar and salt. Set aside.
2. Preheat the oven to 400ºF. Remove the dough balls from the fridge. On a lightly floured work surface, roll one disk out approximately into a 9-inch circle, using flour as needed to prevent sticking. Line a cookie sheet with parchment paper. Transfer dough to parchment paper.
3. Spoon 1-2 tablespoons of the frangipane into the center of the tart and spread toward the edges, leaving a 2-inch border all the way around. Arrange the peach slices, overlapping in a circle over the frangipane, then spread huckleberries on top.
4. Finish the tart by folding the exposed border over the tart onto itself, crimping to make a folded-over border. Chill tart in the refrigerator for 10-15 minutes. Repeat with second dough ball to make a second tart.
5. Once the tarts have chilled for 10-15 minutes, take them out and brush the dough with the melted butter and sprinkle sugar over entire tart. Place in the oven for 30-35 minutes or until crust is golden.
6. Let cool for five minutes on tray then slide parchment paper and tart onto a cooling rack and let cool 20 minutes before serving. Serve with a scoop of vanilla ice cream if you're feeling fancy!

getting started on your essential oil journey


The wholesale member price alone for the diffuser is $75 (retail it's almost $100!). Total no brainer. This is why I recommend the $150 kit. You can’t beat getting 10 oils, 2 samples of the top five oils AND the diffuser for that price. The other two kits they offer are $40 and $75 don't make quite as much sense to me. The $40 kit comes with the samples, but not the diffuser or the set of 9 oils pictured above (not super helpful for starting off using essential oils, right?). The $75 kit comes with the diffuser and samples and stress away, but no kit of 9 oils. My issue with the $75 kit is, so you have the diffuser, but only a 5ml bottle of stress away and some sample packs to diffuse, you will obviously have to be buying more oils to use that diffuser, so why not just get 9 super practical oils for $75 more. The only time I recommend the $40 kit is if someone is anxious to get started and budget just doesn’t allow the $150 kit. But! People who ordered the $40 kit usually end up getting the $150 kit that month or the following month. So again, if budget allows, the larger kit is just the best value, hands down.

If you want to get going with Young Living for your essential oils, here's how you do it! First, you are not signing your life away if you become a member. If you would like to purchase Young Living Essential Oils, you can do so by ordering retail from a member (like me!), or you can become a member and get the oils at 24% off. Once you buy your starter kit (I’ll explain those later), you are NEVER required to order a certain amount each month. You are NEVER required to tell others about Young Living. You should NEVER be bothered by people to work it as a business. You simply are now able to purchase at the discounted price. Think of it like a SAMS Club or COSTCO membership. You pay a small fee to become a member to get cheaper prices, the only thing different is SAMS or COSTCO will give you a card, YL gives you a kit of oils and a diffuser.
To be honest, when I heard that Young Living was set up like a Multi Level Marketing company I was less than enthused. I'd had experience with one in the past and it forced me to spend WAY more money every month than I could ever make back by selling and it was so disheartening. I wasn't a fan of the whole MLM thing, but once I realized Young Living doesn't force you to buy hundreds of dollars in product every month just to keep your membership, you don't have to sell anything, and I actually like the product, I was on board. Ugh, so refreshing. All that is required to keep your Wholesale Member status is to spend $50/year on product, which I happily did about a week after my premium kit came because I wanted to try more oils!
Now that you aren't freaked out anymore about becoming a member, this is how you sign up! There is a visual you can follow here and step-by-step directions below.

Step 1: go to https://www.youngliving.com/signup/?site=US&sponsorid=1691741&enrollerid=1627216
Step 2: make sure “Wholesale Member” is marked off instead of “Retail Customer.” Wholesale Member is the only way to get access to the kit and the 24% discount you get afterwards. It’s really important!
Step 3: make sure my member numbers are in the blanks (they should be entered in there for you if you entered with that link in step 1) 1627216.
Step 4: Fill out all the information. It will ask you for your ss# but this is only for legal purposes so that you have the ability to bring in a paycheck (YL is a referral based business). If you never sign anyone up, your ss # will never be used. I never want to pressure people into the business end…EVER. I want you to use and love your oils as a member whether you work the business end or not.
Step 5: Make sure you write down your pin, user name and password when you choose it because you’ll need that in the future to log into your account.
Step 6: Select the “PREMIUM STARTER KIT” (It should be the first option). This is the one with the everyday oils kit and the diffuser. It will be $150. The other kits do not include the oils starter pack.
Step 7: Scroll down through the “Essential Rewards Kits” and click “no thank you, I plan on enrolling in Essential Rewards later” (you are not obligated to sign up for Essential Rewards at this time, but it does have some great benefits, but to be honest, I always tell new members to get the kit, try the oils out, and then talk to me before your next purchase. Then we'll see if ER is right for you).
Step 8: Click “I Agree” and “Next”
Step 9: Confirm your enrollment information (you should see my name as your enroller and sponsor, or the person who referred you).
Step 10: Add any oils, capsules, or products that you would like in addition to your kit if there are any that you would like.
Step 11: Check out and you are DONE! WOOHOO!
Yay! You are a member! I remember how excited I was to receive my starter kit. Much ripping open of boxes occurred. Your membership will stay active as long as you spend at least $50 in a calender year. You do not have to continue to “renew” your membership…that kit was a one time thing and you will remain a member as long as you spend that $50 a year. Which trust me…will never be a problem.

Essential Oil Disclaimer:
I do not claim to be a medical practitioner. I do not diagnose, treat, or prescribe any medical treatment or advice. You should always discuss treatment of medical conditions with your medical practitioner before using any alternative therapies, natural supplements, or vitamins. The following safety precautions are guidelines only. You should consult with any aromatherapist about essential oil usage and always inform your primary care physician what you are using as they may not be conducive with his/her prescribed therapy and medications.
Essential Oil Rules for Safety:
1. Keep Essential Oils in a secure place away from children and pets
2. Use a variety of essential oils and rotate those which you use often to avoid sensitization and irritation. If you use a blend for 3 days, take a minimum of 3 days off and use an alternate blend for those 3 days.
3. The following essential oils should be avoided during pregnancy: Single oils: Basil, Birch, Calamus, Cassia, Cinnamon Bark, Hyssop, Idaho Tansy, Jasmine, Lavandin, Mugwort, Rosemary, Sage, Tarragon, Thyme, Wintergreen. Synergistic use the following with caution: Single oils: Angelica, Cedarwood, Chamomile (german/blue), Cistus, Citronella, Clary Sage, Clove Bud, Cumin (black), Cypress, Davana, Fennel, Bay Laurel, Marjoram, Mountain Savory, Myrrh, Nutmeg, Peppermint, Rose, Spearmint, Vetiver, Yarrow.
4. Read and follow instructions carefully.
5. Always take precautions with using Aromatherapy.
6. Unless otherwise stated, never use essential oils on your skin without diluting the essential oil with a carrier oil. A skin test is recommended prior to use. If you experience any soreness, redness, or irritation do not use the blend.
7. If an essential oil or essential oil blend gets into your eye, flush the eye immediately with a carrier oil or cold milk. Seek medical attention if the stinging and/or irritation continues.
8. Do not use more than 2 drops of the following oils when used in a bath the first time: Aniseed, Black Pepper, Camphor (rectified), Citronella, Clove, Eucalyptus globulous, Ginger, Juniperberry, Peppermint, Sage, Spearmint, Thyme.
9. If allergic to certain foods, do not use essential oils or carrier oils that come from those foods.
10. The following oils should be avoided if you have epilepsy: Cajeput, Camphor, Eucalyptus, Fennel, Peppermint, Rosemary.
All information, content and product descriptions contained within this site are for reference purposes and are not intended to substitute advice given by a pharmacist, physician, or other licensed heath-care professional. I do not advise you use the information contained within this website, or any other site for treating a health problem or disease or to make a self-diagnosis, without talking to your doctor. Actual product packaging and materials may contain different information than shown on this website. Contact your health care provider immediately if you suspect that you have a medical problem. Information and statements regarding our products have not been evaluated by the FDA.

Hi, I’m Liz
I'm an artist, writer, designer, DIY renovator, and … well basically I like to do all the things. If it’s creative I’m probably doing it. I’ve spent over 30 years voraciously pursuing a life steeped in creativity and I wholeheartedly believe creativity and joy are inextricably linked.
Read more…






Explore The Archive
- October 2026
- May 2026
- January 2026
- July 2025
- May 2025
- January 2025
- December 2024
- August 2024
- July 2024
- May 2024
- April 2024
- January 2024
- December 2023
- October 2023
- September 2023
- July 2023
- June 2023
- May 2023
- April 2023
- March 2023
- February 2023
- January 2023
- December 2022
- November 2022
- October 2022
- August 2022
- June 2022
- May 2022
- April 2022
- March 2022
- November 2021
- October 2021
- August 2021
- July 2021
- May 2021
- January 2021
- November 2020
- October 2020
- September 2020
- August 2020
- July 2020
- June 2020
- May 2020
- April 2020
- February 2020
- January 2020
- November 2019
- October 2019
- August 2019
- July 2019
- June 2019
- May 2019
- April 2019
- February 2019
- January 2019
- December 2018
- November 2018
- October 2018
- September 2018
- August 2018
- July 2018
- June 2018
- May 2018
- April 2018
- February 2018
- January 2018
- November 2017
- September 2017
- August 2017
- July 2017
- June 2017
- May 2017
- April 2017
- March 2017
- February 2017
- January 2017
- December 2016
- November 2016
- October 2016
- September 2016
- August 2016
- June 2016
- May 2016
- April 2016
- March 2016
- February 2016
- January 2016
- December 2015
- November 2015
- October 2015
- September 2015
- August 2015
- July 2015
- June 2015
- May 2015
- April 2015
- March 2015
- February 2015
- January 2015
- December 2014
- November 2014
- October 2014
- September 2014
- August 2014
- July 2014
- June 2014
- May 2014
- April 2014
- March 2014
- February 2014
- January 2014
- December 2013
- November 2013
- October 2013
- September 2013
- August 2013
- July 2013
- June 2013
- May 2013
- April 2013
- March 2013
- February 2013
- January 2013
- December 2012
- November 2012
- October 2012
- September 2012
- August 2012
- July 2012
- June 2012
- May 2012
- April 2012
- March 2012
- February 2012
- January 2012
- December 2011
- November 2011
- October 2011
- September 2011
- August 2011
- July 2011
- June 2011
- May 2011
- April 2011
- March 2011
- February 2011
- January 2011
- December 2010
- November 2010
- October 2010
- September 2010
- August 2010
- July 2010
- June 2010
- May 2010
- April 2010
- March 2010
- February 2010
- January 2010
- December 2009
- November 2009
- October 2009
- September 2009
- August 2009
- July 2009
- June 2009
- May 2009
- April 2009
- March 2009
- February 2009
- January 2009
- December 2008
- November 2008
- October 2008
- September 2008
- August 2008
- July 2008

VISIT THE SHOP




PRIVACY POLICY & DISCLOSURE
We are a participant in the Amazon Services LLC Associates Program, an affiliate advertising program designed to provide a means for us to earn fees by linking to Amazon.com and affiliated sites.
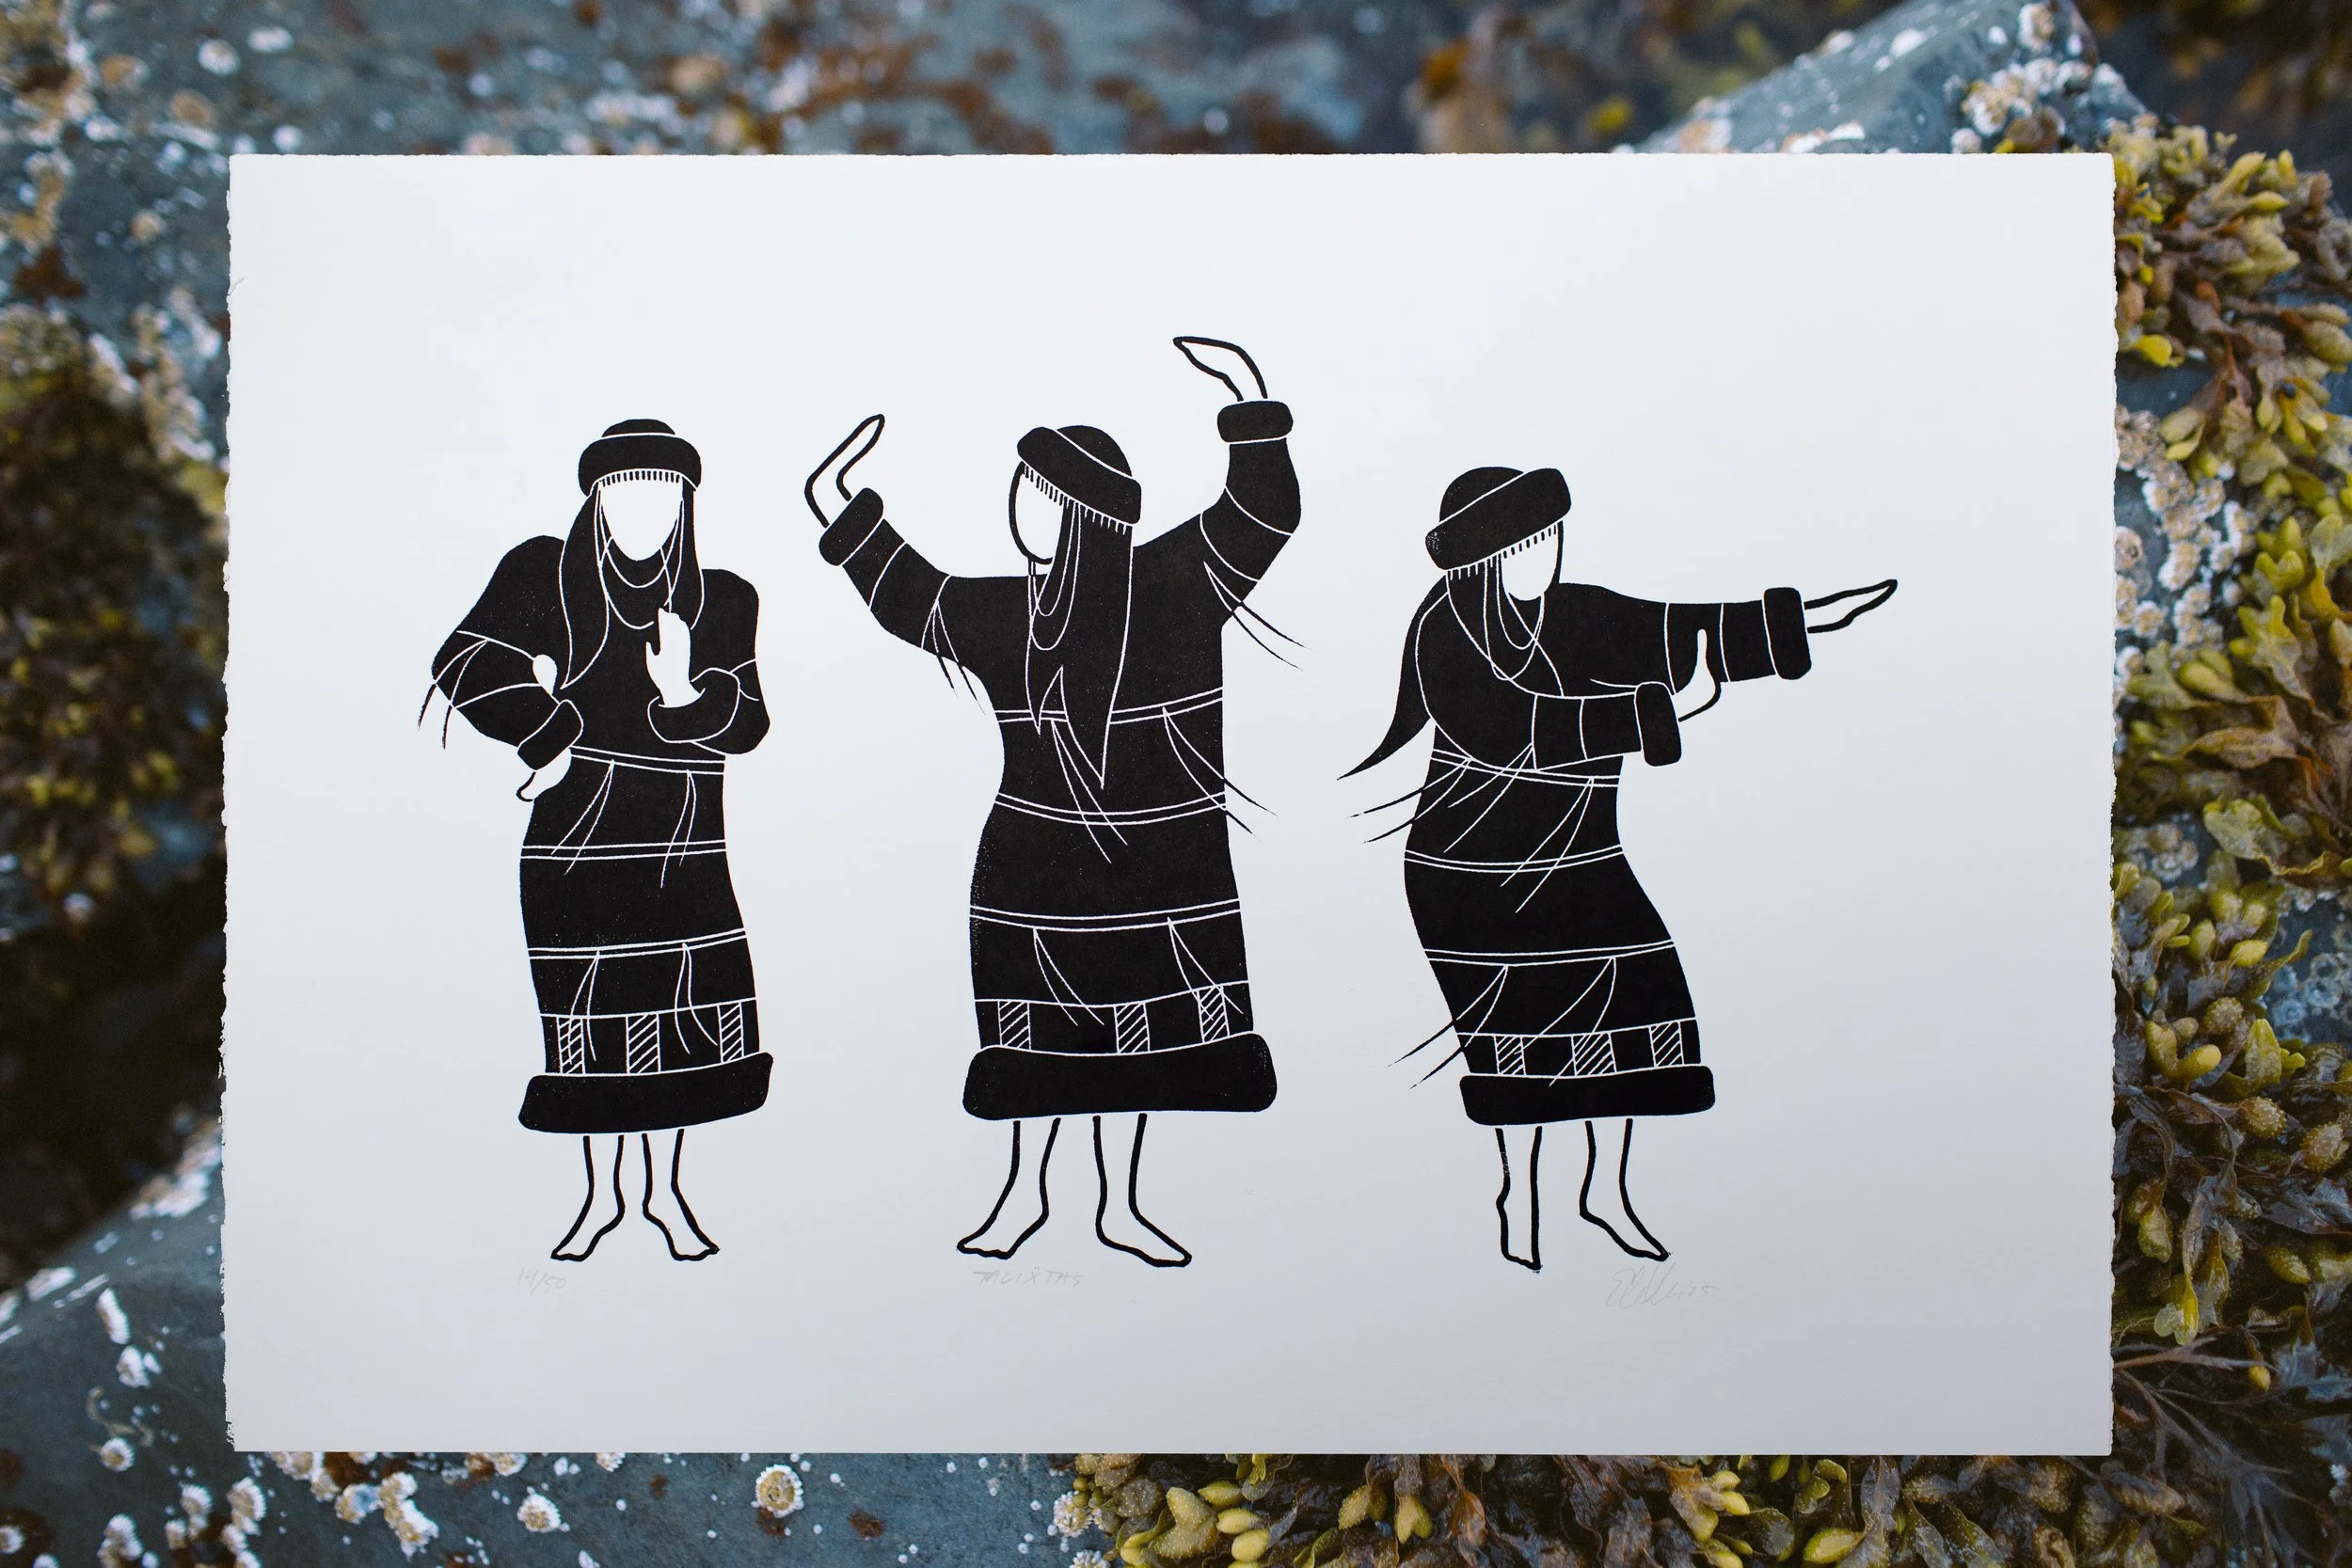
Lino relief print created during the 2026 Wayzgoose Steamroller Print event in Tacoma. Each print was pressed using a 1.5 ton steamroller. See the entire process here!
The Wayzgoose theme this year was Tacoma Works, a celebration of the labor history of Tacoma, labor solidarity, Tacoma industry, and what work in Tacoma looks like.
As I thought about the theme, I realized I wanted to highlight the unpaid labor that women do, all the work that doesn't get acknowledged as “real work" and goes uncompensated but quietly forms the backbone of society. Care work, cooking and cleaning, household management, pregnancy and child rearing, carrying the emotional and mental load, etc.
I wanted to use the imagery of a quilt because this devaluing of "women's work" has extended into the art world by deeming mediums historically associated with women as merely "craft" - lots of fiber art, quilting, embroidery: highly skilled and artistically incredible work that wasn't considered "fine art."
Women's work is the thread that stitches everything together. It's the thread that goes unnoticed and under appreciated, but without it, everything would fall apart.
When I say “women’s work” I don’t mean that only women engage in these types of work, but historically these types of unpaid labor have fallen vastly upon women. I also don’t mean that women don’t or haven’t engaged in paid labor and industry throughout Tacoma’s history, they obviously have. To me, “women’s work” is the phrase that embodies how we devalue certain types of labor typically associated with women, and can extend into forms of paid labor— why is it that teachers are so underpaid in our society? Could it have anything to do with teaching having been a workforce of primarily women historically?
So when we talk about women’s work we’re talking about things like care work, elder care, feeding a family, procuring groceries, household management, keeping a home clean and stocked, rearing children, pregnancy, birthing and breastfeeding, emotional labor, mental load, community building and organizing. Without these forms of “women’s work” our society would unravel.
Women's work is work. The labor and industry history in Tacoma could not have happened without the women in the background supporting it all with the work they did that wasn't considered real work.
Tacoma Works because Women Work.
—
Due to the nature of printing outdoors, on the ground, with a steam roller, there are variations and slight imperfections from print to print.
Prints ship rolled in a cardboard tube.
Local pickup is in Central Tacoma.
Paper size: 30.5 x 44 in
Print size: 24 x 36 in