

DIY Triangle Hanging Shelves

I knew I wanted more plants in my bedroom, but with not a lot of floor space, I'd have to get creative with how I was going to incorporate them. I already had a board that I'd bought months ago to make a different shelf that I never got around to making so all I had to do was buy some cord and whip these up! They probably only took 10- 15 minutes to put together, so they're a quick and easy way to add some great shelving to any room!
WHAT YOU'LL NEED
1x8 common board
Rope or Cord
Screw with anchor (anchor optional)
Saw
Drill

/ STEP 01
Take your 1x8 board and chop it into the lengths you want your shelves to be. I made mine 26 inches. I used a skillsaw to cut mine but if powertools freak you out or you don't have access you can have them cut the board for you at most hardware stores! Or just use a regular saw!

/ STEP 02
Use a drill to make 4 holes at the corners where your rope/cord will go through. How big your holes are will depend on how thick your rope is, but I used a 1/4in bit for mine. Make sure you don't make the holes bigger than your knot will be, otherwise it will slip through when weight is put on the shelf.

/ STEP 03
Take your first rope (cut to 57 inches long) and push the ends through the front two holes. If the rope is frayed you may have to singe the rope ends to make it easier to push through the holes. Tie a knot at the ends of the ropes after you've pushed them through.

/ STEP 04
Once you've done the front rope, repeat the same process with the back rope. Cut the back rope to 55 inches (the back rope is slightly shorter because it's flush to the wall, whereas the front one has to angle back to the wall).

/ STEP 05
Screw a hole in your wall where you want to hang your shelf! I used an anchor to help secure my shelf because I knew I'd be putting plants on in and didn't want the weight to be an issue. If you aren't putting anything heavy you might be able to get away with a nail, but I'd recommend a screw. Voila, you're done!

You Might Also Like


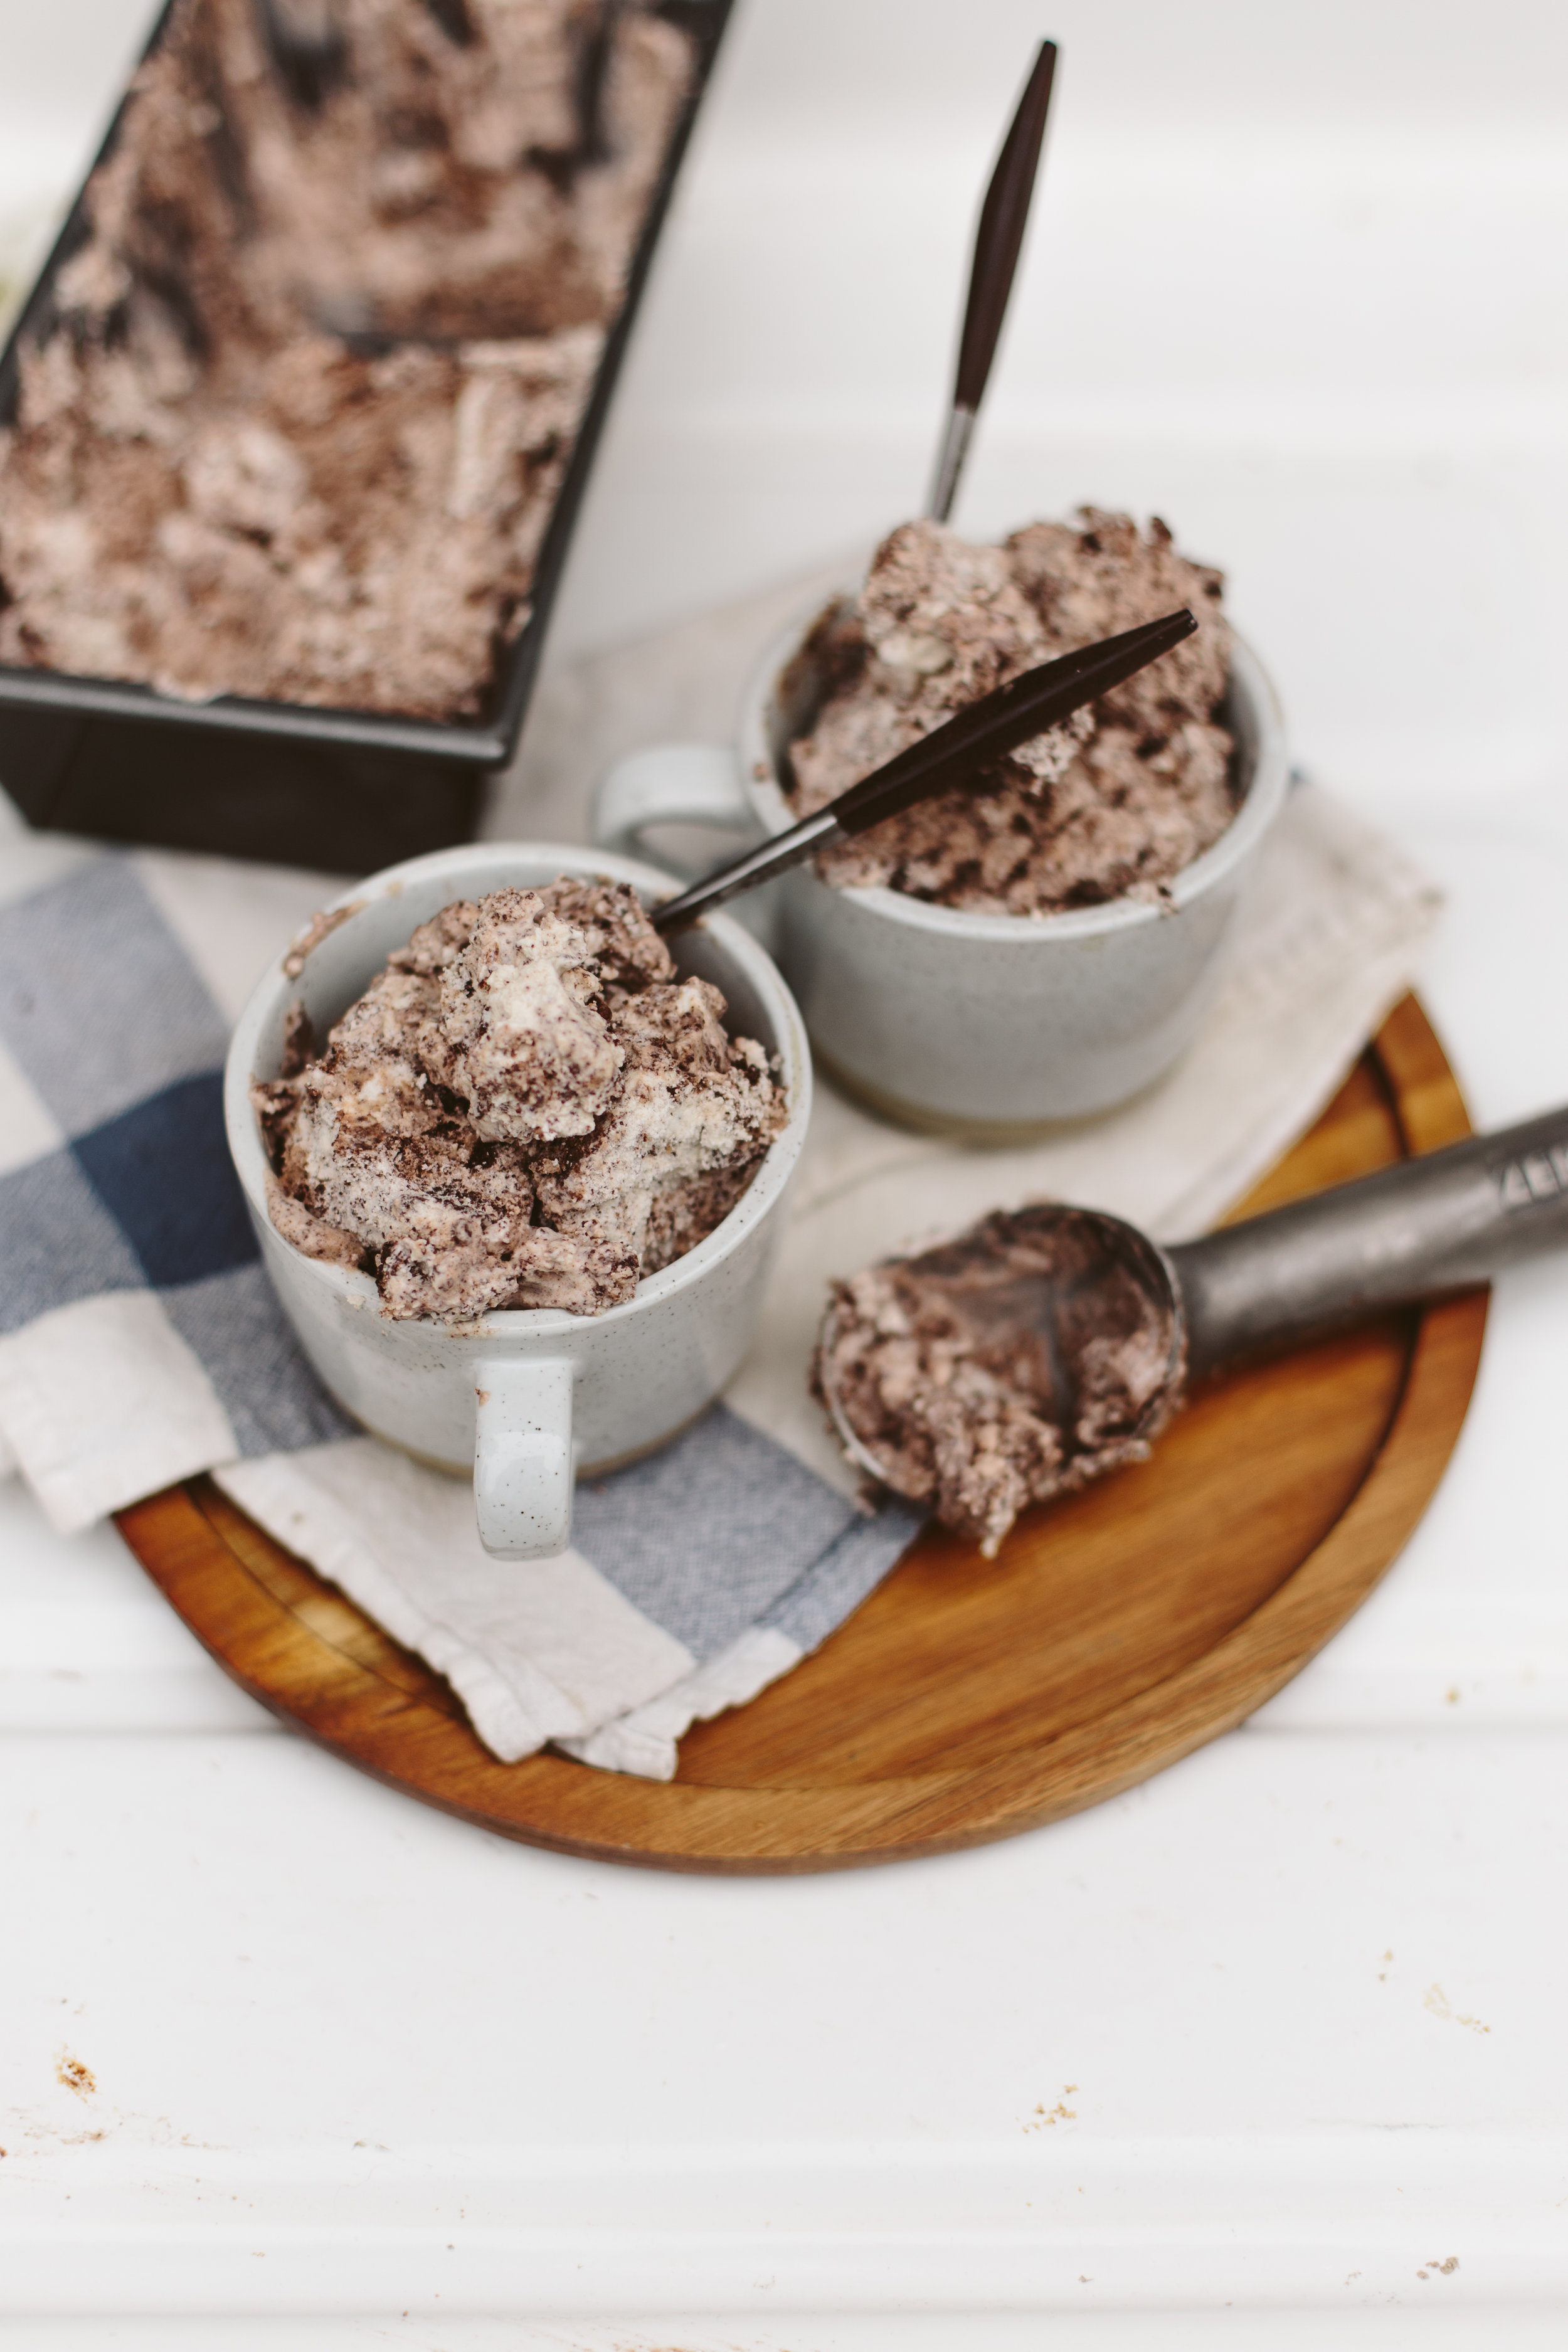
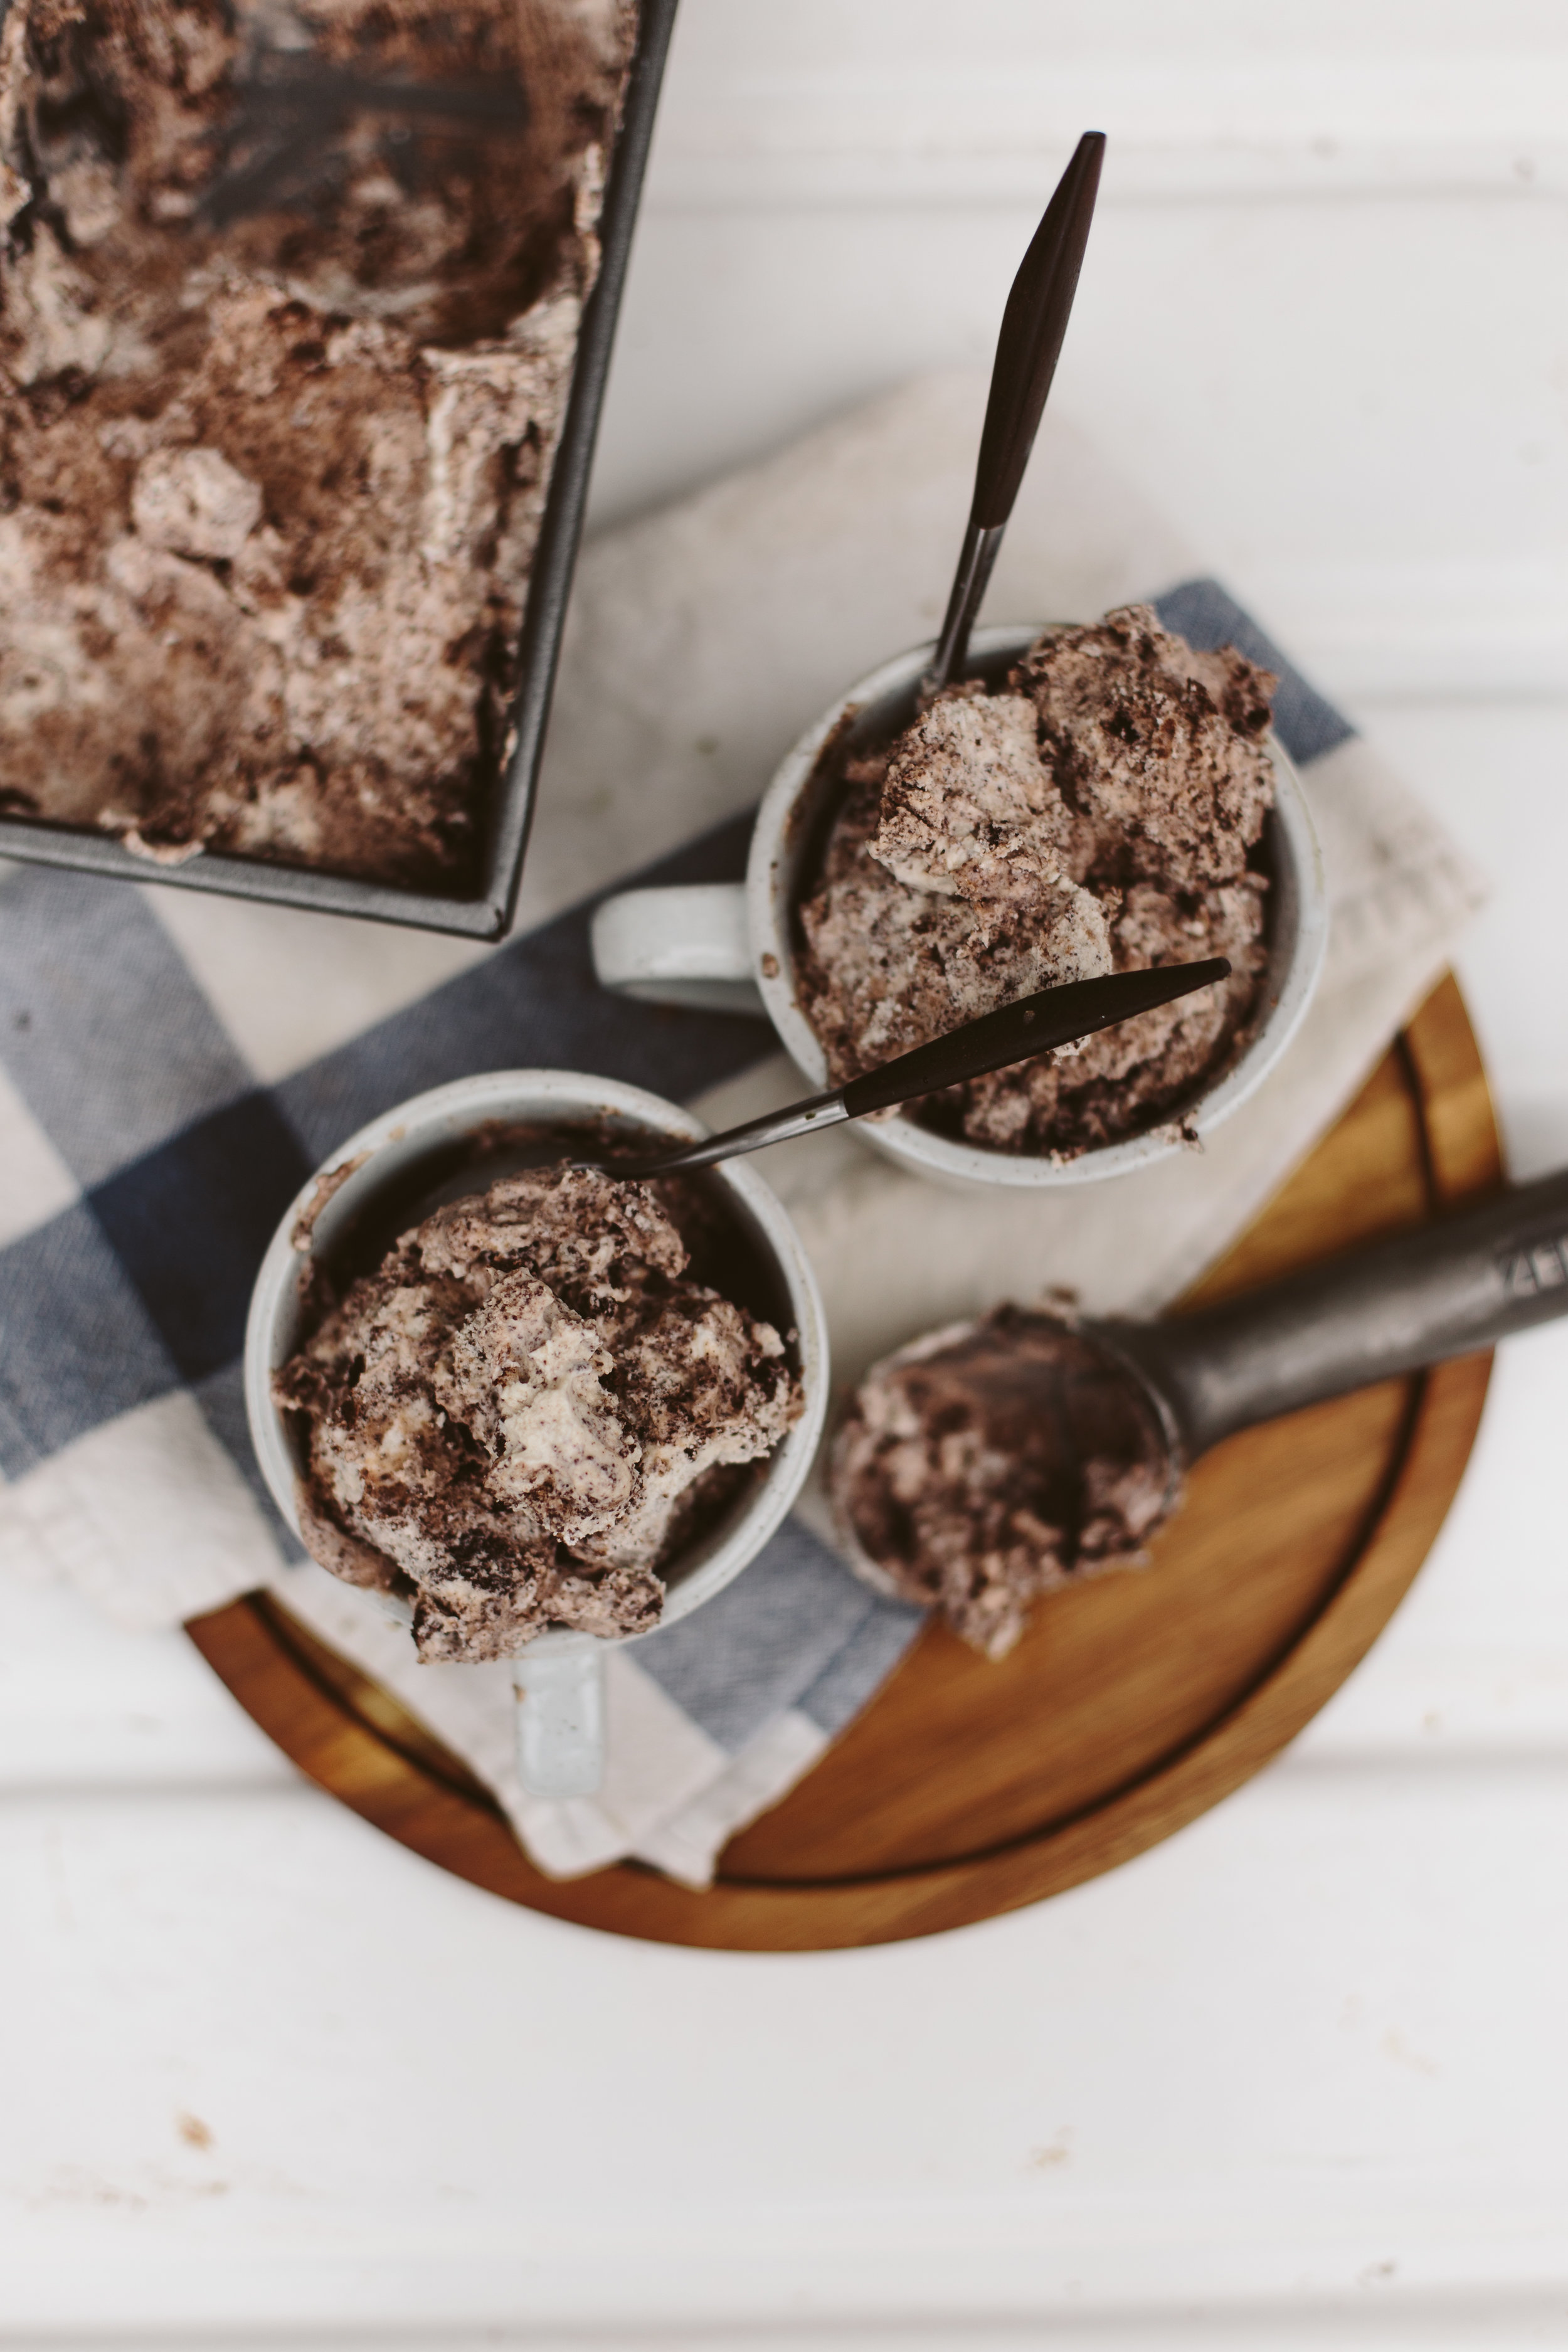
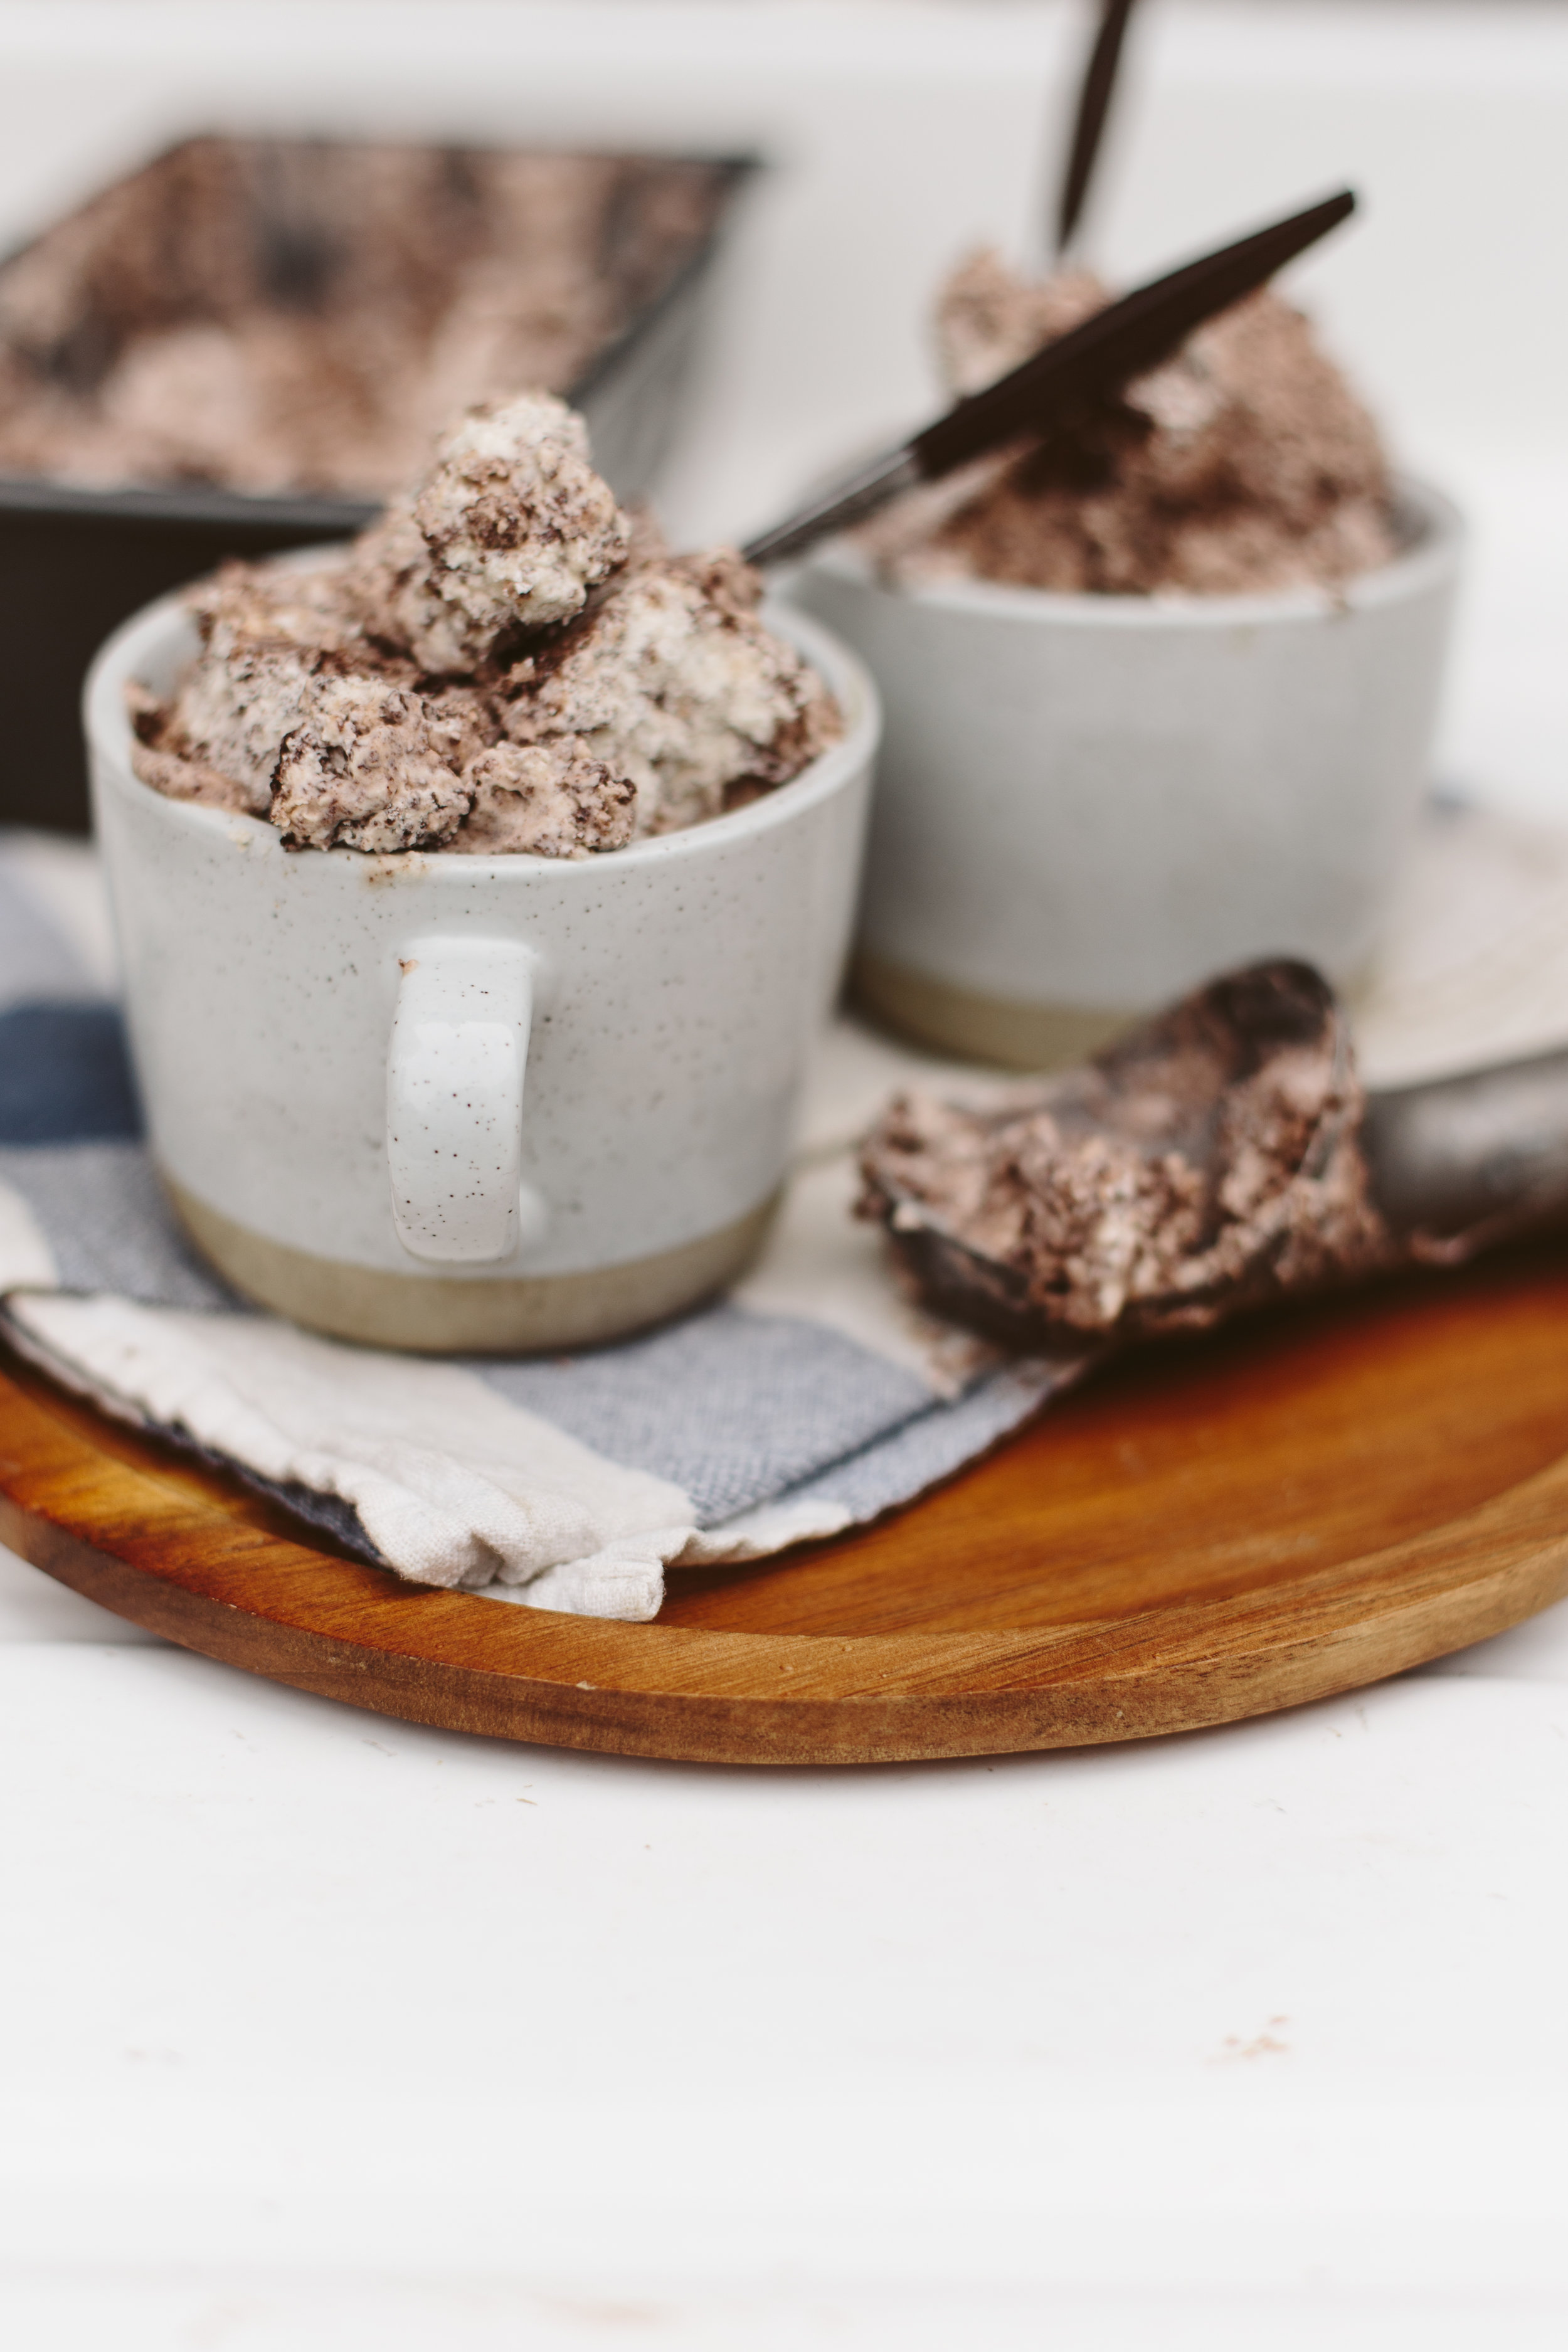
Keto Cookies & Cream Ice Cream

Dan and I have been attempting Keto since last summer. Well, I should say Dan has been pretty successfully doing Keto, and I have been... not. But I finally feel like I have mental and physical energy to focus on my own health and am diving back in! For those who have no clue what Keto is, the readers digest version is: Your body runs on glucose and ketone bodies, but will default to glucose when it's present. Ketone bodies are created from fats, so if you reduce the glucose you consume and increase the healthy fat, your body switches to running off of fat. So real basic: eat fat = burn fat. When your body is running on ketones, it's said to be in "Ketosis" hence: Keto. Anyway, in such a carbohydrate and sugar heavy culture it can be hard to switch to a high fat/low carb diet, so something like Keto ice cream can help not feel sad about the carbohydrates I'm craving.
I was skeptical that this would be actually as tasty as normal ice cream because usually substitute foods are like a sad version of the original, but this stuff is actually amazing. I was pretty excited to make ice cream because it was the first time I used my ice cream bowl and mixer for my Kitchenaid mixer! If you have a Kitchenaid, you can find the ice cream attachment here!

Keto Cookies + Cream Ice Cream
makes 10 servings (recipe via ruled.me)
INGREDIENTS FOR COOKIE CRUMBS:
3/4 cup almond flour
1/4 cup cocoa powder
1/4 tsp. baking soda
1/4 cup erythritol (I used Swerve)
1/2 tsp. vanilla extract
1 1/2 Tbsp. softened coconut oil
1 egg, room temperature
Pinch of salt
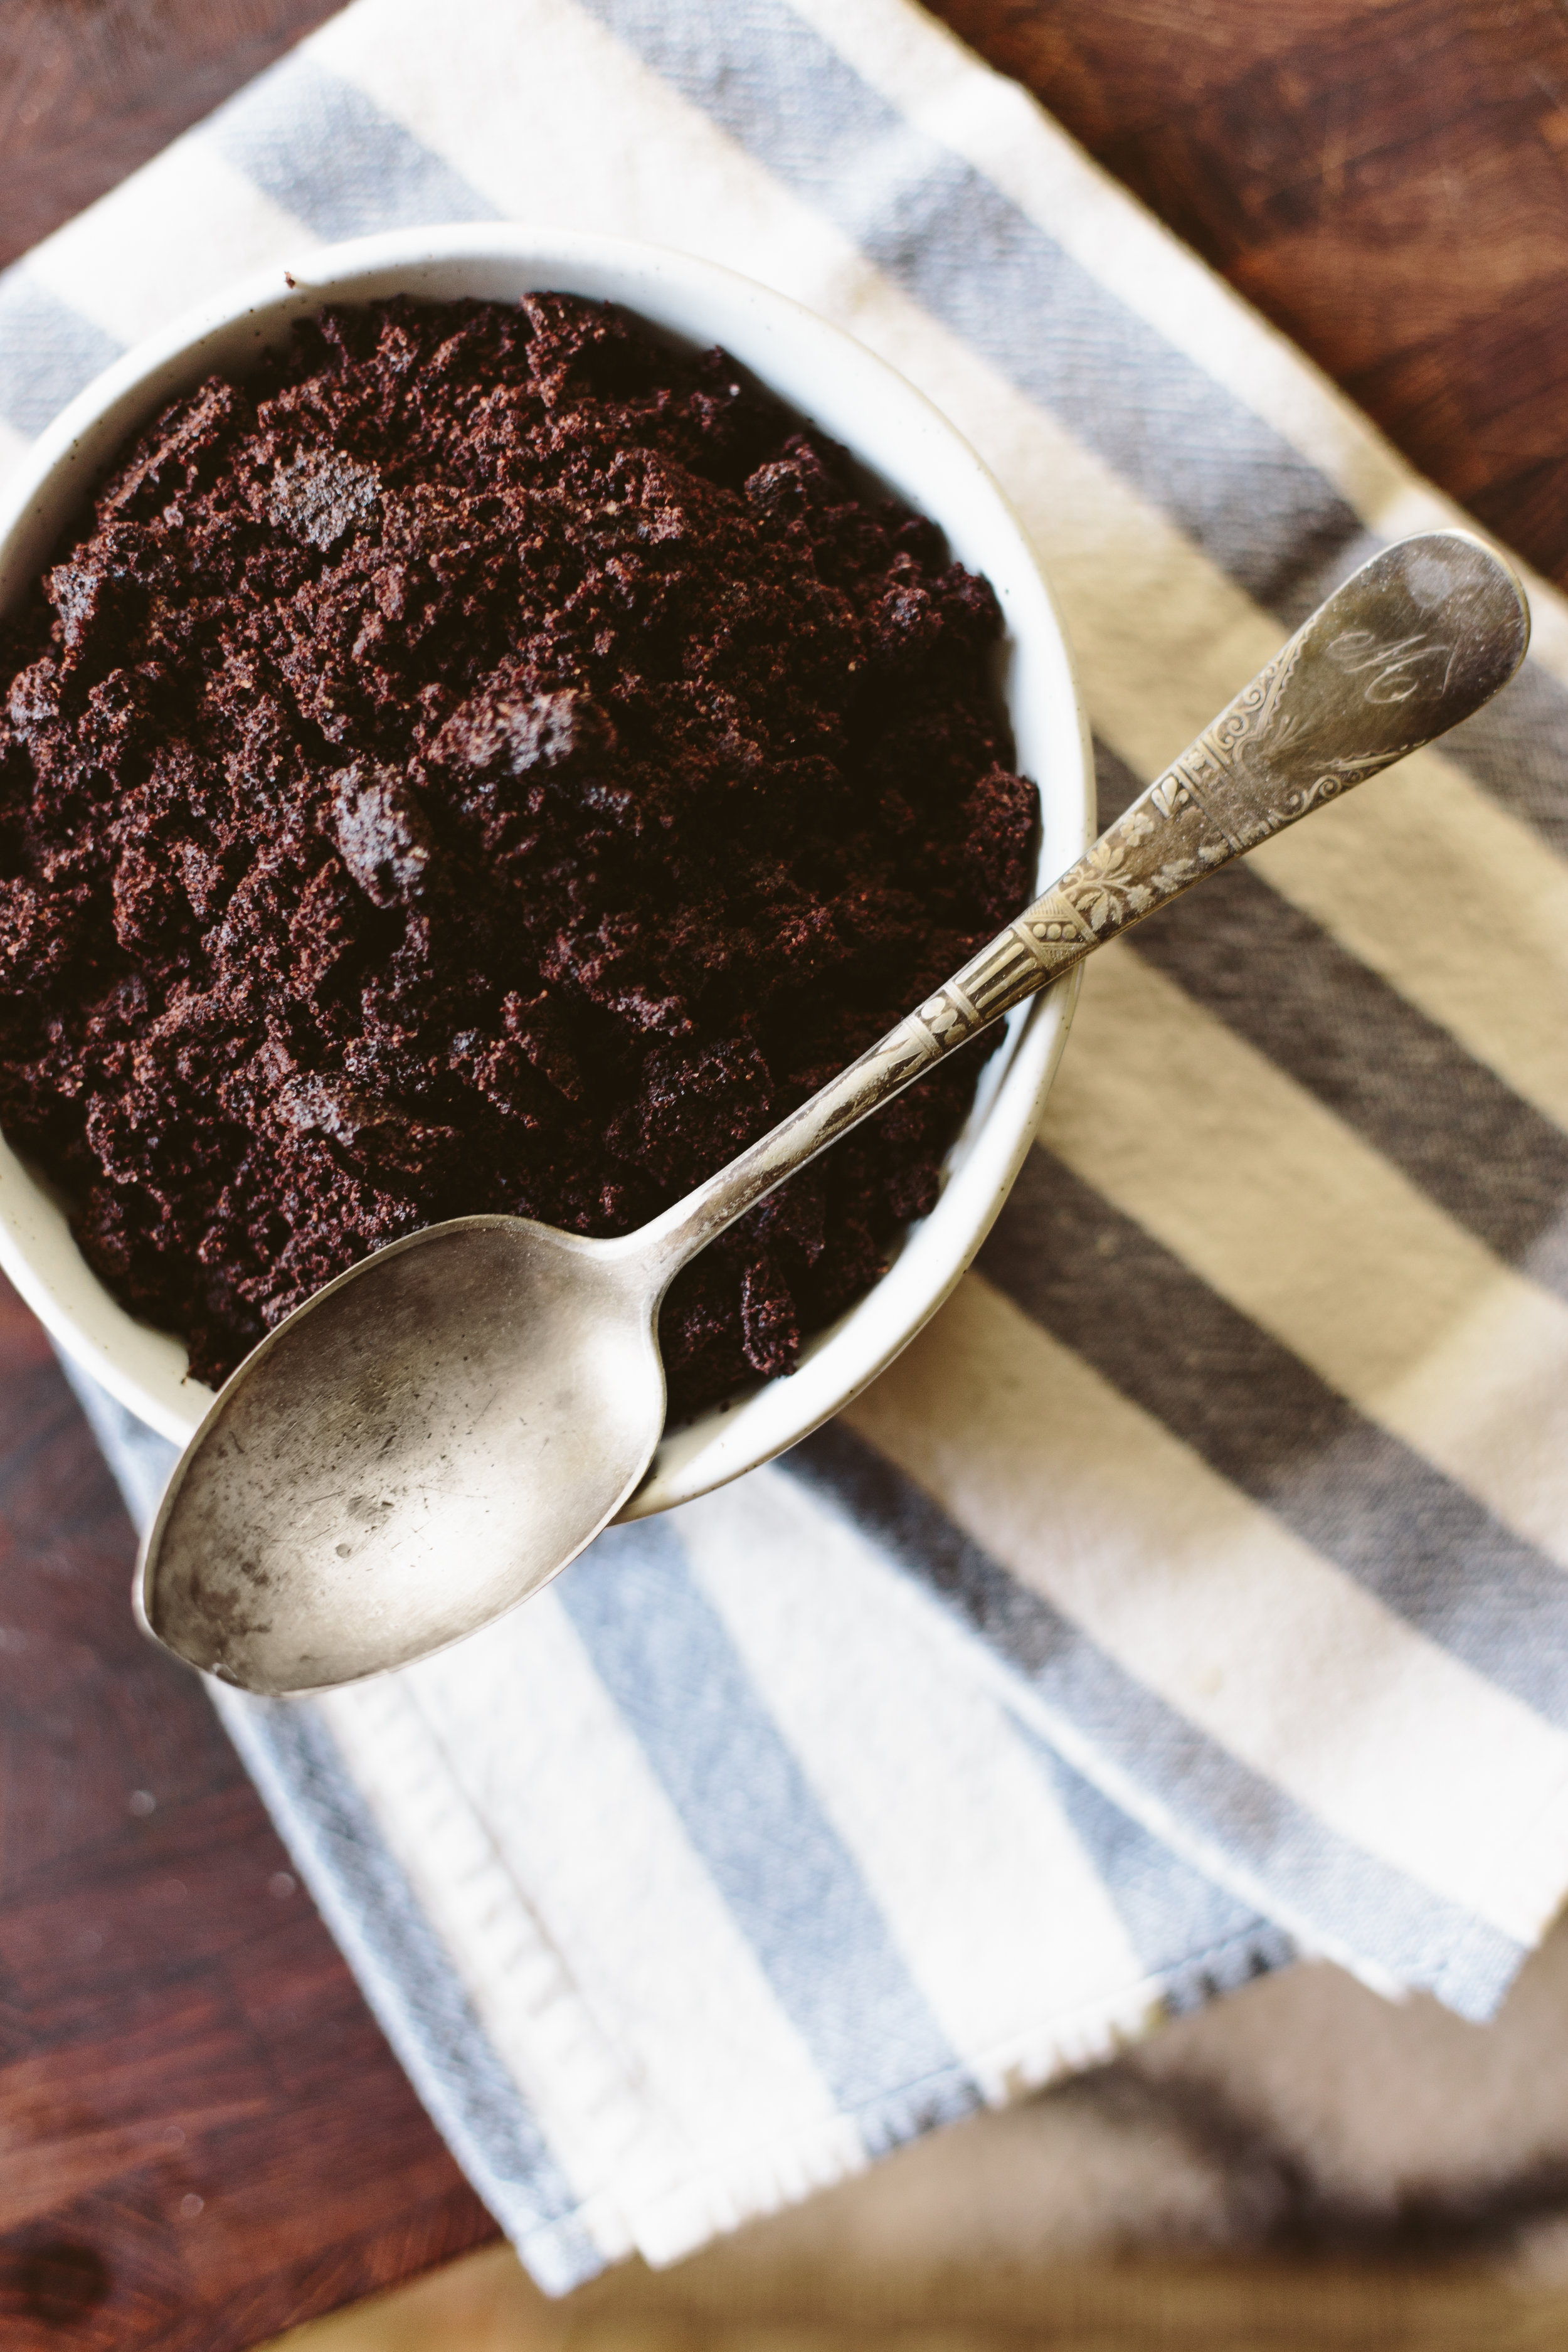
MAKE THE COOKIE CRUMBS:
1/ Preheat your oven to 300°F. Take a 9 inch circular cake pan (or similar sized pan), and grease with oil, or line with parchment paper.
2/ Into a medium bowl, sift your almond flour, cocoa powder, baking soda, erythritol, and salt then whisk until there are no lumps.
3/ Add the vanilla extract and coconut oil to the bowl and mix until batter forms into crumbs.
4/ Add the egg and mix everything together until the cookie batter begins to stick together.
5/ Dump the batter into your prepared pan and press the batter down with your fingers until it evenly covers the bottom of the pan.
6/ Pop it in the oven and bake for 20 minutes or until the center of cookie bounces back when it's pressed.
7/ Once it's done, take the pan out of the oven and let it cool.
8/ Now that the cookie has cooled, crumble the cookie into small bits. Set aside.
INGREDIENTS FOR ICE CREAM
2 1/2 cups heavy whipping cream
1 tablespoon vanilla extract
1/2 cup erythritol
1/2 cup almond milk, unsweetened
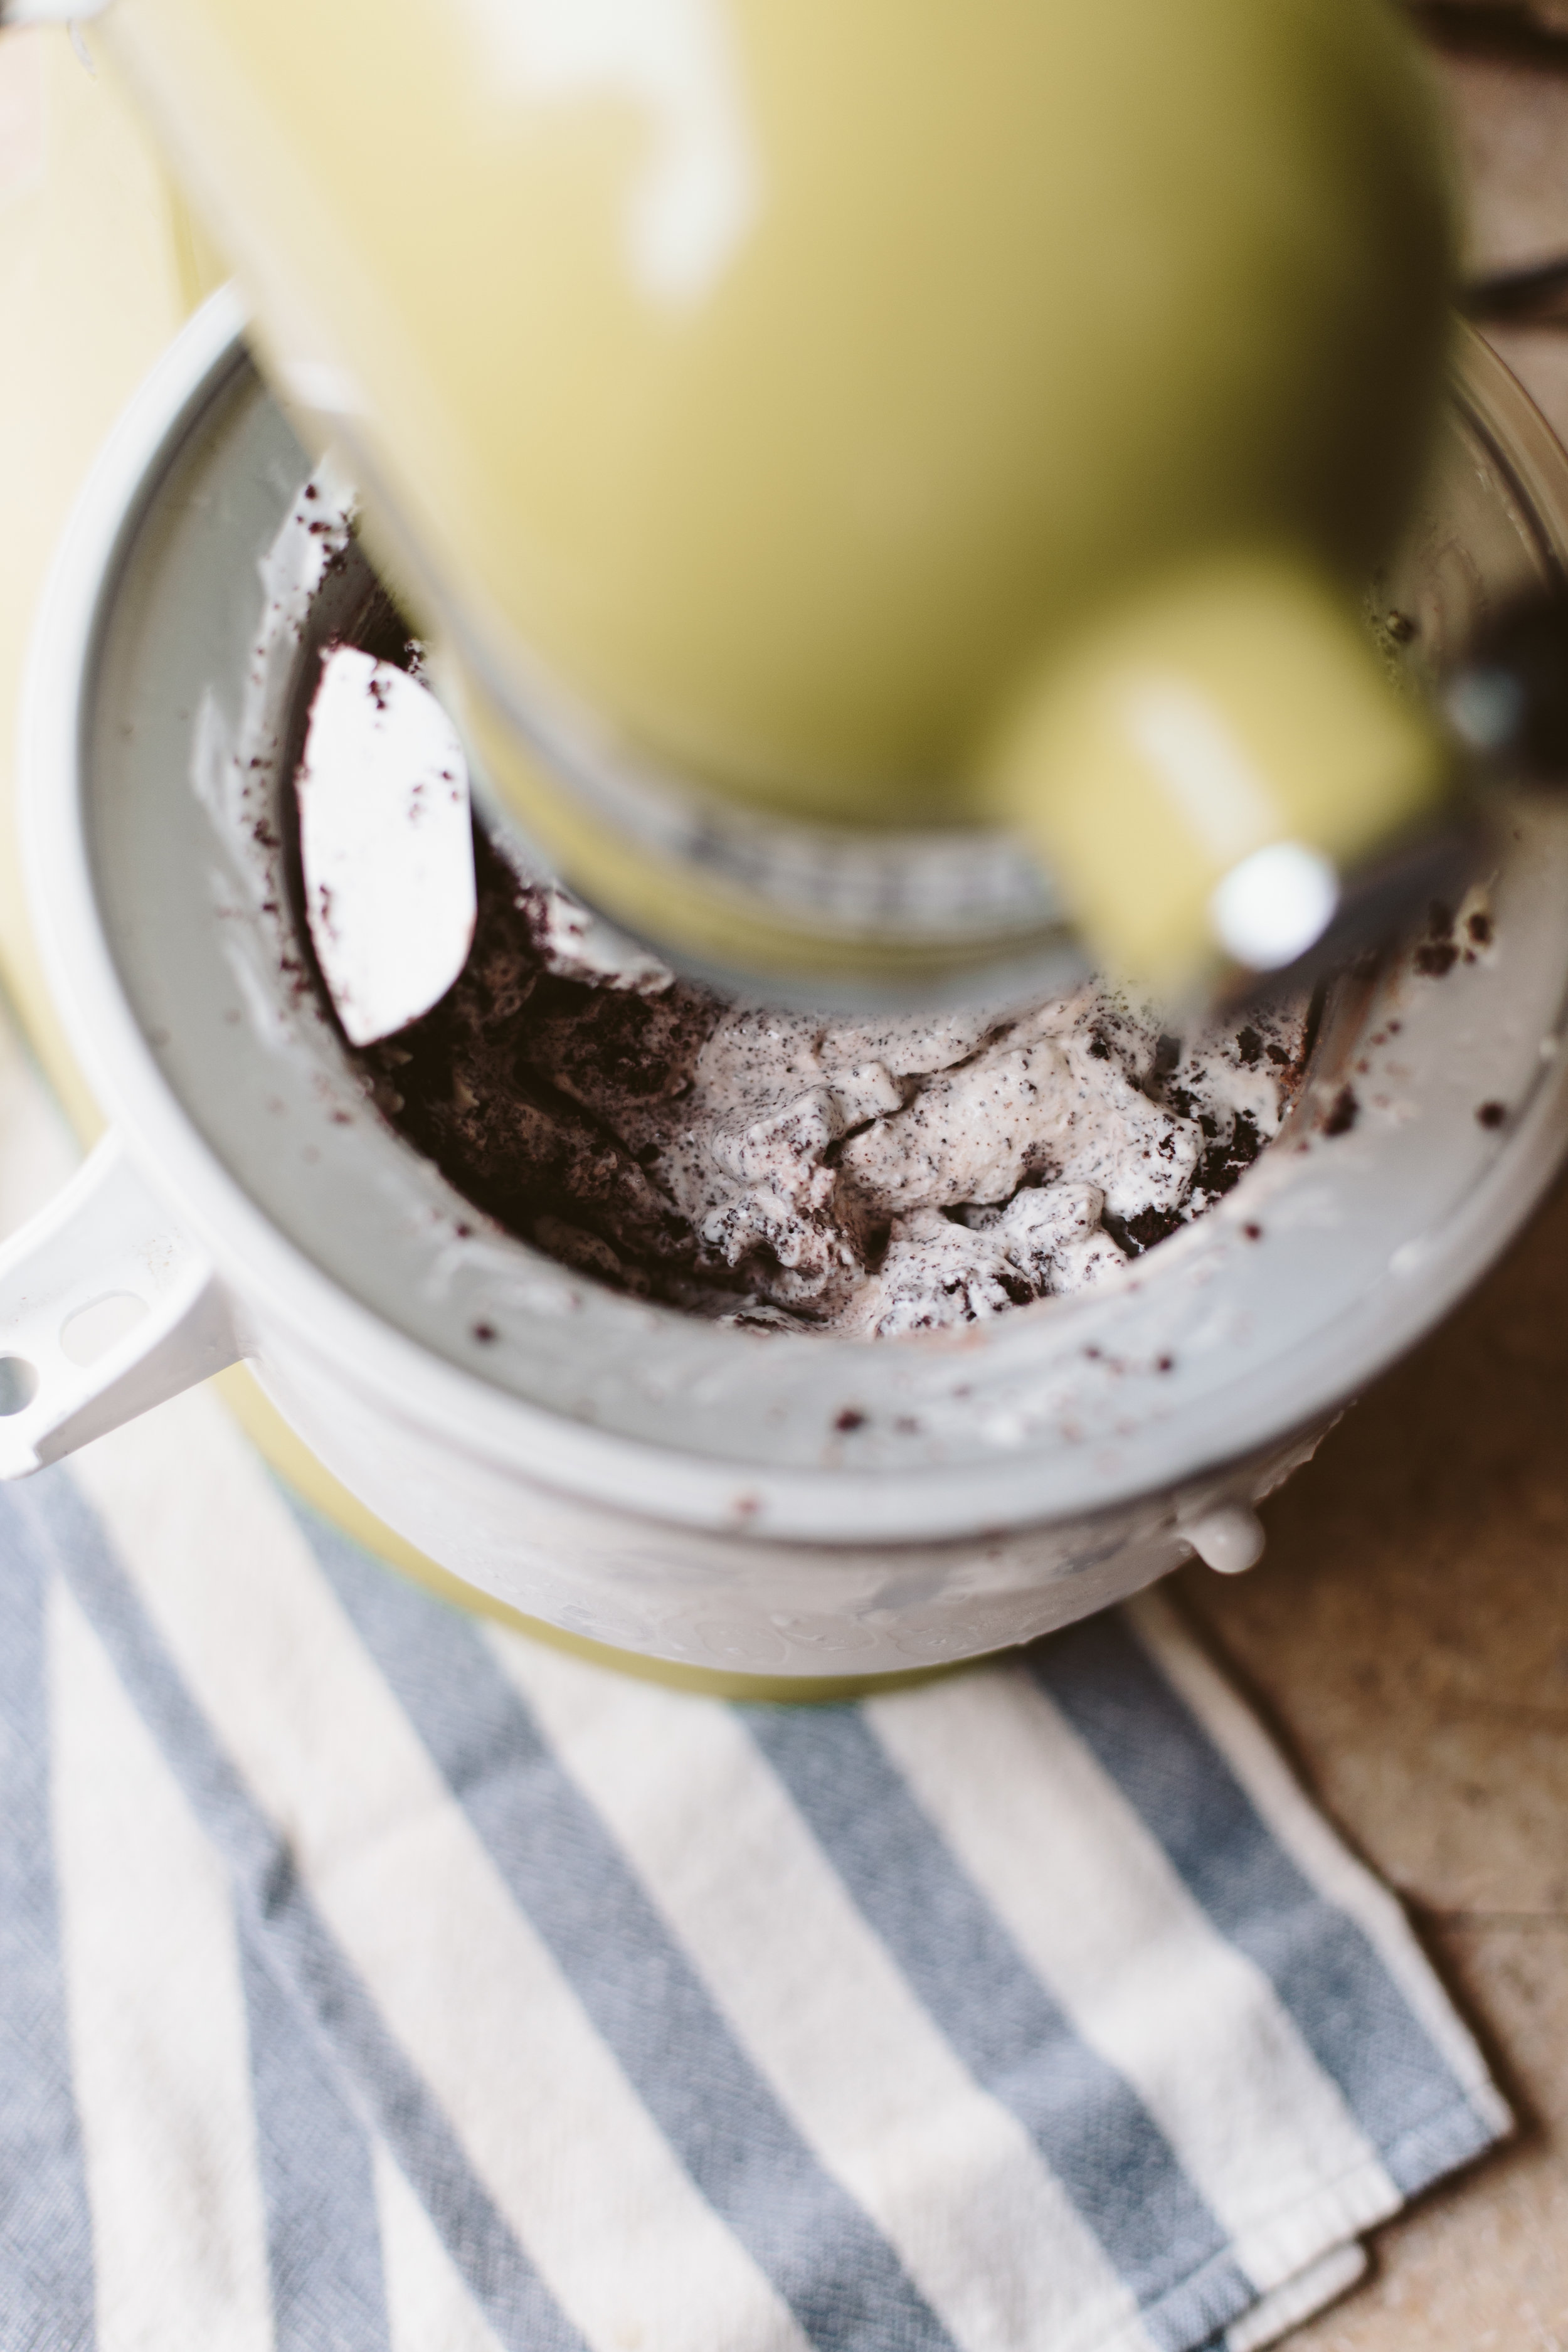
MAKE THE ICE CREAM
1/ In a large bowl, blend the whipping cream with a Kitchenaid or electric mixer until stiff peaks form.
2/ Add vanilla extract and erythritol, and whip until thoroughly combined.
3/ Pour in the almond milk and blend mixture until it re-thickens.
4/ Transfer cream mixture to ice cream maker bowl and churn until ice cream begins to hold its shape. If you're using the kitchenaid mixer, make sure you only use the churning attachment on the "stir" speed. Churn for about 20 minutes.
5/ Once you've been churning for 20 minutes or so, gradually pour the cookie crumbles in while the ice cream maker is churning to evenly mix the crumbles into the ice cream. Churn for 5-10 more minutes, until the cookie crumbles are mixed throughout.
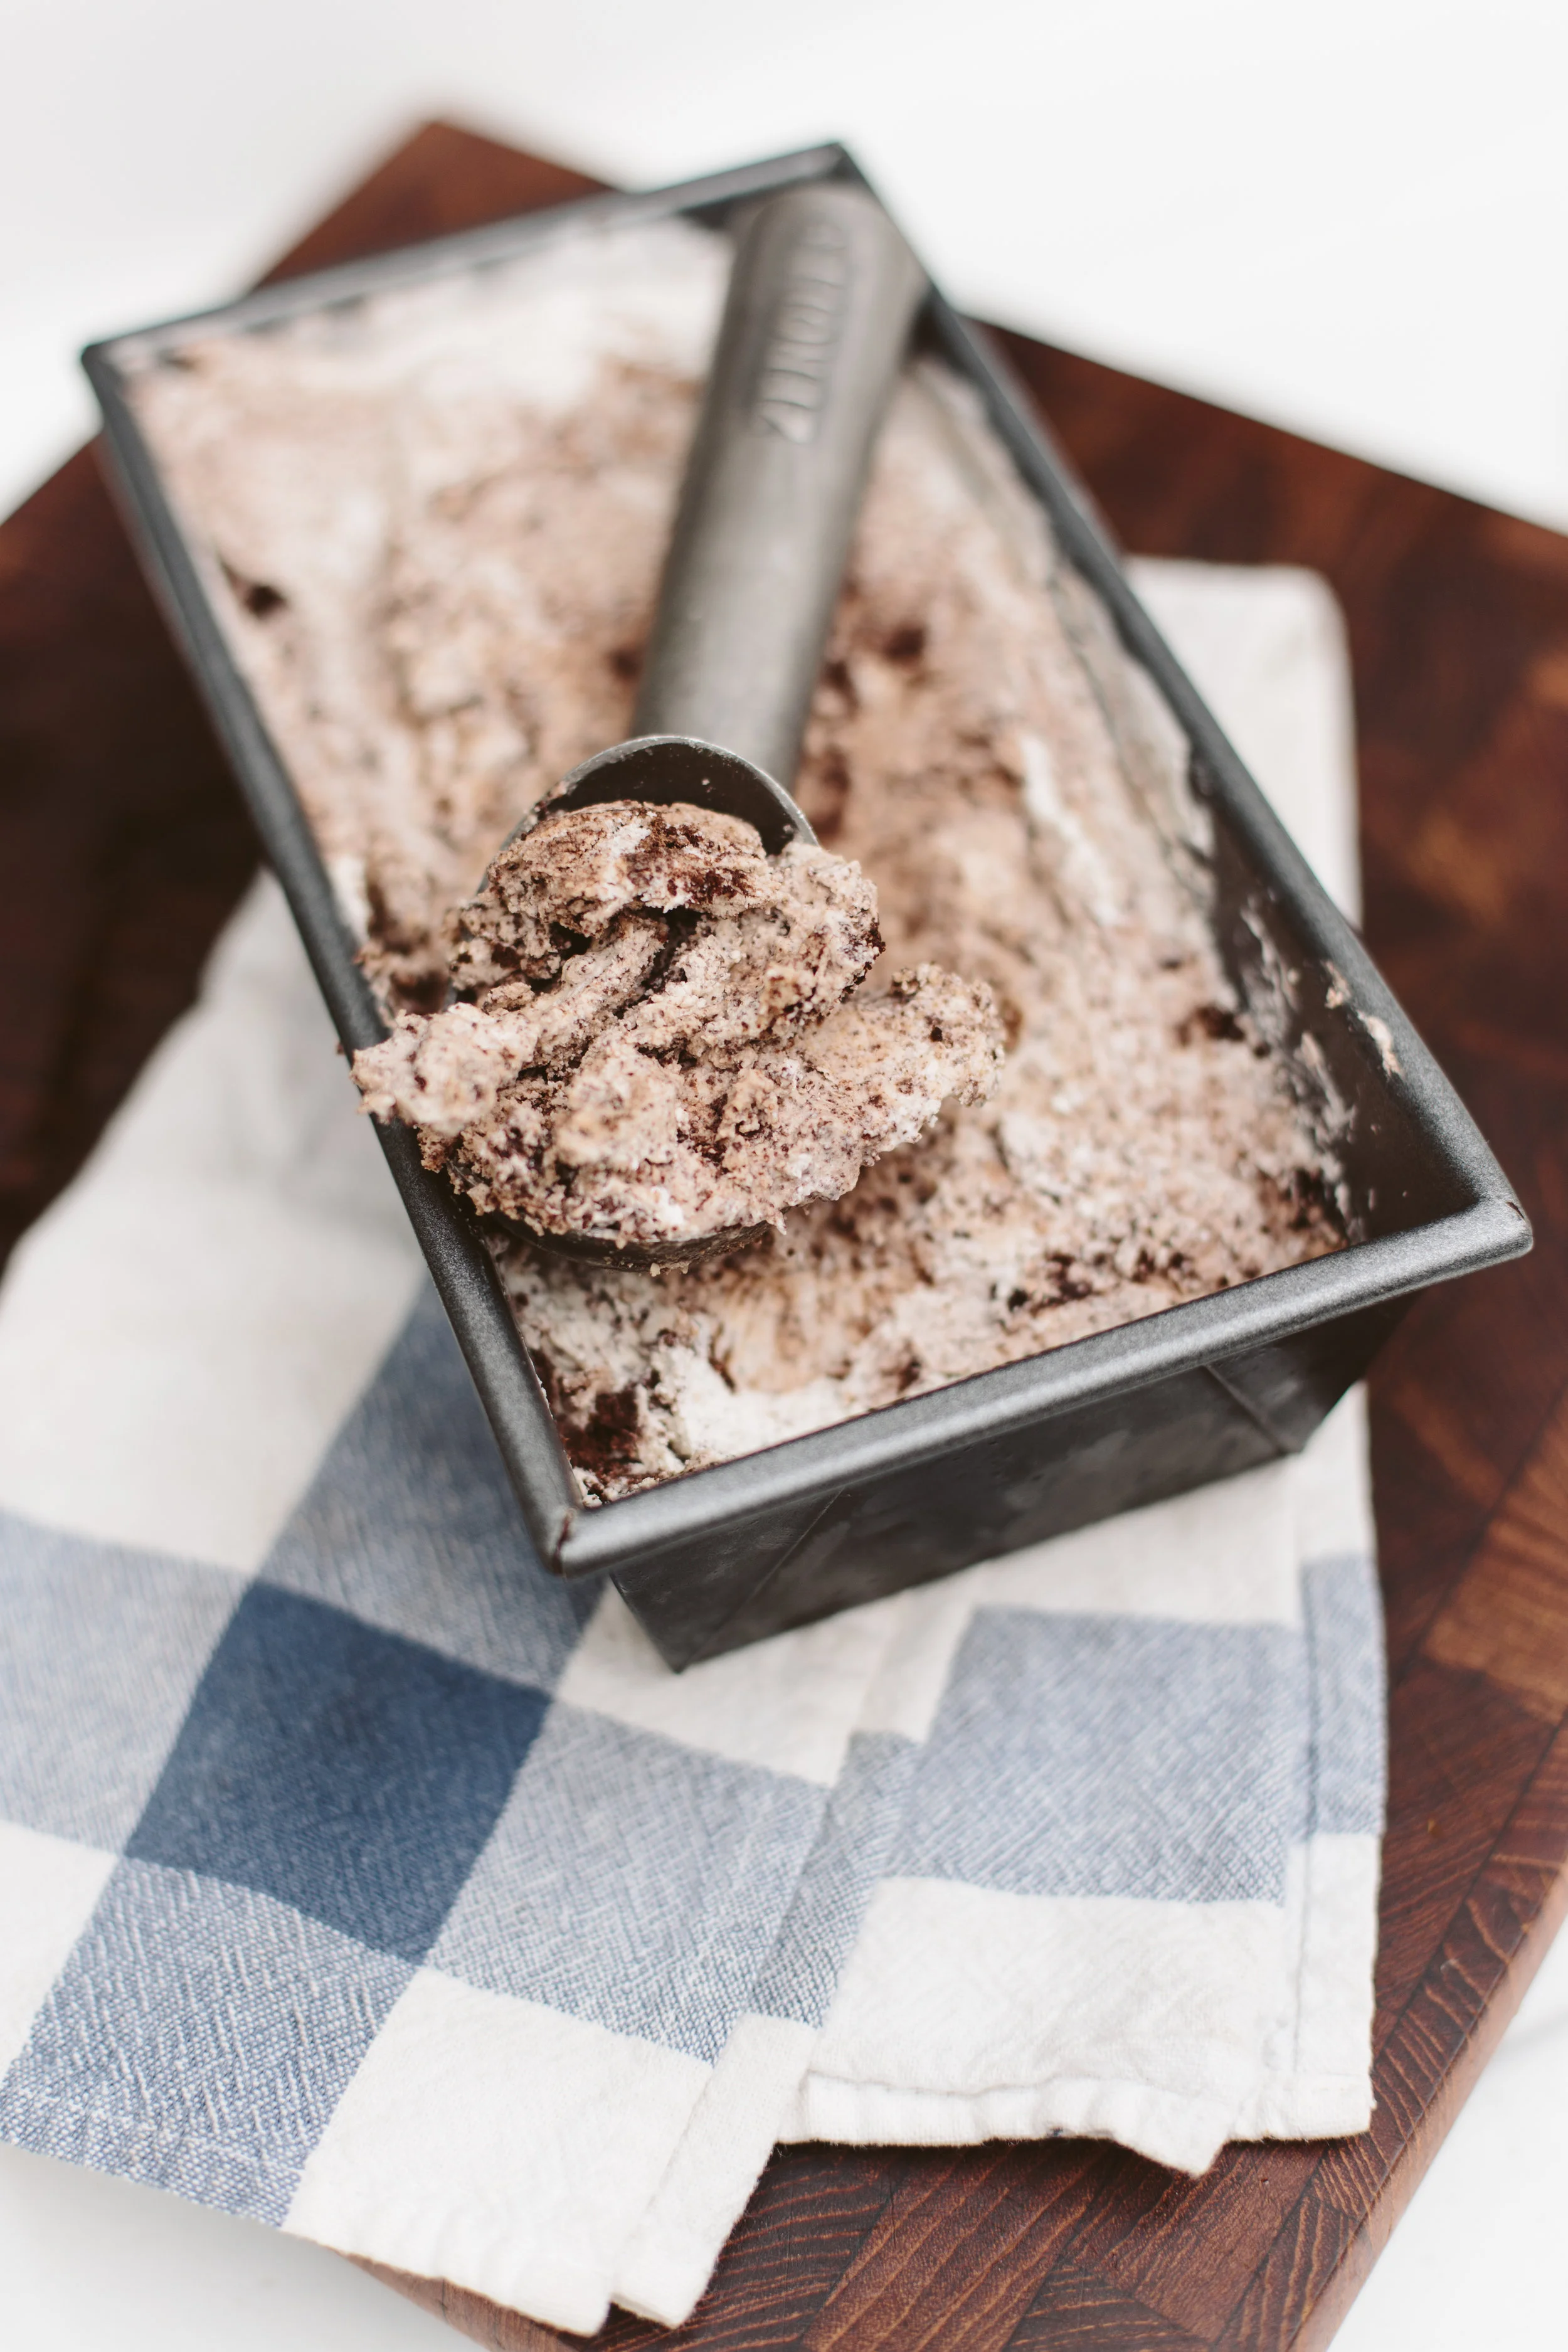
6/ Once all of the cookie crumbles are incorporated, transfer the ice cream into a freezer-safe container. You can serve the ice cream right away if you want a softer texture, or if you want it harder, put it in the freezer for an hour or two. Mine gets too hard in my freezer, so I have to take it out and put it in the fridge for a bit to let it soften up.
Makes 10 servings. Each serving comes out to be 289.9 Calories, 28.9g Fats, 3g Net Carbs, and 4.6g Protein.
ENJOY!

You Might Also Like


My Mother's Day 2018 Gift Guide

Commercialized Mother's Day gifts feel so impersonal and out of touch with what real moms want and need. Not that I don't like flowers and little goodies, and growing up I don't think I thought much in depth about a Mother's Day gift. But I think if we're going to have a holidays celebrating moms, lets give moms something they really need. And obviously for every mom that's going to be different, especially depending on her love language and personal interests.
For me, my love language is quality time, and I've realized that as a mom you get tons of quality time with your kid(s), not as much quality time with your partner, and almost no quality time with your self. This gift guide doesn't really have a theme other than "things I as a mom truly love or crave." So it might be relatively specific, but I figure there are probably moms out there like me, so you might enjoy this little list too!
A get-away OR a staycation

image via the joshua tree house
I crave an escape to the desert at least once a month. But being able to hang out in a relaxing home-- ALONE --in the warm sun, getting to sleep in, not have to give my kid any of the food I'm eating, and lounge around all day with no one bugging me? Sounds magical. On the flip side, being able to be in my own home for a long weekend so I can accomplish projects around the house that feel impossible to do when a toddler is following me around or napping also sounds magical. I think the key here is: time sans child(ren). Just time to fill our own tanks without the distraction or obligation of caring for anyone else.
Plants that don't die in a week

image via wearetriibe
Flowers are nice and all, but in a few short days, they start to wilt and eventually all those pretty blooms will have dropped their petals and died. I don't know about you, but I adore have living plants in my space and have accumulated a small urban jungle-- but I always want more. I would prefer to get a snake plant, monstera, or some other beautiful greenery that will fill my home with life for years to come!
Professional Hair Cut/Color

image via jessfxstyle
I would love to sit in a salon chair and have a hair magician take my locks to the color I've been dying to try for years. I haven't had my hair colored since before I had our son, and while I'm not a salon junkie and I prefer low-maintenance hair, it feels so luxurious and caring to have someone refresh your hair. I'm usually too cheap to splurge on a salon, so it would be a lovely treat to be able to hit the salon and get a fresh look.
Gift Card to a Shop I Love

image via satori
This one gets me two things: time alone to walk around said store and enjoy the ambiance of a store I like (ya'll even Target will do, my ambiance threshold is loooow), and then things that I want to buy. I know people like to give gifts that they find meaningful, but it can feel really nice to just get something that you know you'll love because YOU picked it out. A gift card to an online shop is nice, but now that I'm a mom I kind of like the idea of getting to get out of the house by myself, wander around the store and touch things. Ideas? World Market, Target, Home Goods, Satori, Moorea Seal, Ikea (These are just stores that I like shopping at that have local shops where I can go walk around).
I know Mother's Day is coming up quickly, but pretty much all of these gifts can be procured last minute (probably minus a vacay). And throwing in a nice note of appreciation can go a long way too. Oh and a mimosa. Happy Mother's Day!
photos of me + jack by sons and daughters photography
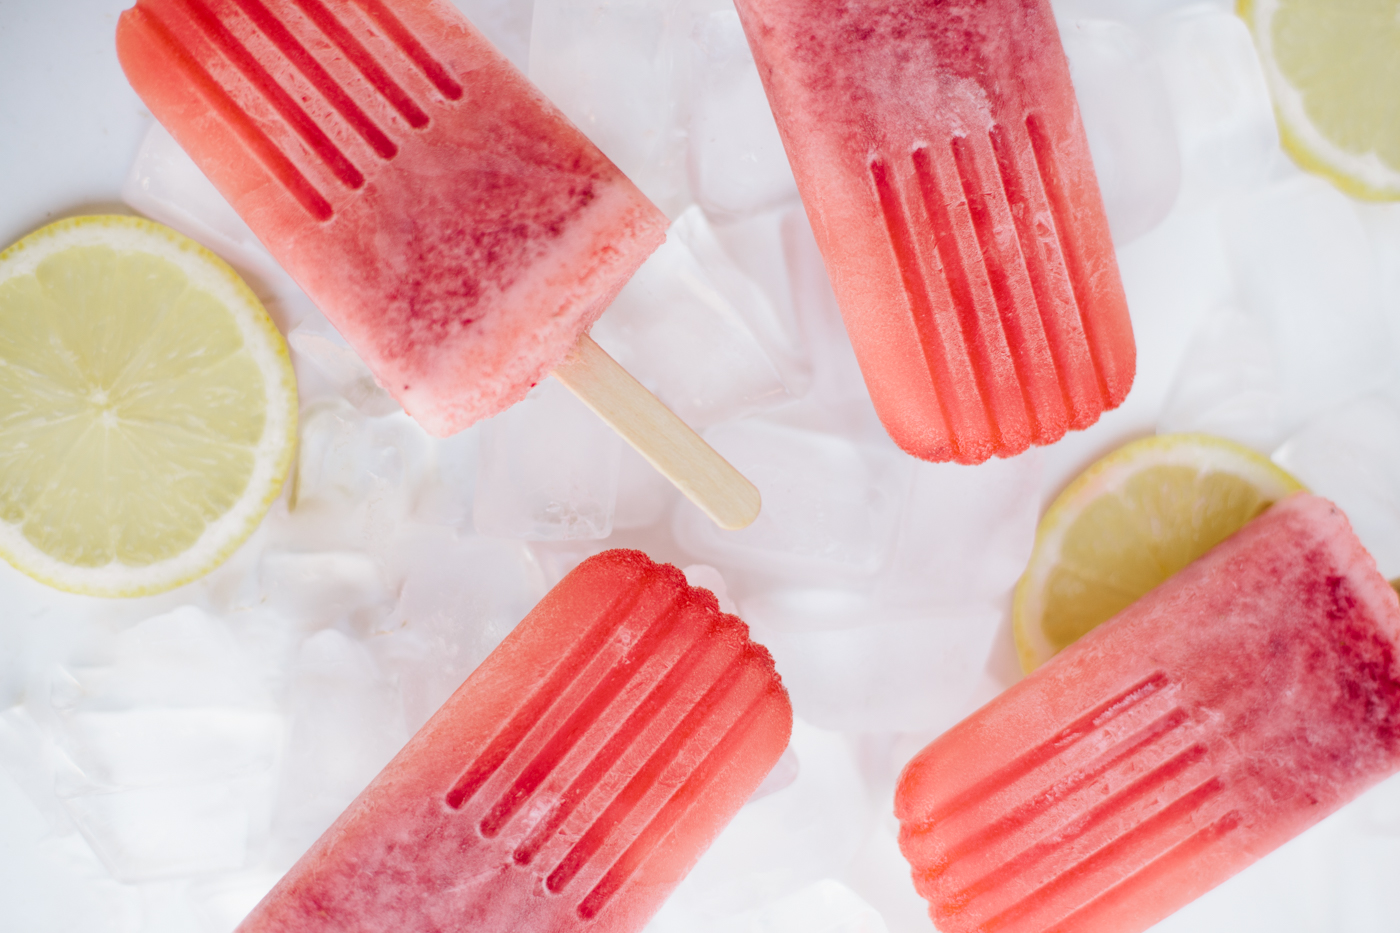
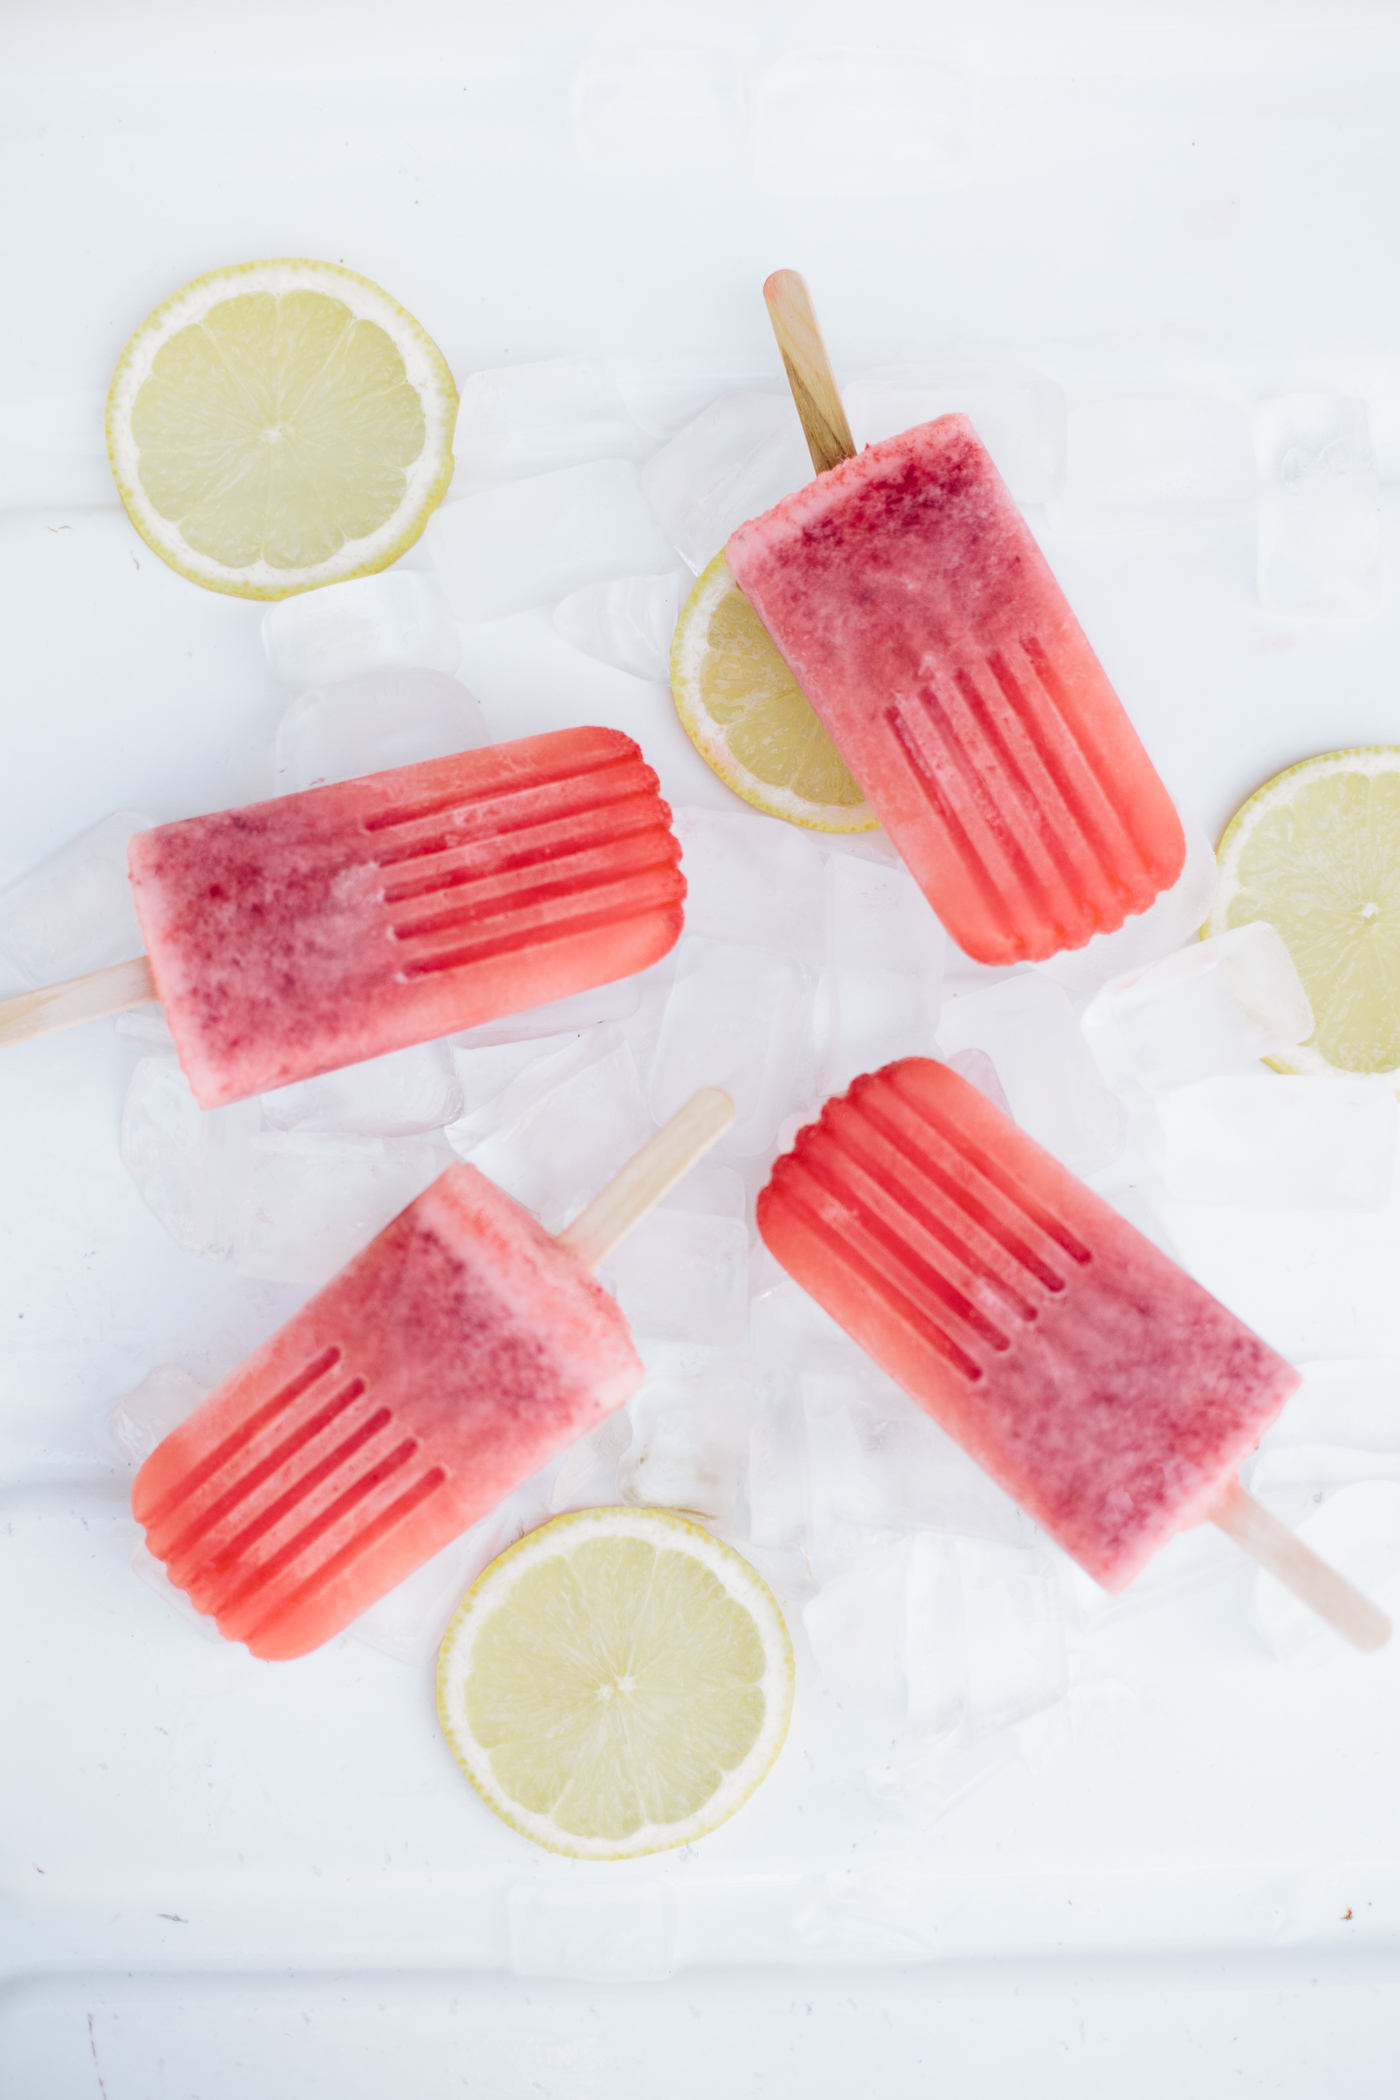
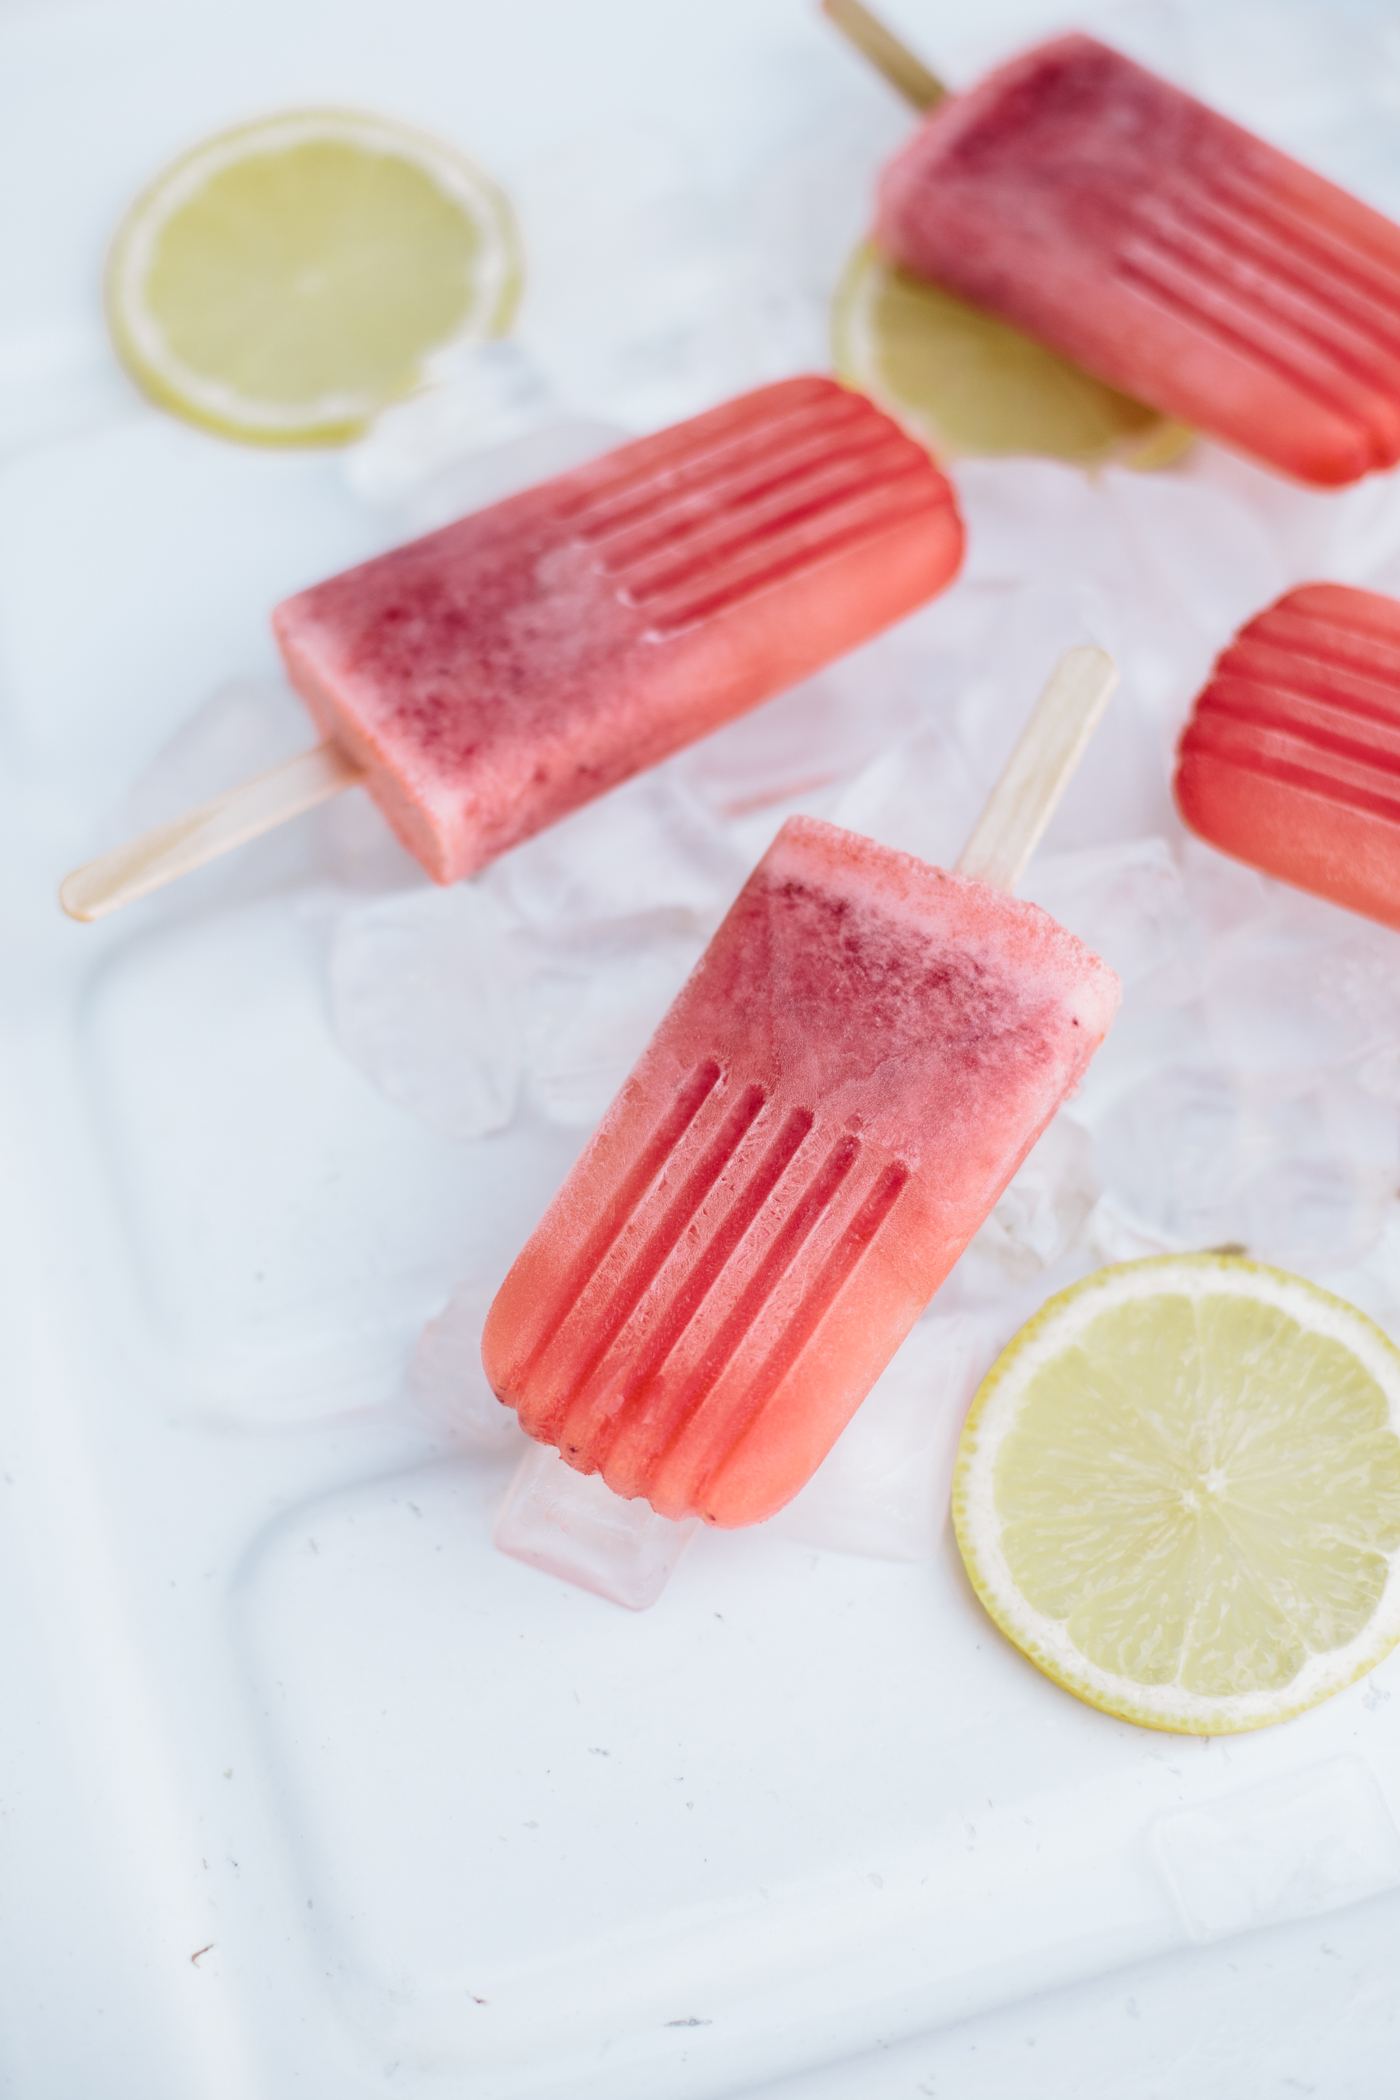
Strawberry Mango Lemonade Popsicles

I got these popsicle molds a few years ago and have rarely used them but this time of year when the days get hotter, I get really excited about making homemade popsicles and ice cream. I like the idea of homemade popsicles and being able to keep the amount of sugar in them pretty low. With there being lemonade in these ones they are pretty sweet but not overly sweet.
Jack is teething with some new molars right now so I wanted to make something icey that he could chew on and he really likes these. I'll probably try to make some other ones that are less sugary for him instead, but the texture is perfect for him to chew! Maybe this summer will be the summer of the popsicle!
Ingredients (makes 6 popsicles):
2 Cups Mango Lemonade
3 Strawberries
1/2 Banana
1/2 Cup Strawberry Banana Coconutmilk Yogurt
In a blender, blend everything together and then pour into your popsicle molds and insert the top with the sticks. Put them in the freezer and wait! I usually wait overnight but I'm sure a few hours would do the trick. Enjoy your summer frozen treat!

More Brunch!

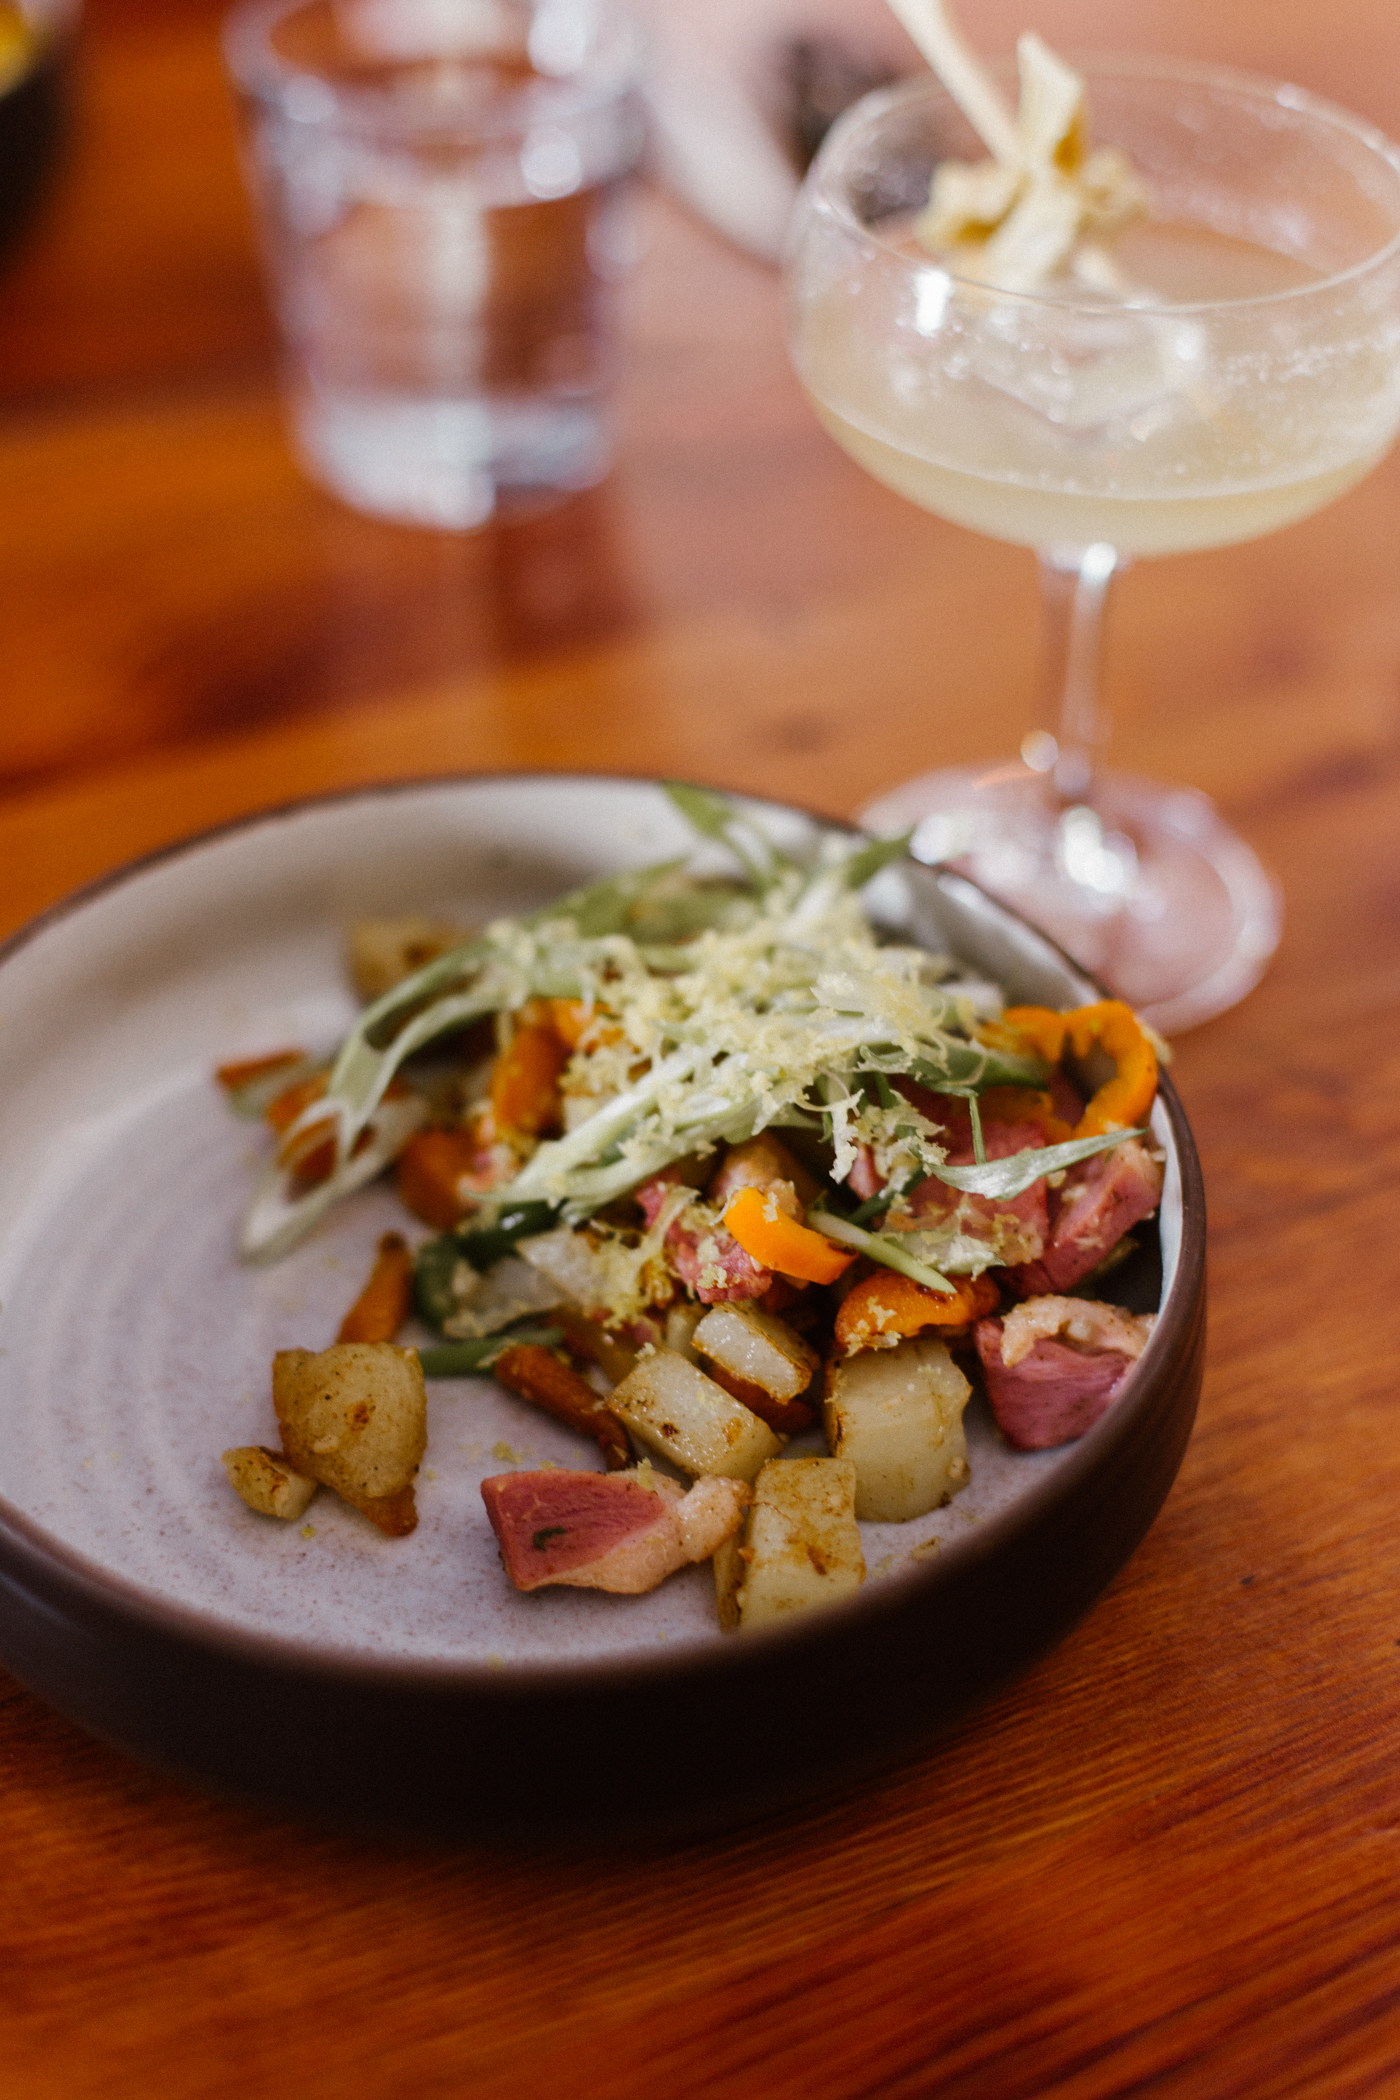
Another day, another brunch! This time we went down to the Downtown Tacoma Market at the old post office building and grabbed brunch at En Rama! They don't usually do brunch, even on weekends, but every time there's a downtown market, they do brunch! Luckily this time it fell on my friend Amy's birthday weekend so we got to head down for a special birthday brunch for her!
I love En Rama, and their drinks are amazing but the food is pricey and you don't get a lot of quantity. Which is why typically I don't eat there, simply because even though it tastes seriously incredible, I just want to go eat an entire meal after having just eaten. Which miiiight be what we ended up doing (tacos tho. So, it was like... lunch, so a totally different meal. clearly). Anyway, my advice: don't miss En Rama. But maybe eat first at home... and make sure you have a DD cuz the drinks are stiff (and amazing).

Hi, I’m Liz
I'm an artist, writer, designer, DIY renovator, and … well basically I like to do all the things. If it’s creative I’m probably doing it. I’ve spent over 30 years voraciously pursuing a life steeped in creativity and I wholeheartedly believe creativity and joy are inextricably linked.
Read more…


Explore The Archive
- January 2026
- July 2025
- May 2025
- January 2025
- December 2024
- August 2024
- July 2024
- May 2024
- April 2024
- January 2024
- December 2023
- October 2023
- September 2023
- July 2023
- June 2023
- May 2023
- April 2023
- March 2023
- February 2023
- January 2023
- December 2022
- November 2022
- October 2022
- August 2022
- June 2022
- May 2022
- April 2022
- March 2022
- November 2021
- October 2021
- August 2021
- July 2021
- May 2021
- January 2021
- November 2020
- October 2020
- September 2020
- August 2020
- July 2020
- June 2020
- May 2020
- April 2020
- February 2020
- January 2020
- November 2019
- October 2019
- August 2019
- July 2019
- June 2019
- May 2019
- April 2019
- February 2019
- January 2019
- December 2018
- November 2018
- October 2018
- September 2018
- August 2018
- July 2018
- June 2018
- May 2018
- April 2018
- February 2018
- January 2018
- November 2017
- September 2017
- August 2017
- July 2017
- June 2017
- May 2017
- April 2017
- March 2017
- February 2017
- January 2017
- December 2016
- November 2016
- October 2016
- September 2016
- August 2016
- June 2016
- May 2016
- April 2016
- March 2016
- February 2016
- January 2016
- December 2015
- November 2015
- October 2015
- September 2015
- August 2015
- July 2015
- June 2015
- May 2015
- April 2015
- March 2015
- February 2015
- January 2015
- December 2014
- November 2014
- October 2014
- September 2014
- August 2014
- July 2014
- June 2014
- May 2014
- April 2014
- March 2014
- February 2014
- January 2014
- December 2013
- November 2013
- October 2013
- September 2013
- August 2013
- July 2013
- June 2013
- May 2013
- April 2013
- March 2013
- February 2013
- January 2013
- December 2012
- November 2012
- October 2012
- September 2012
- August 2012
- July 2012
- June 2012
- May 2012
- April 2012
- March 2012
- February 2012
- January 2012
- December 2011
- November 2011
- October 2011
- September 2011
- August 2011
- July 2011
- June 2011
- May 2011
- April 2011
- March 2011
- February 2011
- January 2011
- December 2010
- November 2010
- October 2010
- September 2010
- August 2010
- July 2010
- June 2010
- May 2010
- April 2010
- March 2010
- February 2010
- January 2010
- December 2009
- November 2009
- October 2009
- September 2009
- August 2009
- July 2009
- June 2009
- May 2009
- April 2009
- March 2009
- February 2009
- January 2009
- December 2008
- November 2008
- October 2008
- September 2008
- August 2008
- July 2008

VISIT THE SHOP


PRIVACY POLICY & DISCLOSURE
We are a participant in the Amazon Services LLC Associates Program, an affiliate advertising program designed to provide a means for us to earn fees by linking to Amazon.com and affiliated sites.