Jack's big kid room
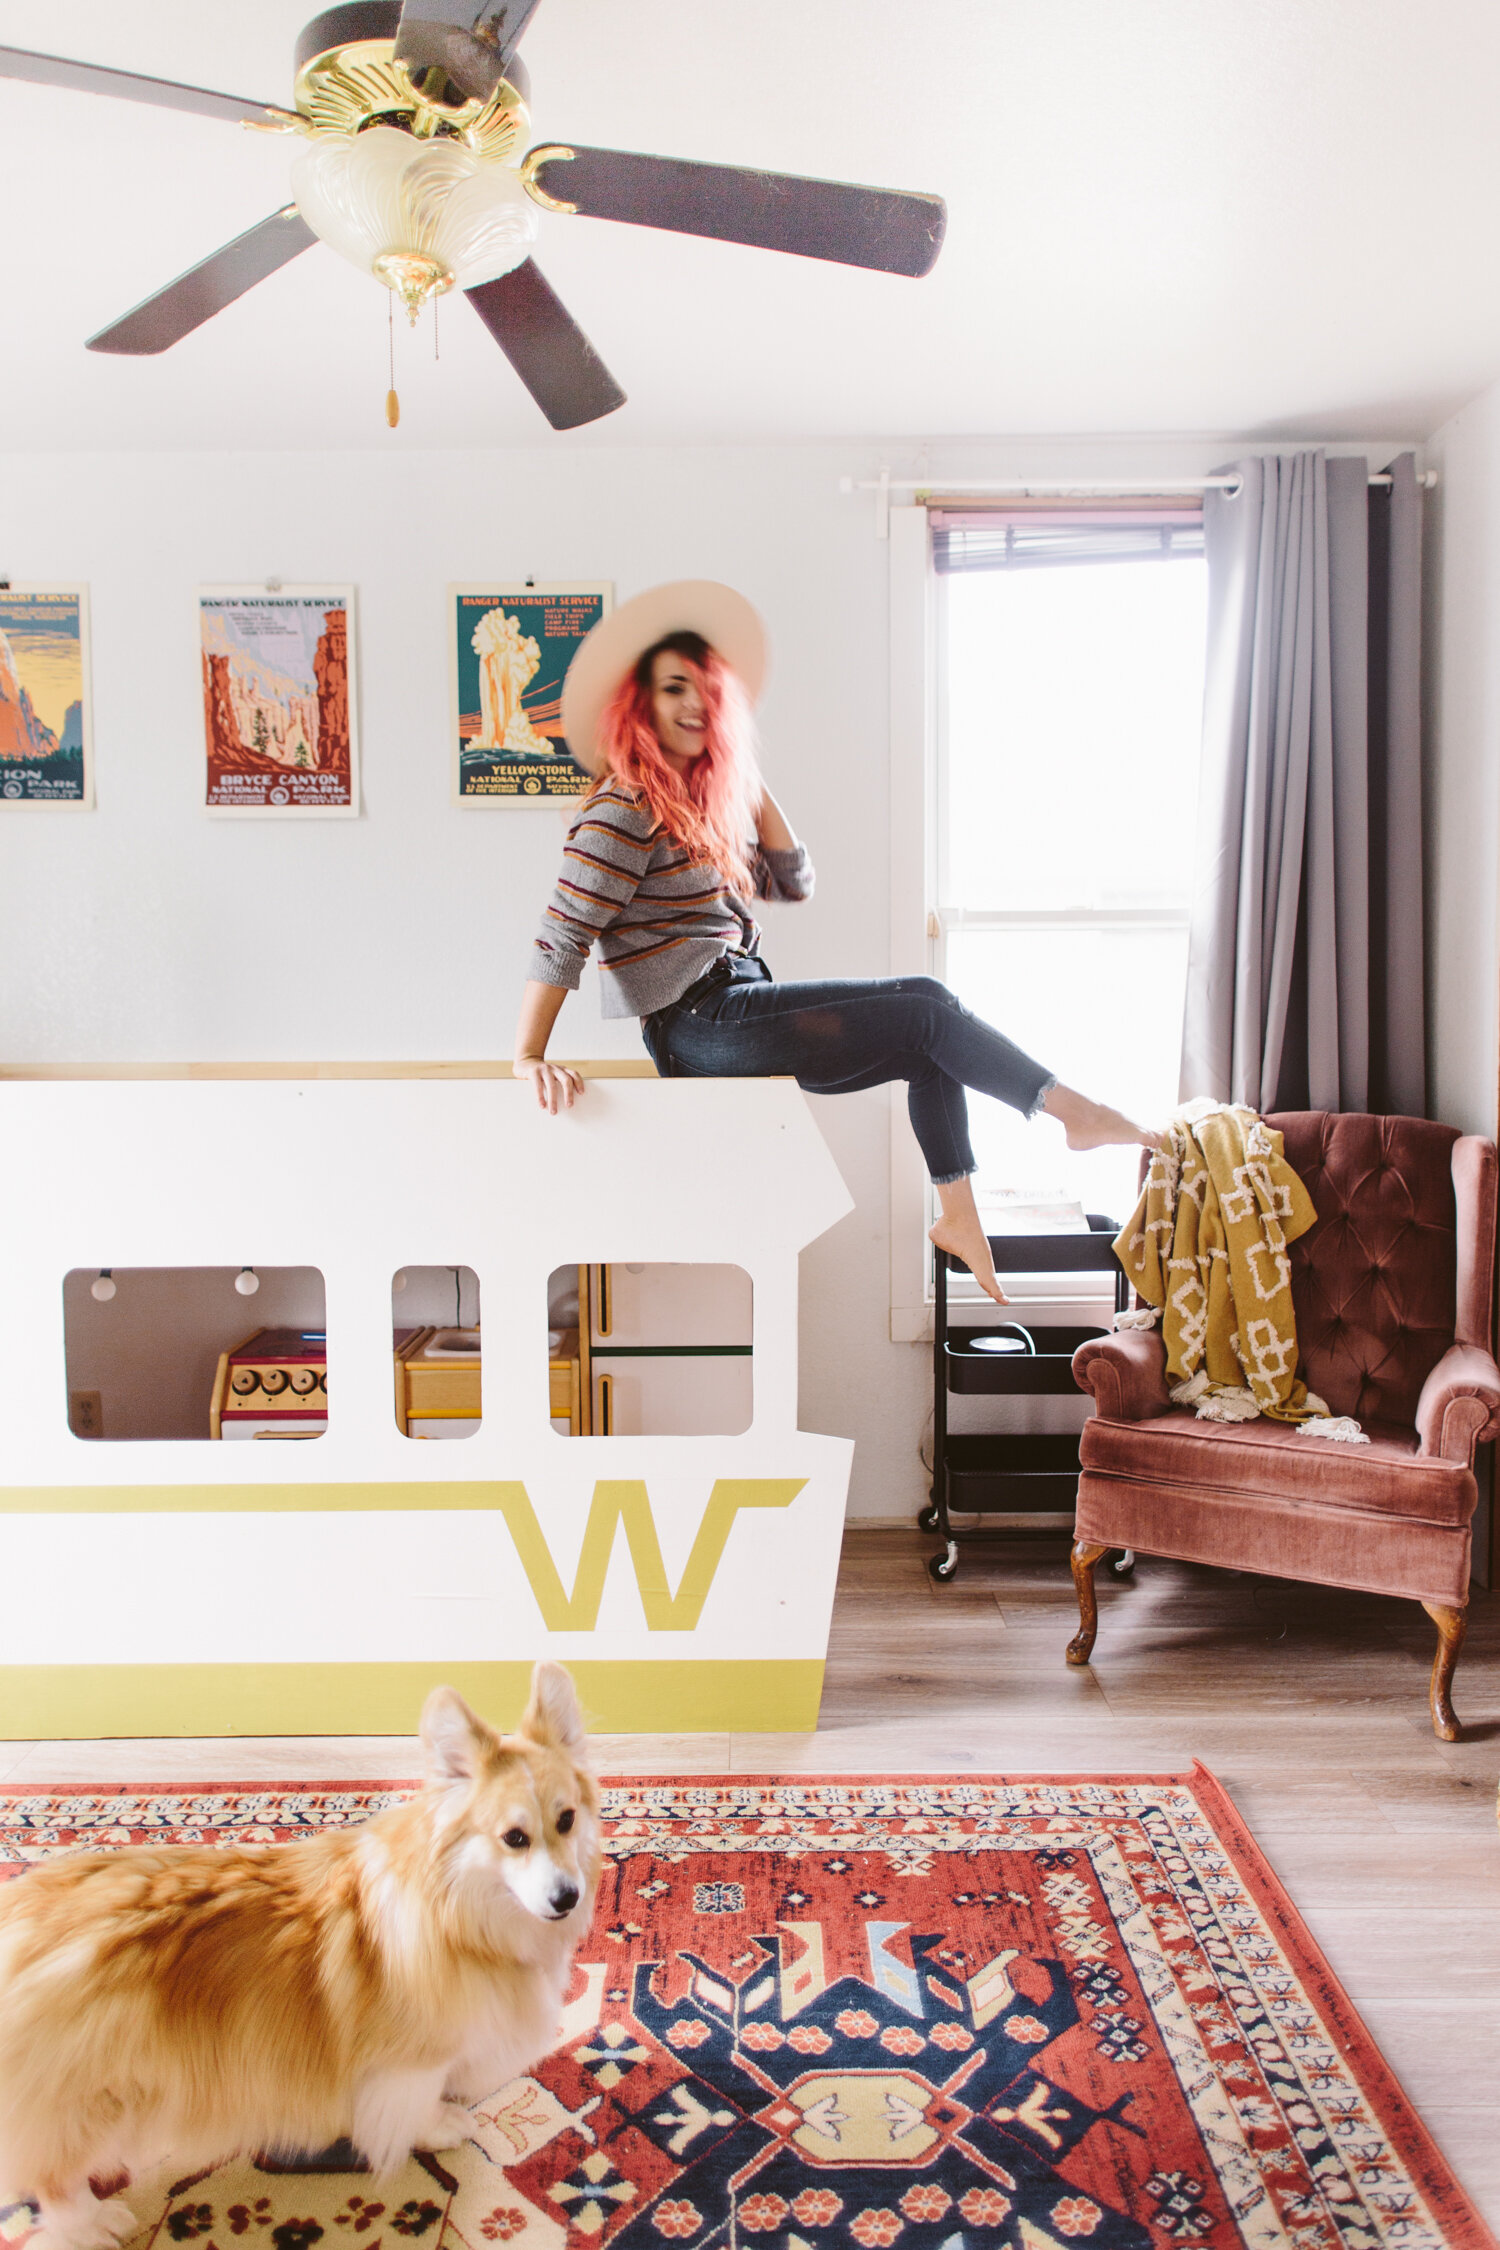
A little less than a year ago, shortly after we moved into this house, we transitioned Jack from a crib to a “big kid” bed. I got this Ikea bed planning on making it into a cute little house, but after sketching out a bunch of iterations, I realized that his bed needed to be a Winnie! Luckily by this time he was a little bit older and I flipped the bed into the loft configuration in order to turn it into his very own Mini Winnie! I had some plywood leftover from a project, cut it into the Winnie shape, cut out the windows, painted it, and then just screwed it to the side of the bed!
I hadn’t really set out on designing his room with a plan, but over time it turned into a sort of adventure room, which I love. I had a bunch of National Park posters from years past, so I put those up (still need to find some frames that fit them). I found a vintage map at a local vintage shop, and had the paper star lanterns from his newborn nursery (Jack’s middle name is Polaris, so his baby nursery had a subtle star theme).
There’s obviously some work to be done, we need to finish the trim throughout the house so his room is missing door and baseboard trim, but for the most part, everything else is almost there! I’d love to take the super dated ceiling fan down and do a DIY paint job that fits his room, maybe do a Hudson Bay blanket look on the fan blades? The yellow triangle was inspired by Erin Barrett (@sunwoven on insta, if you don’t follow, you must! Her house is gorg).
Like the rest of our house, most of Jack’s room is thrifted, with the exception of the Ikea bed and the rug, which is from Wayfair!
Sources:
Bed frame: Ikea Kura Bed | Rug: Wayfair | Red Ampersand : Modcloth (years ago, here are some similar options) | Letter Boards: Mini + Poet size from Letterfolk | Winnie Painting: by me | Shelving unit: thrifted (originally from Ikea) | Storage Bins: thrifted (similar metal bins) | Bookshelf: thrifted (similar) | Elephant Clothes Hamper: thrifted (similar) | Chairs: thrifted | Floor Pouf: c/o D+K Renewal
DIY Hanging Rope Shelf
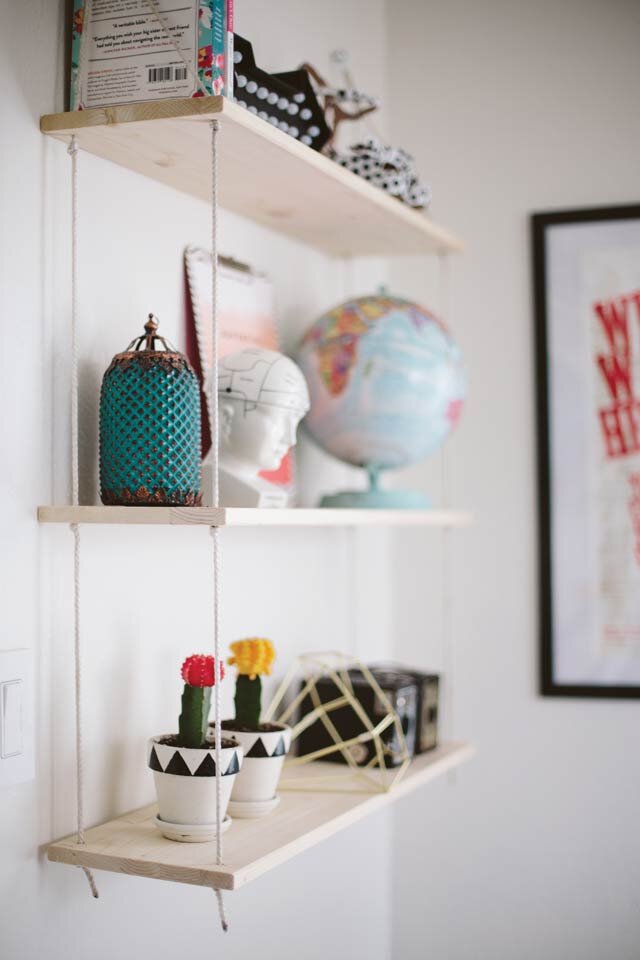
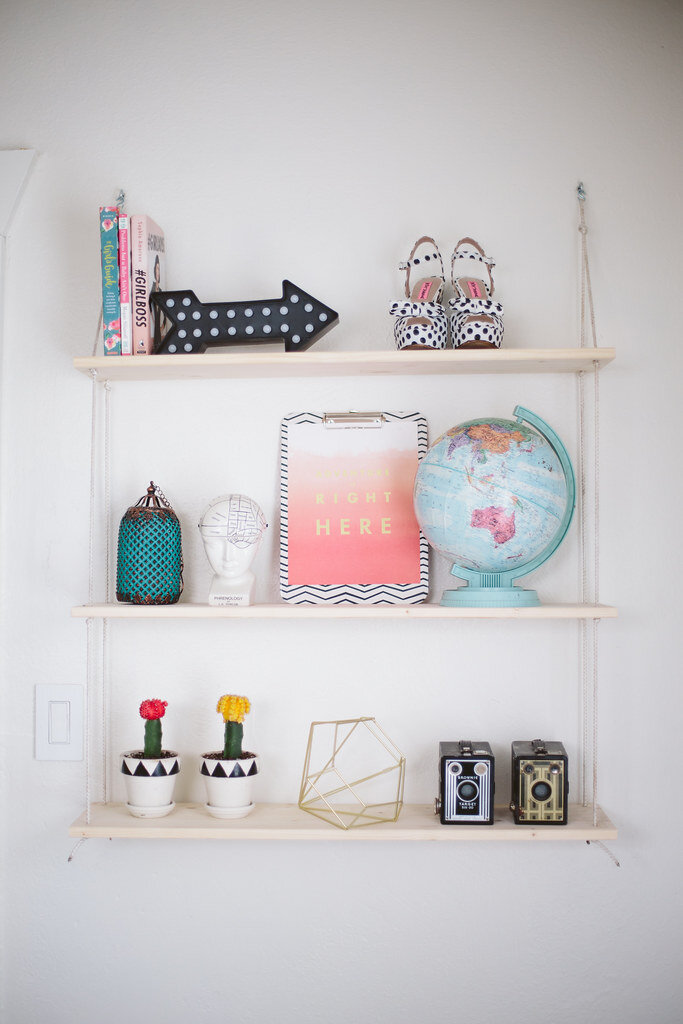
I made this shelf probably five or six years ago and it’s followed me around in all those years. I brought it over to our new house when we moved in last year and it’s just been sitting in Jack’s closet since then. Yesterday I finally decided to put it up, but then when I got some questions about it I realized I had never posted the DIY to my blog! So here it is!
What you’ll need:
Rope
Screw hooks and anchors
Wood planks
Drill
1/ Drill holes in the shelves in their four corners, about an inch in from the edges.
2/ Decide how far apart you want your shelves to hang from eachother. Cut a length of rope long enough to go from the bottom of the lowest shelf, up to the top of the shelves and back to the bottom, plus a couple of feet.
3/ Tie a knot at one end of the rope and push the other end through a corner hole on the first plank. Tie the next knot at the distance apart you decided to make your shelves and then push the end of the rope through the next shelf’s corresponding corner hole.
4/ Repeat with each shelf. When you reach the top shelf, create a looped knot at the top, forming a right triangle so the shelves hang level from the screw hook you’ll be hanging the shelves from.
5/ Now, take the rope down through the back holes in the shelves, tying knots at equal distances as the first set of knots so the shelves hang level. When you get back to the bottom knot, cut off the excess rope. Repeat with the second side.
6/ Measure the distance between the two rope sides to determine how far apart you’ll place your hooks. Decide how high you want the shelves to hang, then install your screw hooks. You might want to put anchors in, depending on what kind of walls you have and how heavy you predict the items on your shelf will be.
7/ Once the screw hooks are in, you can hang the shelf! Use a level to check that your shelves are straight. You may need to do some tweaking and raise/lower some of the knots to get everything perfectly level.
Quarantine Meal Planning Round Up
Since the start of quarantine, my meal planning has looked quite different. Or rather, I should say, I’m ACTUALLY meal-planning now. Like picking out recipes for the week or two weeks, then shopping for everything I need for those two weeks so I don’t have to go back to the grocery store for one thing I forgot, which is my usual Modus Operandi.
I don’t have the mental space to go out and scour the internet for recipes to make each week, but early on in the quarantine my friend sent over the Budget Bytes “15 Pantry Recipes for Emergency Preparedness” round up and since then I have been making recipes from Budget Bytes … like pretty much exclusively for the past two months.
I’ve asked on Instagram if you guys wanted me to round up my favorite recipes that I’ve tried (and most of these I’ve made multiple times!), so here they are!
Pasta Sauce
I had been using a similar recipe for pasta sauce from one of my old Hello Fresh meals, but this one is similar and so I’ve started using this one instead. The one thing I pulled over from the Hello Fresh recipe was to slice up 2 small zucchini’s into half-moon chunks and saute those with the onions. It adds a bit more to the sauce and makes it more substantial. Plus, I just like zucchini.
Tikka Masala
My house smelled AMAZING the whole day I was cooking this one. I have been meaning to make it again because I loved it a LOT.
Pineapple Teriyaki Chicken
This one is similar to the skillet pineapple chicken, but I dig pineapple and chicken so both are solid in my book.
Jerk Chicken with Pineapple Black Bean Salsa
I had never had Jerk Chicken before and it was bomb. The pineapple black bean salsa was super delicious and added a nice flavor dynamic.
Skillet Pineapple Chicken
I’ve made this one maybe three times in the past two months? It’s so good and so easy.
Slow Cooker 5 Spice Chicken
We just made this one a couple days ago! Another chicken flavor I had not tried before. Another that made my house smell delicious all day.
Thai Chicken Pizza
I love Thai Chicken Pizza, and this one was fun because I made my own Naan bread for the crusts!
King Ranch Chicken Casserole
I love a good casserole. Mostly I love having hella leftovers and not having to cook the next day. This one was real tasty. I’d never had King Ranch Casserole before, but I was into it. Making it again this week!
Creamy Salsa Chicken Skillet
This one was so delicious. So many good flavors, and I’m always down for a sprinkle of Queso Fresco. This one is solid and is added to my will-make-again-many-times roster.
One Pot Creamy Cajun Chicken Pasta
This one was recommended by an instagram follower of mine who also loves Budget Bytes’ recipes. I’m not typically a big pasta fan, so I don’t think to make it too often, but I loved the Cajun flavor and creaminess of this recipe. Plus: leftovers!
Lemon Blueberry Cornbread Skillet
I just made this one today, because I just happened to have everything on hand for it! I love cornbread and this is a more dessert-y version that I will probably eat for breakfast for the rest of the week (if it lasts that long).
all images via Budget Bytes, except cornbread images
ORC Week 2: Master Bath Progress!
Progress! this was one of the few rooms in the house that actually got down to the studs. We had to take out the whole left half of the room where the old (tiny, gross) shower, and the (stupidly deep) linen closet were. We were lucky to find a shower pan that was the exact dimensions we needed for the space, which was kind of amazing because it’s not really the most common size, but Home Depot had ONE that came in that size. Huzzah! We contemplated doing a tiled shower floor but it just felt a little frustrating to figure out so we decided to just simplify things and go for the shower pan.
We had to add a layer of OSB subfloor to beef up the floor so it’d be sturdy enough to take the tile, and once that was done we were able to finally lay tile!!! I’m so in love with the black hex tile we got. It was surprisingly affordable, but still had the exact look I wanted.
When I bought the mirror, I did not realize that the brass was a slightly different tone than the brass sconces I’d ordered. The mirror was going to be right between the two sconces so having it be a different shade of brass (way more yellow-toned) was definitely going to be waaay too clashy, so I just grabbed my trusty spray paint, masked off the mirror, and after a few minutes it was the perfect color.
I knew I wanted to do a “barn door” because we were eliminating the pocket door, but didn’t want to take up precious floor space in the small bedroom with a swinging door. Since there’s nothing about this home that says “farmhouse,” a barn-y barn door wouldn’t fly. I found this reclaimed french door from Earthwise Salvage here in Tacoma and knew it’d be the perfect fit. I’m going to paint it black so it stands out against the white wall and really pops!
I ordered the barn door hardware from Amazon and it was pretty easy to install! The locations where the lag bolts go are not moveable, and since the studs on that wall are in pretty odd locations I did have to add backing in a few spots, but luckily we hadn’t put up drywall in the bathroom yet, so that was easy peasy.
Next up on the project is to update the shower valve to a modern pressure balanced valve so we can put up the wonderboard on that wall, and then tile the shower surround!
Make sure to check out the ORC blog to see all the other room transformations!
ORC Week 1: Our Master Bath Before!
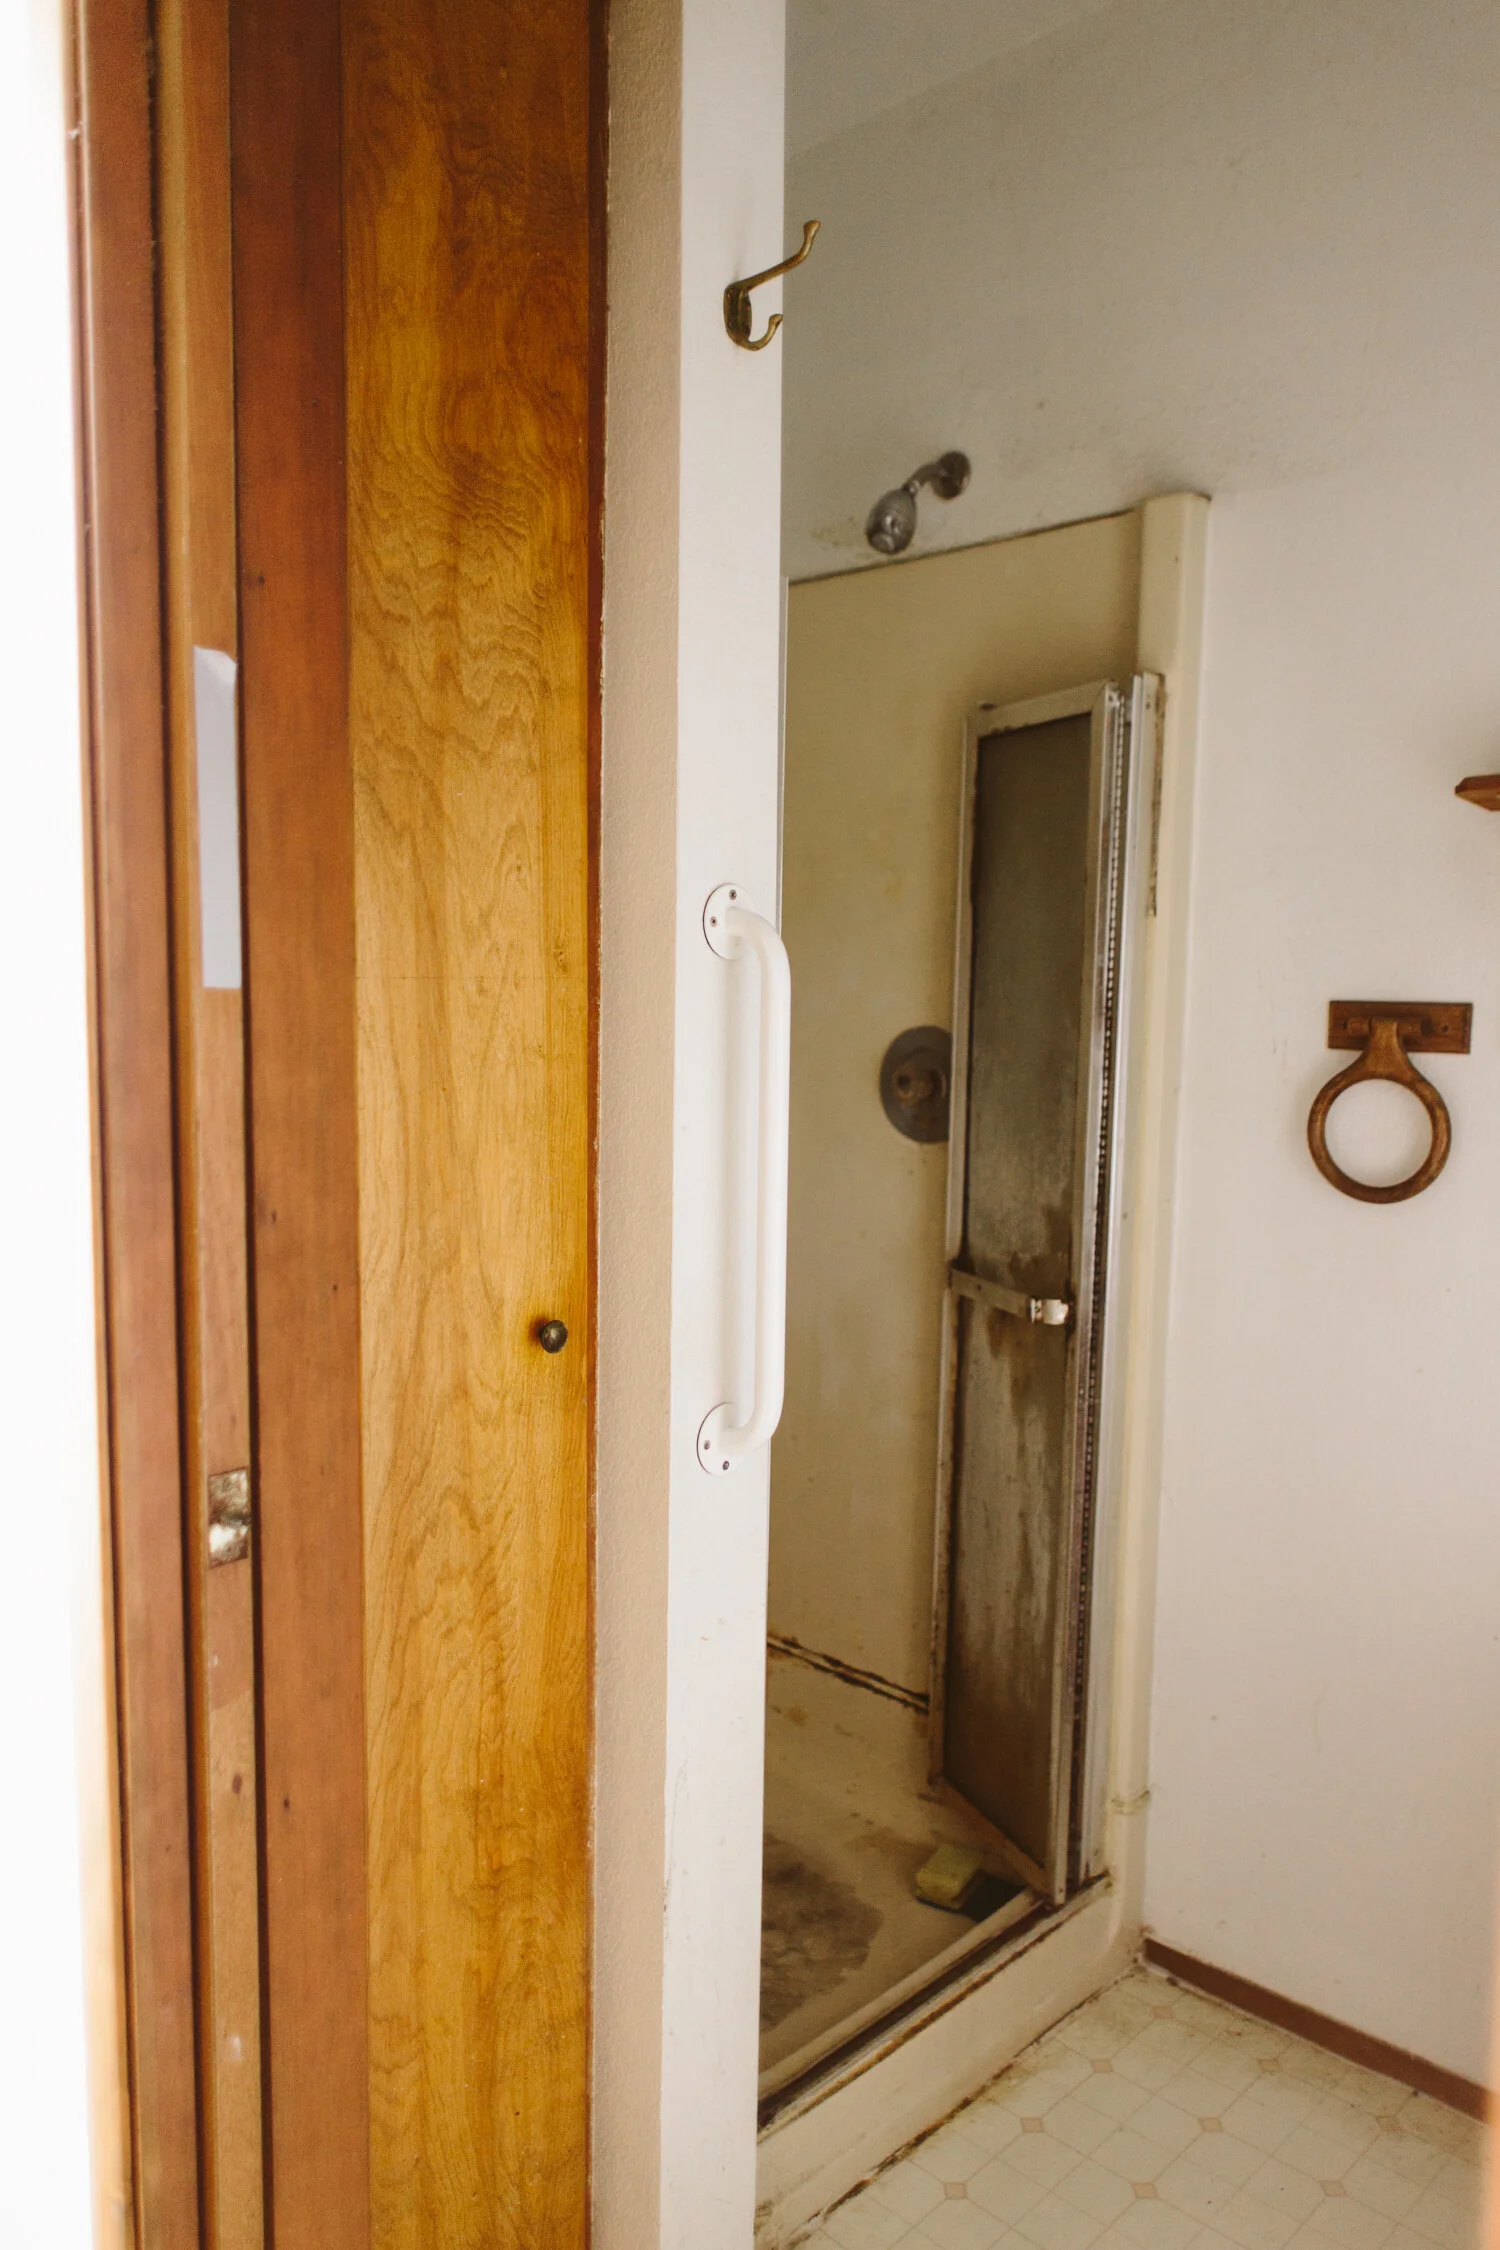
Our Master bath was the one room that we really needed to gut completely and start from scratch. It had a disgusting 3x3ft shower, with a tiny linen closet next to it, an itty bitty vanity and the toilet sat smack dab in the door way. Whoever designed this space was completely insane. We didn’t have the budget to move a bunch of plumbing around, so we are working with what we’ve got for the most part (yes, including the toilet location).
Originally, this bathroom really didn’t feel at all like a “master” bath. It feels like the dingy basement bathroom from my college duplex, only less spacious. So while we couldn’t do a ton with the layout of the space, we could make it feel more like a nice bathroom that was designed in this decade.
Like, you guys, it kind of even gives me the heebie-jeebies just looking at these pictures. There are so many things about this house that made me a little stunned that humans were living here right before we bought it, but this bathroom was definitely high on that list.
We’re also removing the pocket door, and moving the doorway slightly to the left so that the toilet isn’t RIGHT in the middle of the doorway. Look, I love my husband, but I’d rather not have a direct line of sight to him taking a dump while I’m laying in bed. But that’s just me. Taking out the pocket door also allows us to beef up that wall where the pocket was for the door, so it’s sturdy enough to take the tile that we’ll be putting on the shower surround. We still really need a sliding door since our bedroom isn’t very big and a traditional door will take up too much space, so we’re putting in a sliding barn door instead. I got a vintage french door, which I’ll be rehabbing and doing a faux mercury glass treatment on the glass panes for privacy.
Next to the shower was a tiny, 3ft deep linen closet which felt minimally useful, so we decided to tear out that whole side of the room and instead put a walk-in shower. Originally I wanted to do a penny tile floor for the shower, but it ended up being a lot of work to do all that ourselves, so instead we bought a pre-made shower pan that fit the space perfectly. It’s not fancy, so I’m going to make a teak slat floor for the shower that will fit right on top of the shower pan and make things feel way more “spa” like.
The flooring will be completely replaced with large black hex tile, and we are moving the vanity to be on the wall opposite the doorway, next to the shower. Since the shower entrance will now be where the linen closet used to be, we can utilize that wall for a vanity with way more counter space. We’re putting up a gorgeous brass hexagonal mirror and two brass sconces on either side of the mirror!
I’m so excited to have a functional bathroom in our master! We have a second full bath in the house, so we haven’t “needed” it, but it’s going to be SO nice to have a space of our own.
Check out the other One Room Challenge posts!
Hi, I’m Liz
I'm an artist, writer, designer, DIY renovator, and … well basically I like to do all the things. If it’s creative I’m probably doing it. I’ve spent over 30 years voraciously pursuing a life steeped in creativity and I wholeheartedly believe creativity and joy are inextricably linked.
Read more…
Explore The Archive
- January 2025
- December 2024
- August 2024
- July 2024
- May 2024
- April 2024
- January 2024
- December 2023
- October 2023
- September 2023
- July 2023
- June 2023
- May 2023
- April 2023
- March 2023
- February 2023
- January 2023
- December 2022
- November 2022
- October 2022
- August 2022
- June 2022
- May 2022
- April 2022
- March 2022
- November 2021
- October 2021
- August 2021
- July 2021
- May 2021
- January 2021
- November 2020
- October 2020
- September 2020
- August 2020
- July 2020
- June 2020
- May 2020
- April 2020
- February 2020
- January 2020
- November 2019
- October 2019
- August 2019
- July 2019
- June 2019
- May 2019
- April 2019
- February 2019
- January 2019
- December 2018
- November 2018
- October 2018
- September 2018
- August 2018
- July 2018
- June 2018
- May 2018
- April 2018
- February 2018
- January 2018
- November 2017
- September 2017
- August 2017
- July 2017
- June 2017
- May 2017
- April 2017
- March 2017
- February 2017
- January 2017
- December 2016
- November 2016
- October 2016
- September 2016
- August 2016
- June 2016
- May 2016
- April 2016
- March 2016
- February 2016
- January 2016
- December 2015
- November 2015
- October 2015
- September 2015
- August 2015
- July 2015
- June 2015
- May 2015
- April 2015
- March 2015
- February 2015
- January 2015
- December 2014
- November 2014
- October 2014
- September 2014
- August 2014
- July 2014
- June 2014
- May 2014
- April 2014
- March 2014
- February 2014
- January 2014
- December 2013
- November 2013
- October 2013
- September 2013
- August 2013
- July 2013
- June 2013
- May 2013
- April 2013
- March 2013
- February 2013
- January 2013
- December 2012
- November 2012
- October 2012
- September 2012
- August 2012
- July 2012
- June 2012
- May 2012
- April 2012
- March 2012
- February 2012
- January 2012
- December 2011
- November 2011
- October 2011
- September 2011
- August 2011
- July 2011
- June 2011
- May 2011
- April 2011
- March 2011
- February 2011
- January 2011
- December 2010
- November 2010
- October 2010
- September 2010
- August 2010
- July 2010
- June 2010
- May 2010
- April 2010
- March 2010
- February 2010
- January 2010
- December 2009
- November 2009
- October 2009
- September 2009
- August 2009
- July 2009
- June 2009
- May 2009
- April 2009
- March 2009
- February 2009
- January 2009
- December 2008
- November 2008
- October 2008
- September 2008
- August 2008
- July 2008
VISIT THE SHOP
PRIVACY POLICY & DISCLOSURE
We are a participant in the Amazon Services LLC Associates Program, an affiliate advertising program designed to provide a means for us to earn fees by linking to Amazon.com and affiliated sites.


