

Kitchen Mural Reveal | Tacoma Mural Artist

After I built out this laundry room in the awkward corner of our kitchen, I knew the wall wanted to have some kind of statement on it. But dang did it take forever to figure out what that statement was going to be. This design was actually inspired by a tile design where each square tile had a quarter circle on it, when meant you could completely customize the design. So I pulled a pic of this spot into photoshop and played around with quarter circles until I landed on something that felt good.
But my favorite element came later. I had been seeing this orange color around and I knew I wanted to incorporate it into the house. My original plan was for the french doors to be painted black, but then a bell went off in my head and I knew they had to be orange. I grabbed a paint chip (which ended up being the exact same color as Home Depot’s signature orange, haha) and bought a little paint sample (a paint sample size is usually enough to paint a door— and they’re only a couple bucks!). A few hours later the doors were orange and it MADE the space.
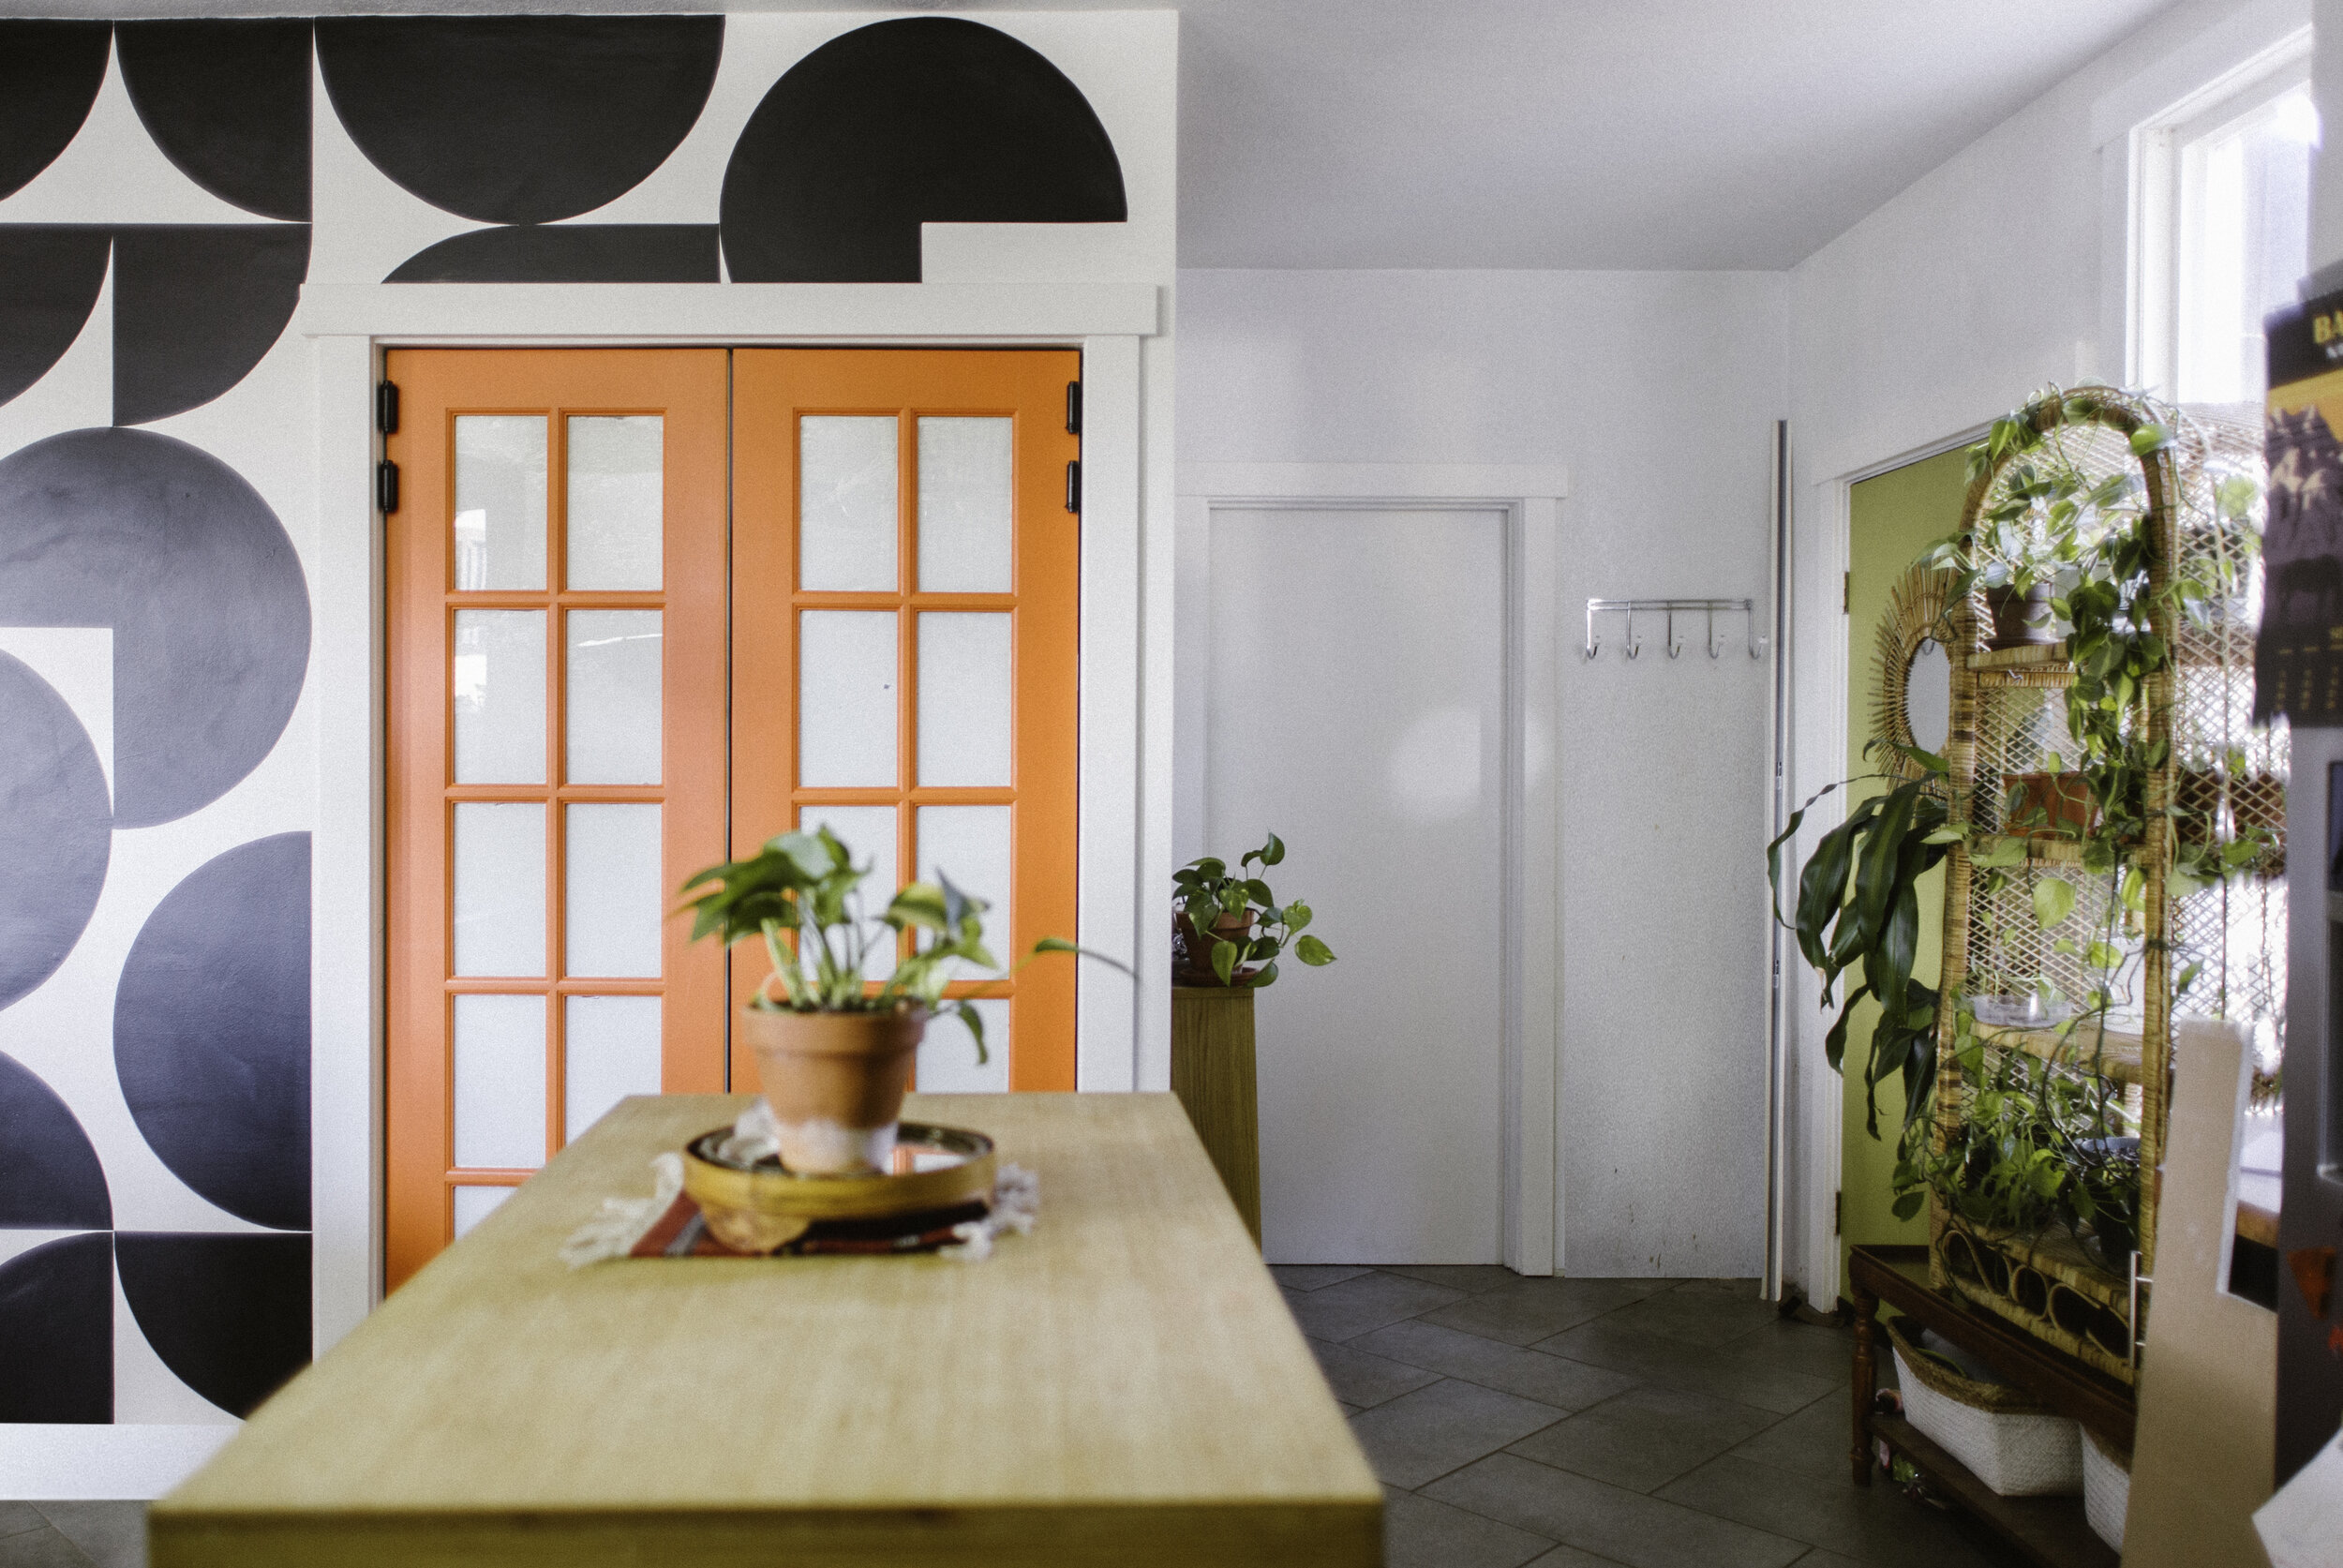
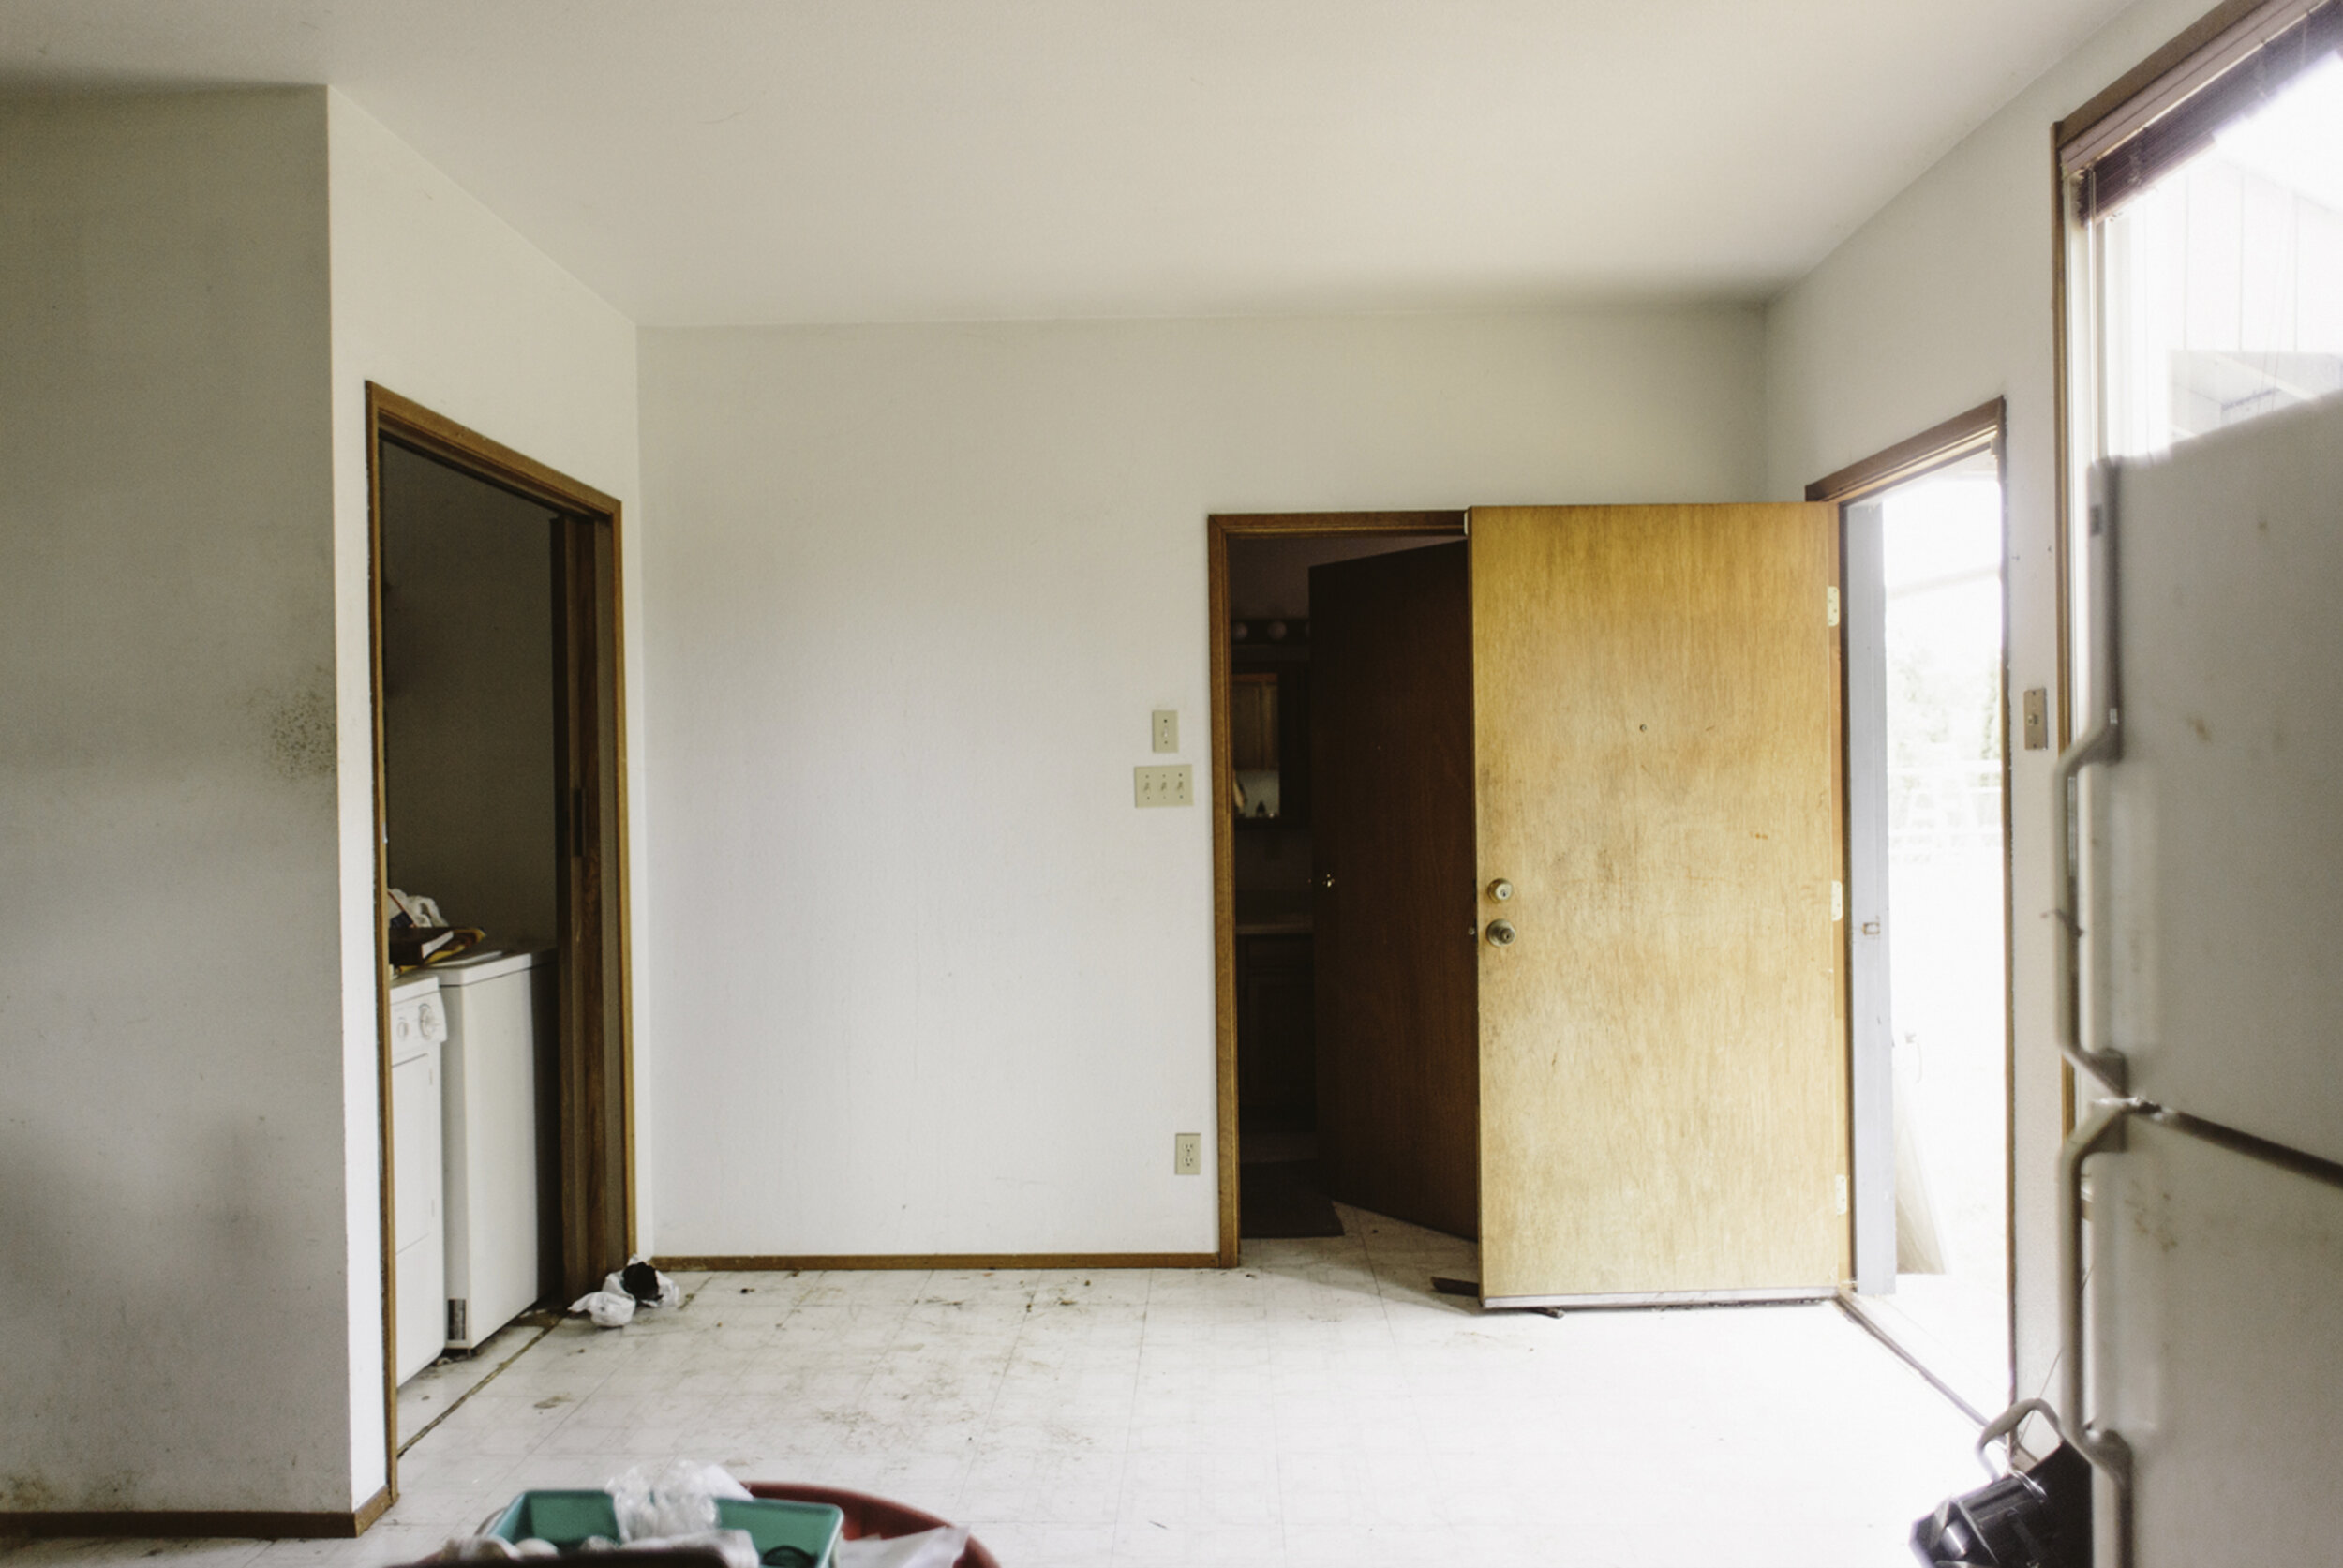
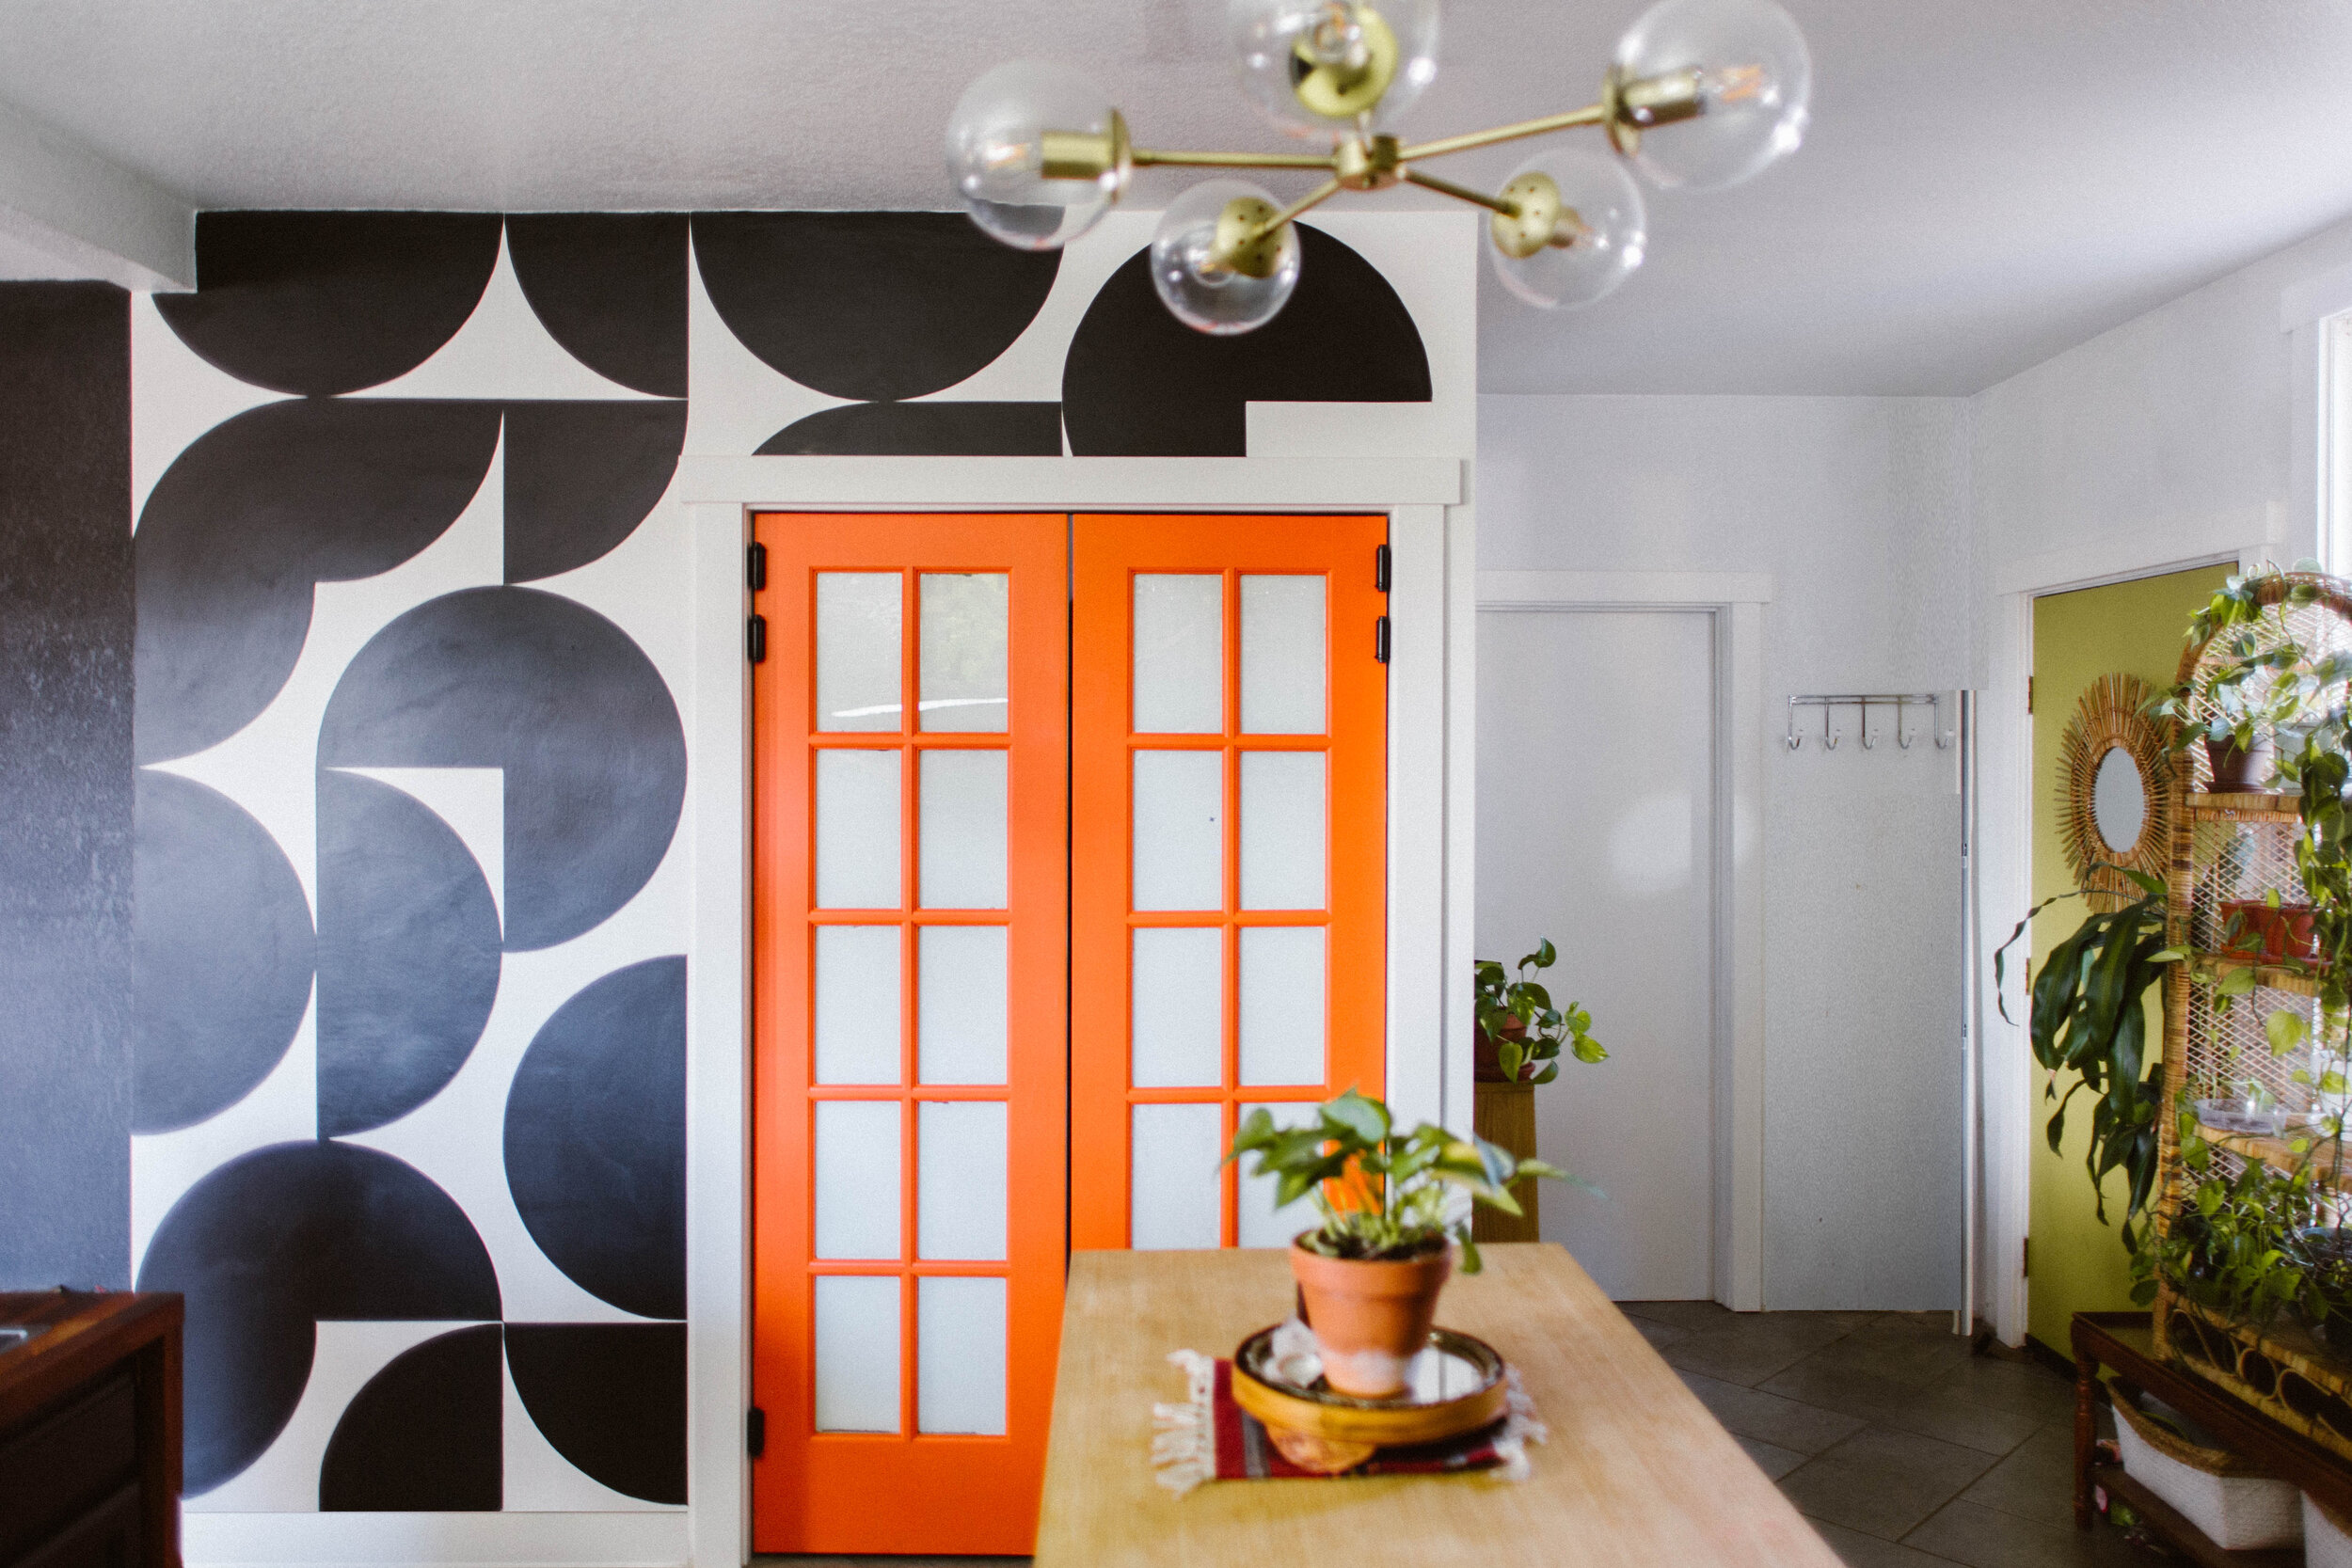
It’s so wild to look at the before pic and see that sad corner with the laundry closet. The space planning in this house by whoever built it is down right bananas, folks. Like… was that supposed to be a breakfast nook? It didn’t feel big enough for a table there, but it’s still a lot of square feet of wasted space. Now we have a laundry room with added cabinetry for storage, a more defined rear entry area for dropping keys, coats, etc, and they functionality and flow through the space isn’t impacted whatsoever.
Now… I just have to finish the final details on the inside of the laundry room…

DIY Fireside Cooler Table Tutorial

There’s not much I love more than enjoying a cold beverage while sitting beside a campfire. We’ve been needing a side table for our fire pit area for a while now, so instead of building a regular table, I made one that houses our little cooler! Now we can have ice cold bevs on hand while we’re enjoying the backyard!
Want to build your own cooler table? Just follow the tutorial below!
You’ll need:
A cooler
Drill
18 gauge brad nailer
Cedar 1x4s
1x2s
Cedar fence boards (lumber quantities will depend on the size of the cooler you’re building the table around)
2in exterior screws
1 1/4 in exterior screws
3/4 in screws
Flat metal plates
Small hinges

Step 1:
Make the corner uprights
Cut your cedar 1x4s into eight 22in lengths (or longer if you want your table higher). These will be the corners of your table. Drill pilot holes and then screw them together in an “L” at a right angle using 2 in exterior screws. I put 3 screws in each.

Step 2:
Make the basic structure
Attach 1x2s to the corner pieces to connect them all together. This will be what the platform for your cooler sits on, so you’ll want to measure the height of your cooler, and then add a half inch— that’s how far down from the top of the corner pieces you’ll attach these 1x2s. The length and depth of your table will depend on the size of your cooler. I’d measure the short side 1x2s to be about an inch larger than your cooler’s depth. If you want to have a table section that doesn’t open (like mine), measure the width of your cooler and add about 10-12inches. This will how long you want your long side 1x2’s to be. Drill pilot holes in the 1x2s before screwing them to the corner pieces and then attach wth 1 1/4 in exterior screws.

Step 3:
Create the platform for the cooler
Cut cedar fence board that span across and rest on top of the 1x2s. This will be the platform that your cooler sits on. Use an 18 guage brad nailer to attach the boards to the 1x2’s
(image is viewing from the top down)

Step 4:
Create an interior wall to secure the cooler
This step is probably unnecessary, but I wanted to create a little barrier so the cooler didn’t scoot over under where the table top doesn’t hinge open. This just keeps the cooler snug in it’s spot. I did this by framing a barrier using 1x2s (which is what I had on hand), but you could also just add another cedar 1x4 to the outside of the platform base 1x2s and then do a cedar fence board across the top from front to back.

Step 5:
Wrap the top of the table
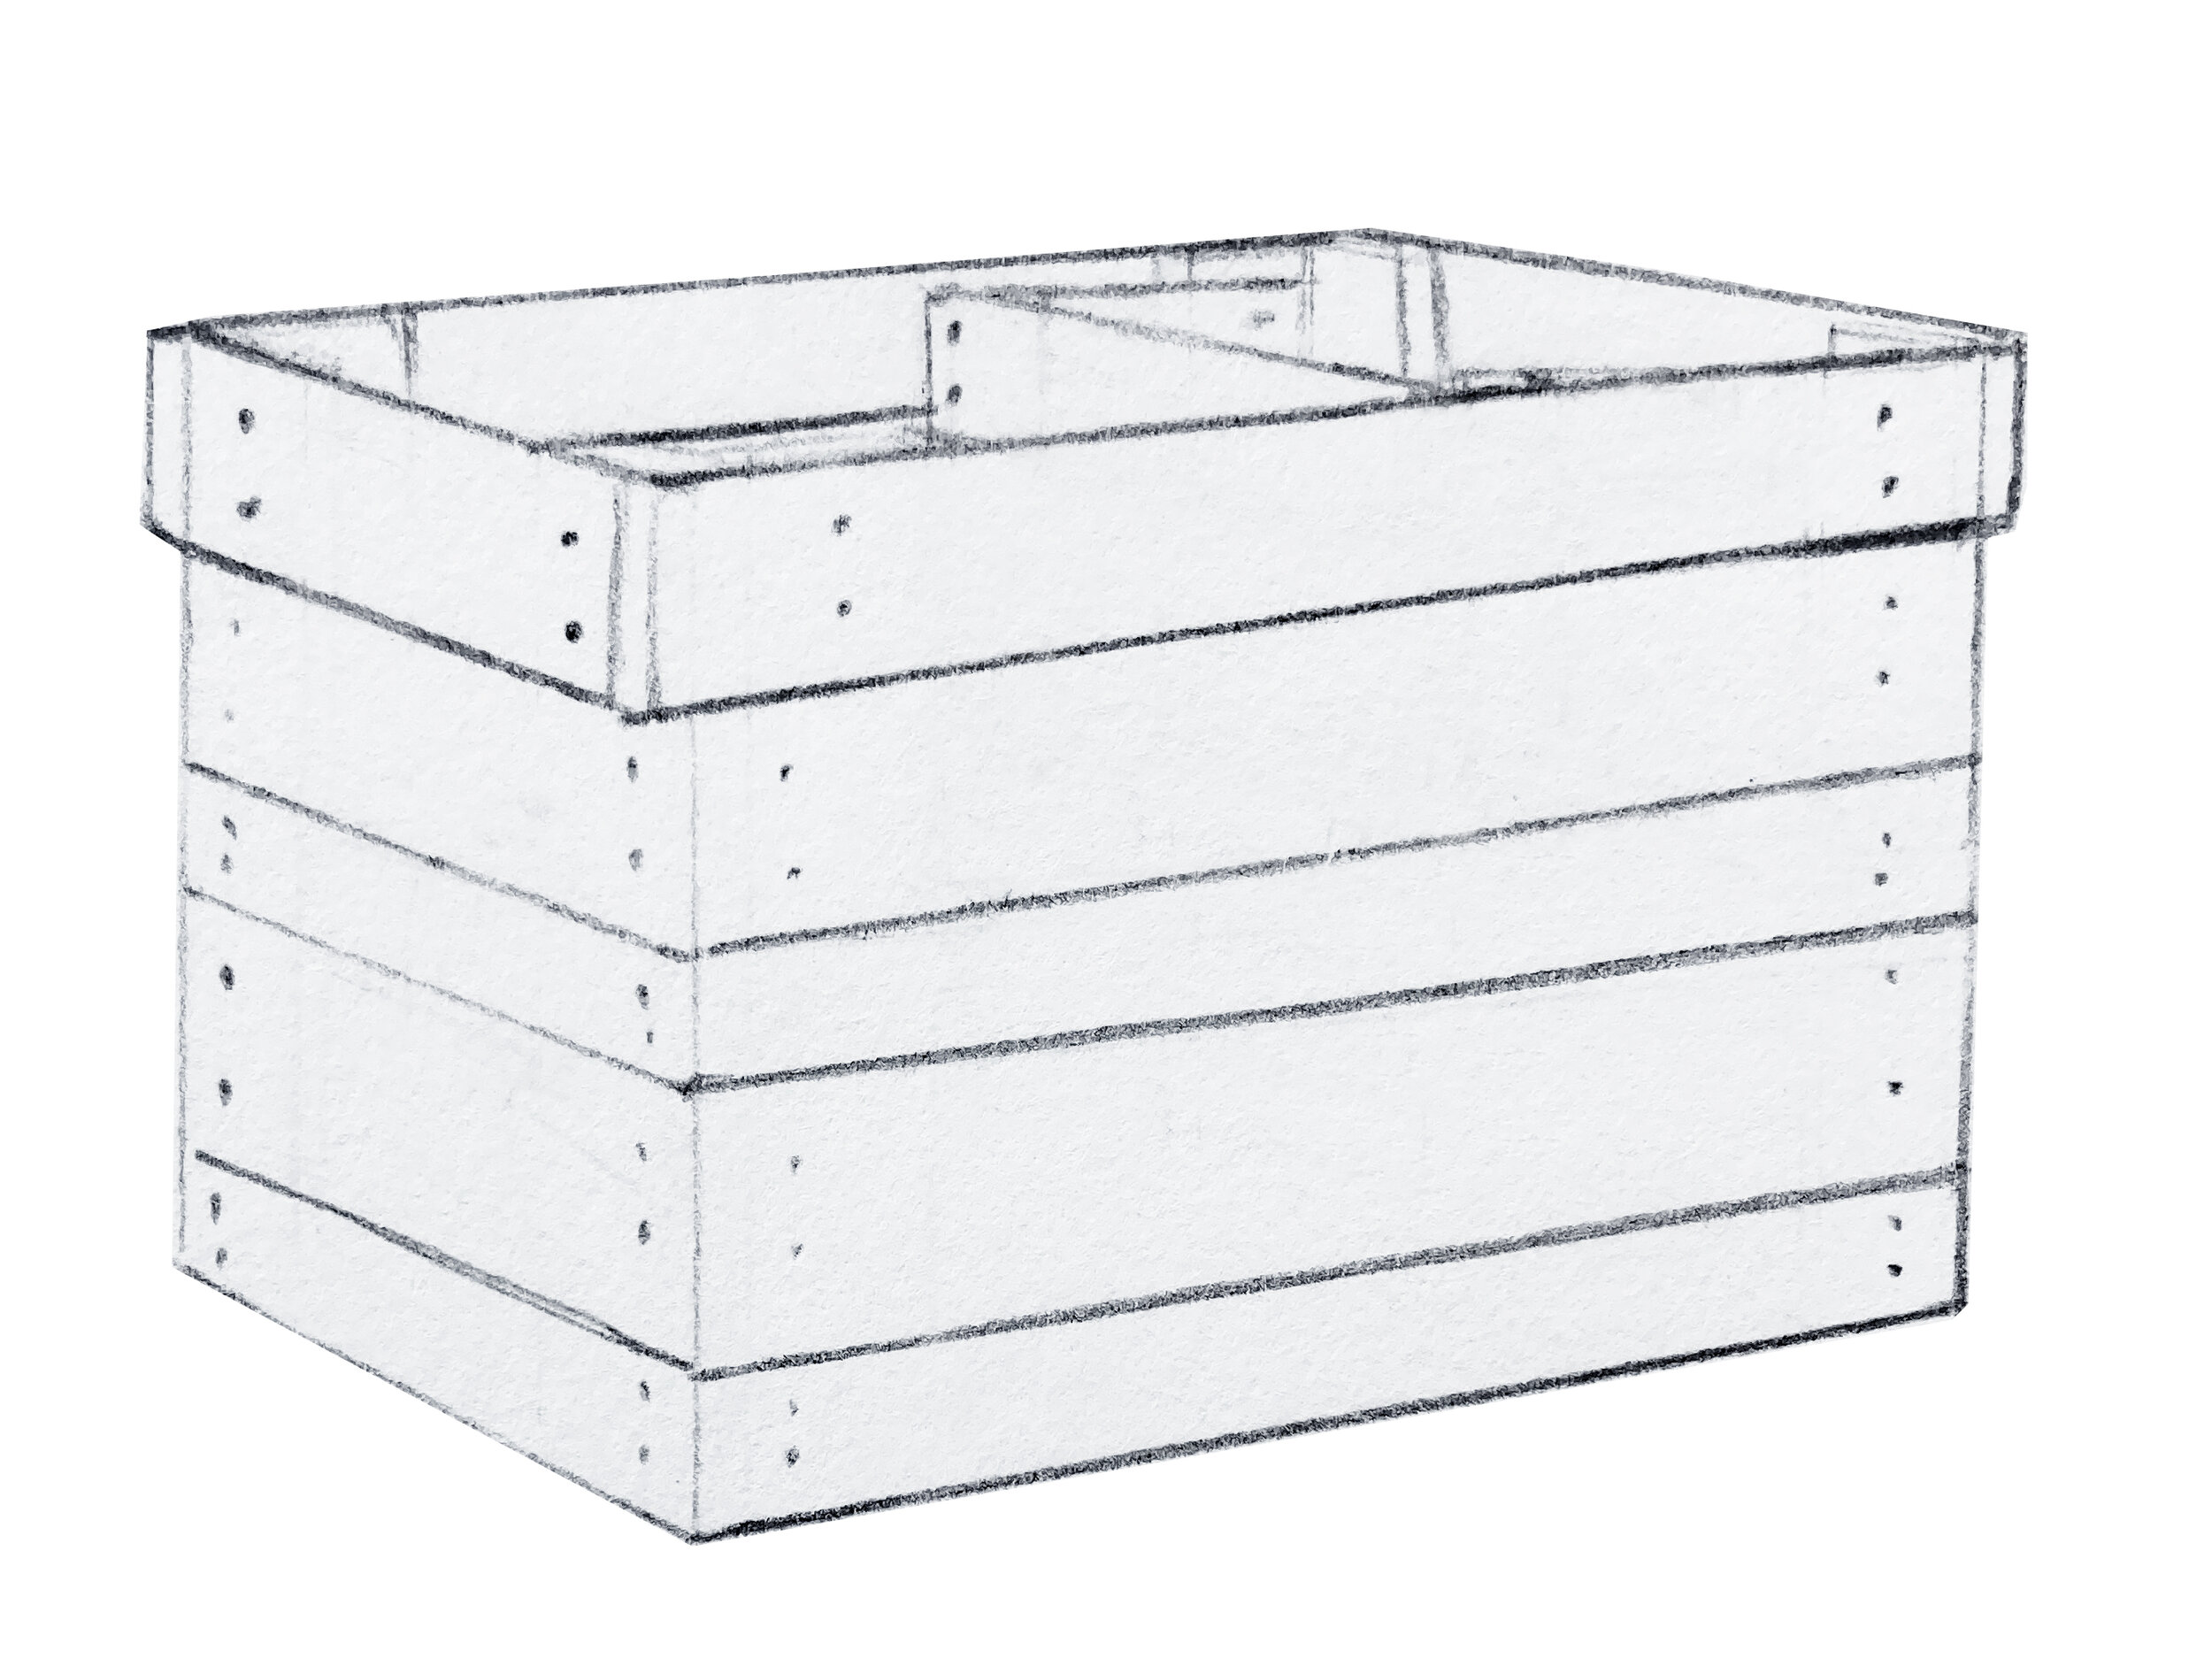
Measure the short side of the table from corner to corner, then cut two cedar 1x4’s at that length. Attach to the top of the corner uprights using 1 1/4 in exterior screws or 18guage brad nails (if you don’t want to see the screws). Do this on both short sides. Now measure the long sides, including the pieces you just attached. Cut two lengths of 1x4 at that measurement and attach those to the long sides of the table.
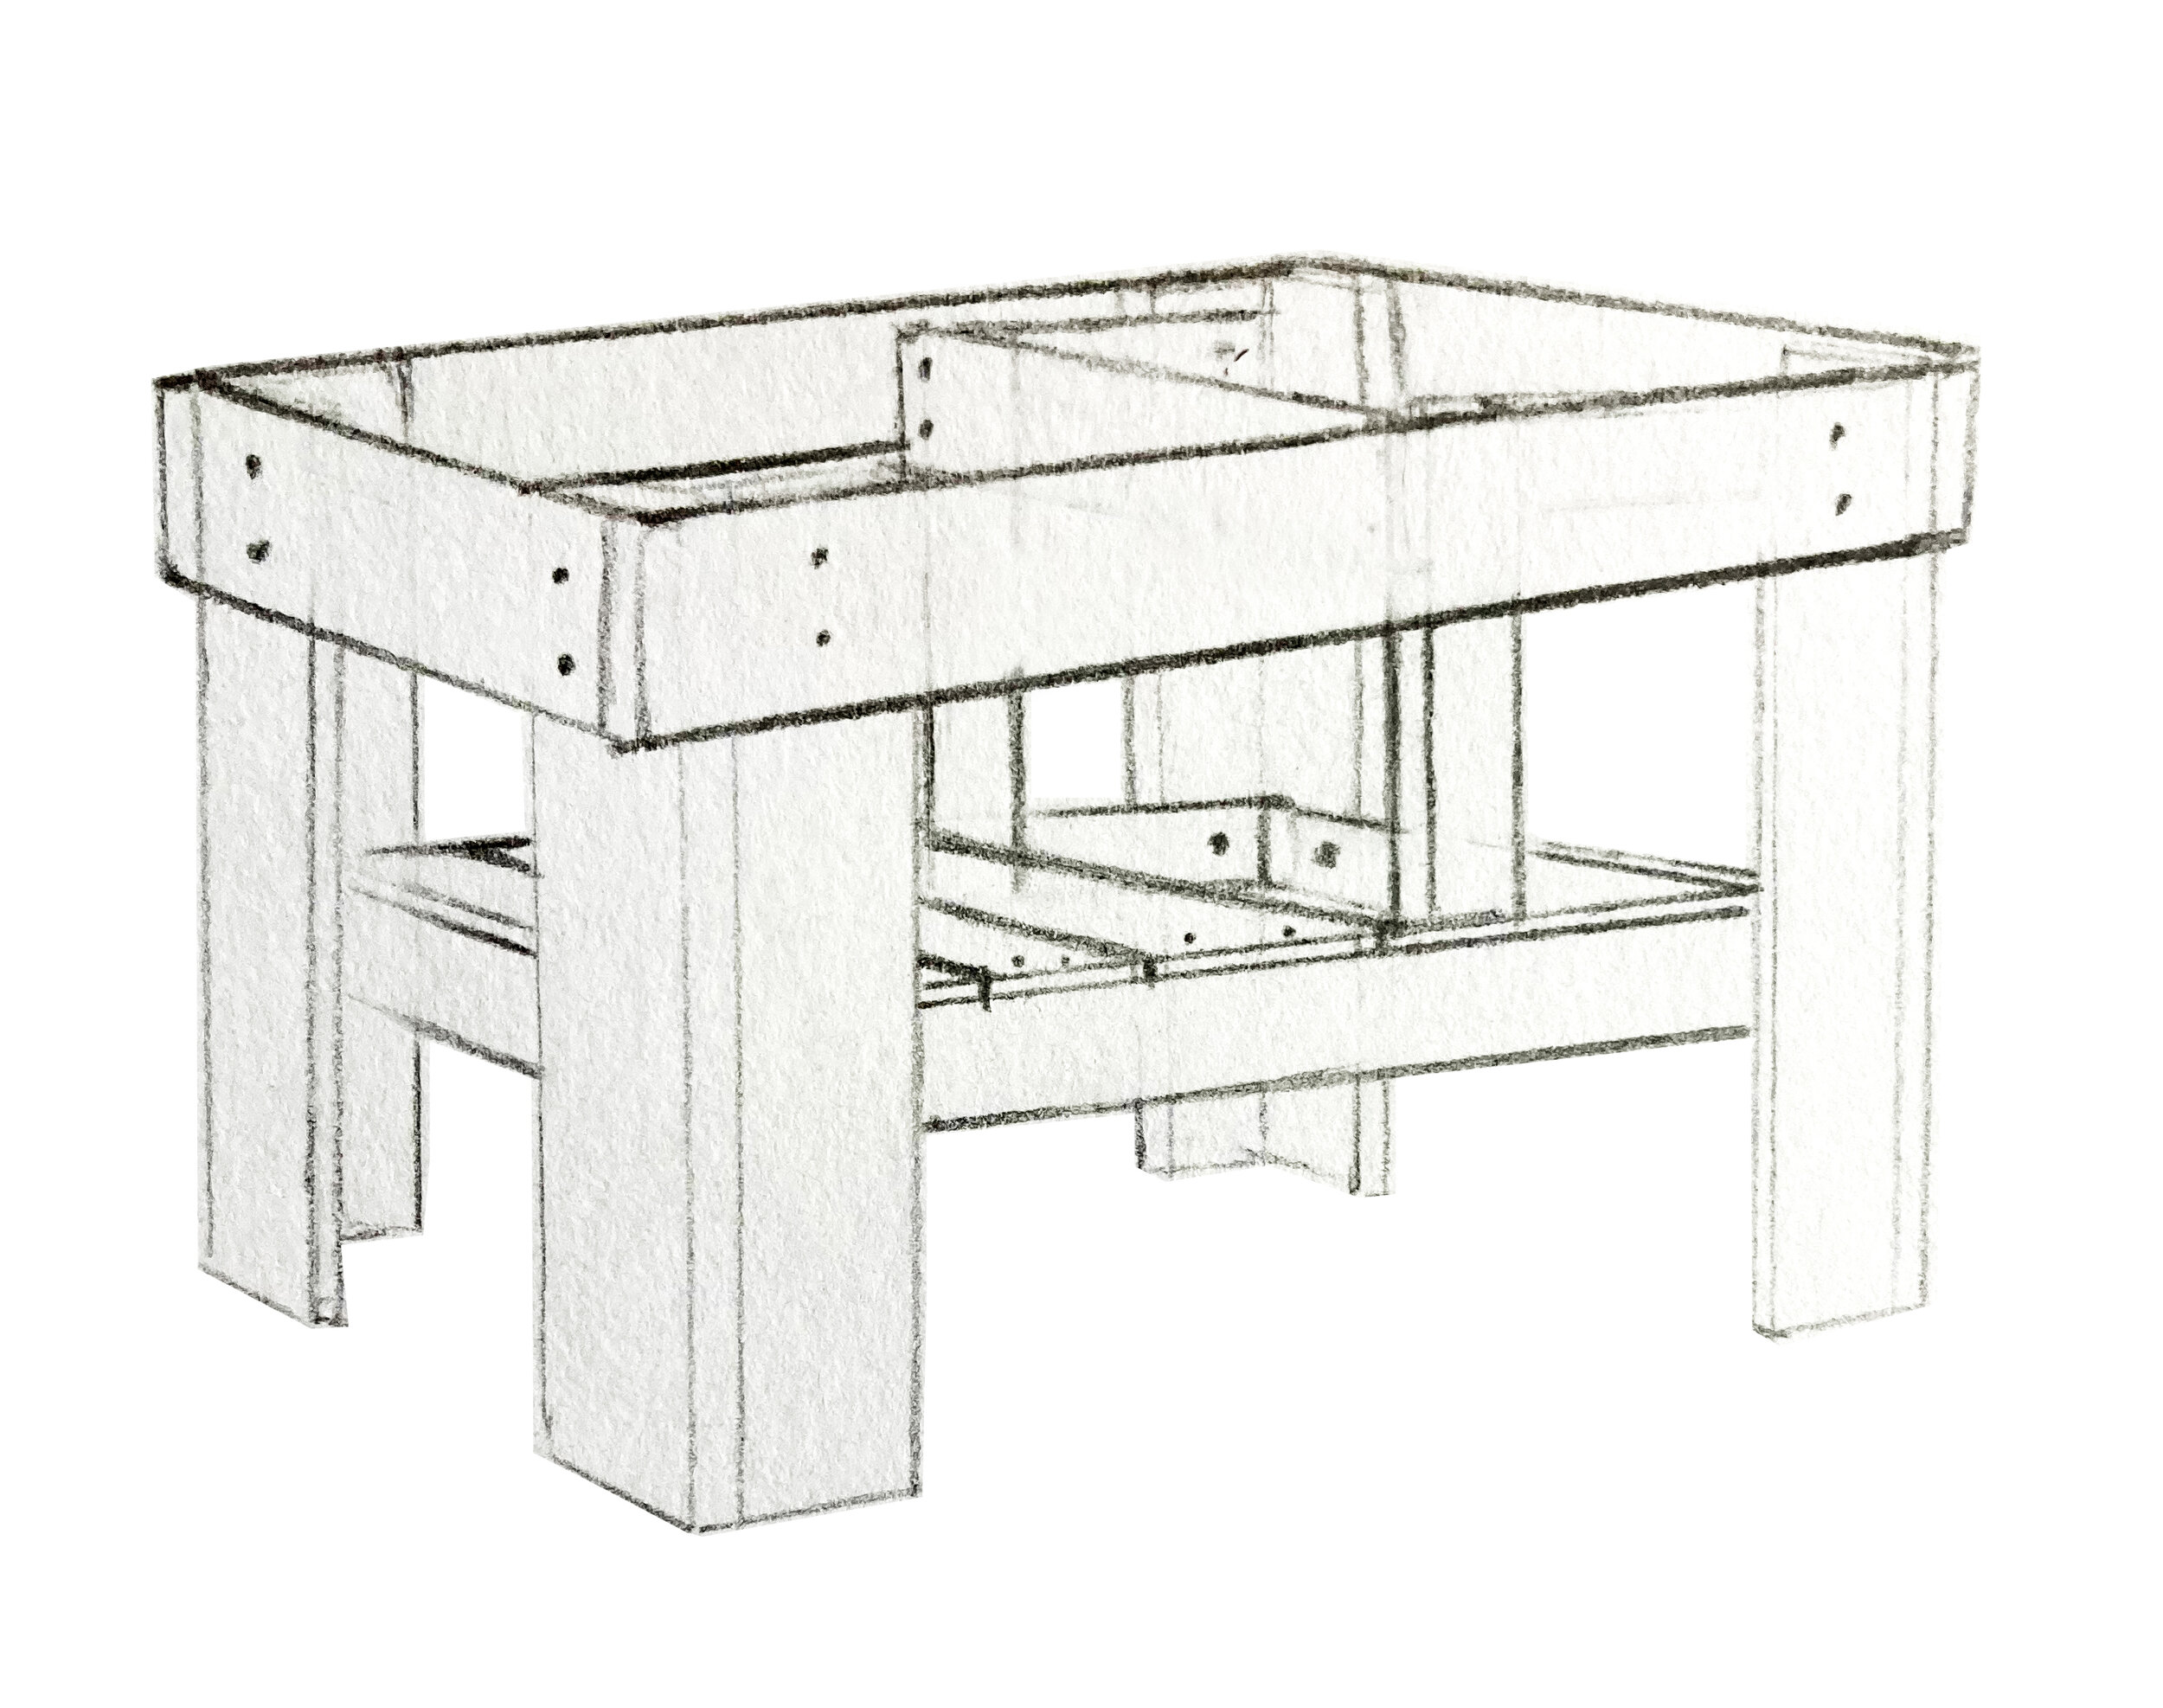
Step 6:
Sheath the outside of the table
Using cedar fence boards (I used both 5.5in wide and 3in wide fence boards) repeat the process you just did for attaching the 1x4s to the top. Use an 18 gauge brad nailer to put two nails in each side of each board to attach them to the corner uprights. I put a small gap between each board (the width of a carpenter’s pencil).

Step 7:
Create the table top
The table top is made out of cedar 1x4s. I had my table top over hang about a half inch on either side, so my 1x4s were cut 1 inch longer than the depth of the table. For the side that isn’t hinged, you just attach the 1x4s to the base. You can do this with brad nails from the top, or if you don’t want any fasteners showing on the top (which I didn’t), you can use pocket screws to screw the table top boards on from below.
I used flat brackets and 3x4in screws to attach all the hinged table top boards together, which is a bit inelegant, but works great. You could also use pocket screws to screw the boards together side by side.
Once your hinged table section is created all you have to do is attach it to the base using a couple small hinges!

Botanical Kitchen Revival: A Rental Kitchen Makeover on a Budget
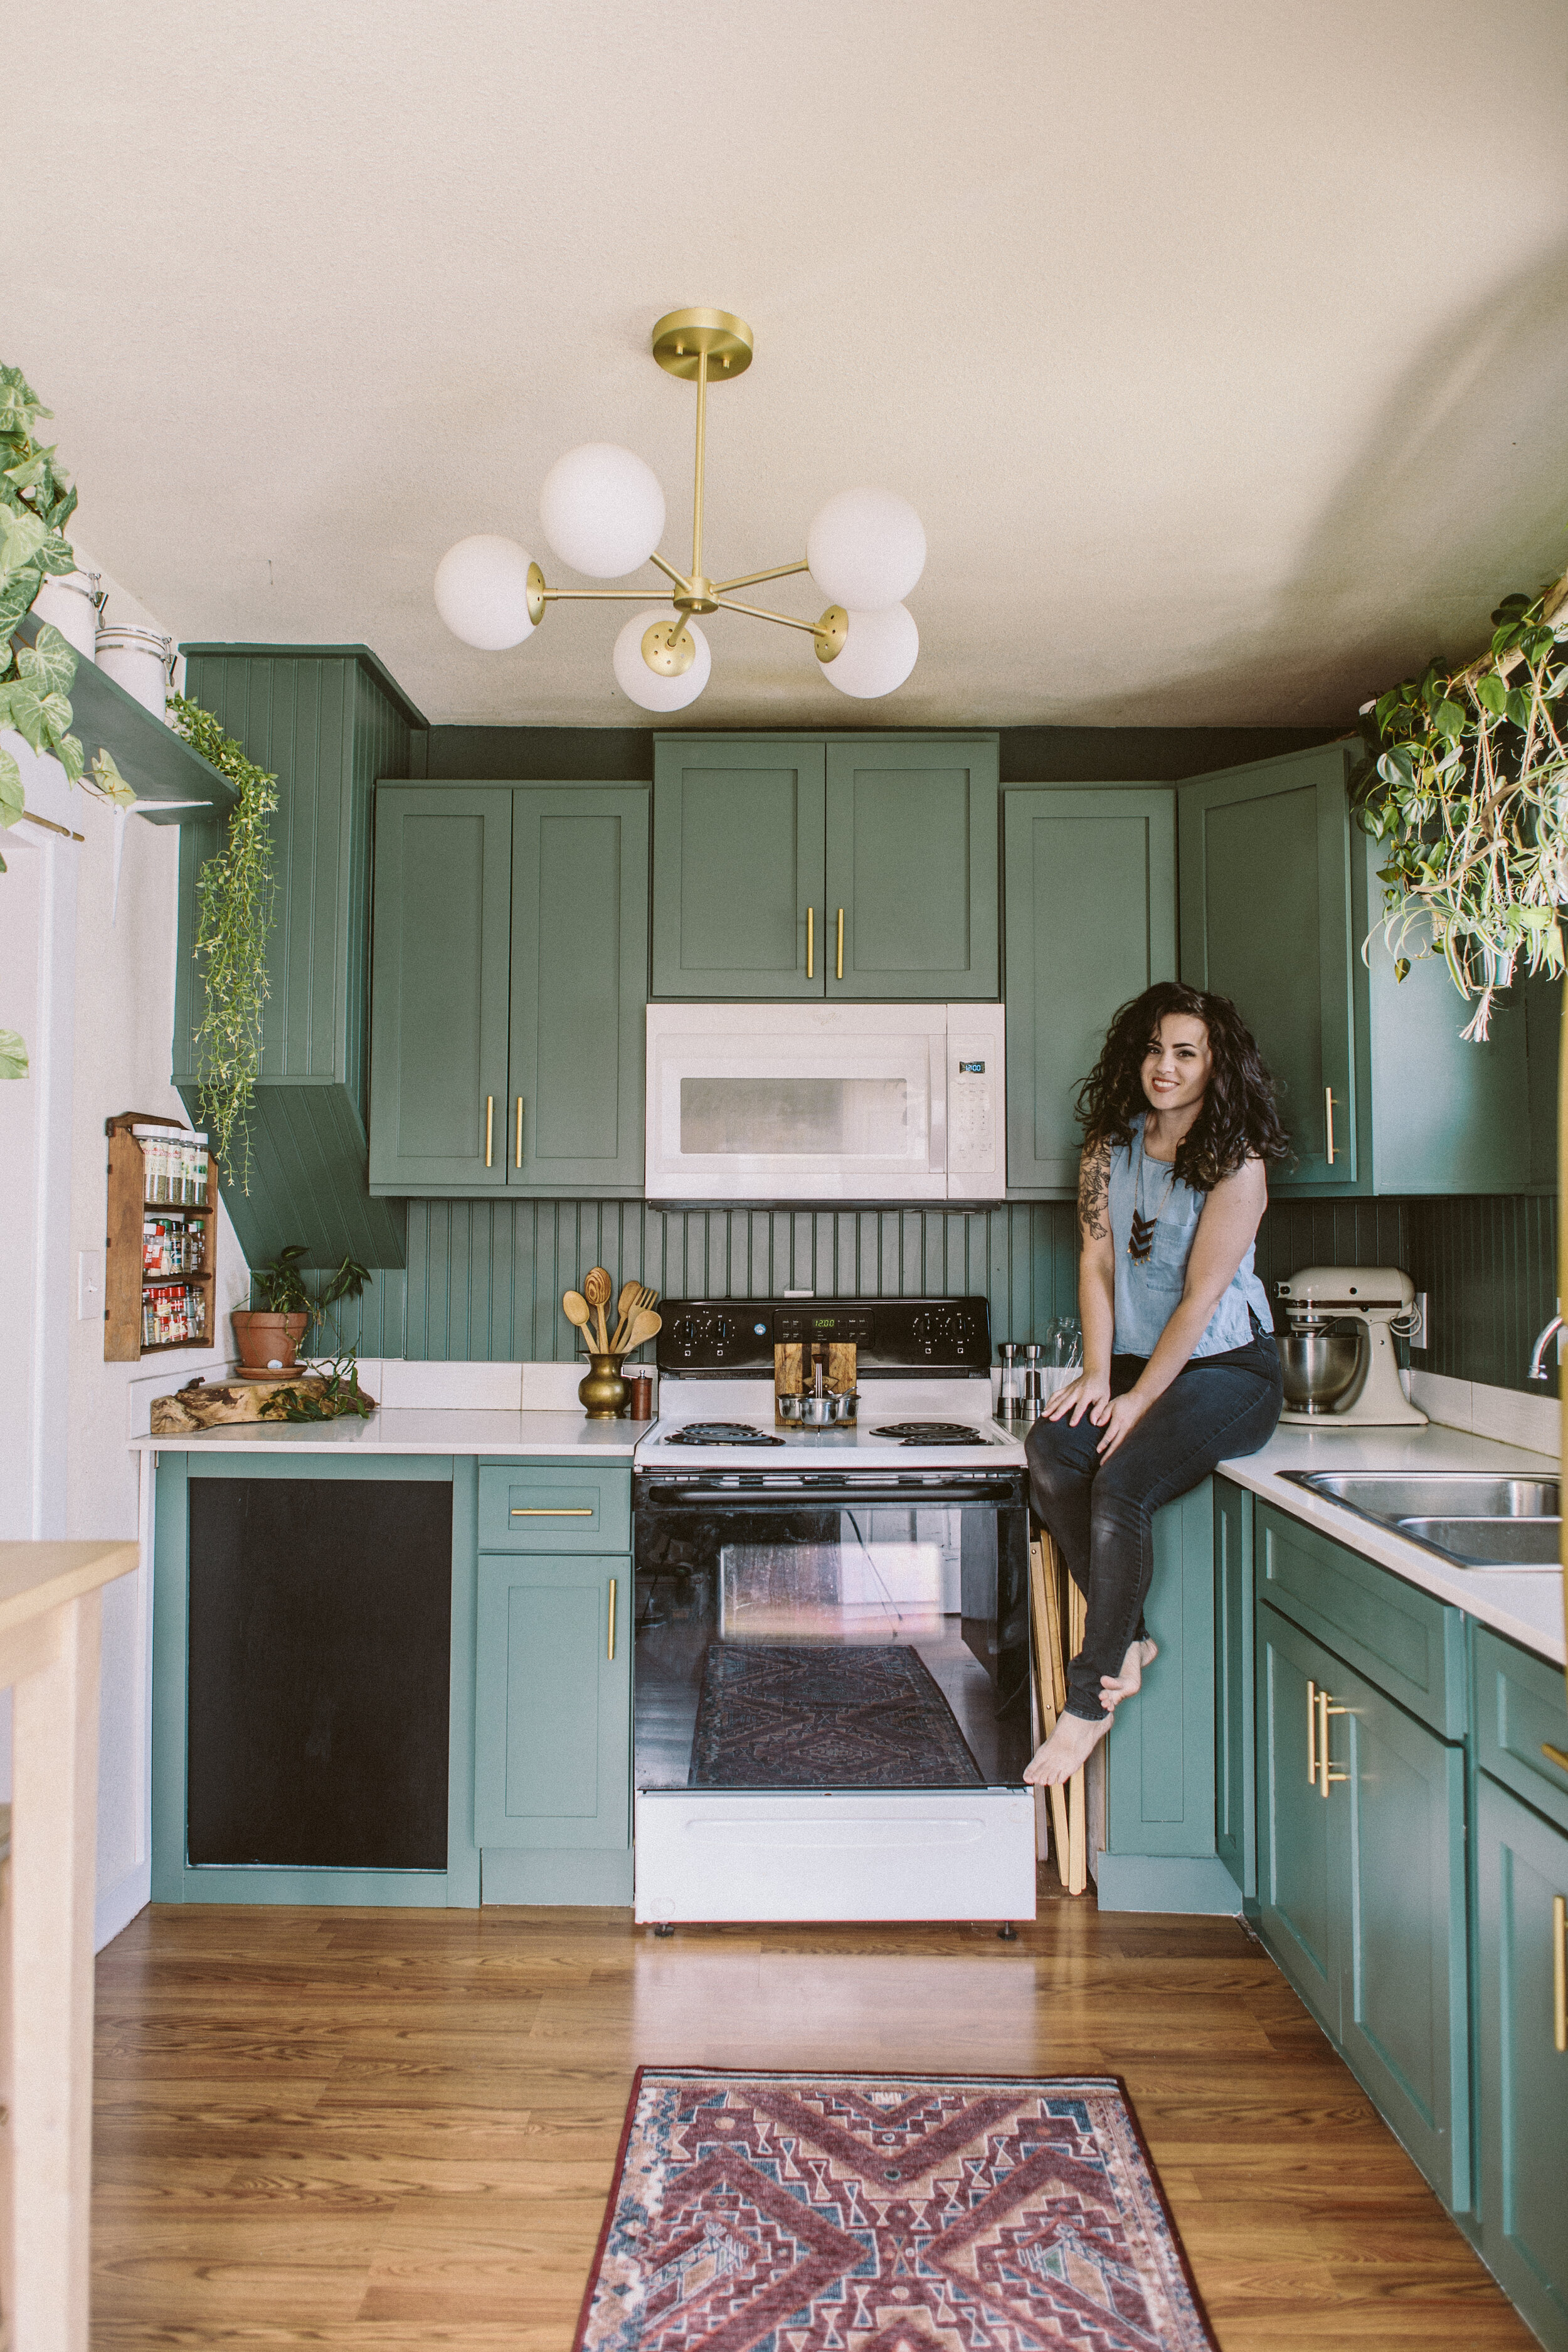
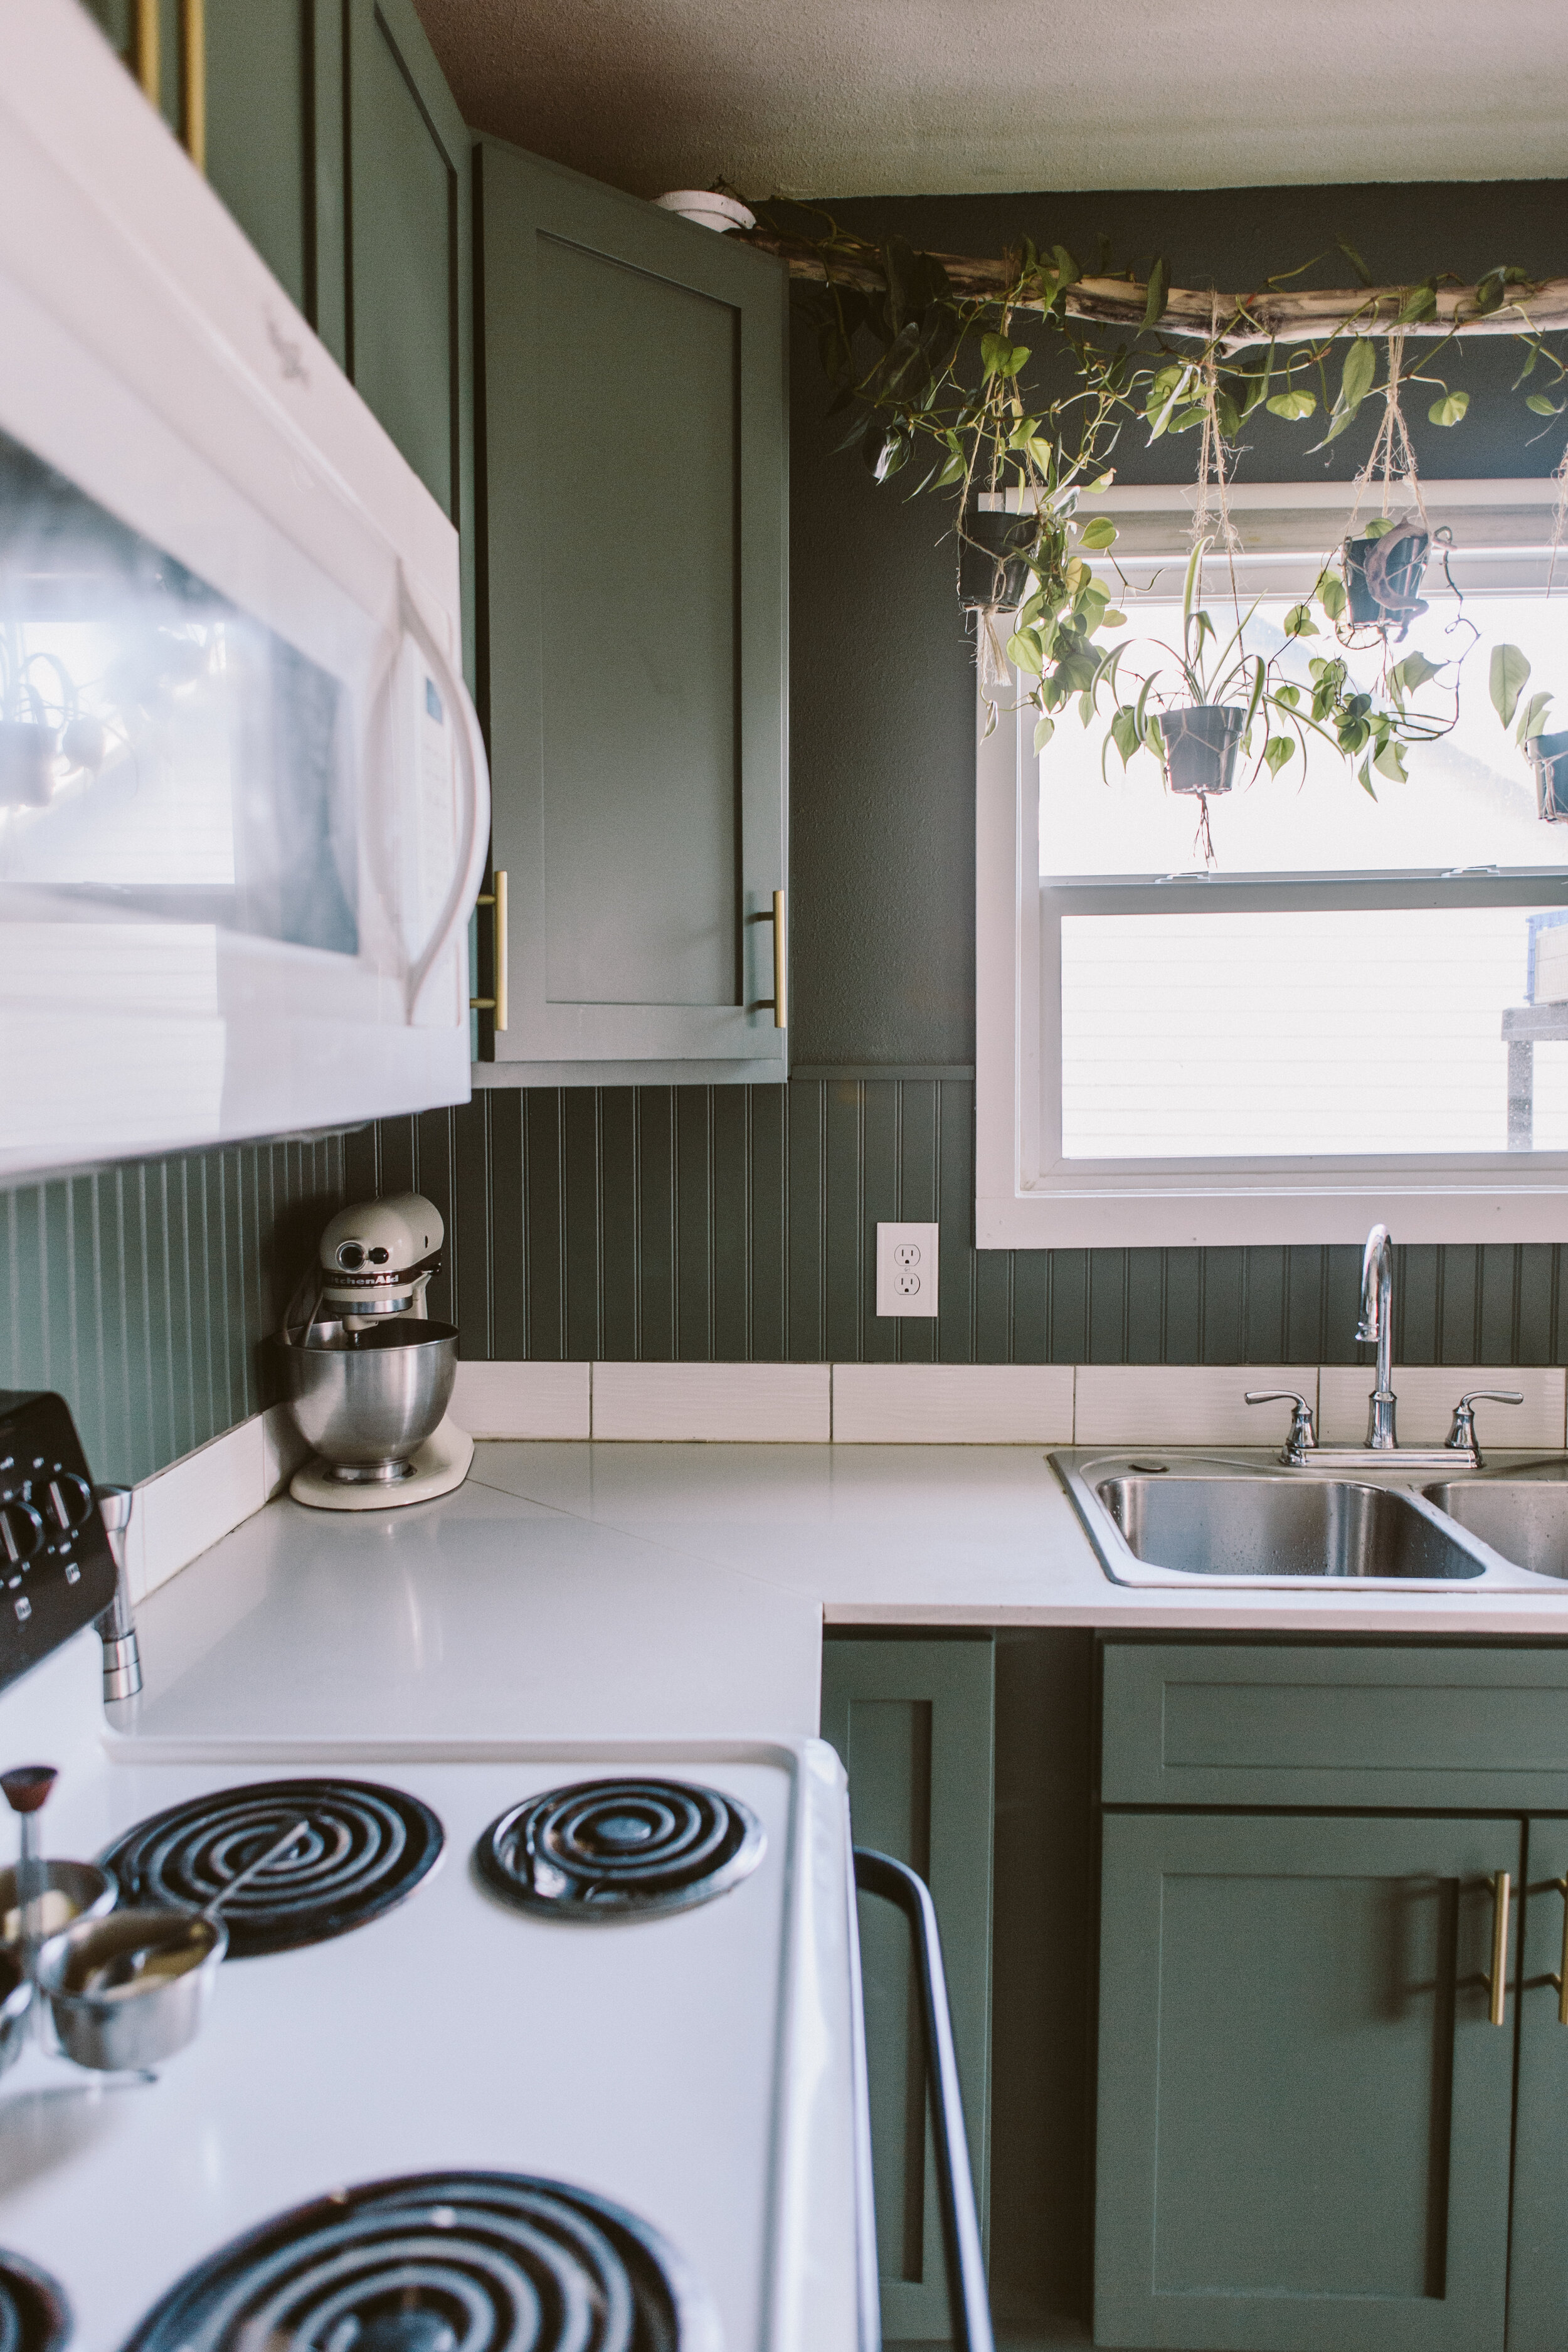
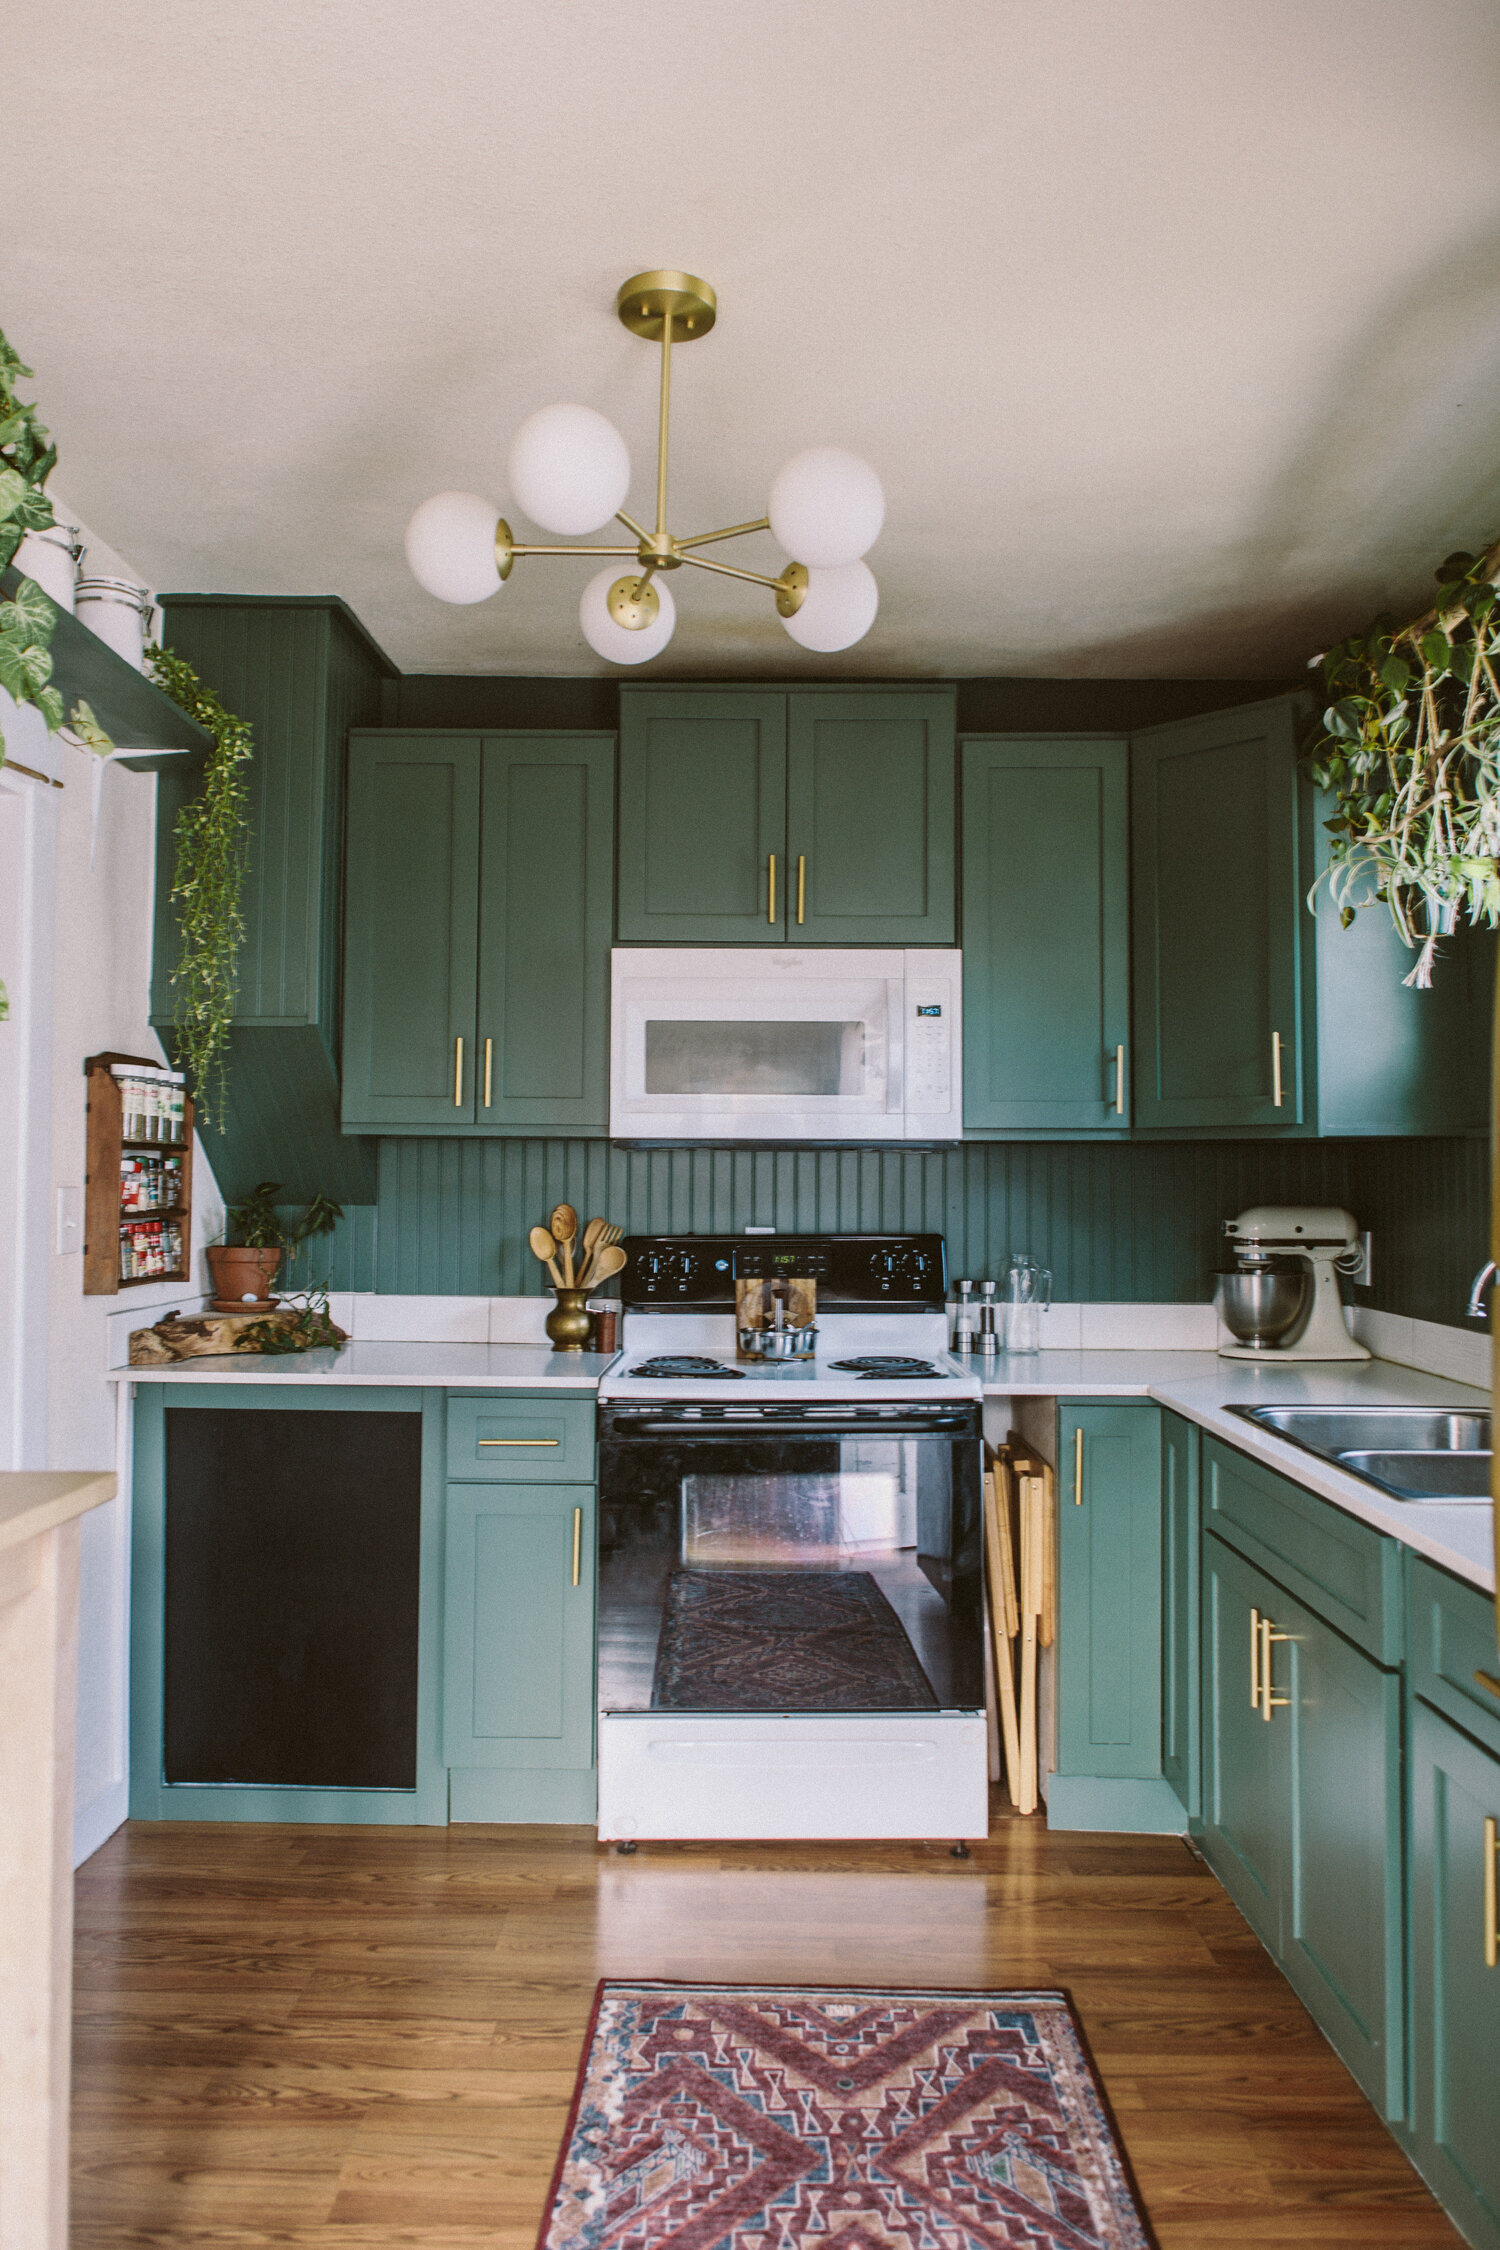
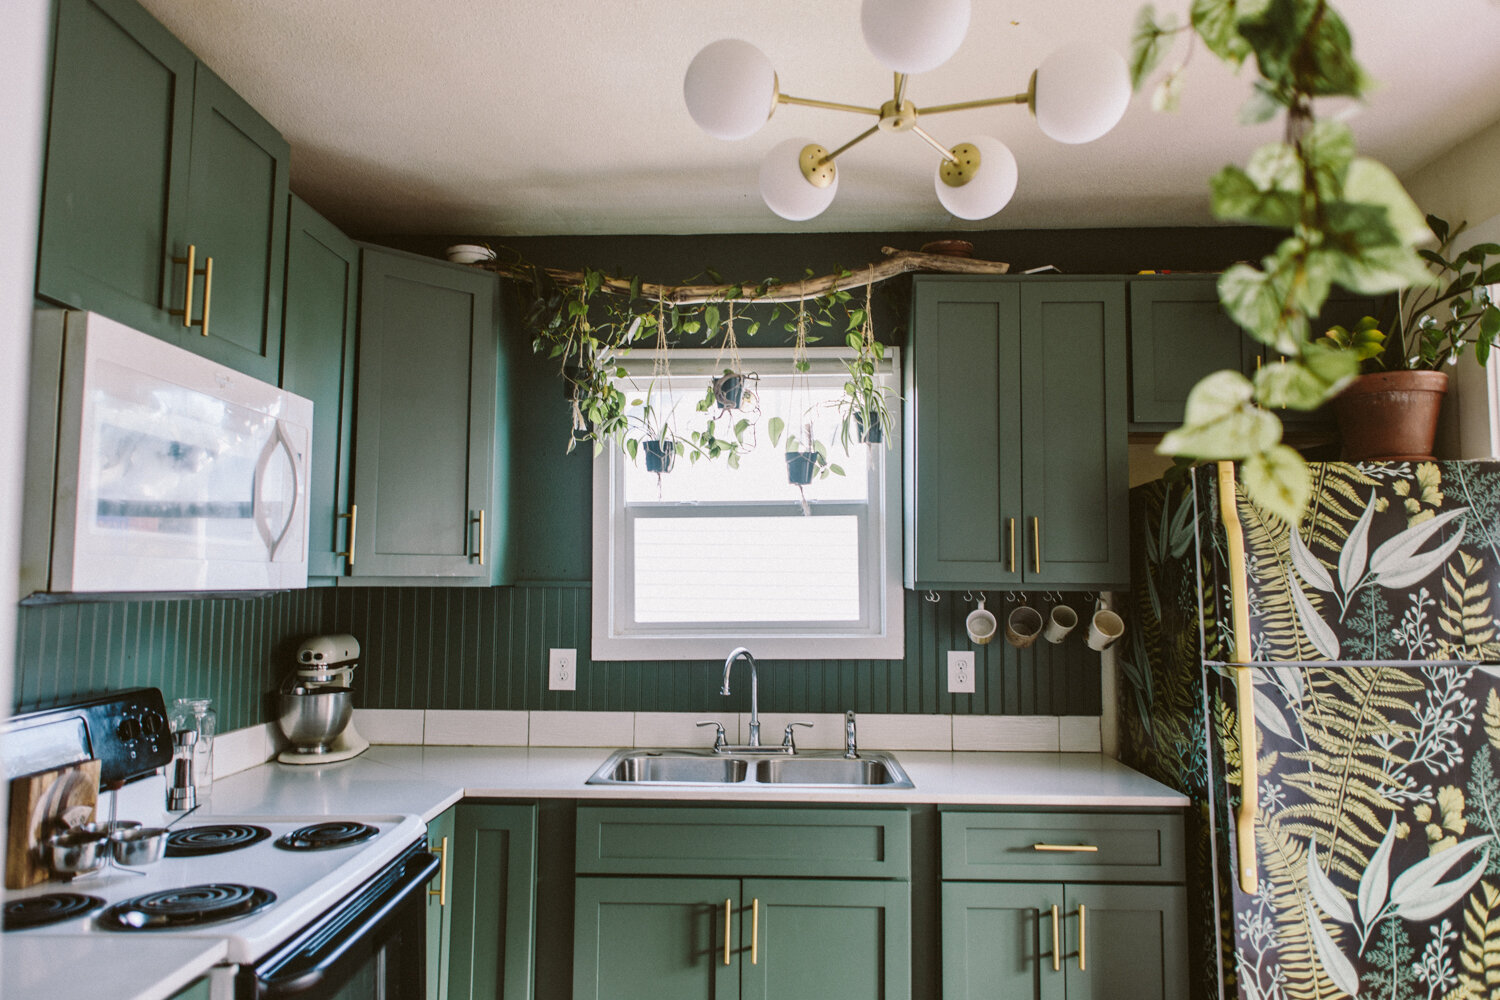
Transforming any space is fun, but transforming your lifelong BFF’s space is a special kind of fun. When Frogtape reached out to me to see if I’d be interested in being a designer for their annual Paintover Challenge, it came at the perfect time. My friend, Kristina, had been talking about wanting to update her kitchen in the rental home where she lives with her husband and son, and I instantly pitched her the idea of doing the paintover challenge in HER kitchen. We talked to her landlord, who gave us the greenlight for the proposed changes and we got to work!
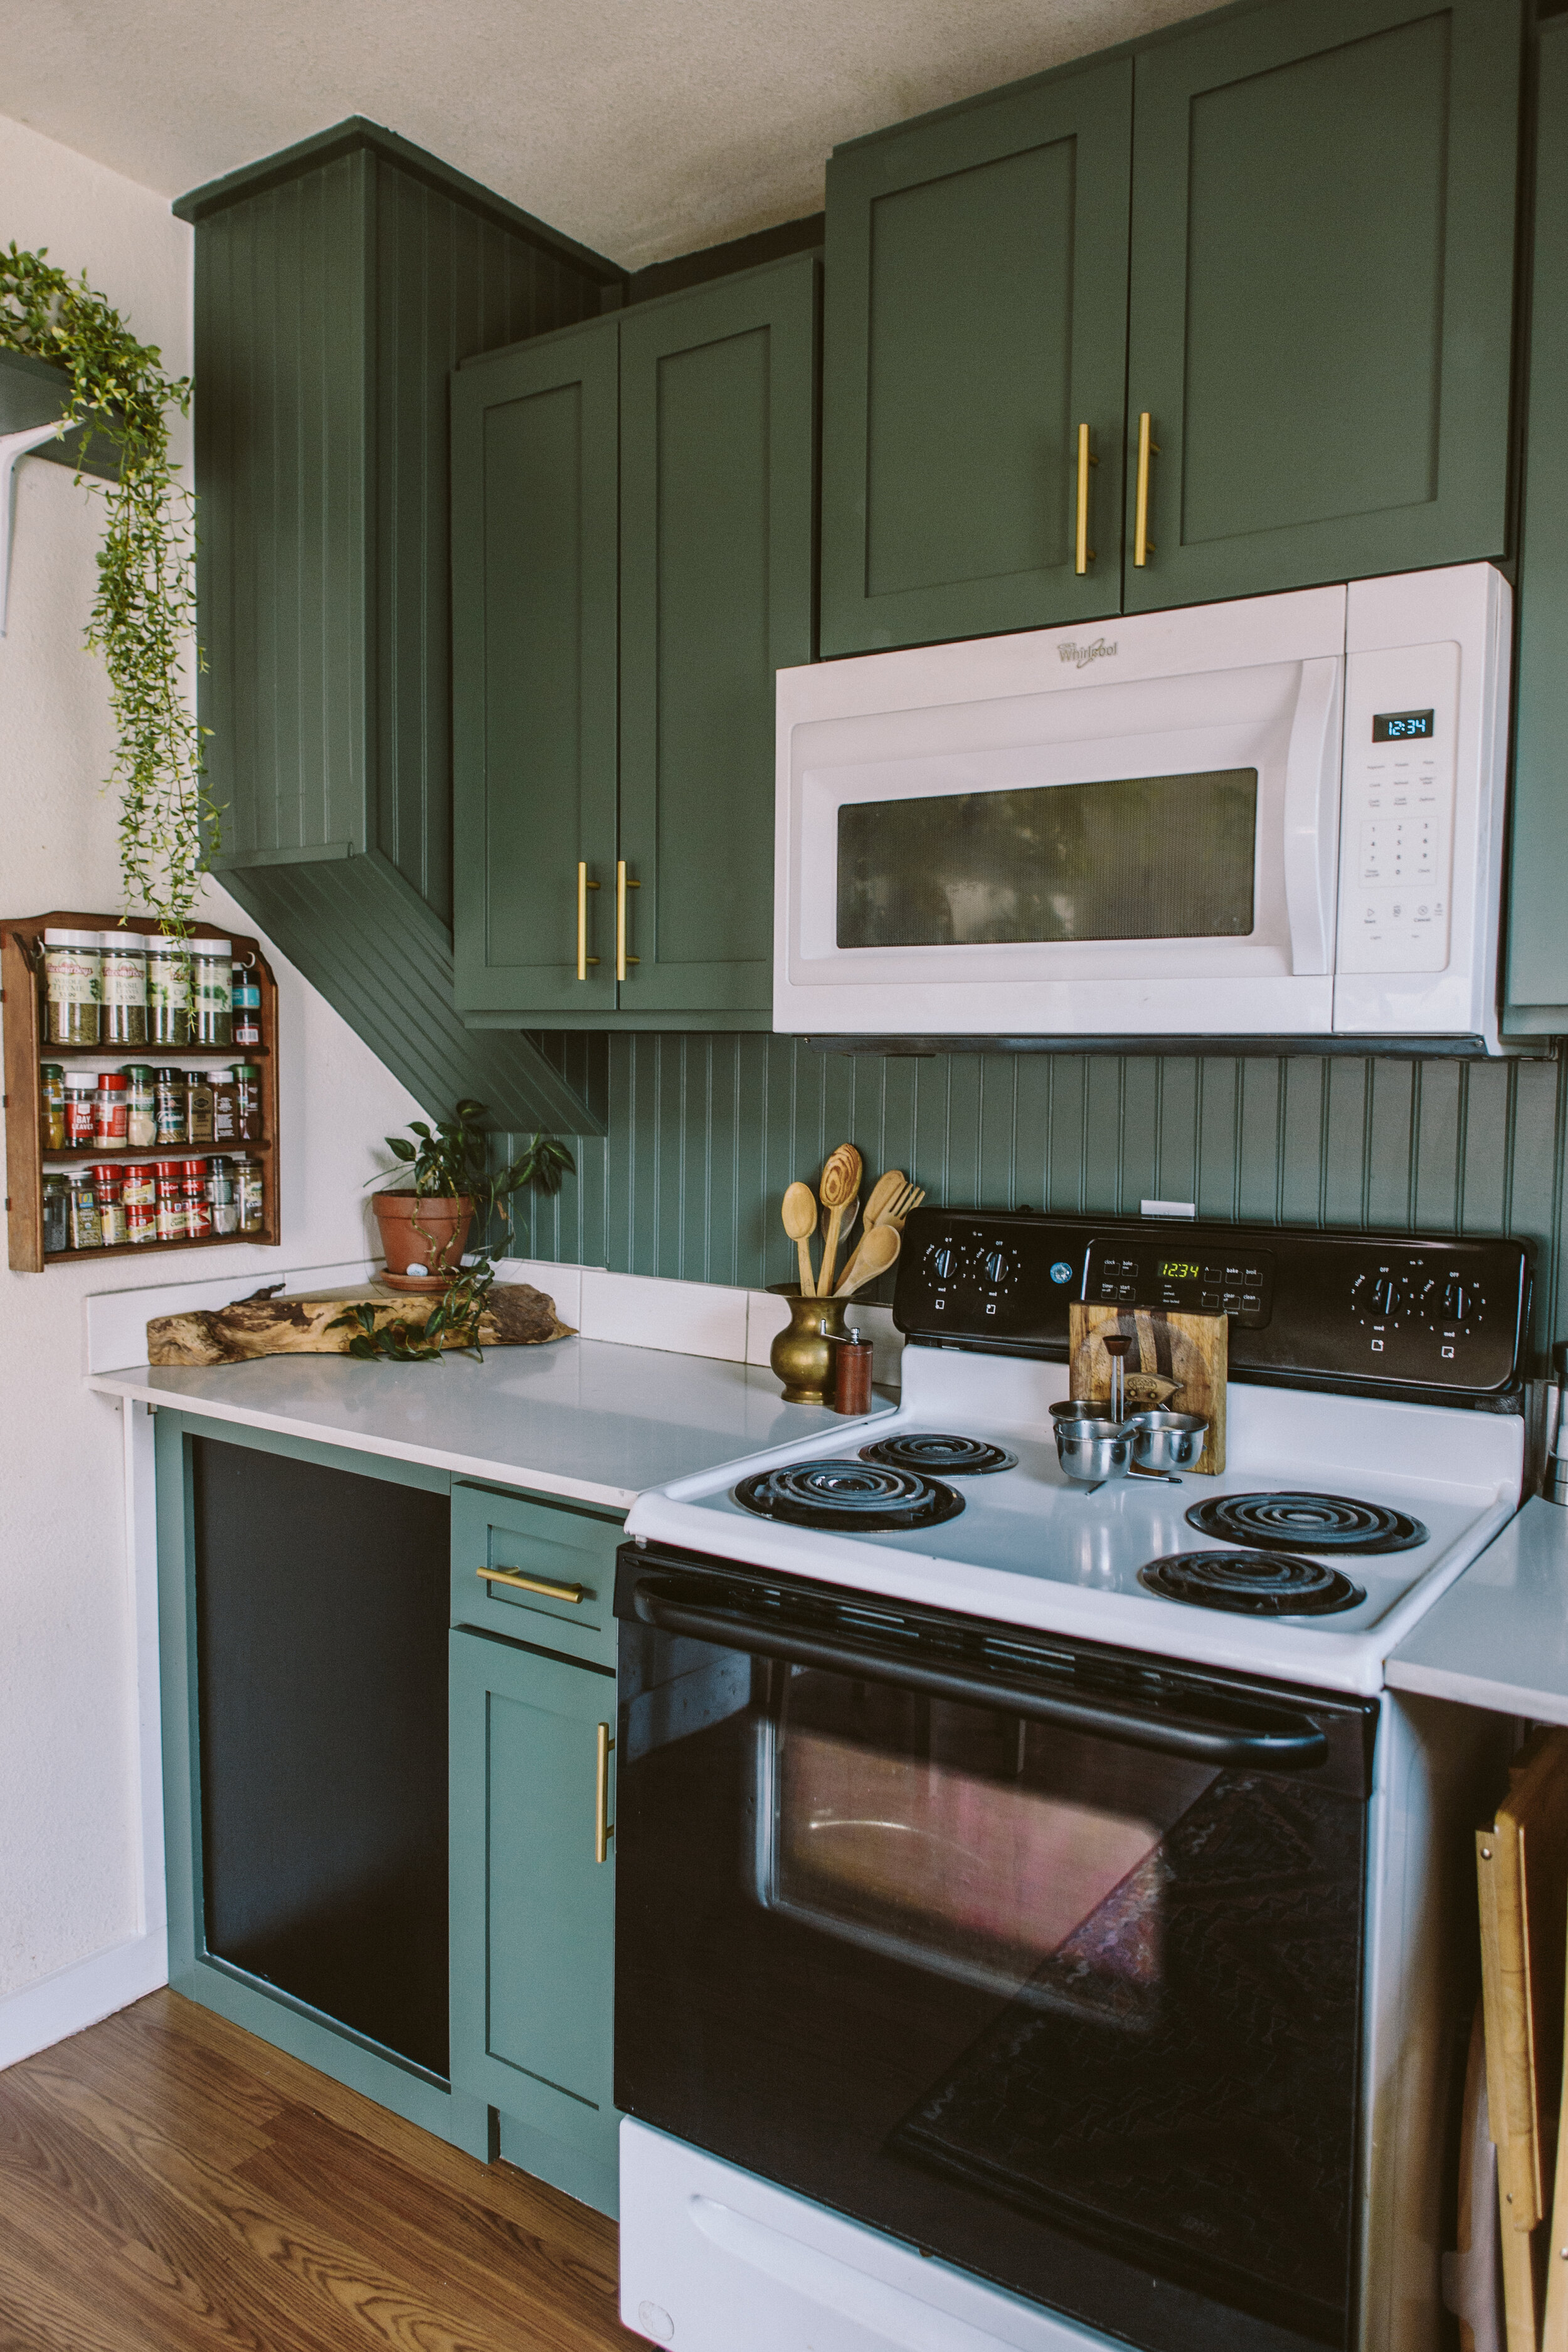
This makeover was primarily achieved with paint, with some honorable mentions from a few other design elements. I traded out the old overhead track lighting for a pretty new light that not only looked gorgeous, but offered way more illumination (which is a godsend come those dim PNW winter months). In lieu of taking out the meager tile backsplash and doing new tile (which probably would’ve required some drywall repairs, and a significant budget bump) I opted to keep the existing strip of tile, and add beadboard on top to fill the blank space between there and the bottom of the wall cabinets. Then, we painted it the same color as the cabinets and the walls, for a delicious tone-on-tone vibe. This basil color is super pretty, it feels lush and sophisticated.
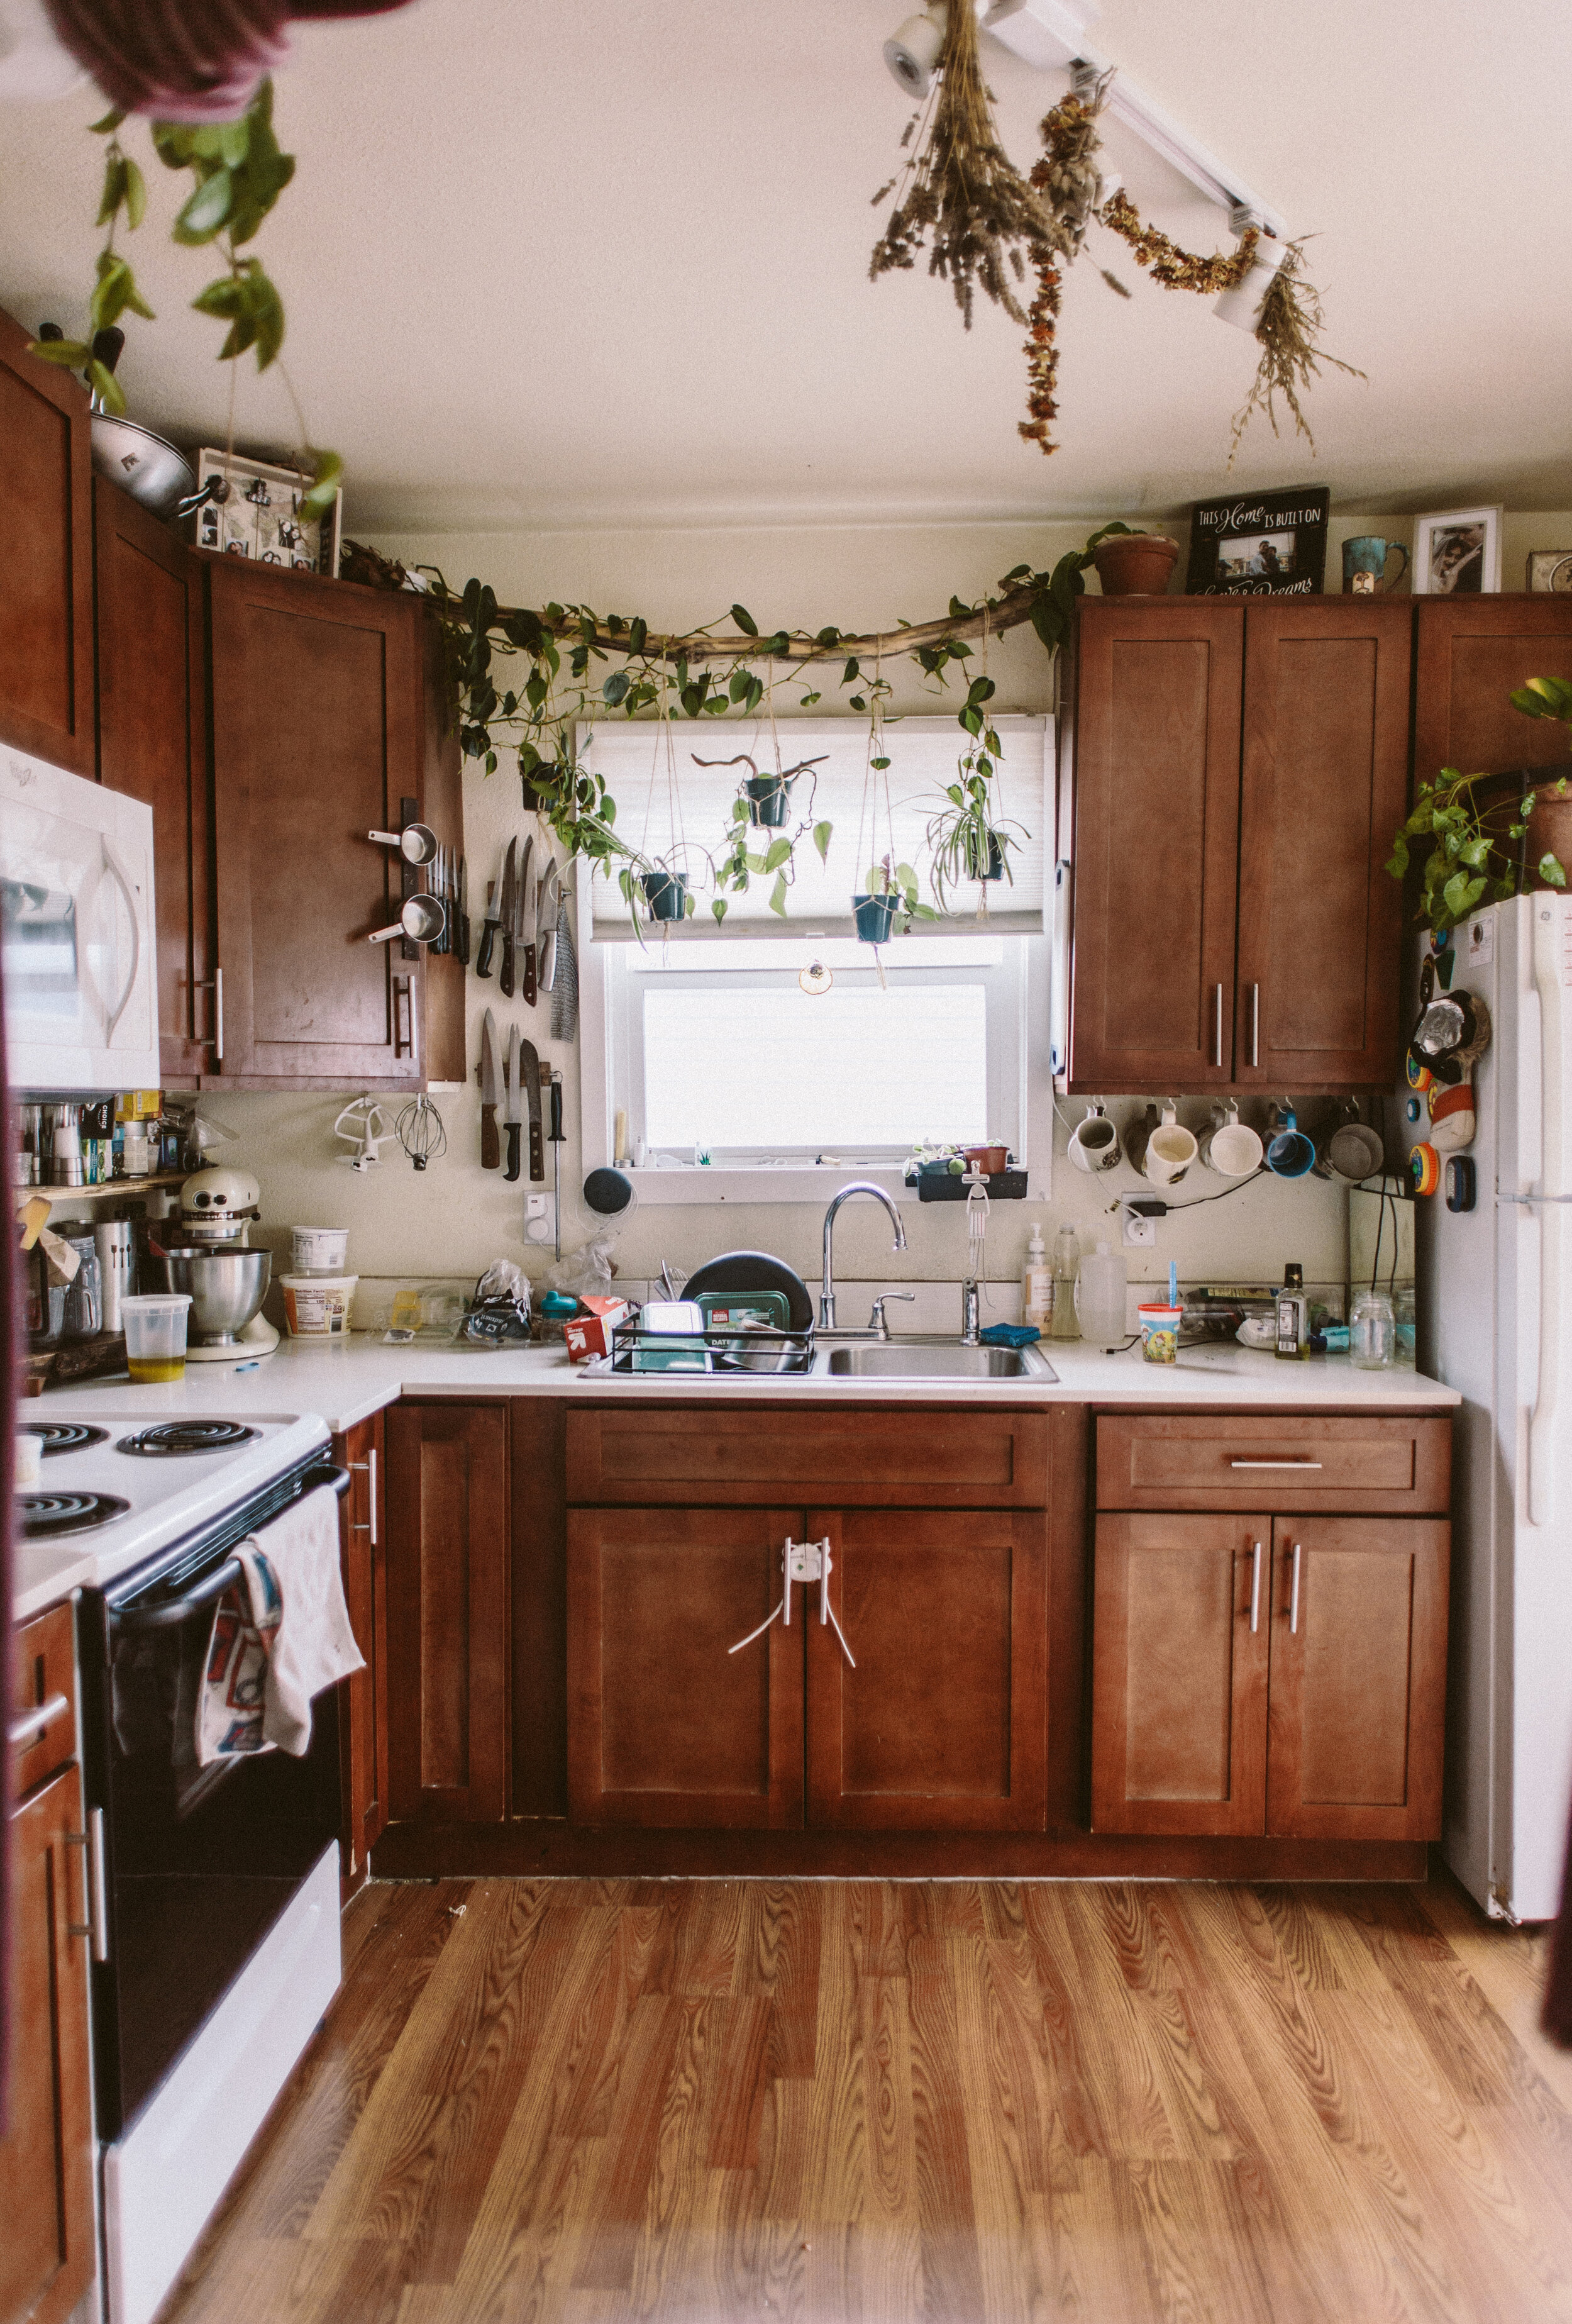

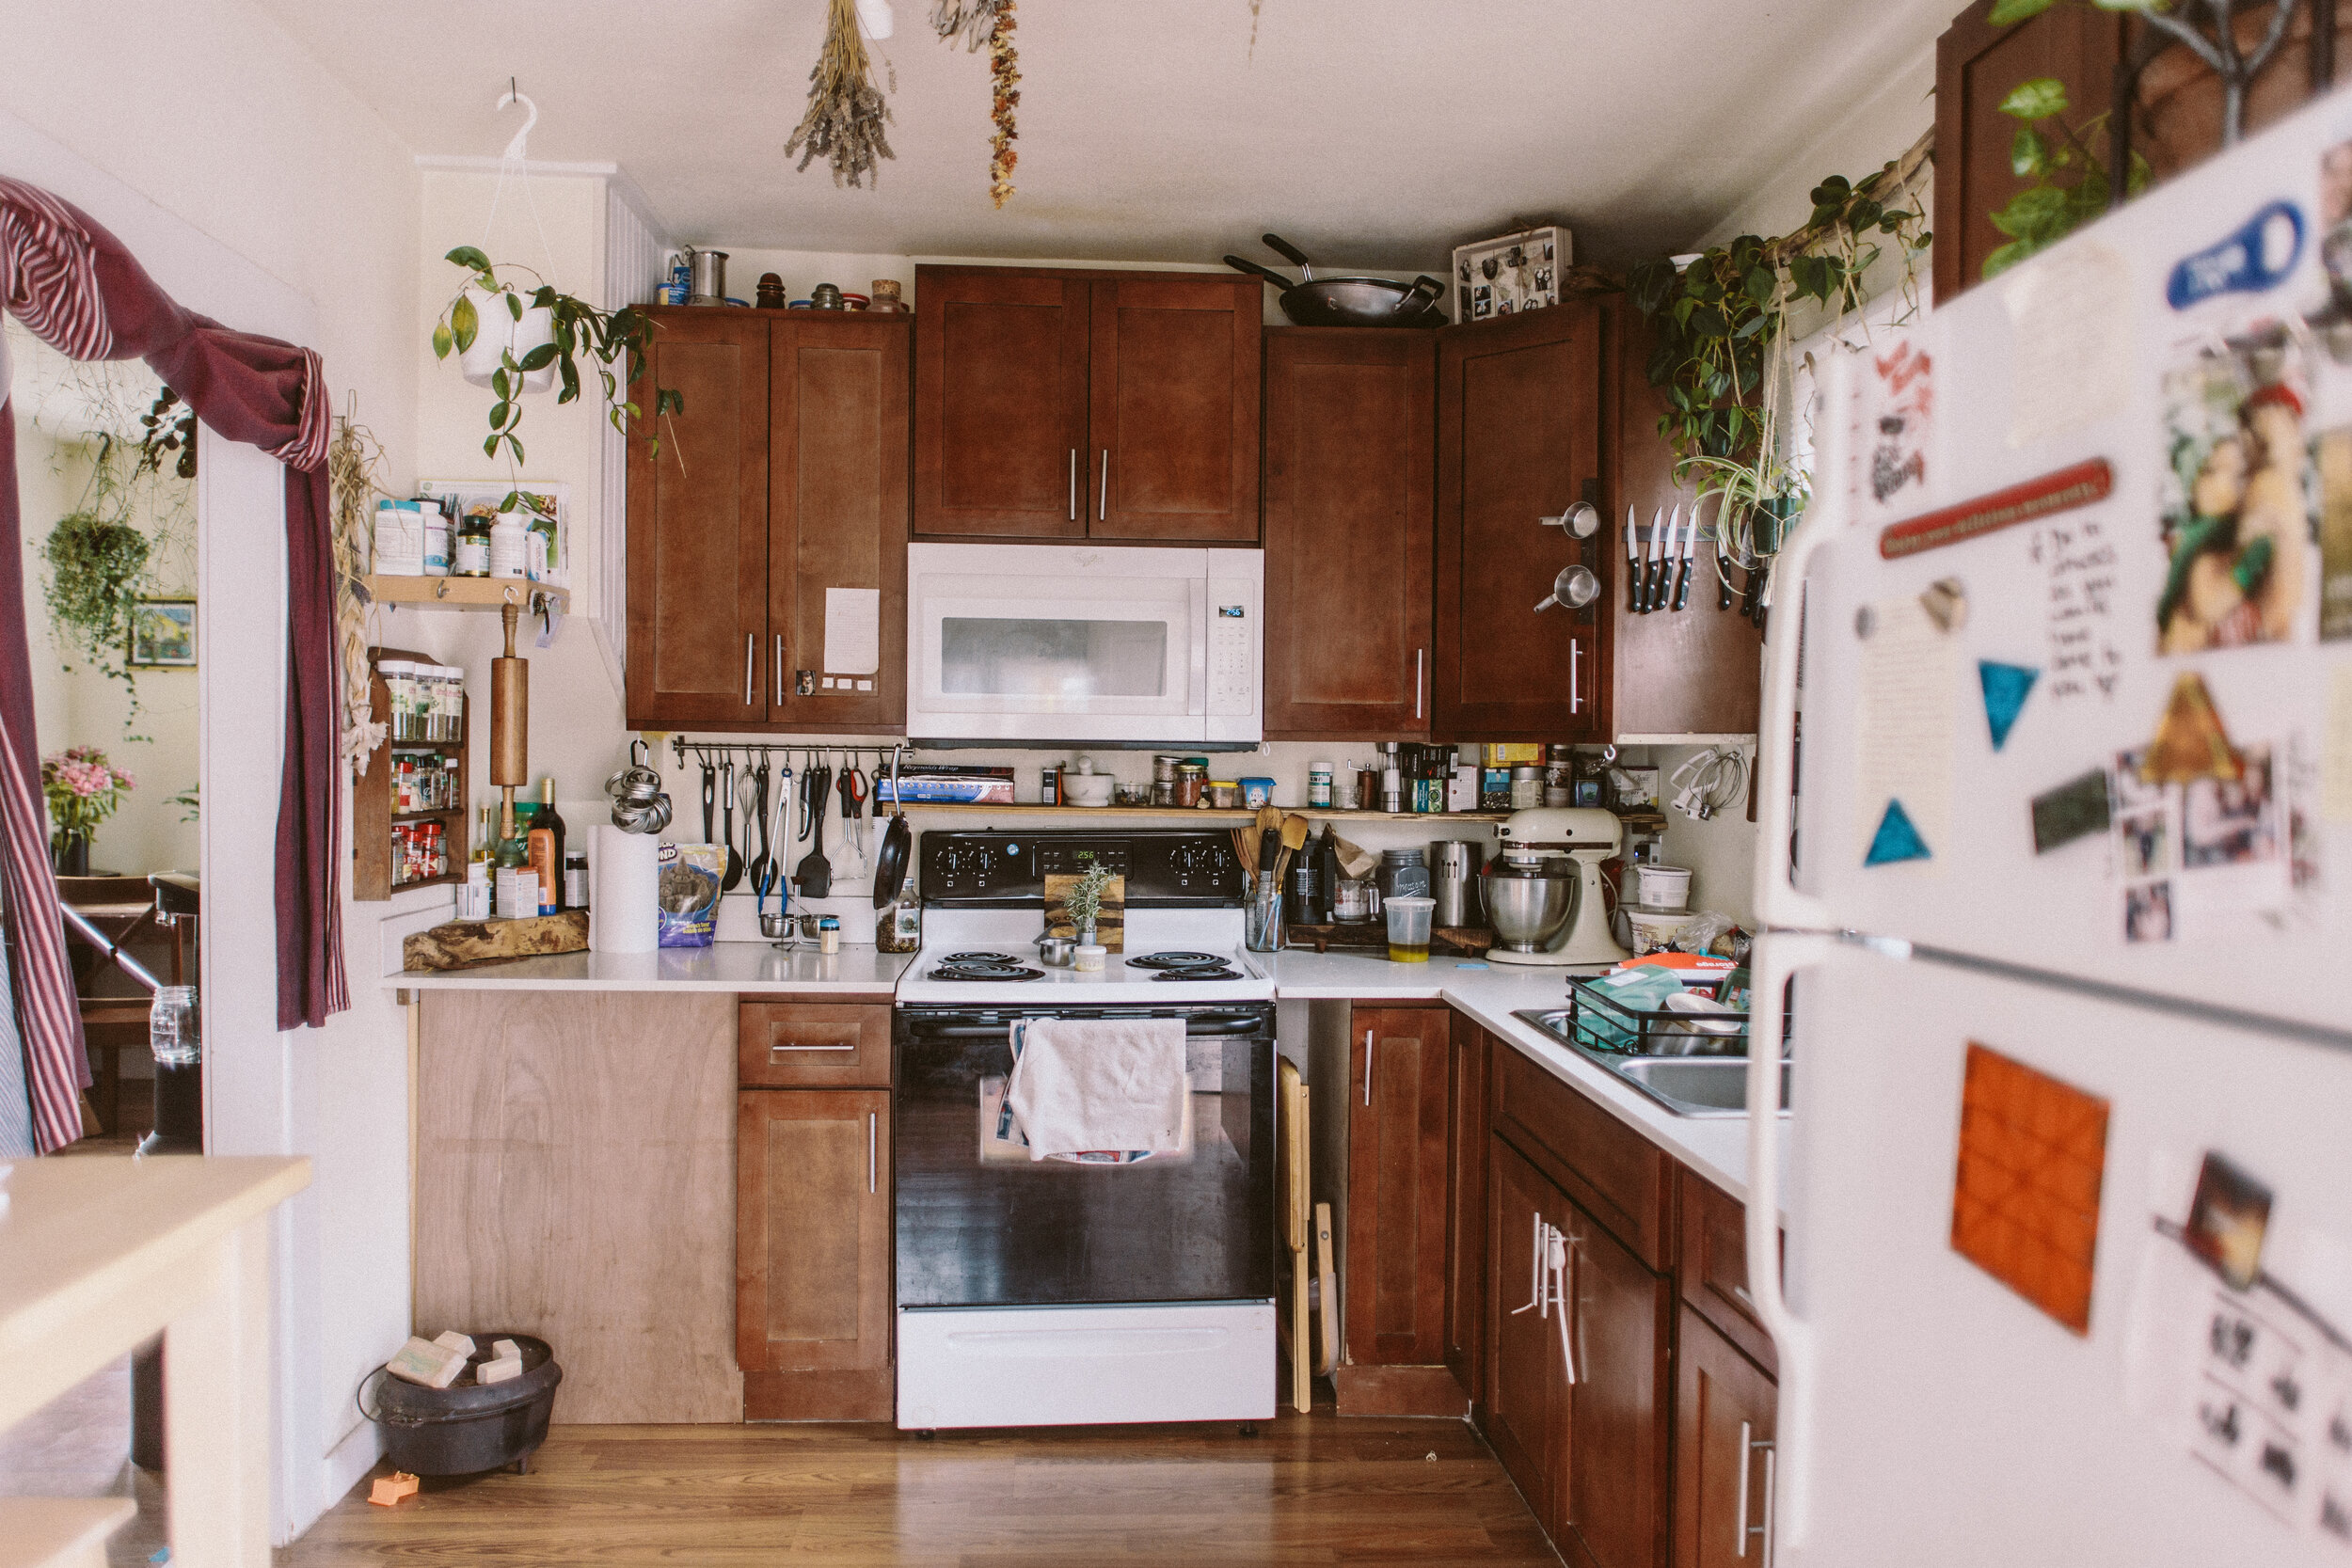
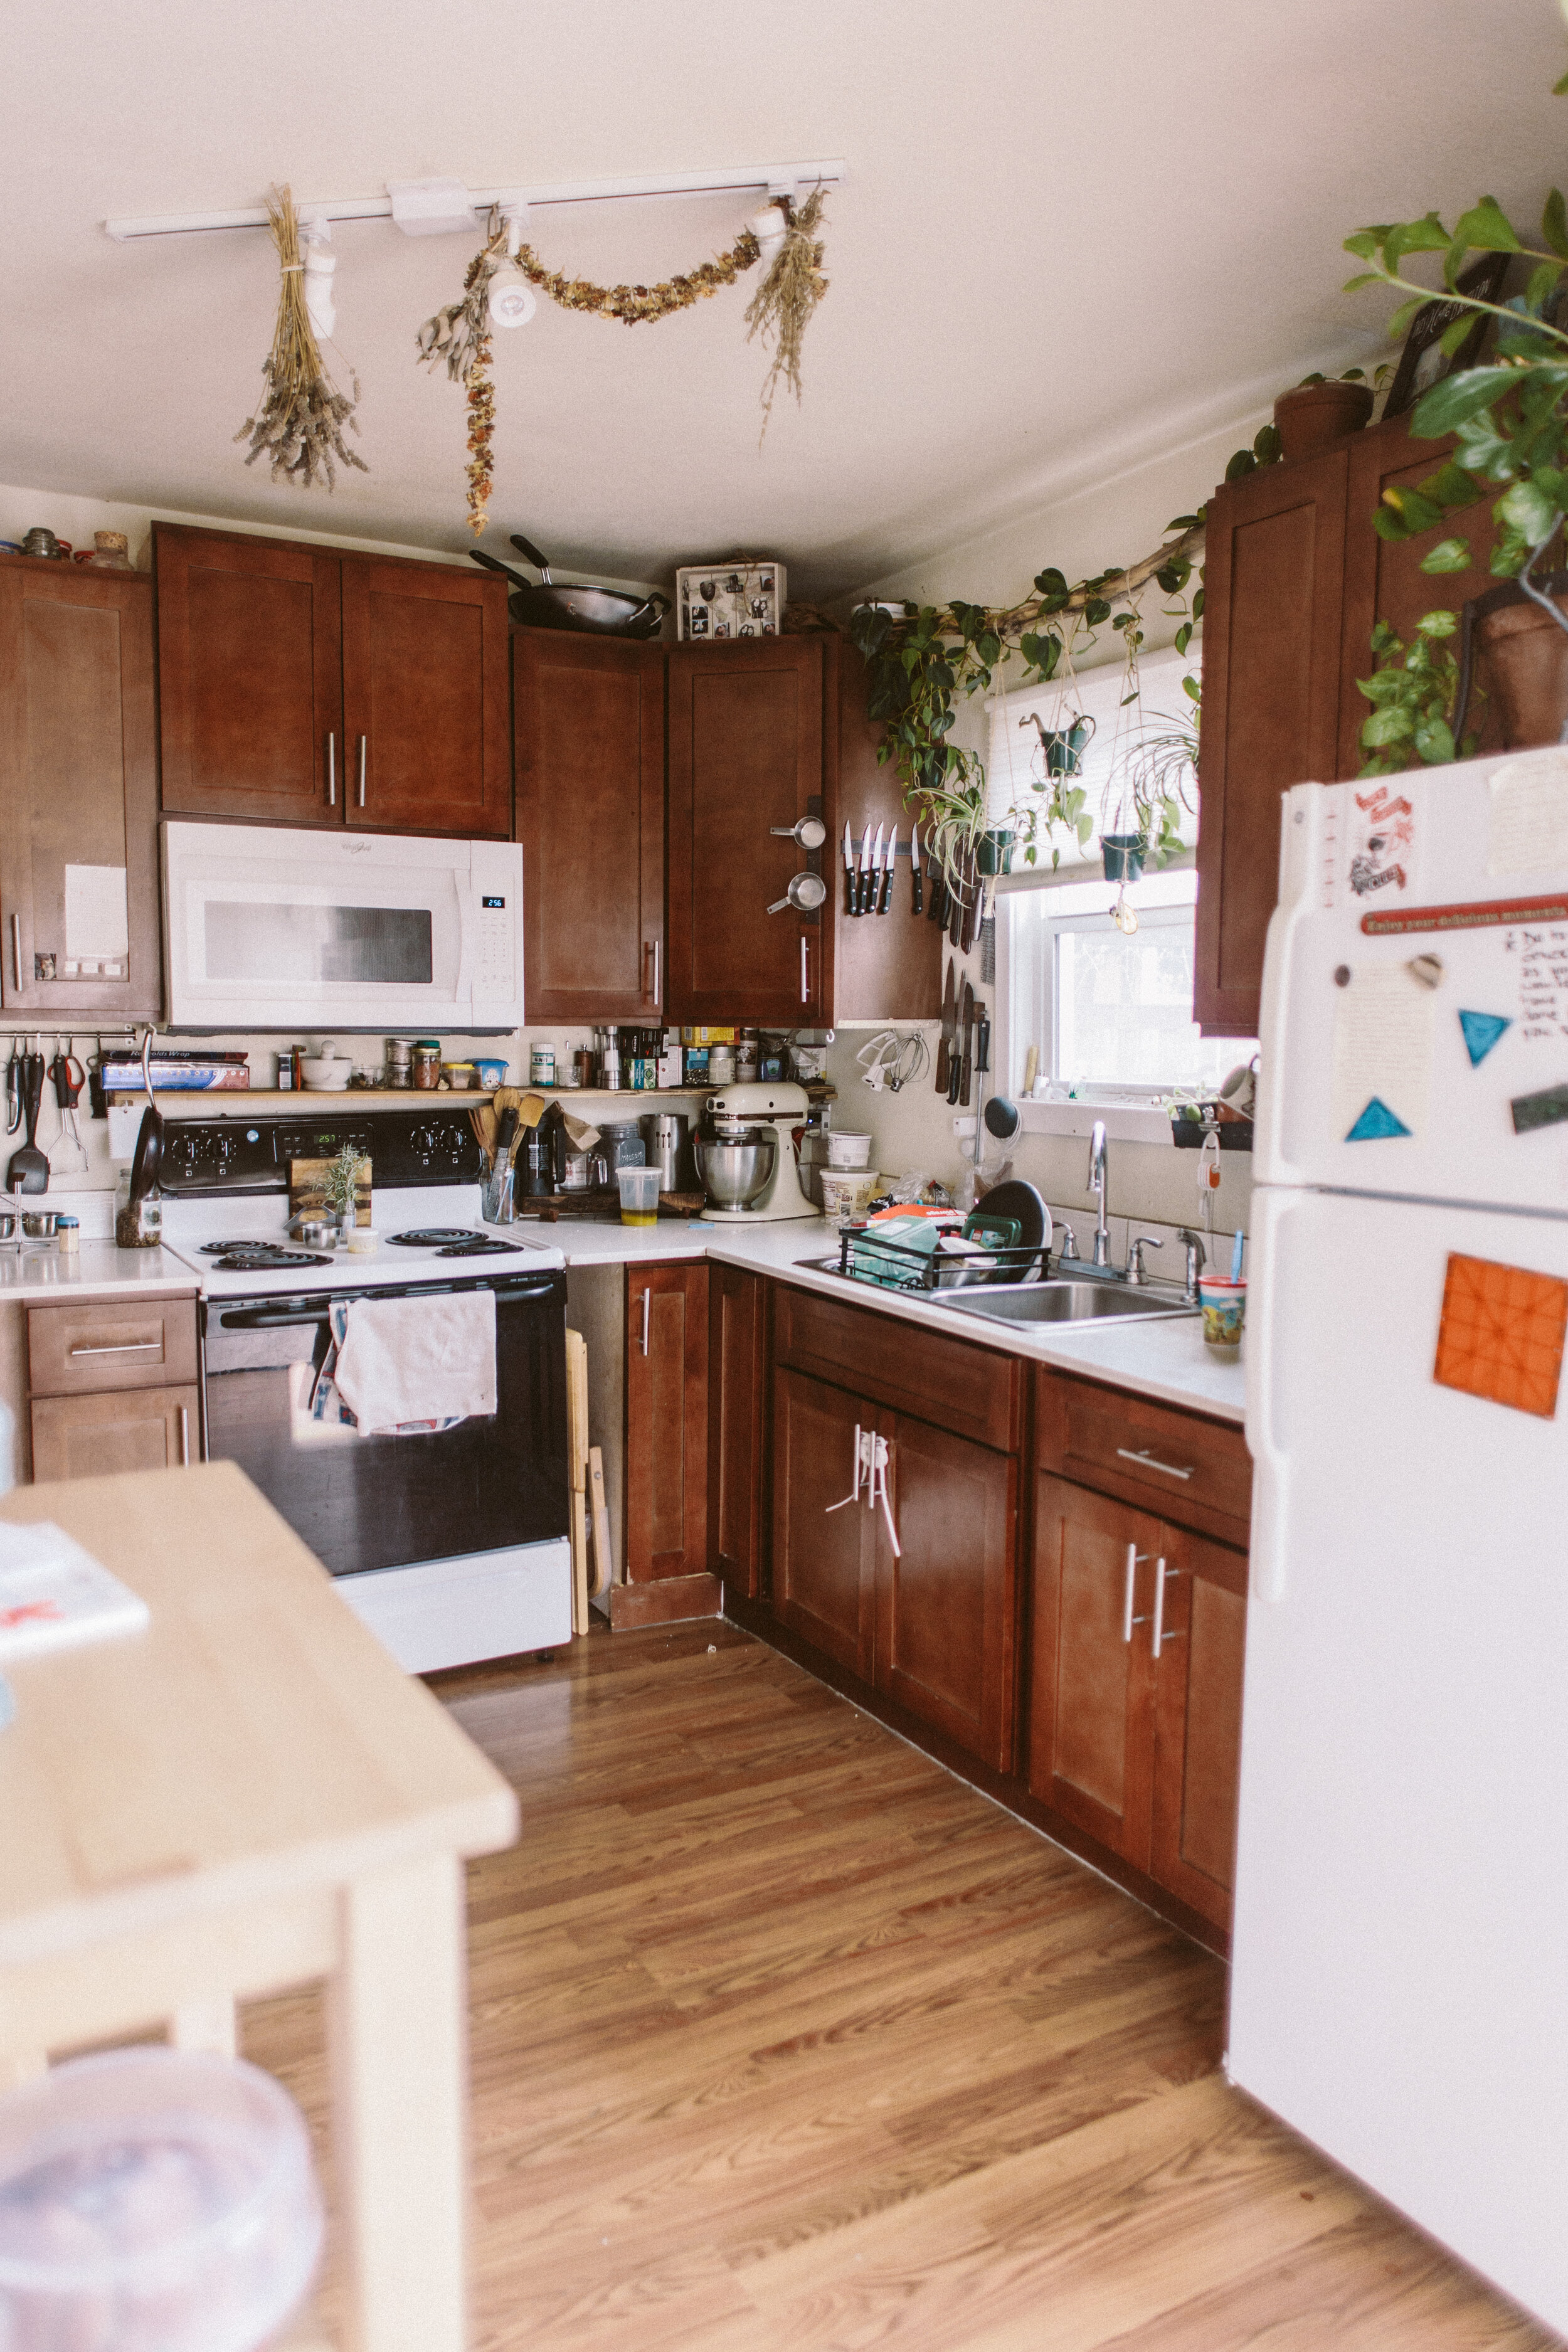
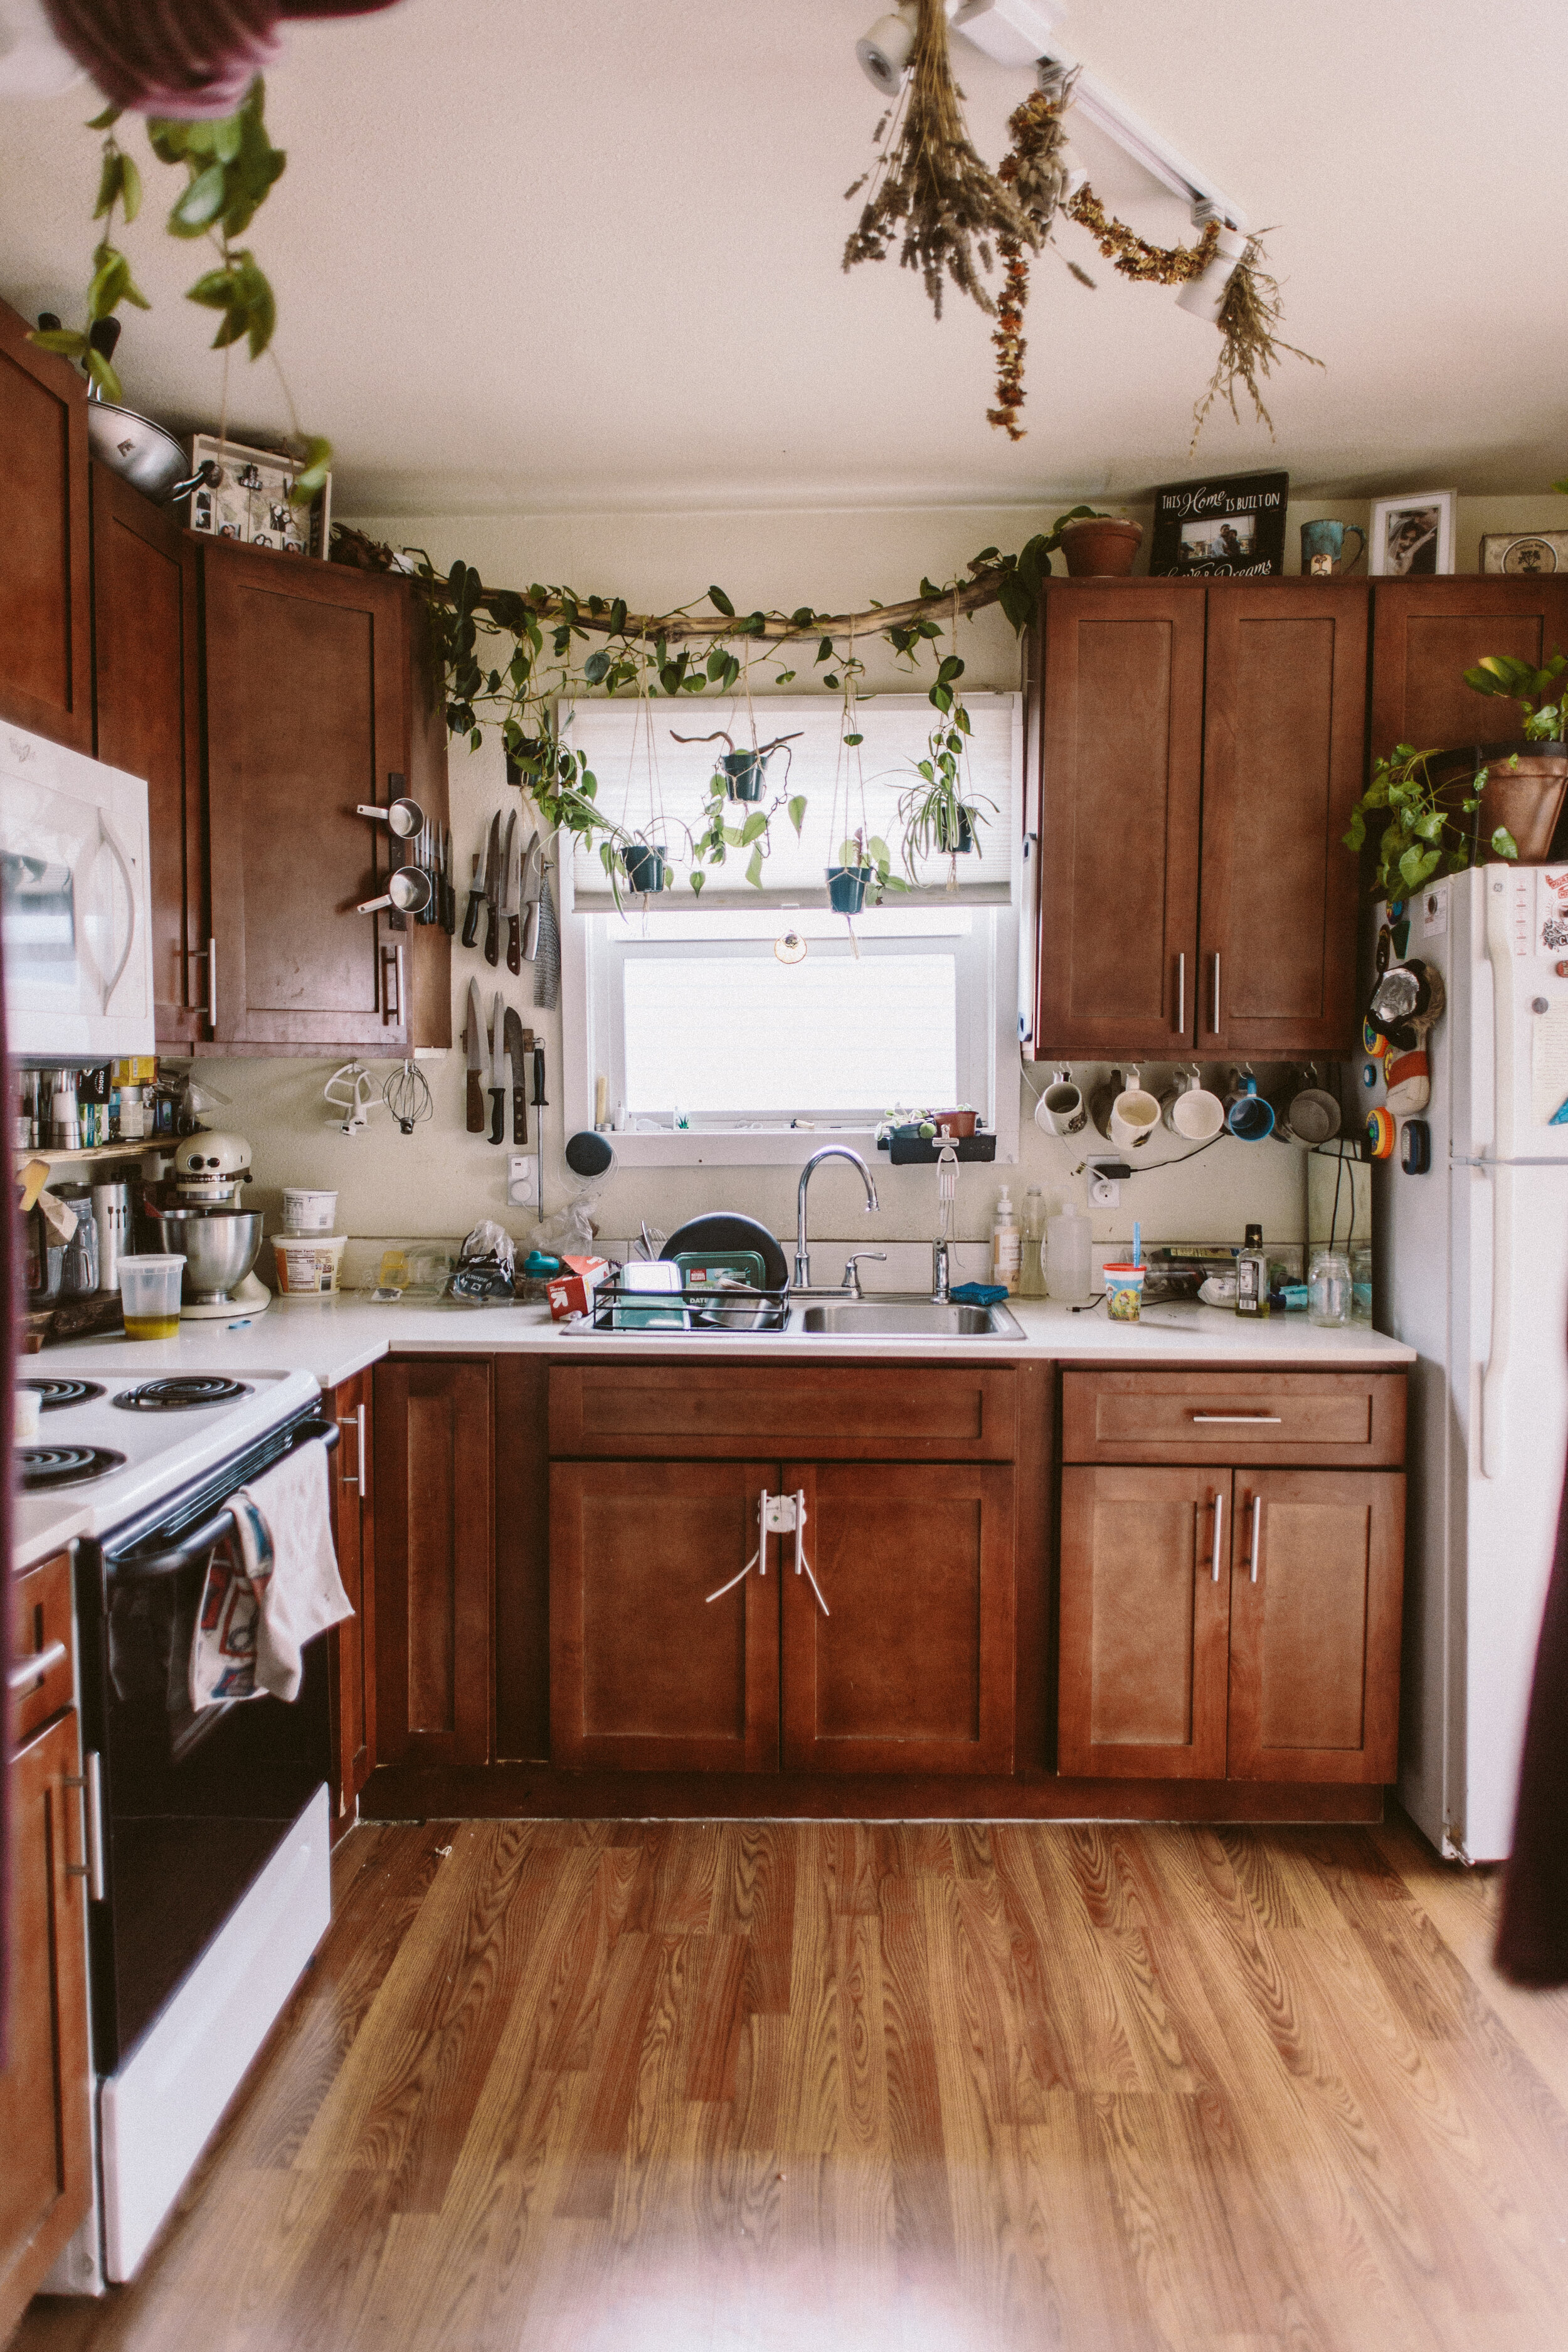
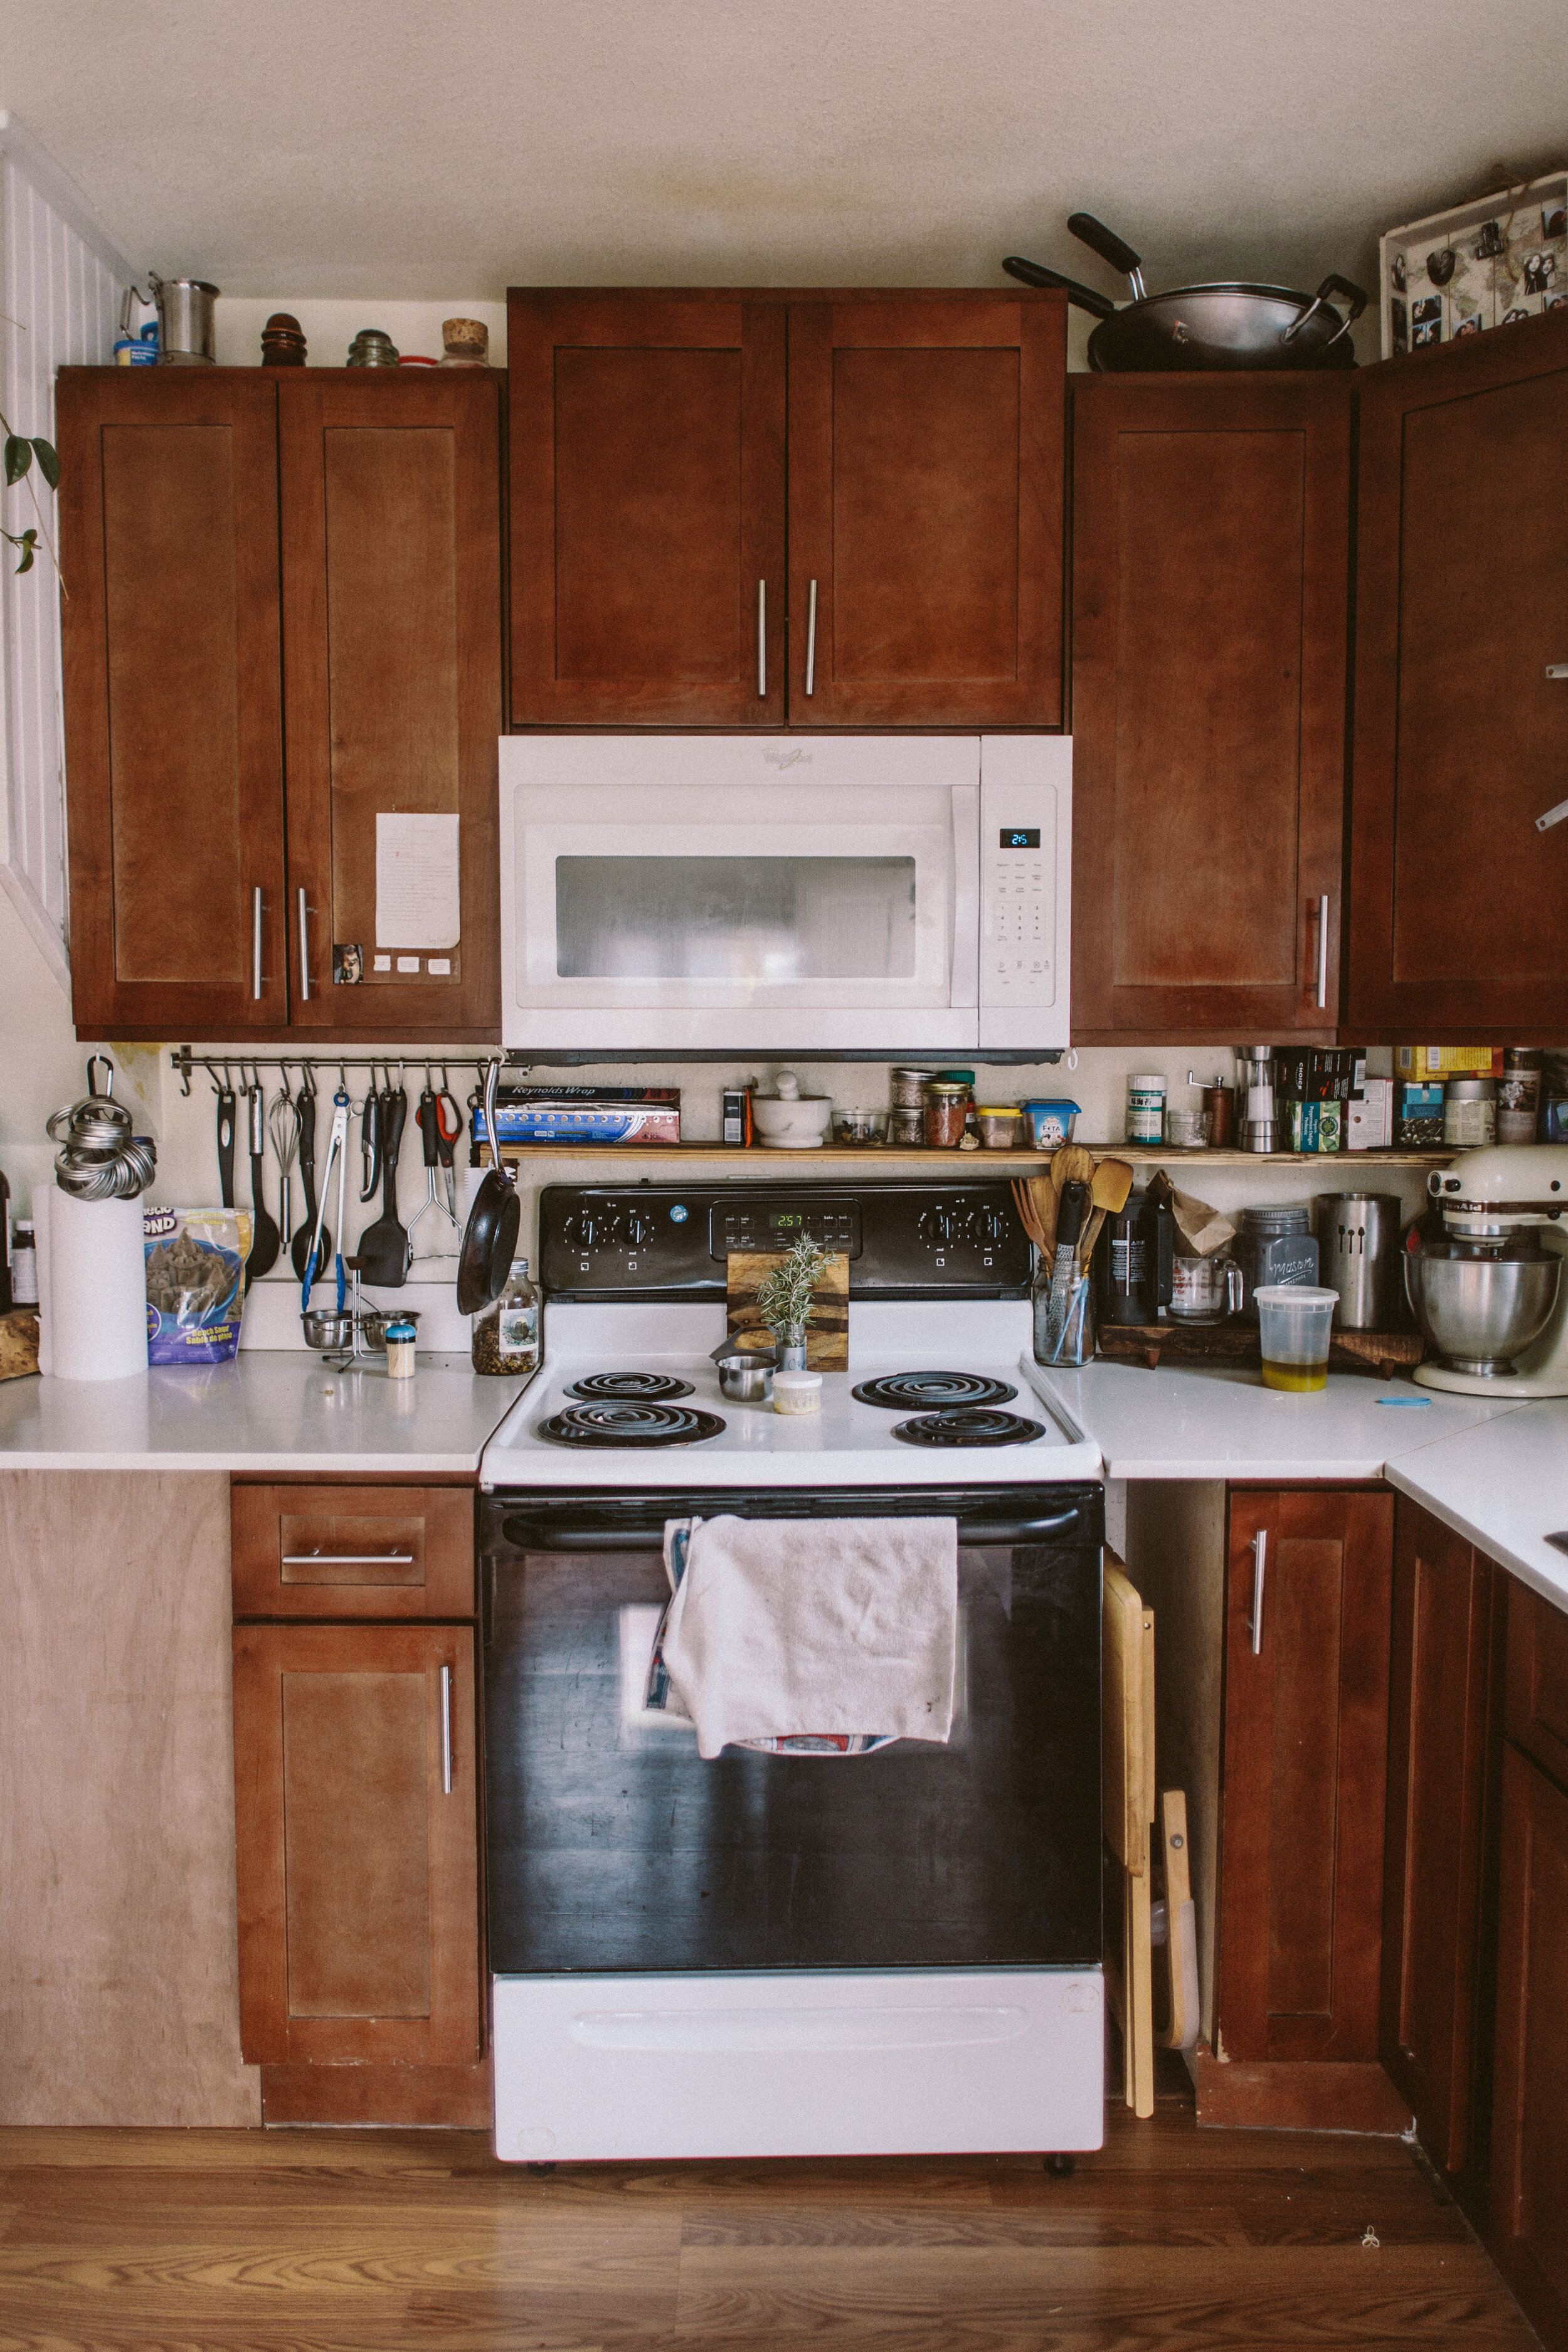
The big, unexpected showstopper ended up being her basic old fridge, transformed with a bit of removable stick-on wallpaper! Since we kept the existing cabinet hardware and painted it brass to match the light fixture, we did the same with the fridge handle to tie everything together. I used Rustoleum Vintage Gold spraypaint to paint both the cabinet door pulls and the fridge handle.
Another thing we did was add a whole wall of open shelving to give her a ton more storage. We painted those shelves the same green as the rest of the kitchen, but kept that wall white to give some contrast. Now she has a bunch of space to store all her pretty jars of dry goods, cute mugs and, of course, more plants.
And one more fun little detail: we put a chalkboard area in for her toddler to use! That panel is access for the water heater, so it was just an unfinished wood panel before, so we framed it out to match the shaker style of the cabinets and did the center panel in chalkboard paint so he could draw and have fun!
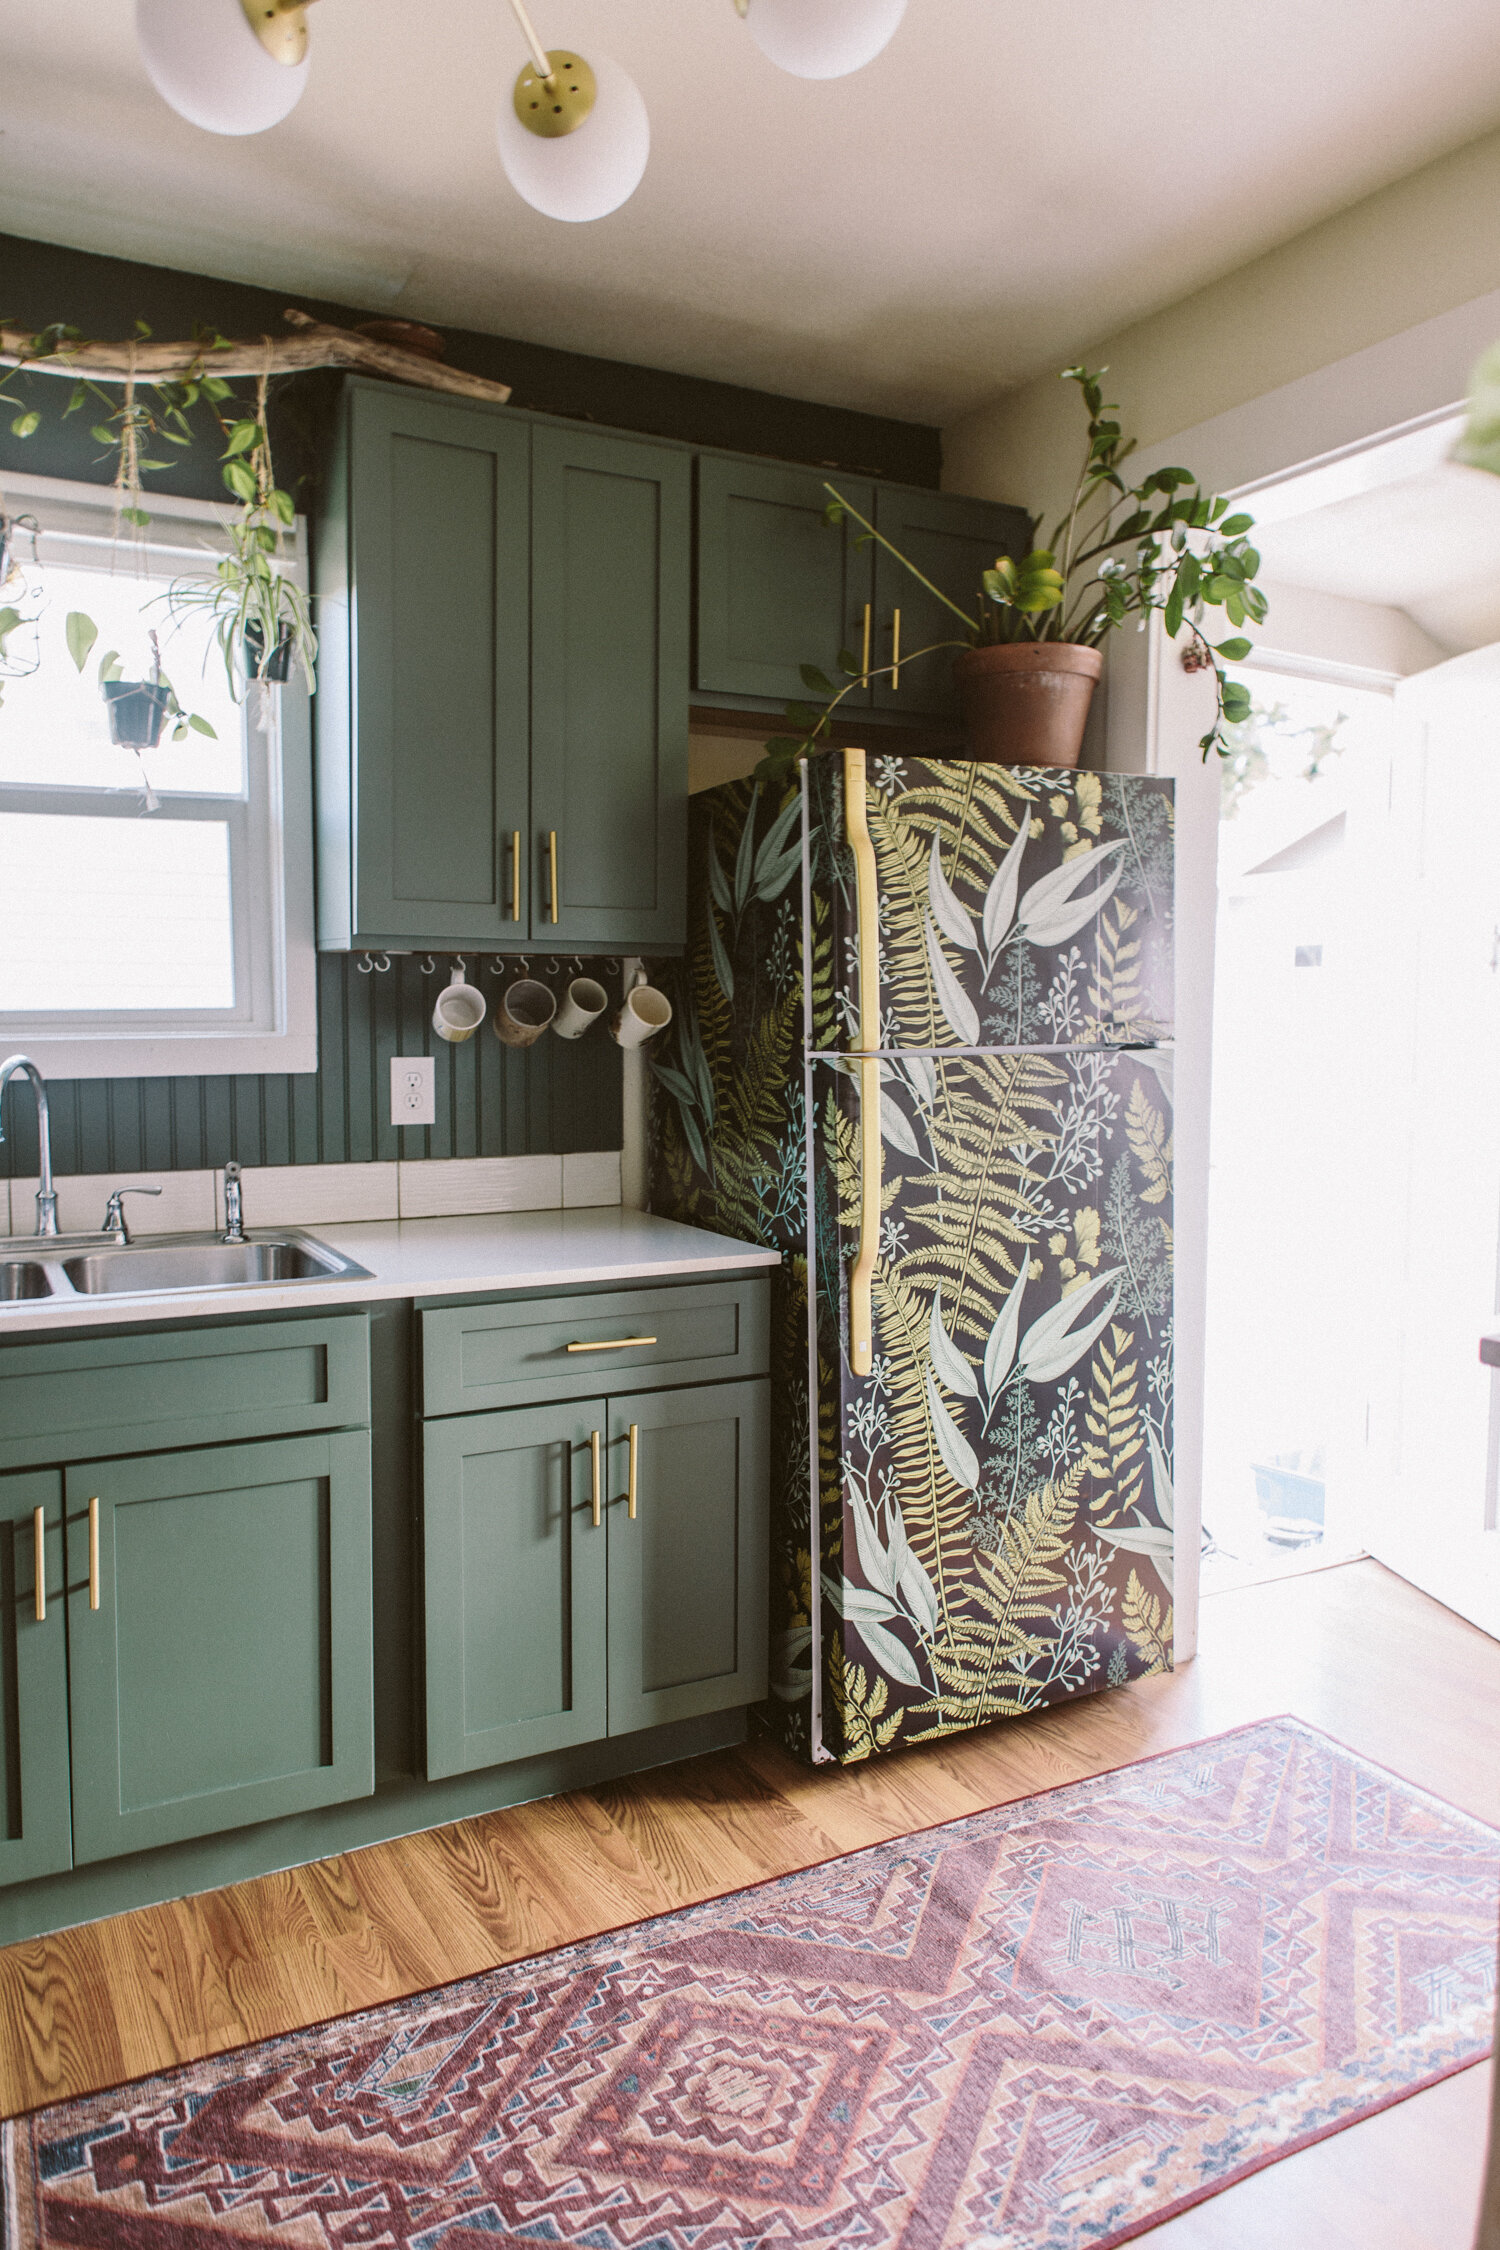
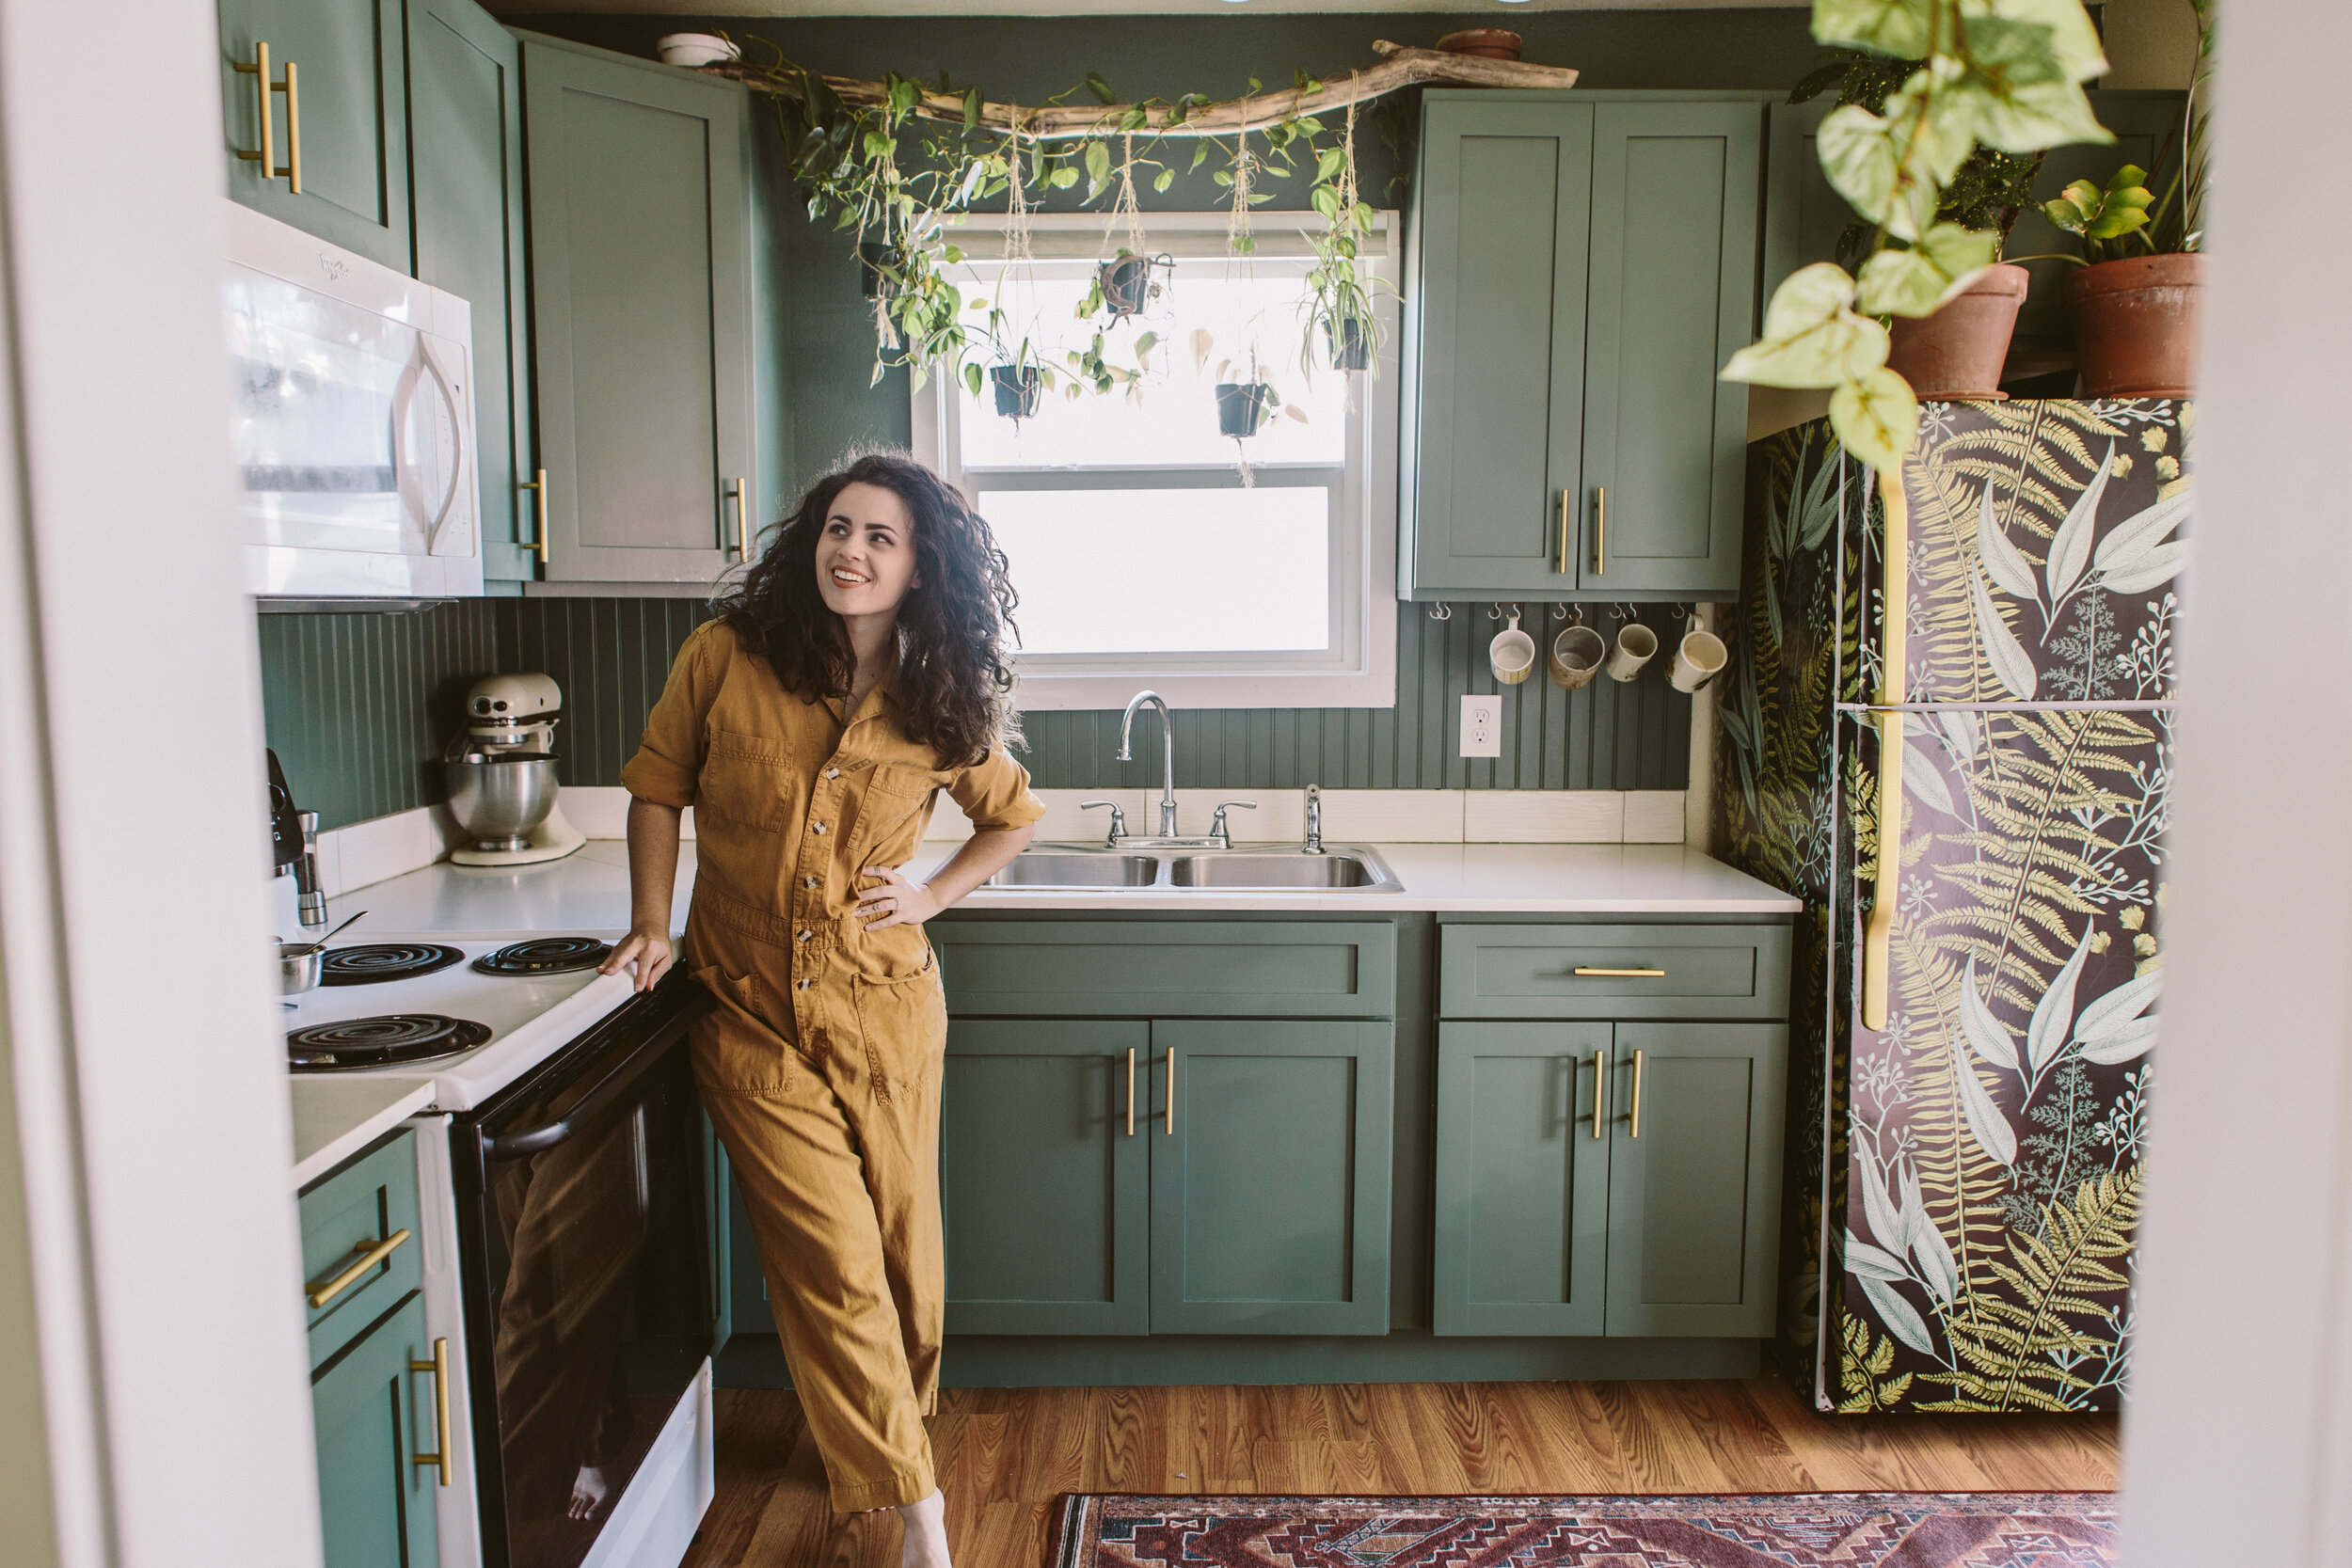
Projects like this have all the elements of what makes me most excited about design and remodels. Making a huge impact for not a huge amount of money, coming up with creative solutions, and doing really fun and out of the box elements (I’ll never get over that fridge).
I’m so thrilled that Frogtape brought me in on their Paintover Challenge this year so I could do this amazing project!
YOU MAY ALSO LIKE:


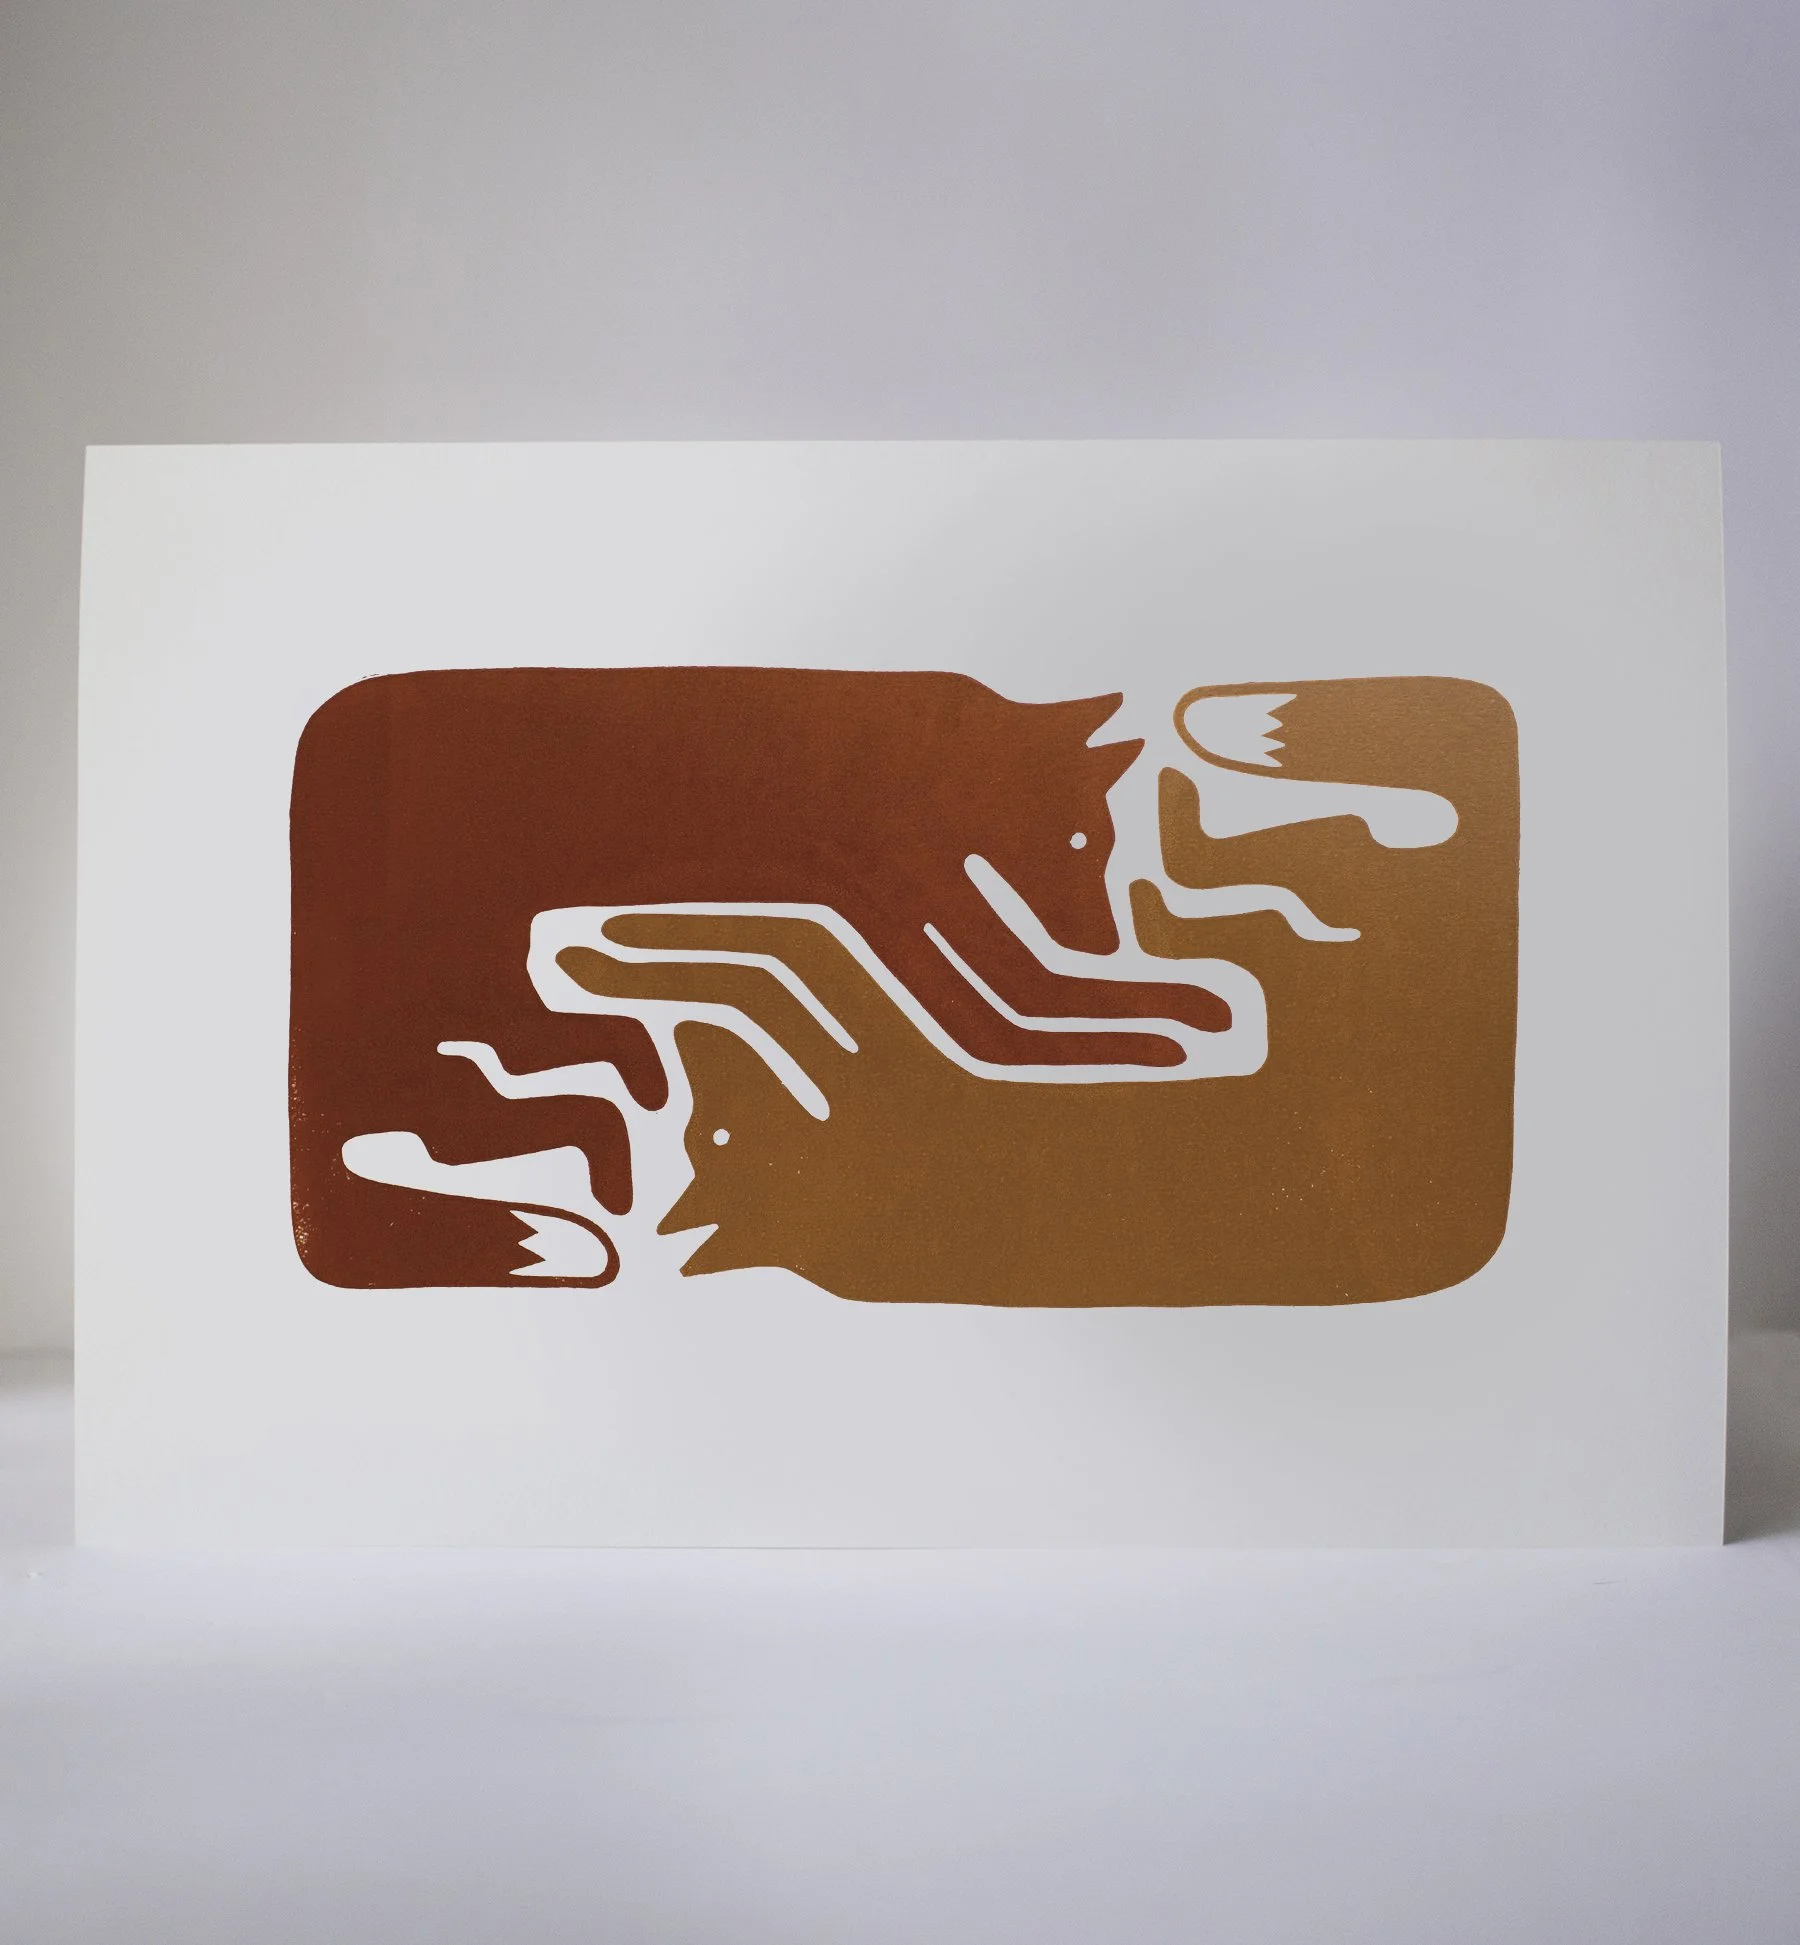
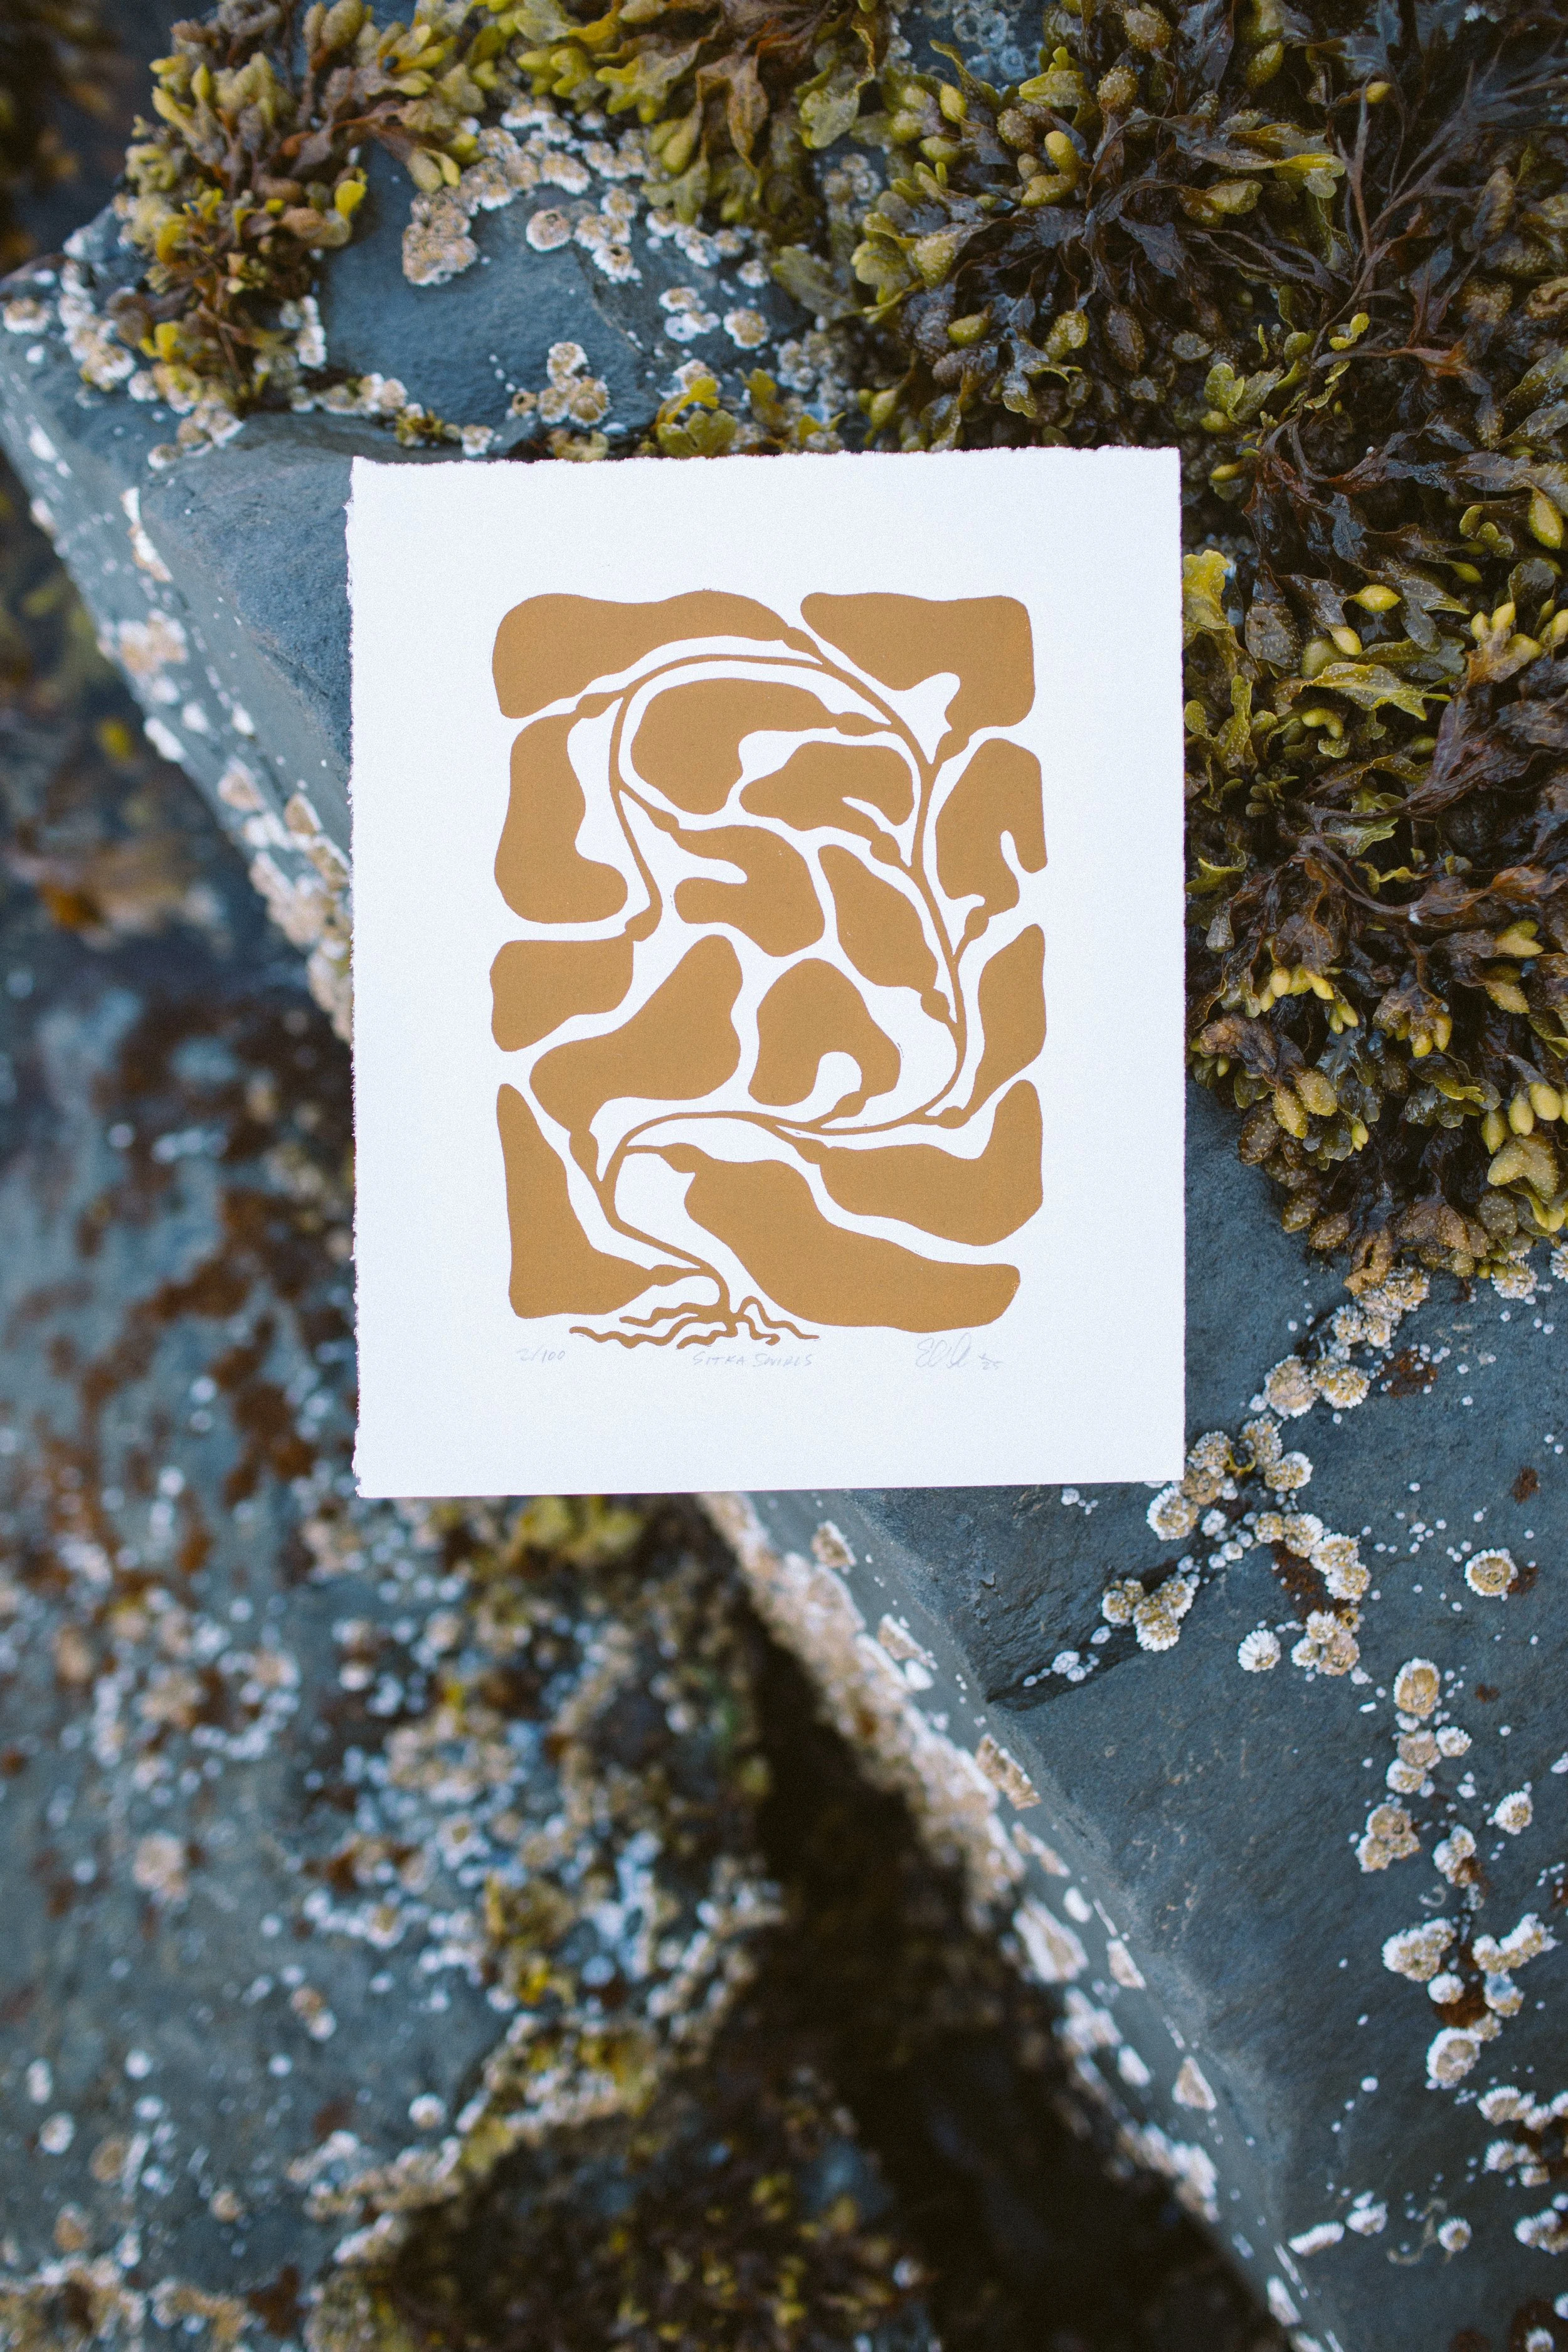
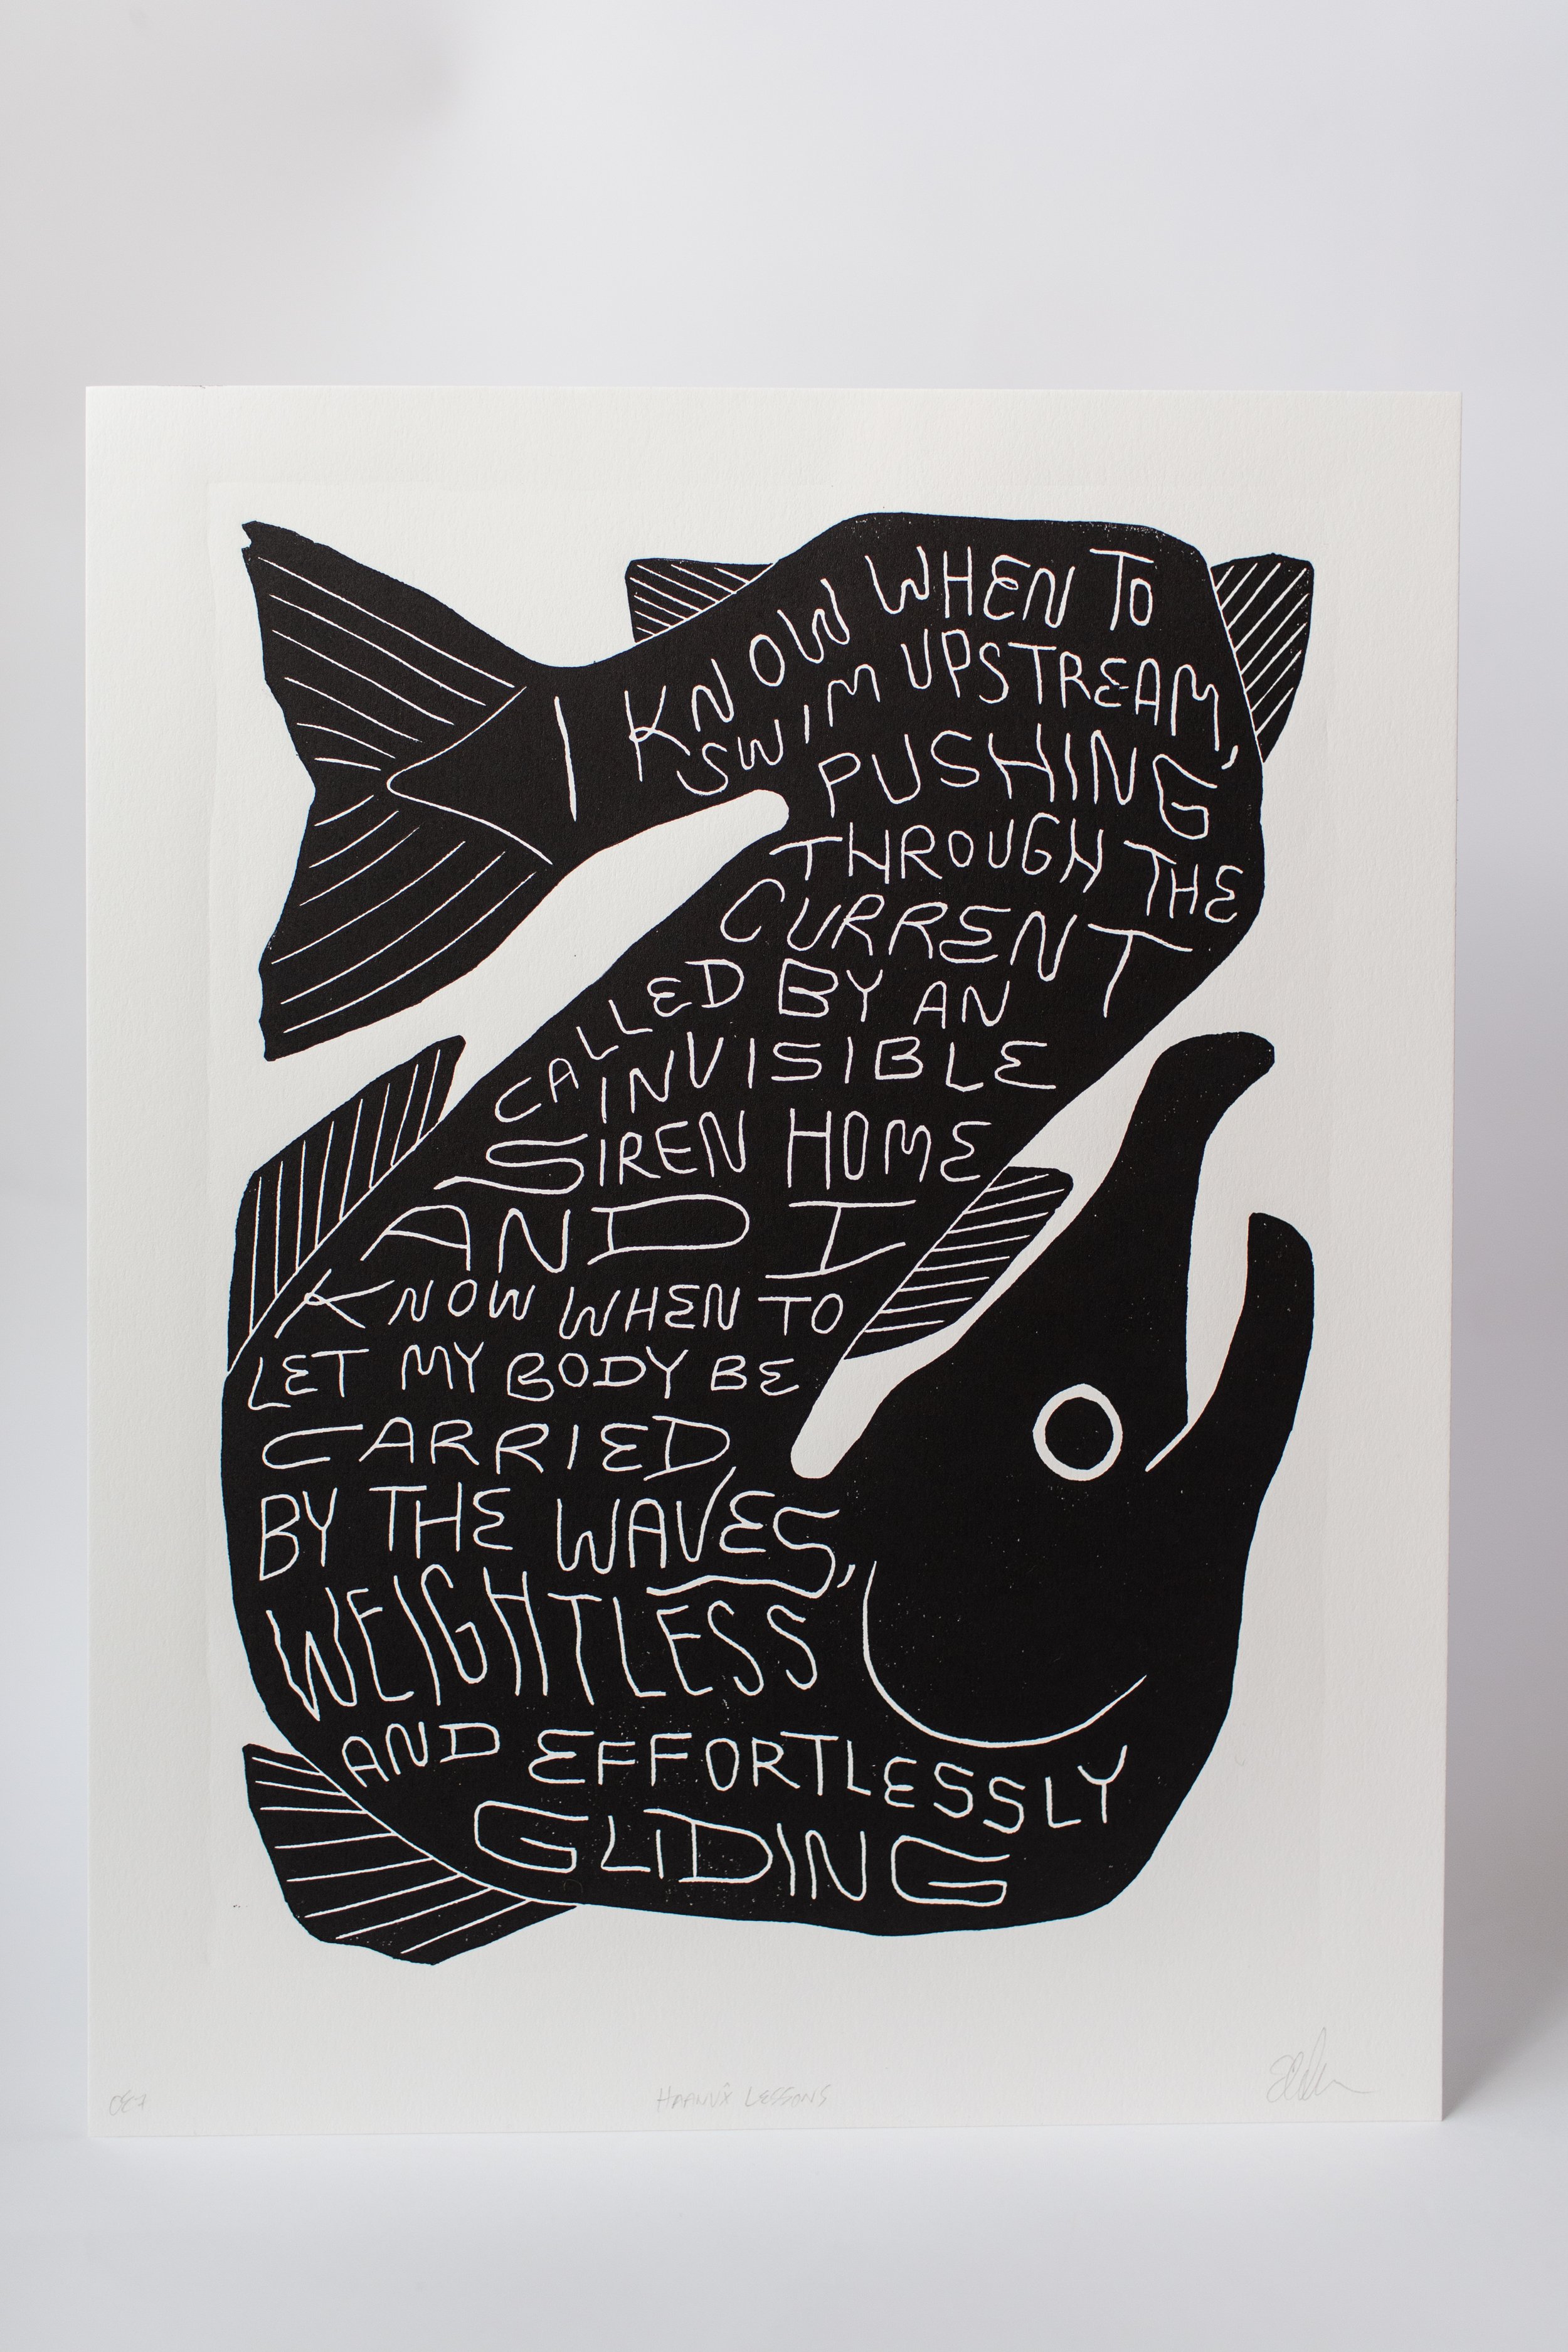
New T-Shirts! Rep the DIY life!

In an effort to not turn my entire wardrobe into paint splattered, sawdust encrusted DIYing clothes, I decided to make some cute (and, okay, a little kitschy) DIYing shirts for me and you! If you need a little somethin to throw on for your weekly— or if you’re like me, daily— Home Depot run, this is it right here.
Scroll down to check out all the new designs!







Elevating interiors using the senses
Thank you WoodWick Candles for sponsoring this post.

Finding inspiration for the design of a space is all about creating a mood.
Taking your design to the next level means creating a space that makes you feel a certain way when you enter that space, not just putting together pretty things. It's that design je ne sais quoi, you know?
Including WoodWick Candles in my home has elevated the spaces I've worked hard to build and style, it's like the cherry on top of all the other design elements. I love the scents, but also the soothing crackle of the wooden wick. It's such a lovely added ambiance that helps my house feel like a home.
Something that I like to think about when I'm designing is focusing on the senses. How does the space look, yes, but also: how does is sound? How does it smell? What do the materials feel like when I touch them? What quality of light is there?
When you design from that perspective it informs how you choose your materials, your finishes, your styling. You don't put fluorescent lighting in a cozy bedroom. You don't buy a firm couch for a room where you're going to curl up and read a book for a couple hours.
One of the things that helps me create a solid vision for a space’s design, whether I’m doing a remodel or simply the decor, is creating a mood board. You can do this digitally, or IRL by gathering swatches and elements of your design. This way you can see how all the different elements interact with one another before you commit to them. How does that tile look against the cabinet finish? How do the paint colors compliment the textiles? Does anything clash? Is there too much of one texture that it’s feeling unbalanced? Mood boards are a great way to give you the confidence to fully realize a design.


Great interior design incorporates all the senses, and scent is a particularly strong element for us psychologically so I try to incorporate some element of fragrance into each room I create. These WoodWick Candles not only have amazing scents, but they have a wooden wick, which crackles softly as it burns, creating an added element of ambiance, which I love.
I chose the Seaside Neroli candle for our bathroom, which elevates the space so beautifully and gives it a subtle spa-like vibe which is exactly the feeling a bathroom should have, and the Melon Blossom candle has such a bright, fruity scent that has been perfect for the kitchen in these spring months.

For this WoodWick Shoreline Trilogy Candle, I wanted to create a mood board based on the candle, taking inspiration from each of the three scents. This mood board is definitely very organic and natural, with a bright and fresh feel. It’s got the pink and peachy colors inspired by the Melon Blossom scent. Then, there are some more beachy vibes, like the wood tones, shaker cabinet door, and textiles, inspired by the Coastal Sunset scent. Then I brought in some bohemian elements inspired by the Palo Santo scent, with the rose quartz and macrame elements.
Having a mood board like this lets me have an anchor when I’m choosing things like tile, throw pillows, rugs, linens, etc. It’s kind of like a design litmus test: does this element fit in with my mood board? If yes? Go for it!

Hi, I’m Liz
I'm an artist, writer, designer, DIY renovator, and … well basically I like to do all the things. If it’s creative I’m probably doing it. I’ve spent over 30 years voraciously pursuing a life steeped in creativity and I wholeheartedly believe creativity and joy are inextricably linked.
Read more…






Explore The Archive
- October 2026
- May 2026
- January 2026
- July 2025
- May 2025
- January 2025
- December 2024
- August 2024
- July 2024
- May 2024
- April 2024
- January 2024
- December 2023
- October 2023
- September 2023
- July 2023
- June 2023
- May 2023
- April 2023
- March 2023
- February 2023
- January 2023
- December 2022
- November 2022
- October 2022
- August 2022
- June 2022
- May 2022
- April 2022
- March 2022
- November 2021
- October 2021
- August 2021
- July 2021
- May 2021
- January 2021
- November 2020
- October 2020
- September 2020
- August 2020
- July 2020
- June 2020
- May 2020
- April 2020
- February 2020
- January 2020
- November 2019
- October 2019
- August 2019
- July 2019
- June 2019
- May 2019
- April 2019
- February 2019
- January 2019
- December 2018
- November 2018
- October 2018
- September 2018
- August 2018
- July 2018
- June 2018
- May 2018
- April 2018
- February 2018
- January 2018
- November 2017
- September 2017
- August 2017
- July 2017
- June 2017
- May 2017
- April 2017
- March 2017
- February 2017
- January 2017
- December 2016
- November 2016
- October 2016
- September 2016
- August 2016
- June 2016
- May 2016
- April 2016
- March 2016
- February 2016
- January 2016
- December 2015
- November 2015
- October 2015
- September 2015
- August 2015
- July 2015
- June 2015
- May 2015
- April 2015
- March 2015
- February 2015
- January 2015
- December 2014
- November 2014
- October 2014
- September 2014
- August 2014
- July 2014
- June 2014
- May 2014
- April 2014
- March 2014
- February 2014
- January 2014
- December 2013
- November 2013
- October 2013
- September 2013
- August 2013
- July 2013
- June 2013
- May 2013
- April 2013
- March 2013
- February 2013
- January 2013
- December 2012
- November 2012
- October 2012
- September 2012
- August 2012
- July 2012
- June 2012
- May 2012
- April 2012
- March 2012
- February 2012
- January 2012
- December 2011
- November 2011
- October 2011
- September 2011
- August 2011
- July 2011
- June 2011
- May 2011
- April 2011
- March 2011
- February 2011
- January 2011
- December 2010
- November 2010
- October 2010
- September 2010
- August 2010
- July 2010
- June 2010
- May 2010
- April 2010
- March 2010
- February 2010
- January 2010
- December 2009
- November 2009
- October 2009
- September 2009
- August 2009
- July 2009
- June 2009
- May 2009
- April 2009
- March 2009
- February 2009
- January 2009
- December 2008
- November 2008
- October 2008
- September 2008
- August 2008
- July 2008

VISIT THE SHOP


PRIVACY POLICY & DISCLOSURE
We are a participant in the Amazon Services LLC Associates Program, an affiliate advertising program designed to provide a means for us to earn fees by linking to Amazon.com and affiliated sites.