Ikea Hack Library Built-in
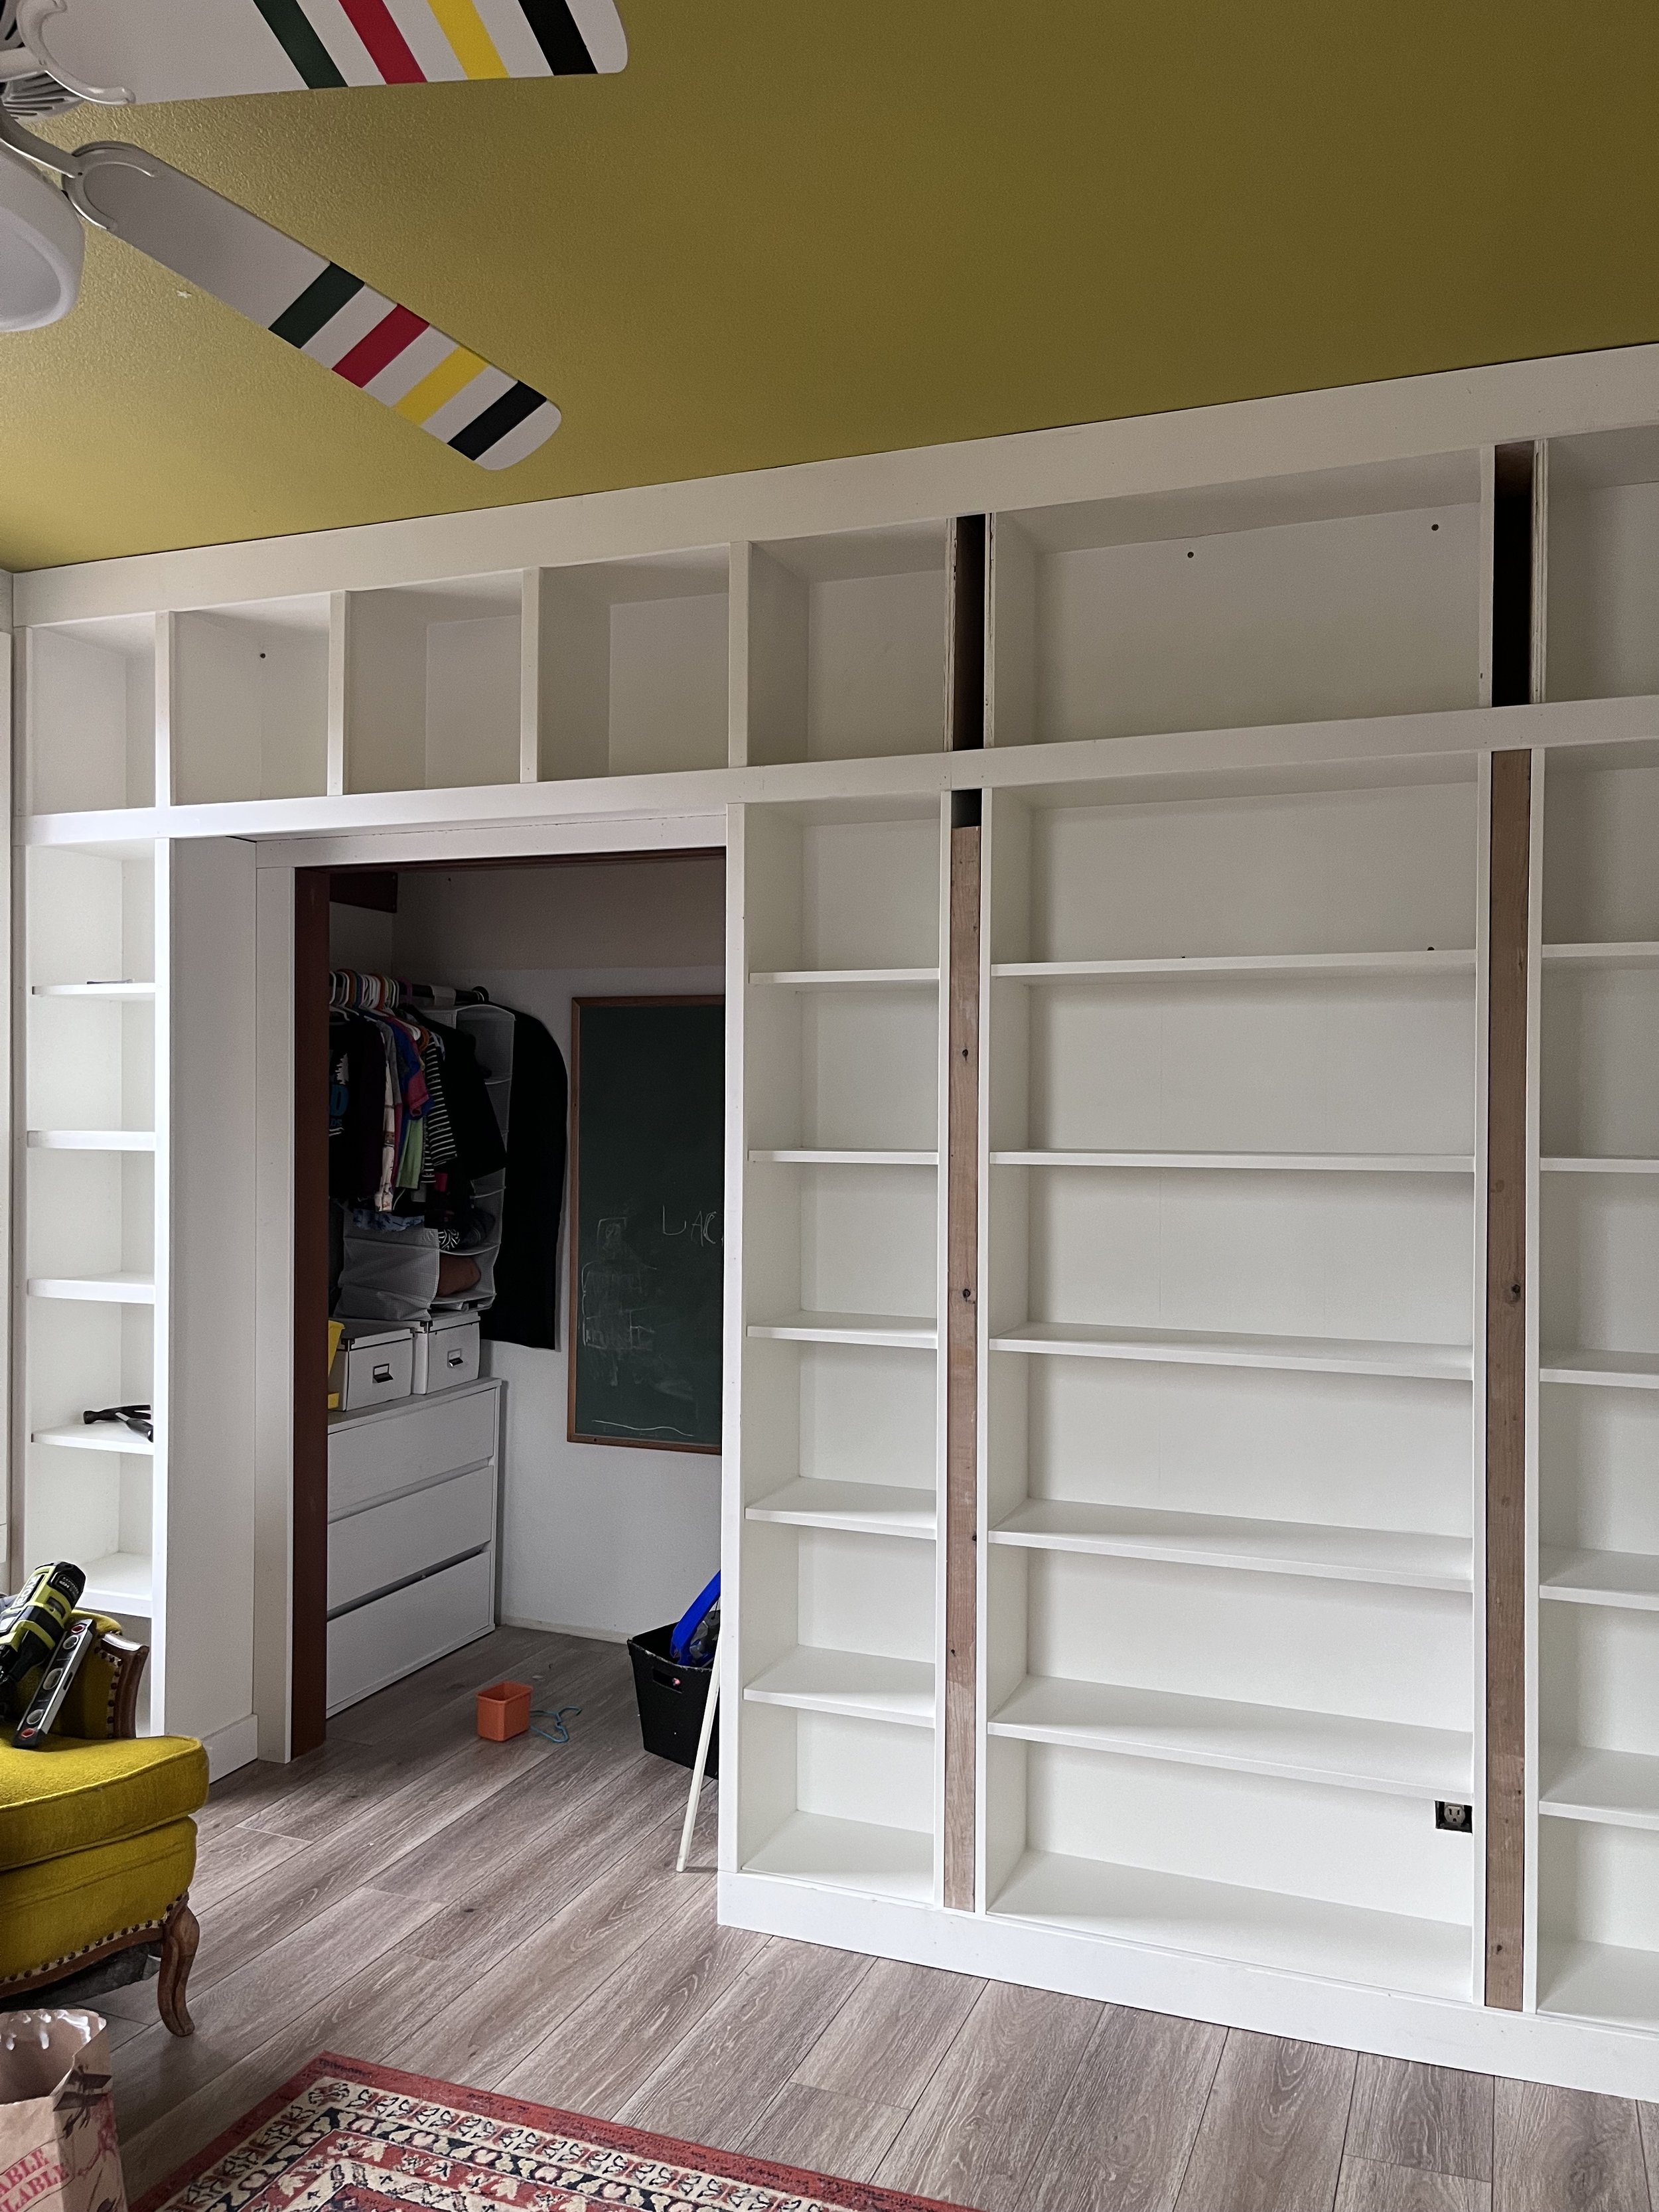
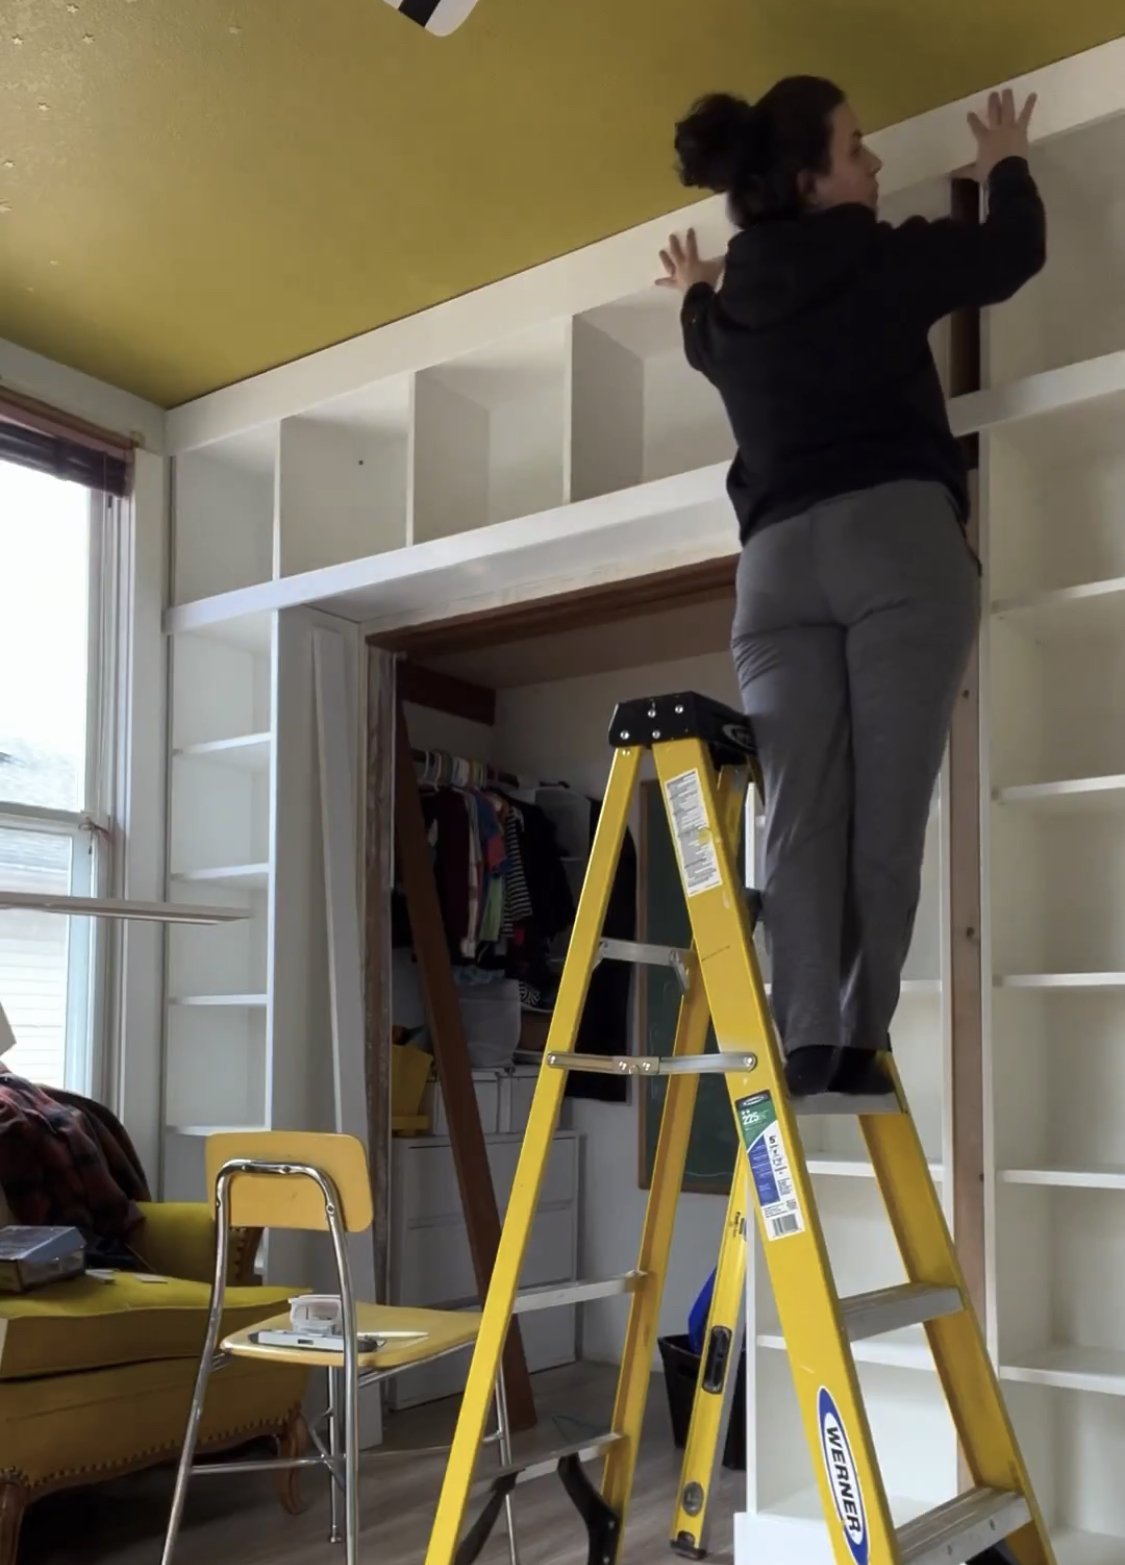
Jack’s library wall is done! This Ikea hack built-in bookshelf was such a fun project to tackle. This build was partially created from Ikea Billy bookcases. The top section of cubbies that spans the entire wall is custom built from scratch, and the shelves below that are the Billy bookcases. Everything was custom trimmed out and secured to the wall to be fully built-in and permanent!
This wall was originally space that was really unusable. You could put a dresser or bookshelves in the wider section of wall, but it’s also behind the swing of the door, so no seating or bed could be against that wall. I had an Ikea Kallax shelf there for a few years, holding Jack’s books, games, and toys, but as he’s started reading more and getting more into board games, I quickly ran out of space on that shelf. Transforming the wall into a floor-to-ceiling bookcase felt like the perfect way to add so much storage and functionality to this room.
Project Cost Breakdown
Plywood for top shelves: $119.50
Ikea Billy Bookcases (3x 16in wide and 1x 32in): $236.00
White Paint + Paint Brush: $64.98
Primer, Wood Filler, Caulk: $103.87
Trim (various sizes): $180.53
Coral Curtains (used an old existing Ikea curtain rod): $40.26
Project total: $745.14
This total doesn’t include the tools used to complete this project, which I already had. It also doesn’t include fasteners like screws or brad nails, which I also already had on hand. The tools I used to complete this project were:
Circular Saw
Drill + Impact Driver
Table Saw
Pocket Hole Jig
Brad Nailer
Corner Clamps


For this project, I decided to use Ikea Billy bookcases for the bottom section of shelves, then custom build the top section that spans the entire wall, going over the closet doorway.
I began by building the Ikea Billy bookcases. I needed to install all the shelves so I could fill all the bracket holes on the insides with wood filler. This really makes them feel seamless and built-in without all the little holes. Once the wood filler was dry I could take these outside and sand them to smooth out the wood filler and scuff up the laminate finish to prep for primer. I sanded with 220 using my sheet sander, then pulled them into the garage to spray with primer.
Using my Graco X7 paint sprayer I sprayed Zinsser B-I-N primer, which is a shellac based primer that sticks super well to finishes like the laminate Ikea furniture finish. Make sure to wear a respirator mask when spraying it, this stuff is pretty nasty but it works great. I put two coats of primer on.
To install the Ikea bookcases, I needed to measure where my studs were and then I added 1/2in scraps of plywood to the wall where the studs were because the way the back of these bookshelves is constructed leaves about a 1/2in gap between the back panel and the wall, which you can see in the video below
I screwed through the back of the bookshelves, the plywood scrap and into the studs to secure these to the wall, then I got to work building the top section of the library from scratch.
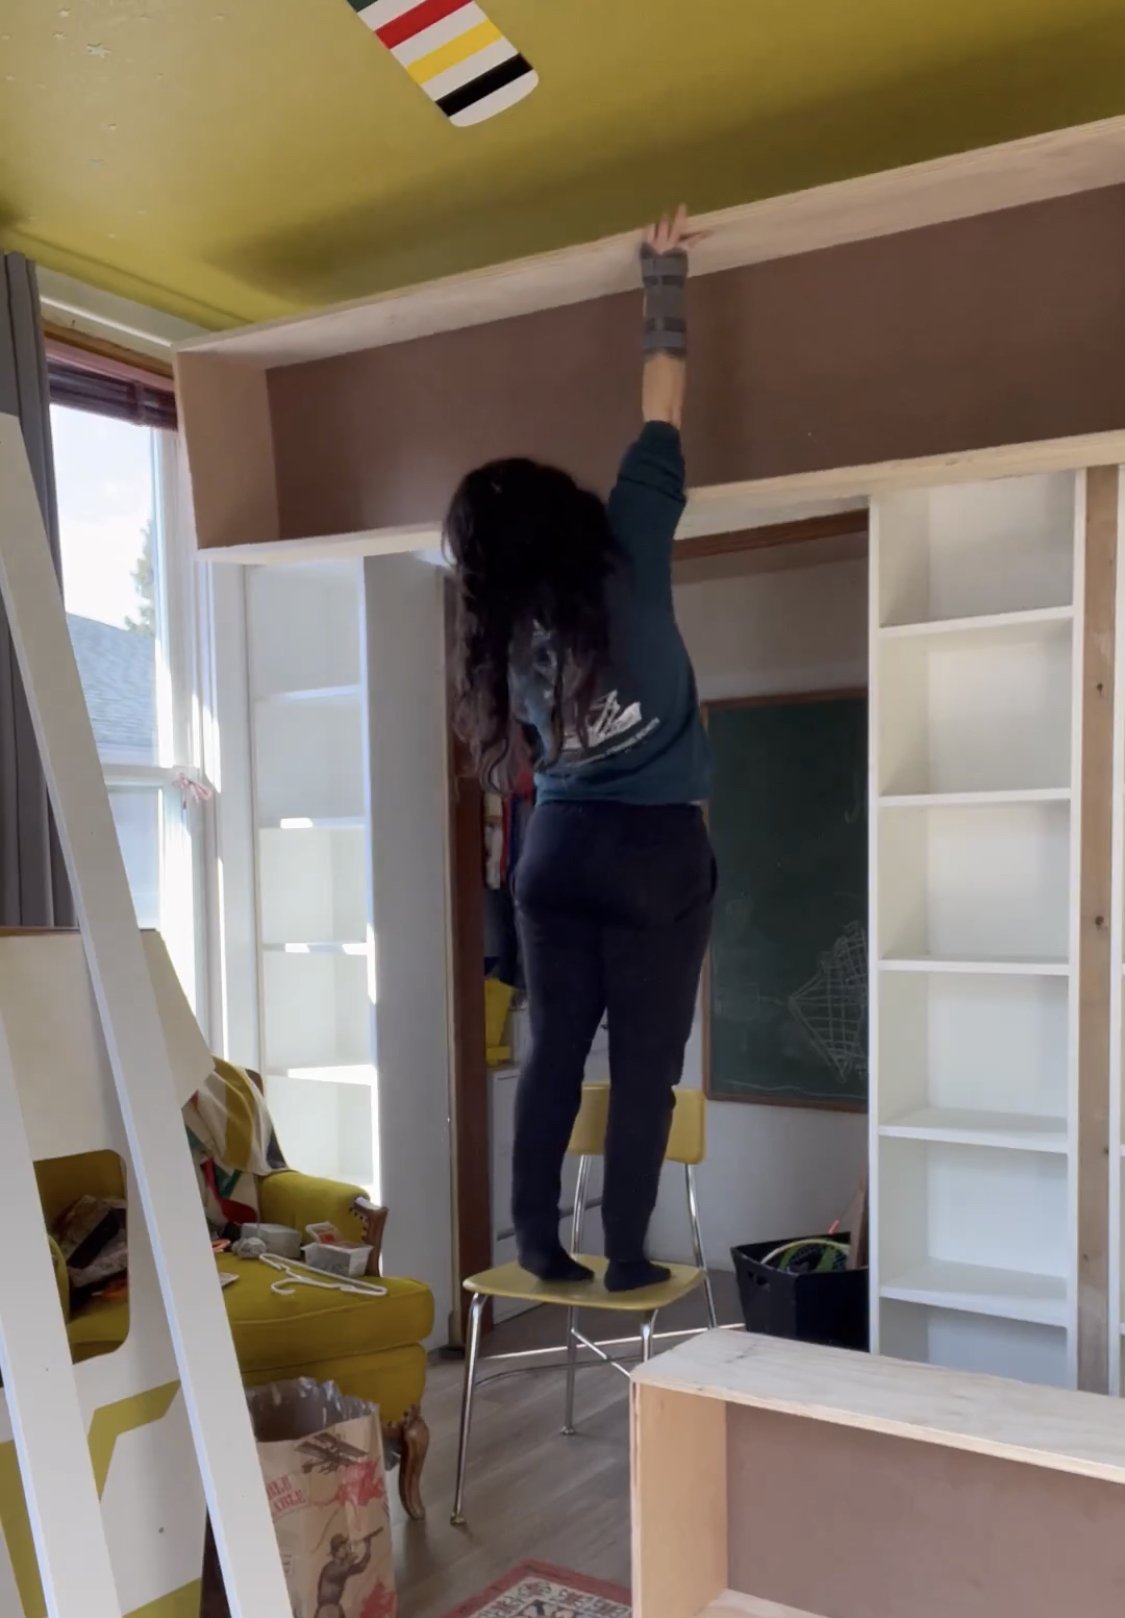
I built this section in two pieces, one piece that spanned over the closet doorway and sat atop the two 16” billy bookcases that flank that doorway, and then a second one that sat atop the 32” bookcase and the 16” bookcase in the corner of the room. I used cabinet grade plywood to build these, which was about $55/sheet at Home Depot, and then used hardboard for the back wall.
I mapped out the measurements for all the side panels and inside vertical separators and input those into cutlistoptimizer.com to get an efficient plan for how to utilize my plywood to avoid waste, this was super helpful when it came time to cut every piece.
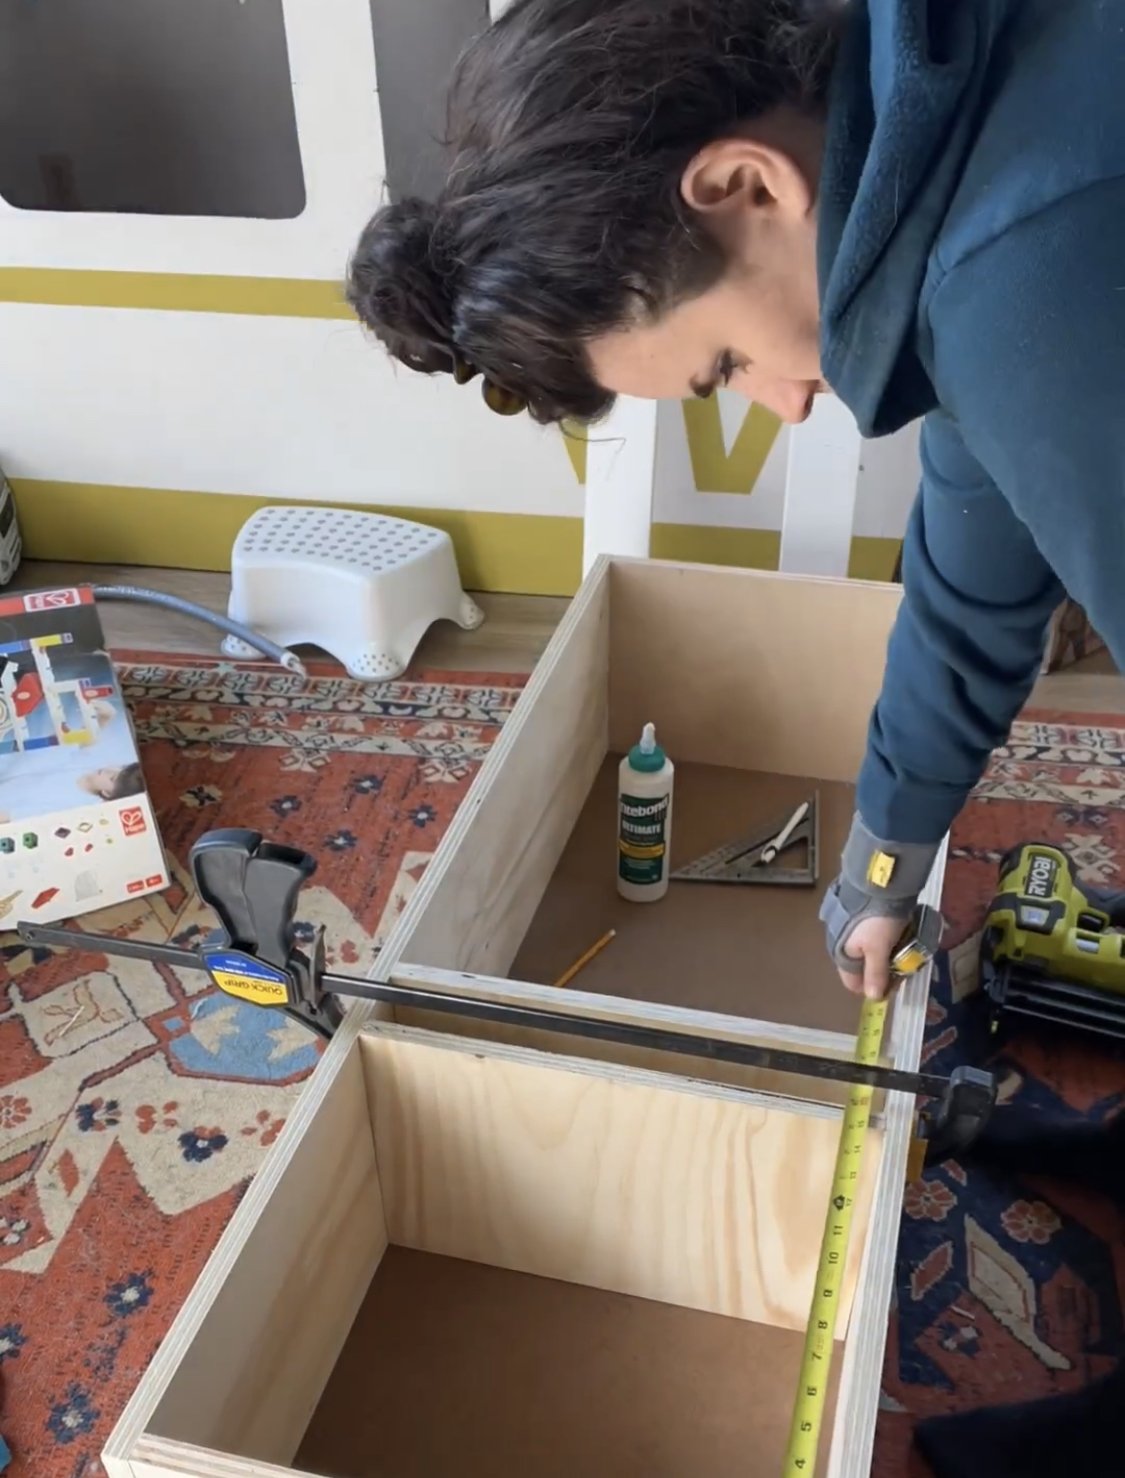
To assemble these upper boxes, I used my Kreg pocket hole jig and drilled two pocket holes on the top and bottom of the vertical sides of the box, and then used corner clamps to hold everything together nice and square while I screwed the sides on to the bottom of the box. Then I flipped it over to attach the top, again using pocket screws.
To cut the hardboard for the back, I just laid the boxes on the hardboard, traced around their perimeter, and then cut out those rectangles. Those got nailed on to the back of the boxes, then we pulled the boxes inside to temporarily install them on the top of the billy bookcases so I could mark where all the vertical dividers would go in those boxes. I wanted all the dividers to match up perfectly with the sides of the Ikea shelves so things looked seamless from bottom to top.
With those measurements taken, I then brought those boxes back down to the ground and installed the verticals using wood glue and brad nails. The final thing the custom boxes needed was a couple coats of primer, so they went back out to the garage for spraying.
Finally they could be installed permanently, again— screwing them to the studs (these didn’t need that extra plywood because they didn’t have a gap between the back panel and the wall).
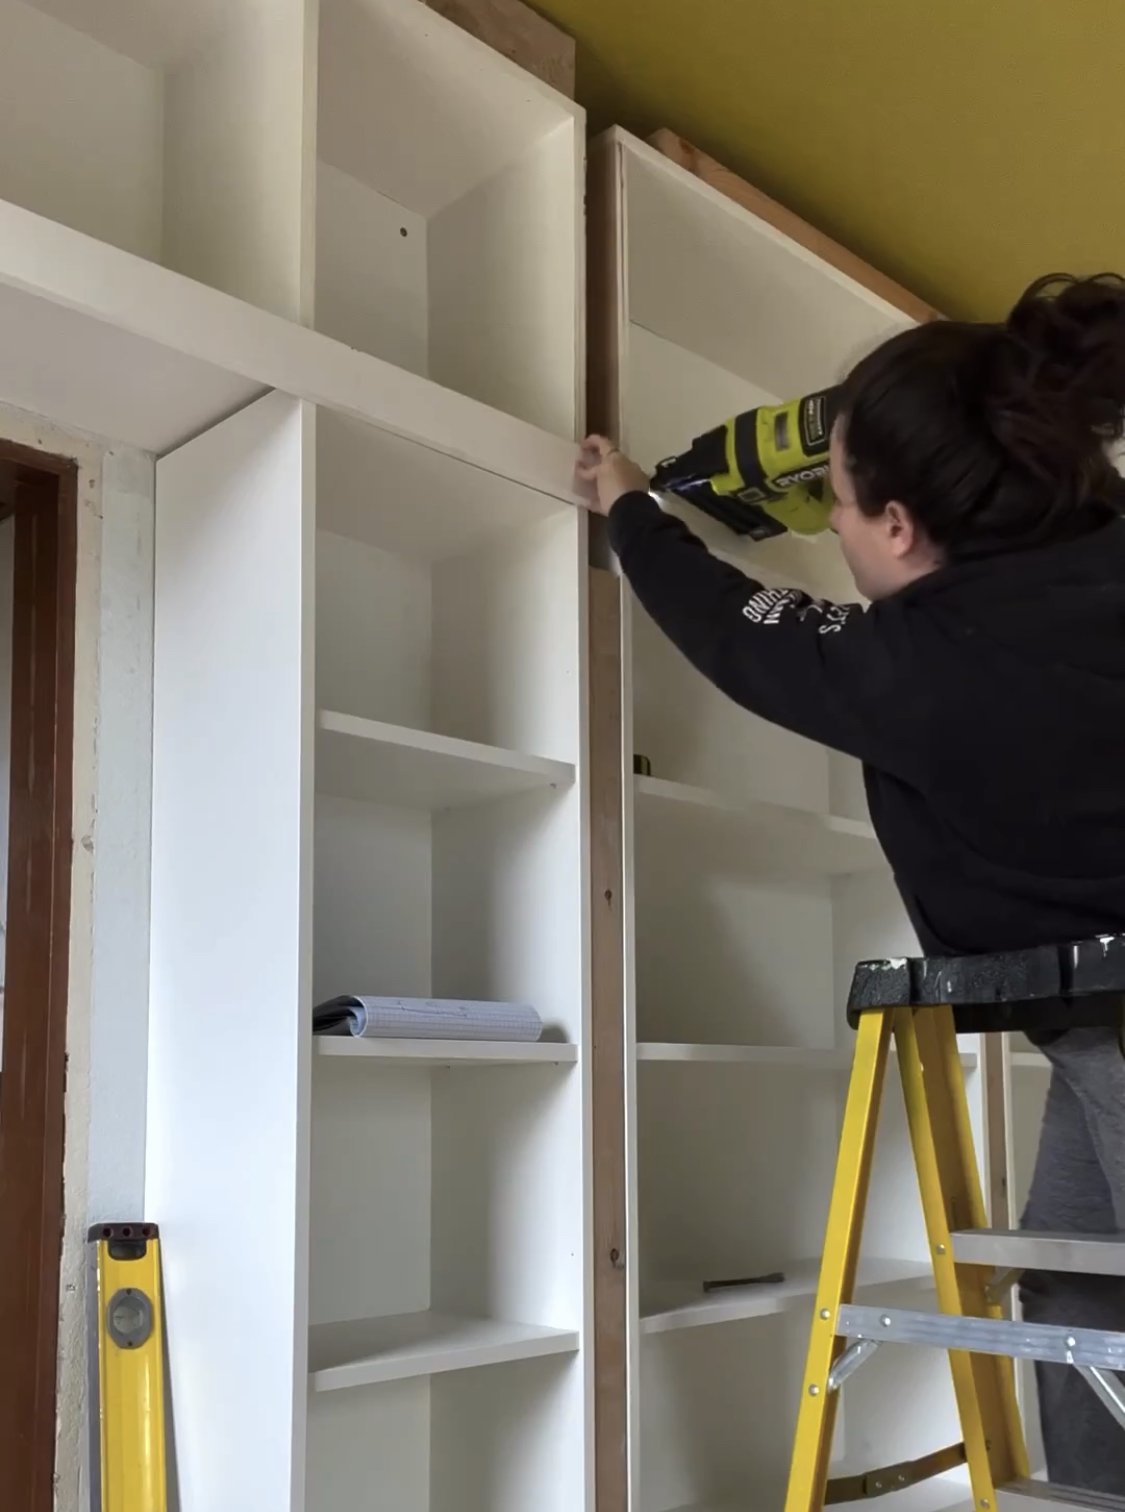
Now I’m able to start installing trim and this is where things get really fun because it starts to feel really built in and finished. I had a couple wider vertical sections, and then a wider crown piece and a 2in horizontal that spanned the full wall, but for the most part the fronts of the bookshelf all got 1.5in wide trim: verticals as well as the horizontal shelf fronts. I used by brad nailer to install all of these, making sure to nail in at opposing diagonals for added security.
All the nail holes got filled with wood filler, and all the seams and joints got caulk, then it was time for paint!
I used Behr’s Scuff Defense paint in Satin finish with the color Bit of Sugar, which is a really nice bright white. Two coats later and I was done! I chose to brush and roll the paint on, rather than have to mask off the whole room and drag my big ol paint sprayer into the house. It took a little longer, but I’m happy with how smooth the finish ended up.
Can you believe this is the same room, just a few short years ago? (Okay maybe not short years. We did have a whole pandemic between 2018 and now— it’s actually felt like an eternity since we bought this house).
I’m super proud of how this room has transformed and TBH I think Jack’s room might be my favorite room in the entire house. It’s so bright and happy and fun. It feels really special.
You may also like:
Eclectic Modern Bathroom Remodel
This before and after still rocks my world a little bit. Truth be told it’s not a true after, there are still projects to be done in here. but, I mean, come on. Are these two rooms even the same?! It’s wild. The layout for this room is strange. I’m really not entirely sure what the person who laid out this space was thinking, but gutting it and rearranging just wasn’t in the budget.
We kept pretty much everything and just reworked it. The vanity is the same, but I put new slab doors on, sanded down the original vanity to its natural oak and then whitewashed it to keep the modern light look that the raw wood had (putting poly over the raw wood would have turned it back into the ugly orangey color of the original bathroom— no thanks!).
For whatever reason, the old vanity had a strange vacant cavity next to the cabinet under the counter. What went there? Who knows. Probably just cobwebs and grime. I added some open shelves there which are perfect for holding baskets with hair product (curly girls represent!), and the bottom shelf is the perfect spot for extra TP rolls.
The large linen closet storage on the left side of the vanity got a slatted upgrade, I just refinished the existing door and trim the same way I did the vanity cabinet, and then added oak slats.
This bathroom is not hurting for storage so the massive medicine cabinet mirror was absolutely not necessary. a streamlined simple brass mirror took it’s place, and the sorely dated vanity lighting got a midcentury modern upgrade.
Dingy white walls be gone! I did a textured wall treatment, giving the walls a plaster-y look to remove the dated orange peel texture, and then painted a moody blue-ish green-ish teal, Valspar’s Everglade Deck.
Obviously the showstopper of the space is the stunning cement hex tile from Riad Tile. I’ve eyed so many styles from Riad for years and this large wall behind the vanity basically begged for a statement wall. I’m absolutely obsessed with how this tile completely transforms the room.
And to replace the old formica counter, we did a poured concrete counter! This whole space was a DIY update, and we did everything we could to do budget friendly updates, use what existing elements we could, and worked around the layout so we could create the maximum update for minimum cost. I did pretty much everything myself, except the poured concrete counter and the floor tile, which my husband took on (though I did cut the floor tile, so we’ll call that one a joint effort).
If you want to see the before images, scroll down!
We’ve got some other big projects in the works so this space is basically on hold for now. It has an ugly ivory fiberglass tub/surround which desperately needs to be replaced, but it works fine and I can hide it behind a pretty shower curtain, so for the time being it stays. A pretty white tub and tiled surround will happen someday! In the meantime, I just bask in the glow of the tile wall.
tile c/o Riad Tile
Our Dining Room Transformation!
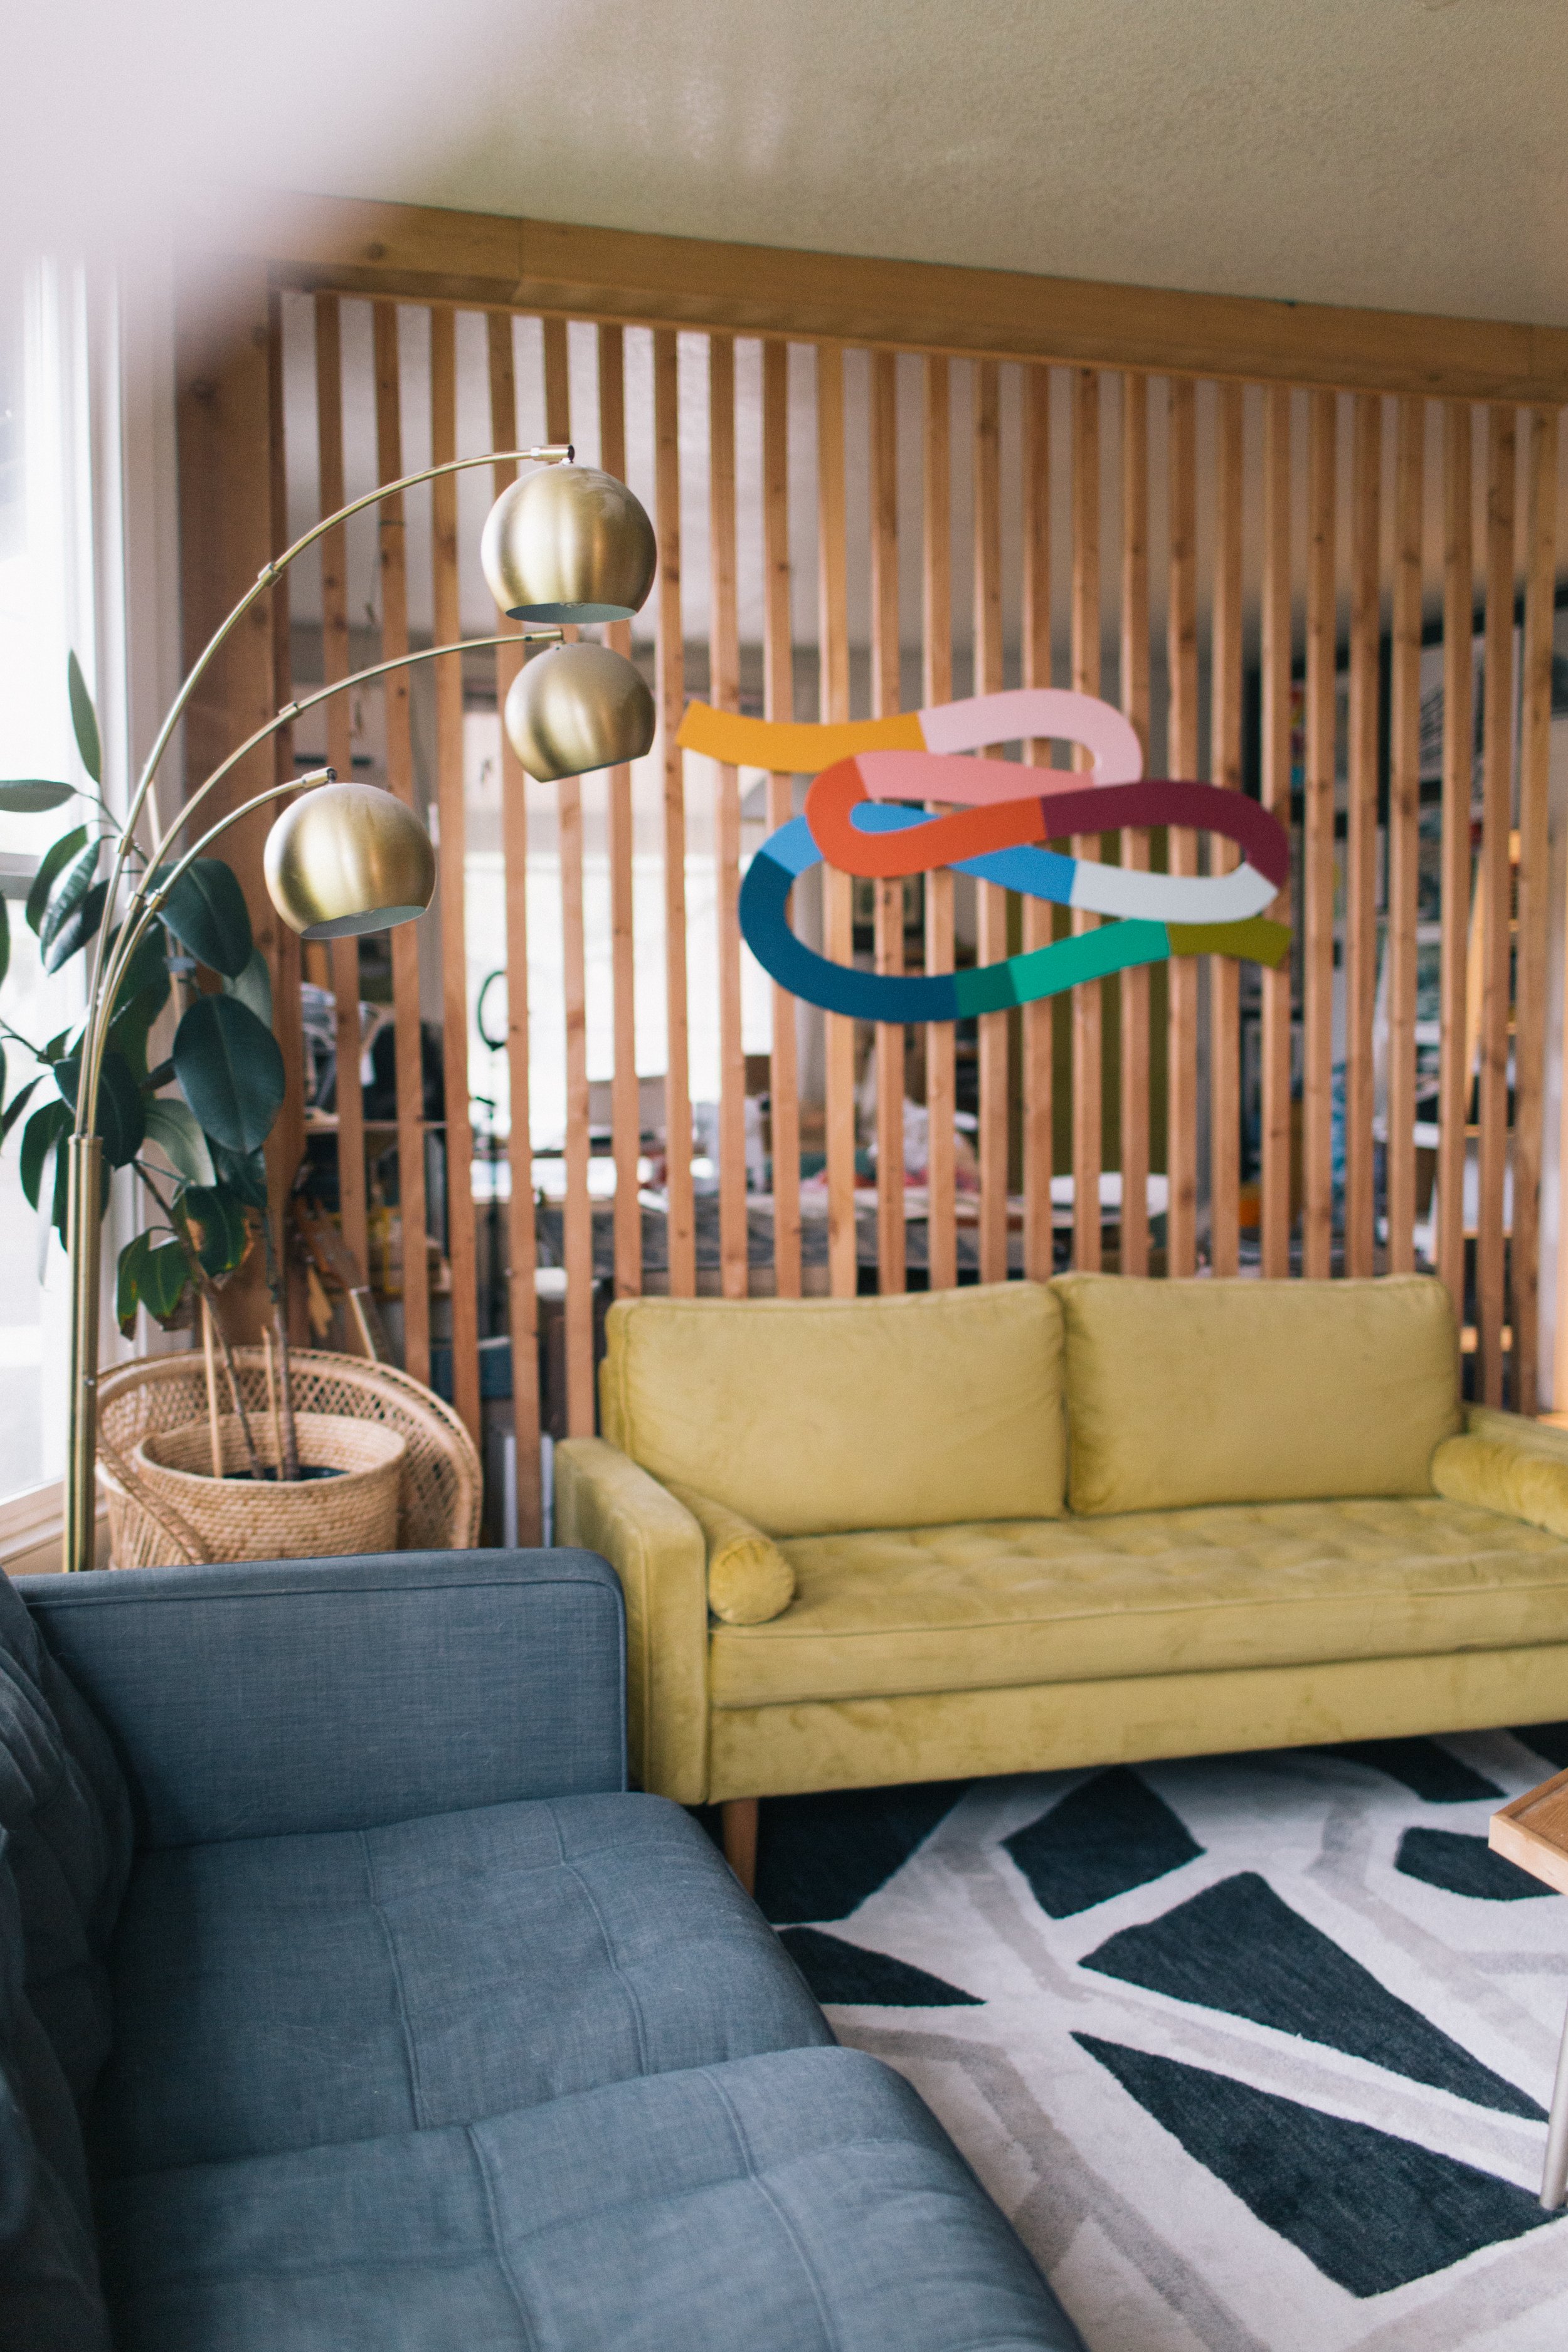
This space is still very much a work in progress, but I love being able to look back at what it looked like when we bought the house, and appreciate how far we’ve come. This room is * technically * the living room, but it’s smaller space and right by the front door, so having the entry there takes away some space too, so we decided to flip them, and put the living room next to the kitchen and move the dining room to the front of the house.
For us, having a dining table is nice for hosting friends, and doing crafts and projects, but we don’t use it on the daily, so moving the living room to the center of the home, right next to the kitchen, made way more sense. We use the living room and kitchen all the time, so putting them close together was perfect for us.
Because this wasn’t designed as a dining room we didn’t have a hardwired light over the table, so I found one at the thrift store for $5 and strung it up with a hook! It’s a plug in lamp so I plugged it into a smart plug so now we just tell Google to turn on the dining room light and it turns on! Way easier than going through the work to install a hardwired light. We may still eventually install one, but for now this works great!
You can kind of tell, but the ceiling was sagging a bit, which is why the old faux beam they had up looks super weird and bent. We jacked the ceiling up and put up a lighter cedar faux beam. We also took out the pony wall that divided the two rooms, and another tiny pony wall that was right by the front door, which made that space extra claustrophobic.
The disgusting, dog scented, dog fur saturated carpet was the first thing to go. It was even more disgusting IRL, and yes, all the stuff in the house was left when we bought it as-is, so we had to fill a couple dumpsters with all that crap as well as the stuff we demoed.
I’ve got more projects up my sleeves for the dining room, but those are on the back burner with some more pressing projects in line first, but I’m so happy with how far we’ve come since those photos on the first day!
Fresh & light-filled Kitchen Before + After
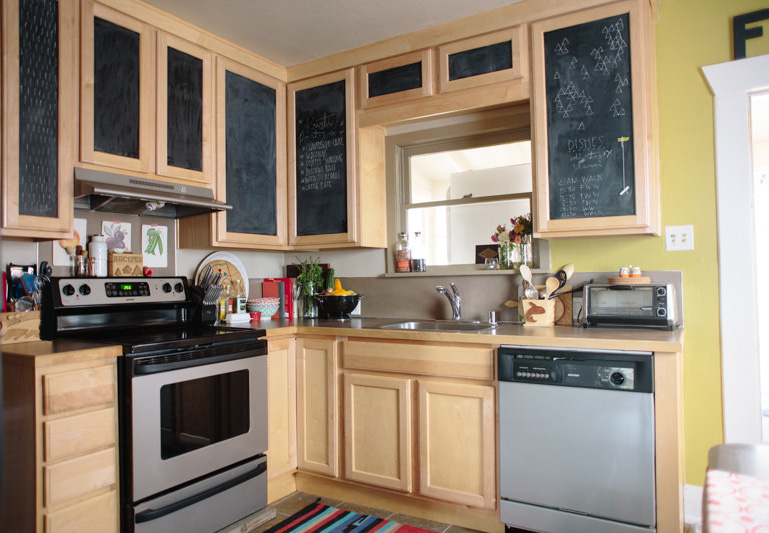
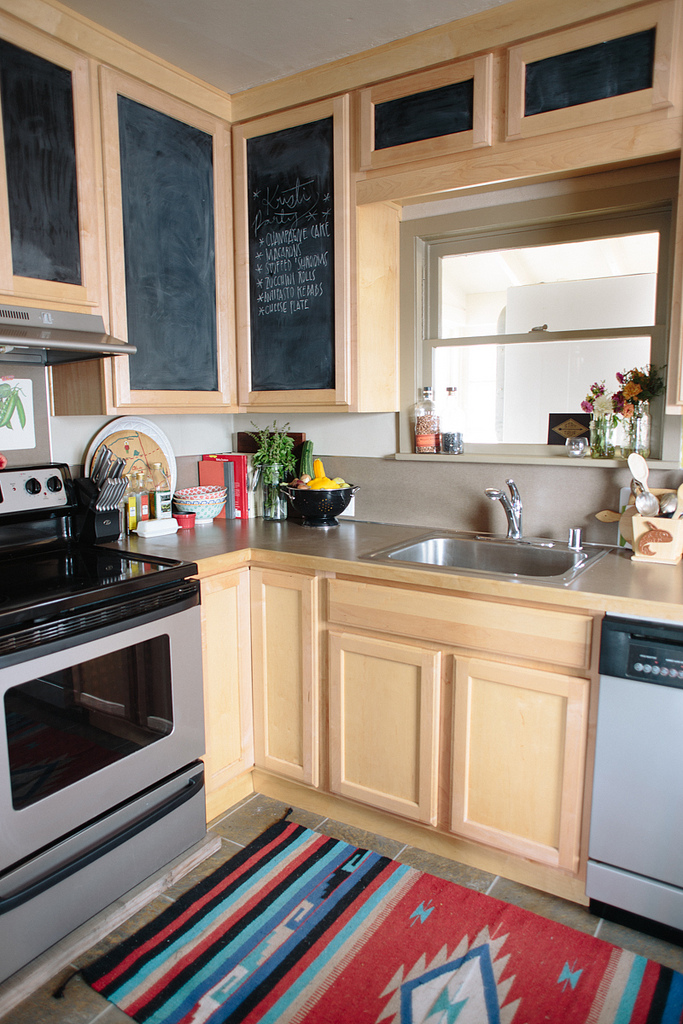
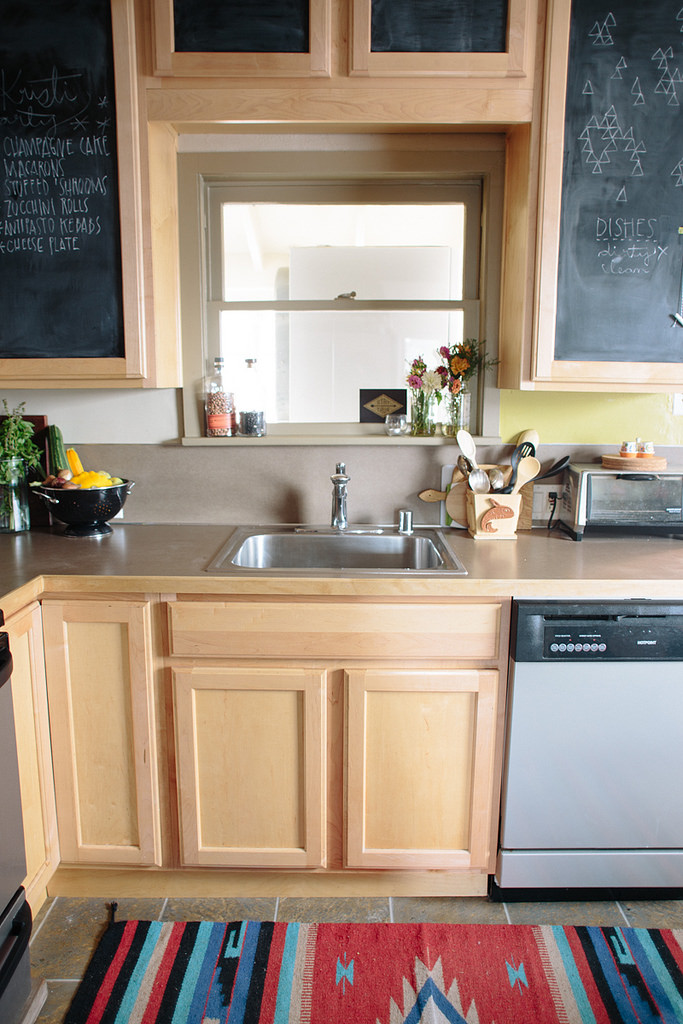
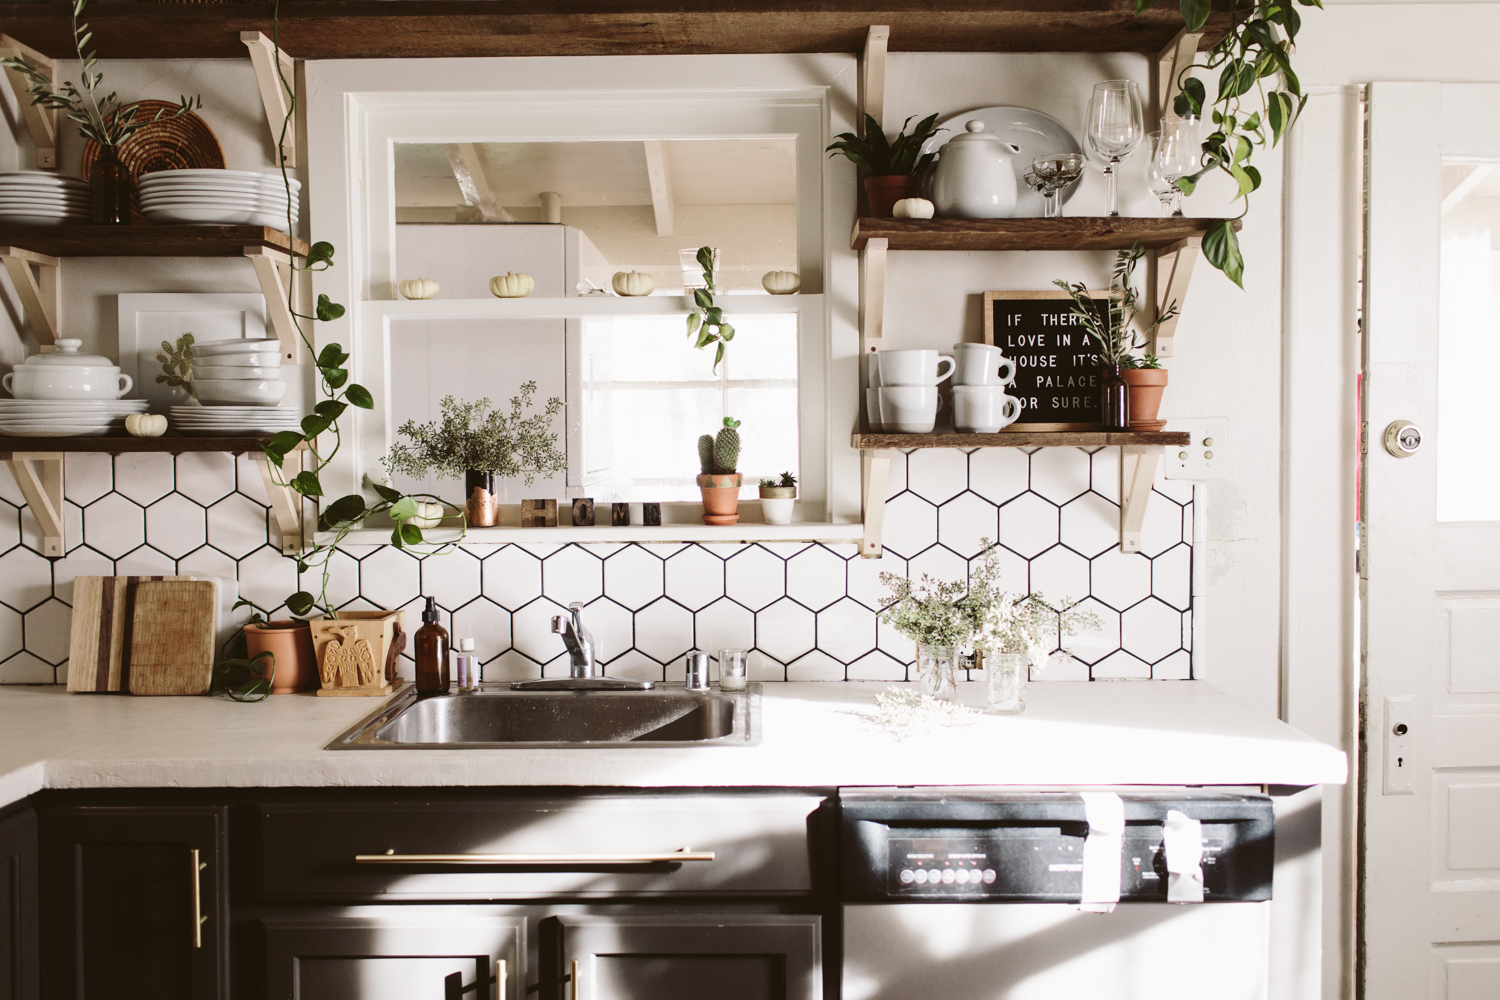
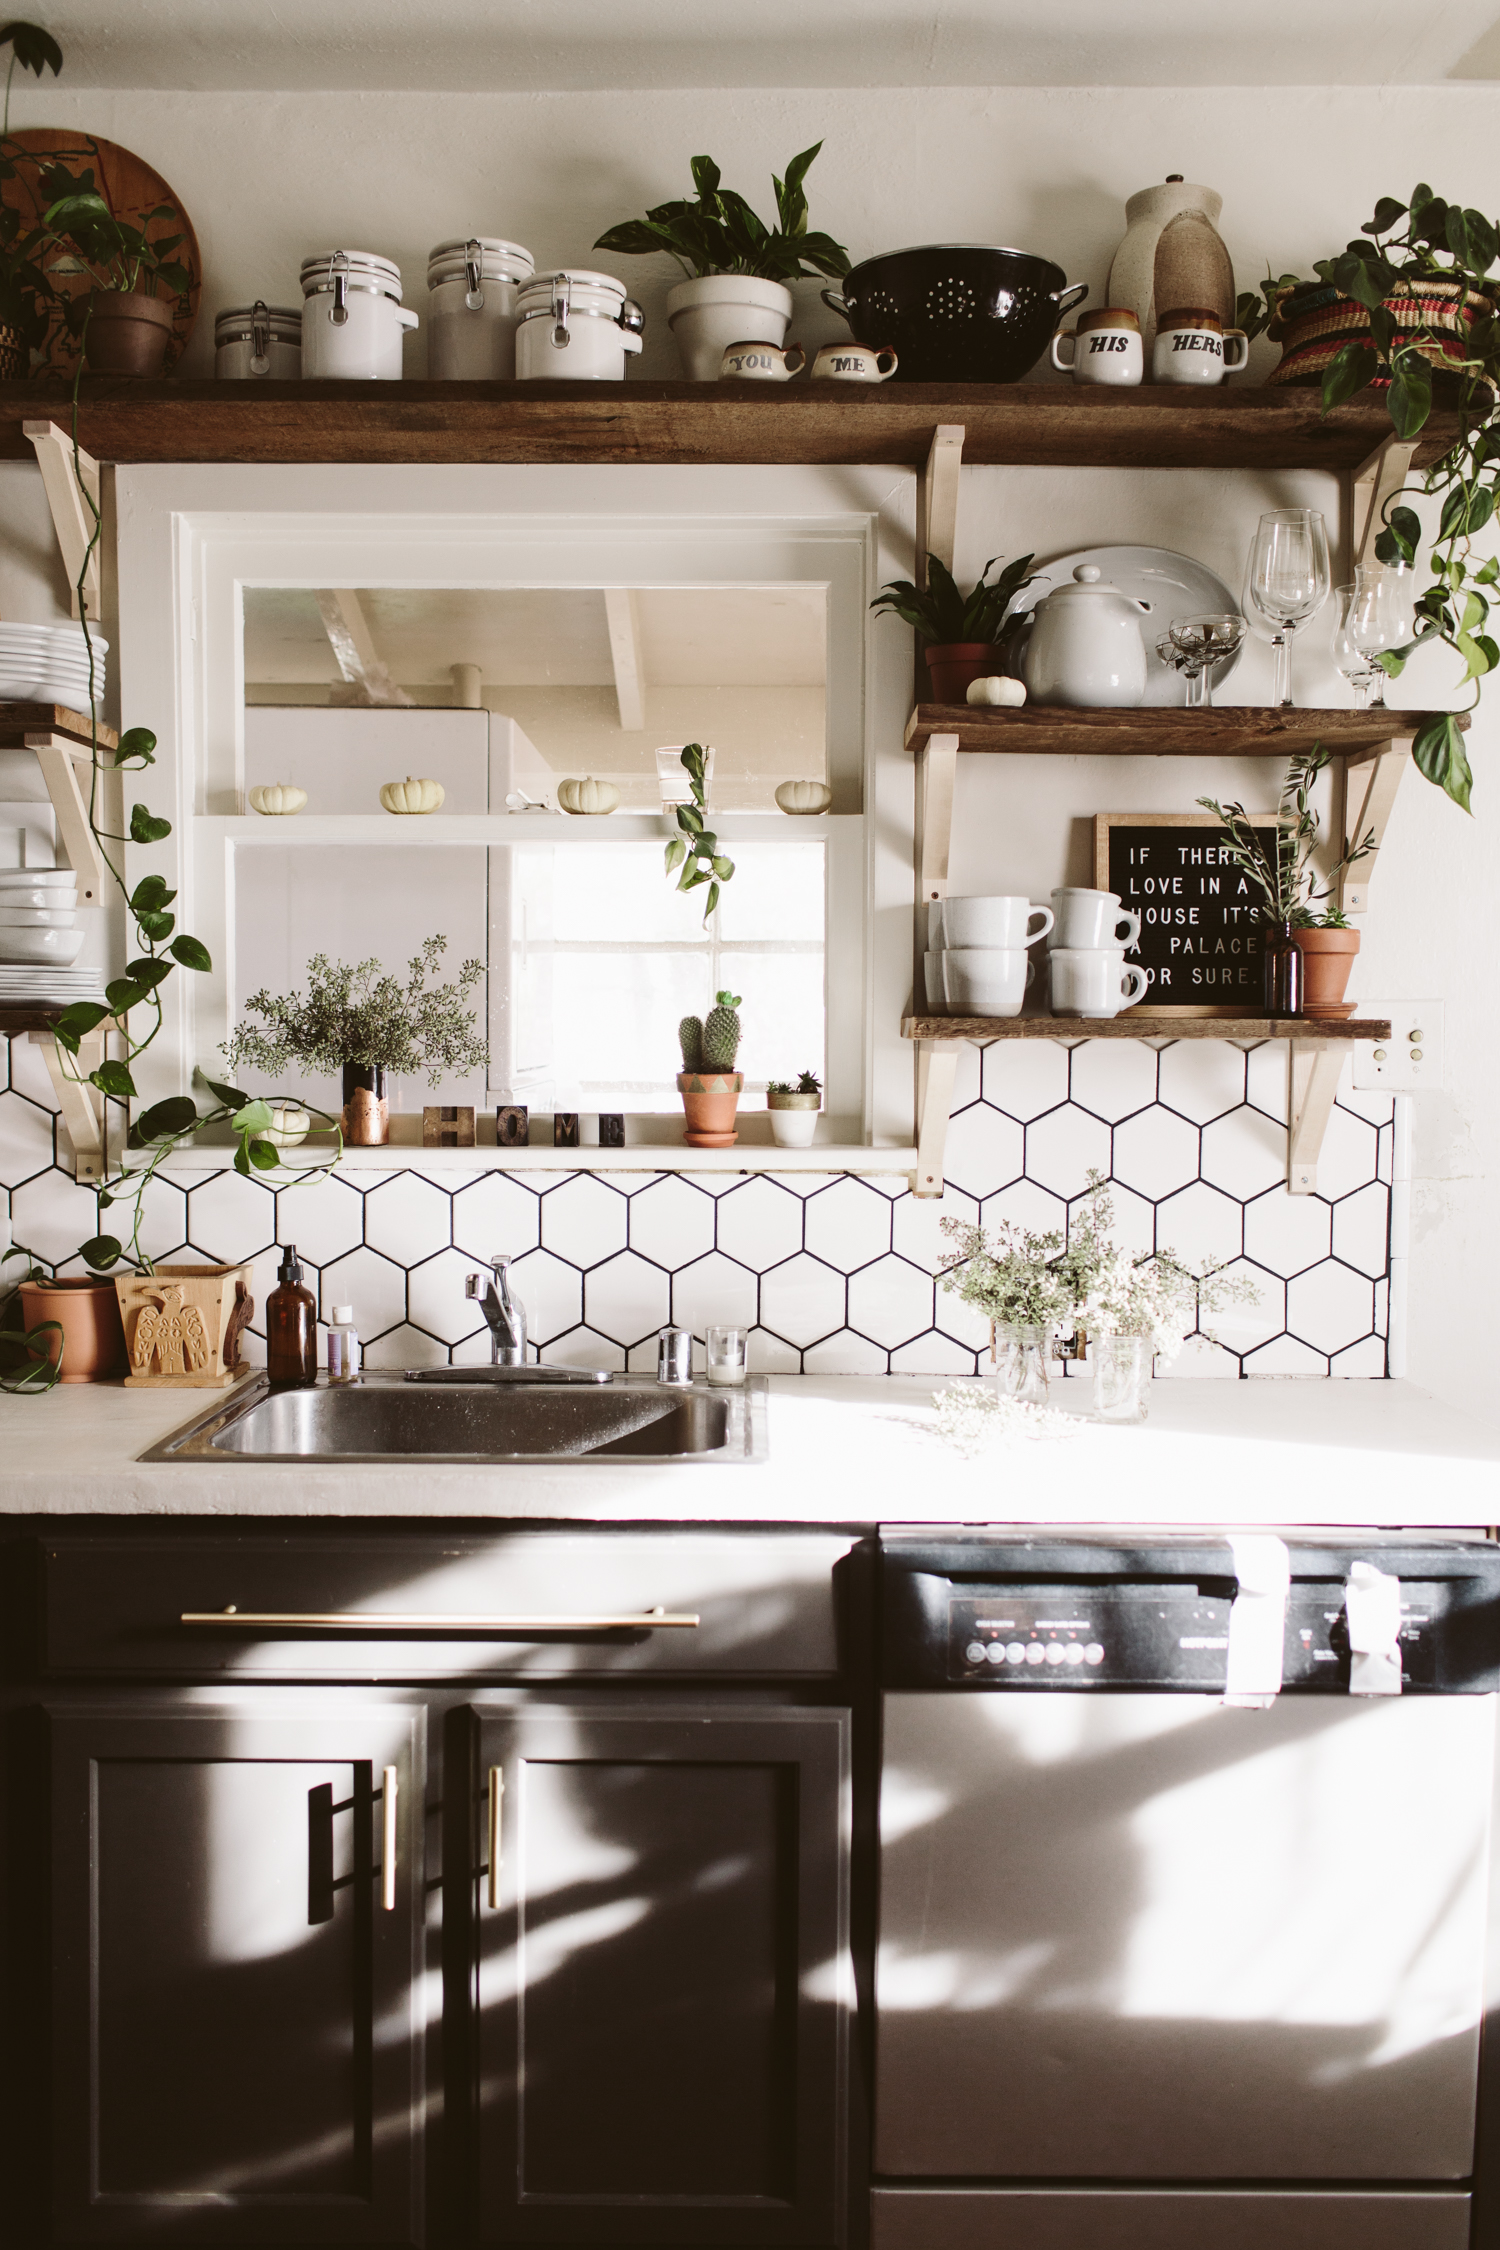
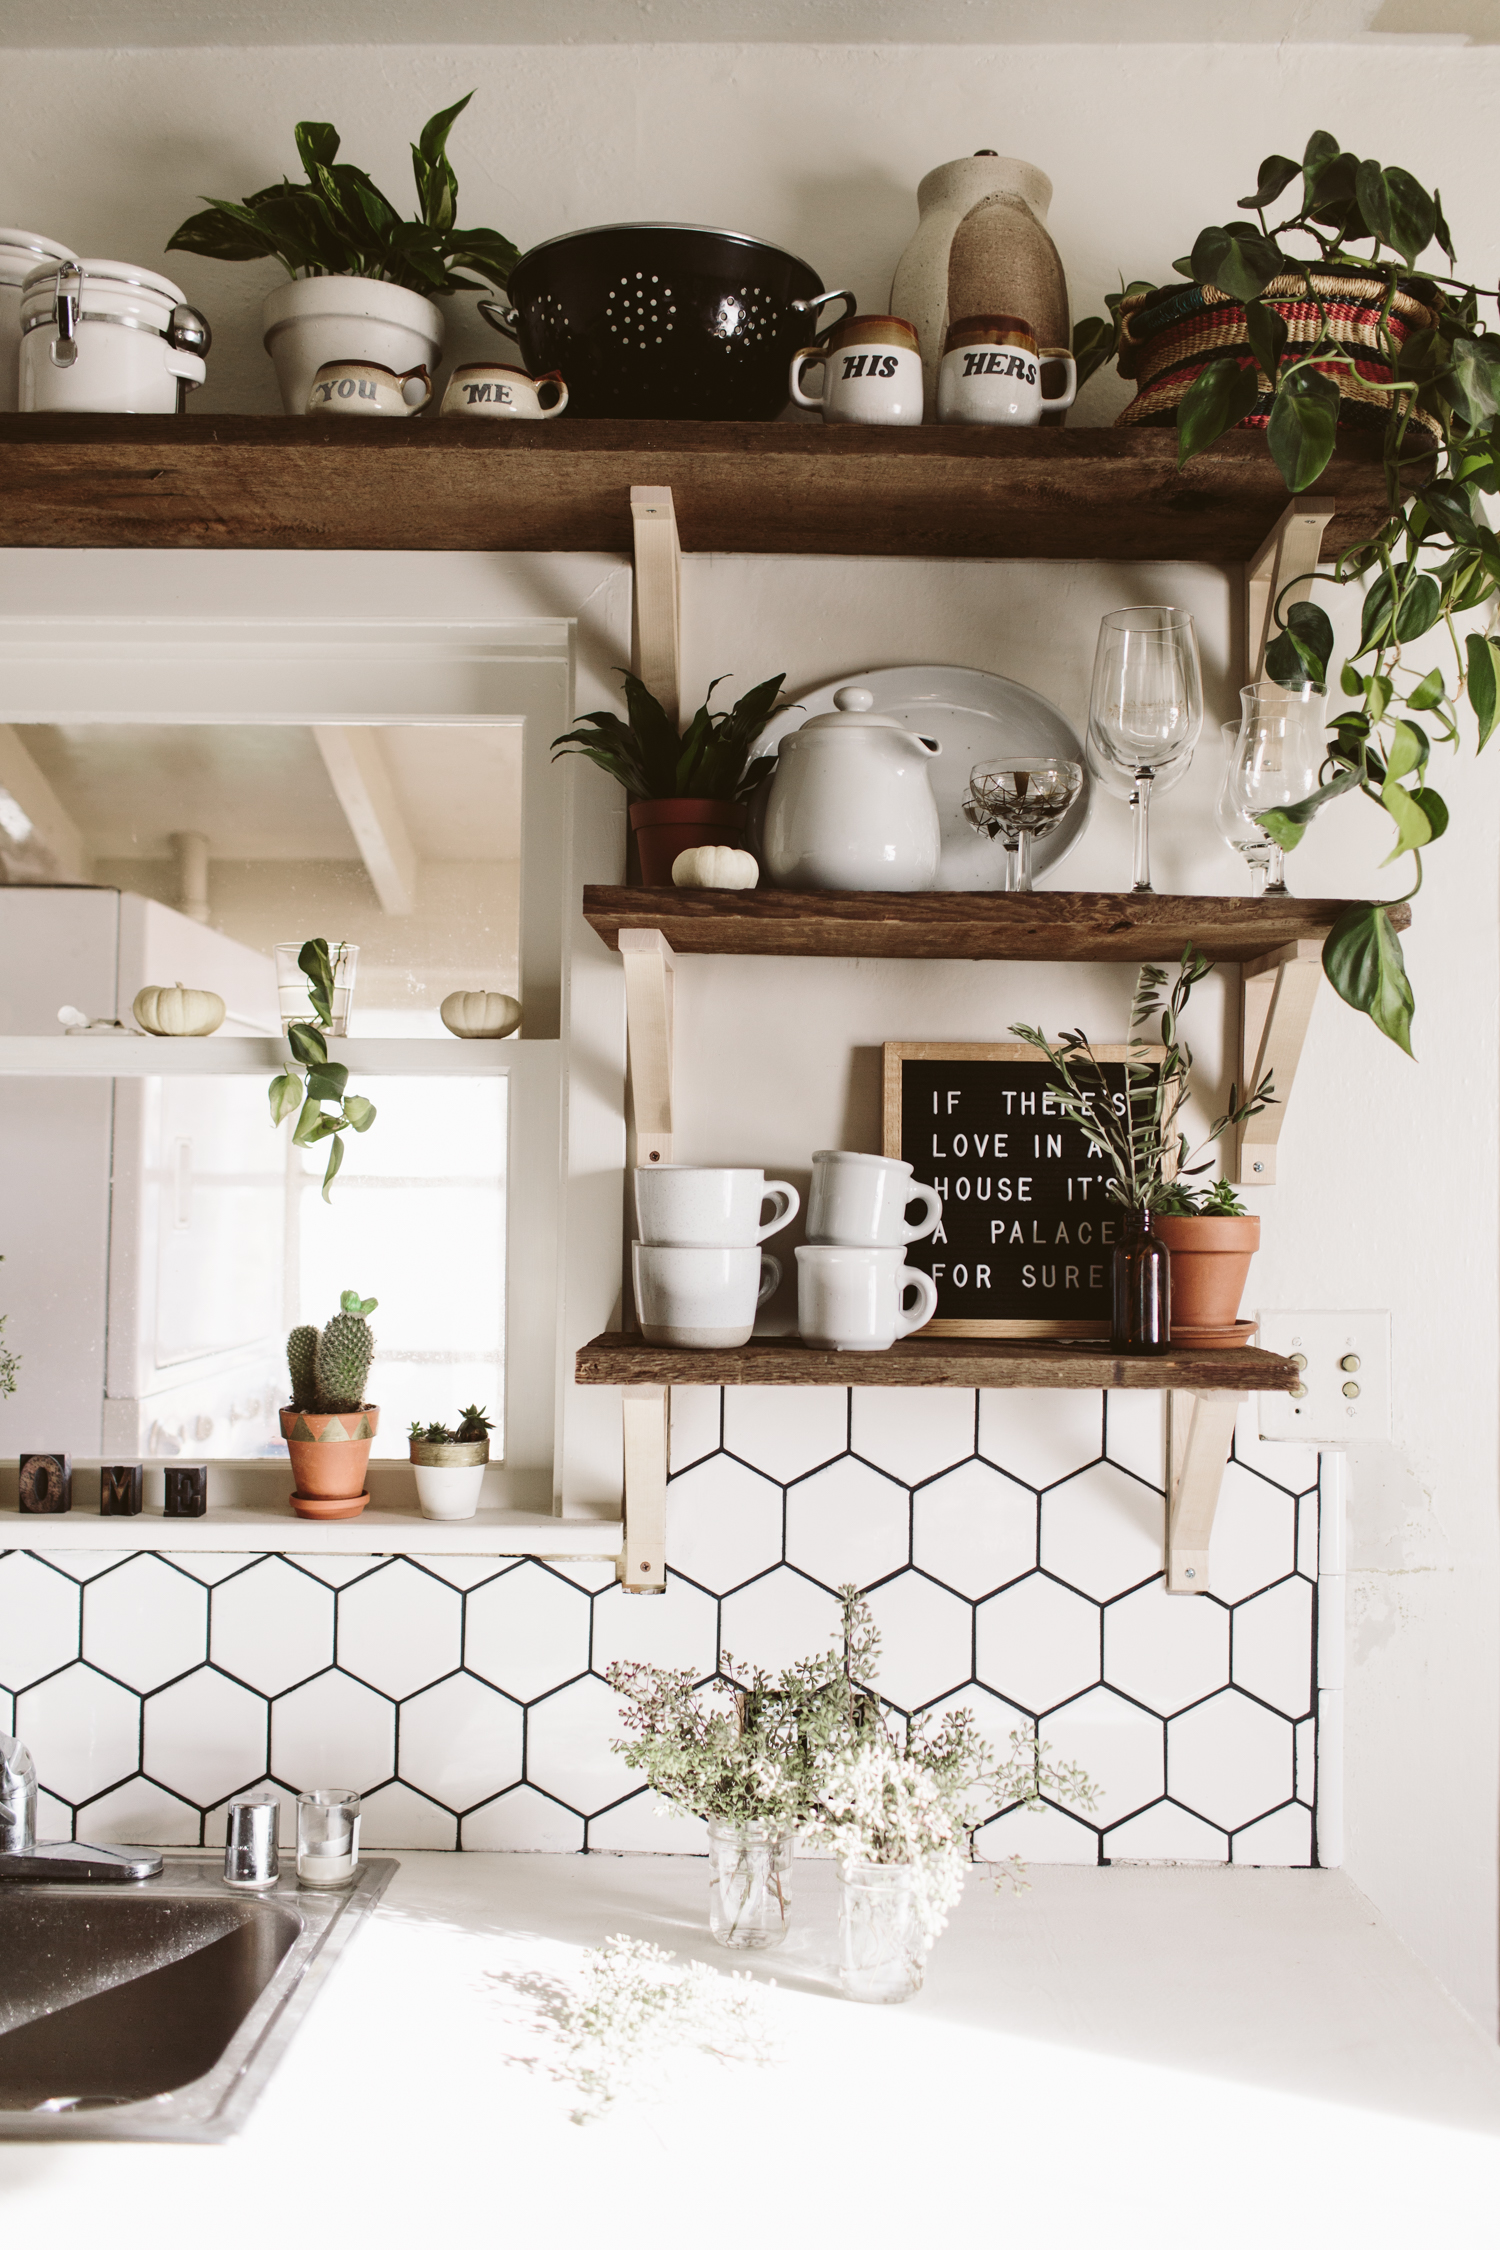
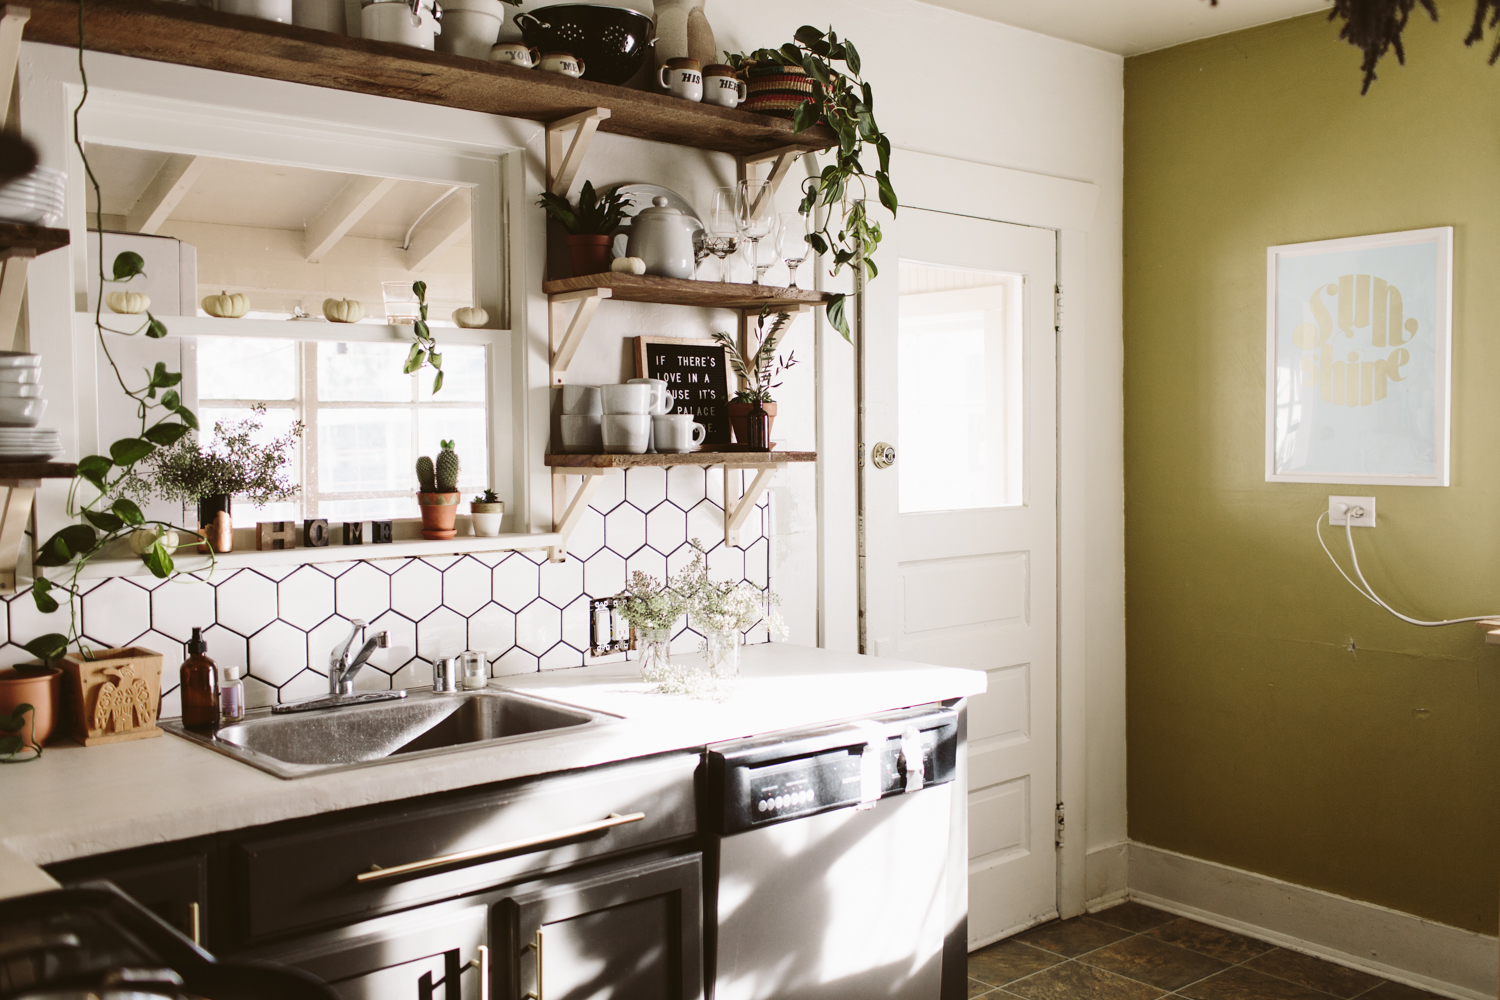
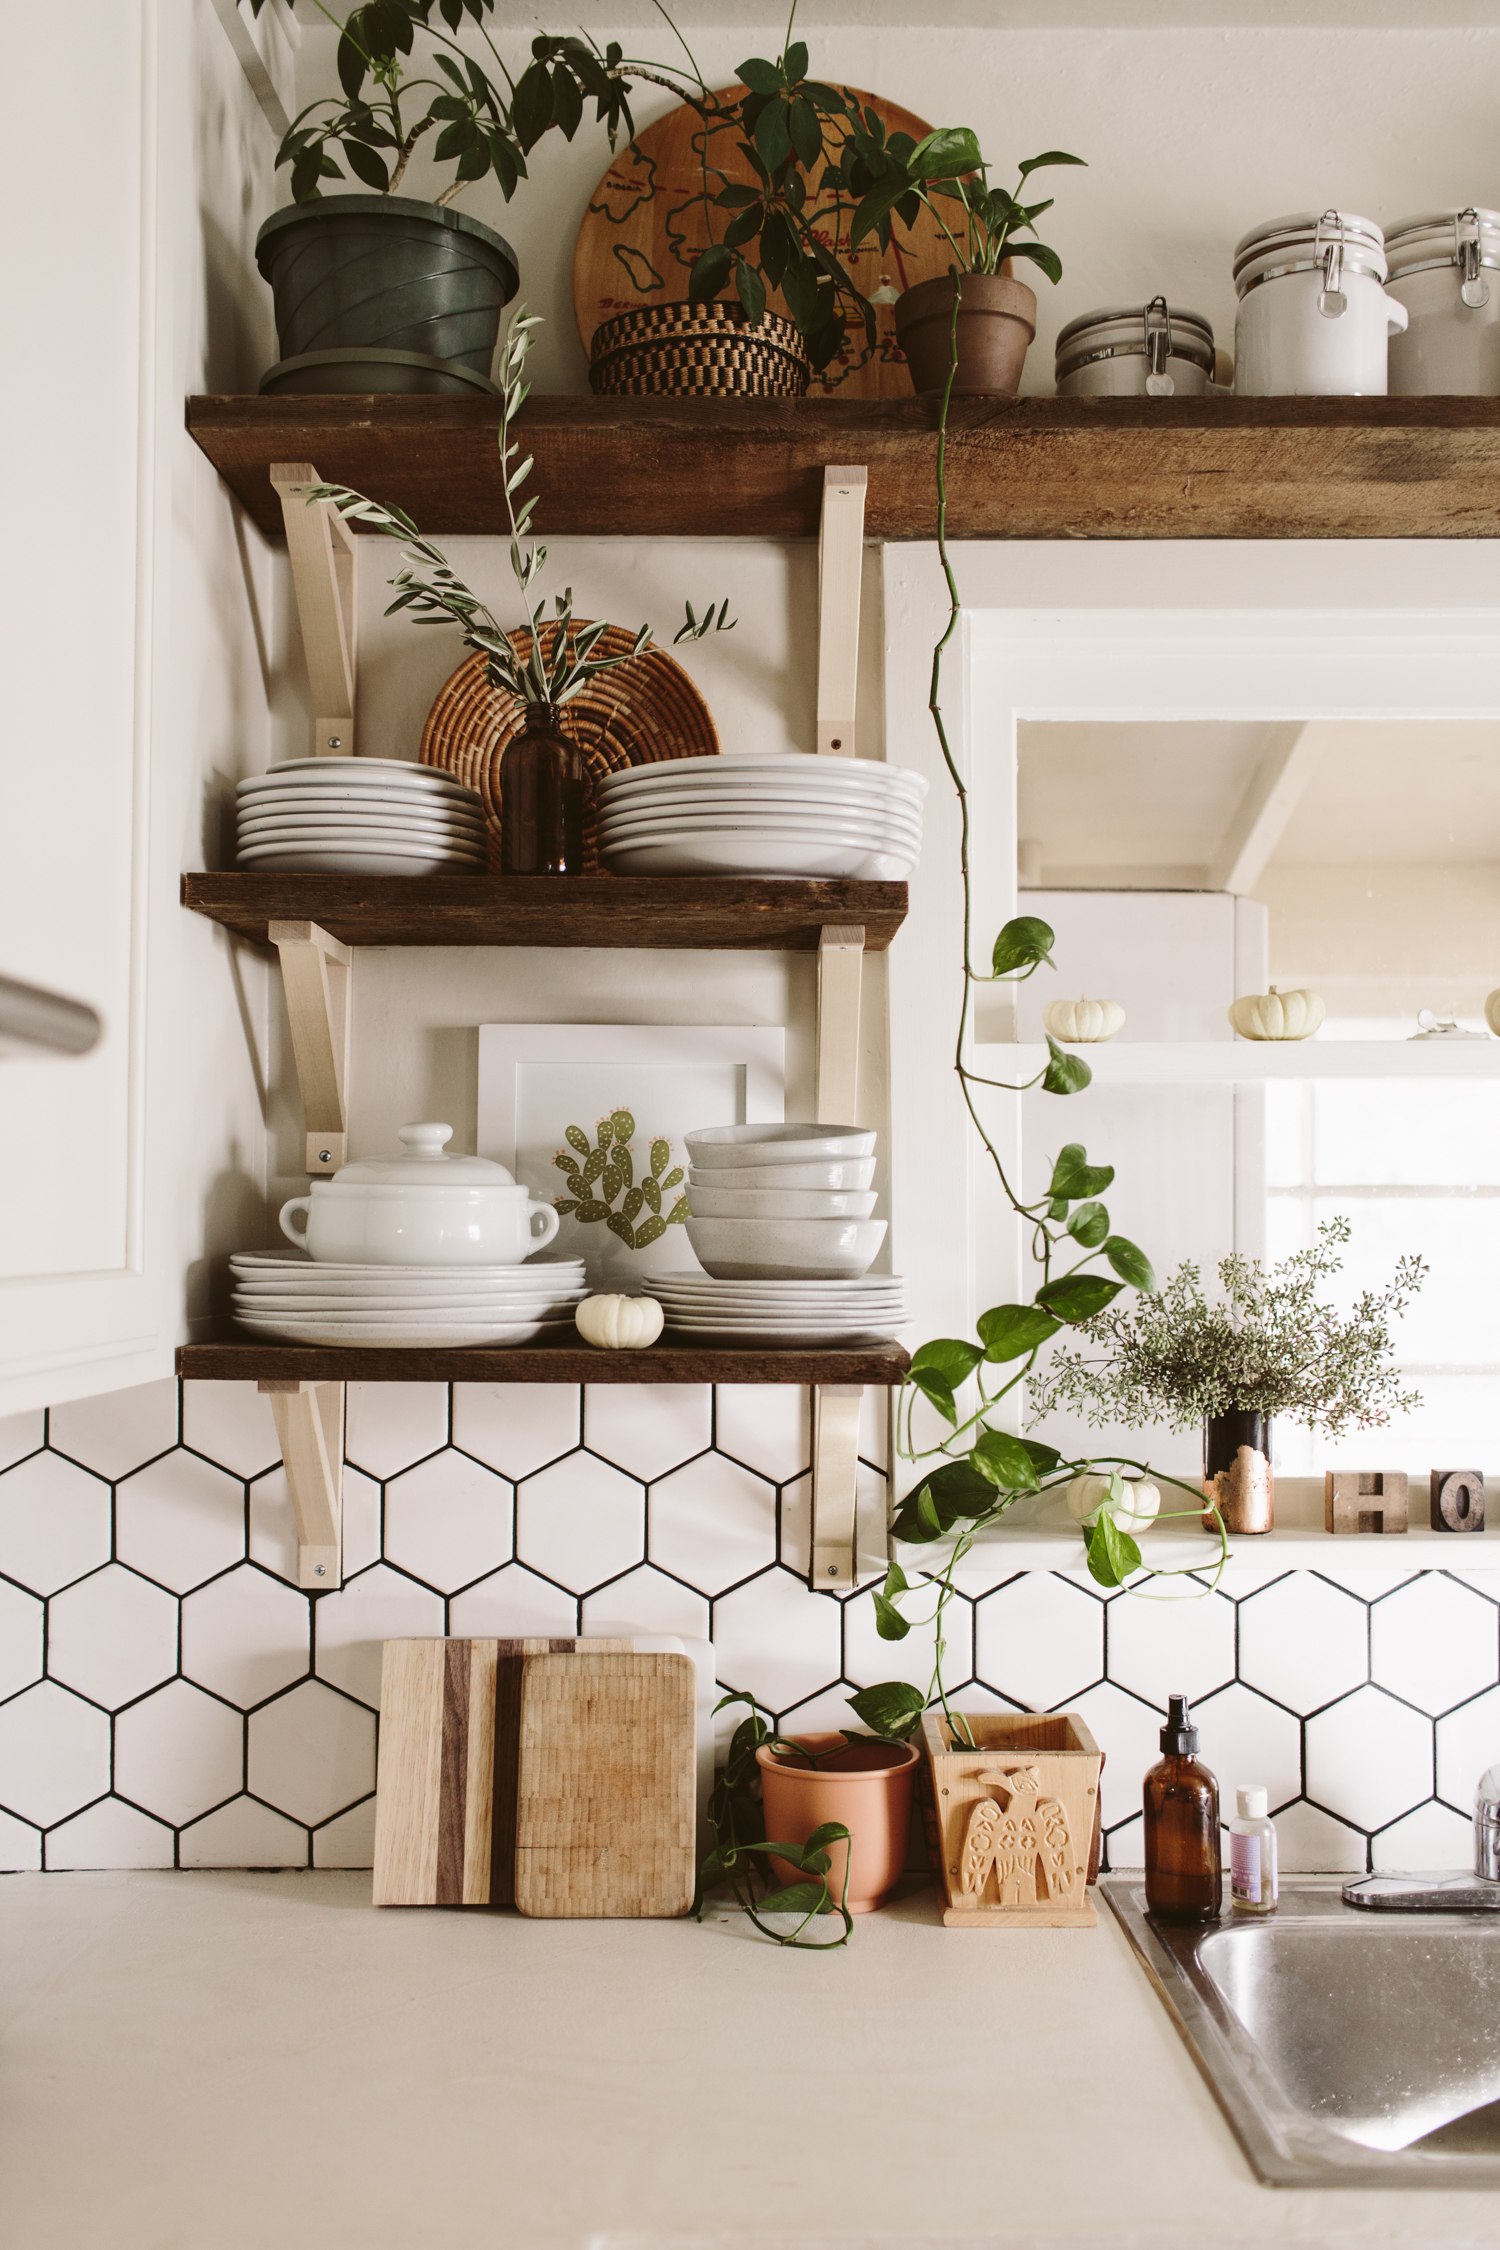
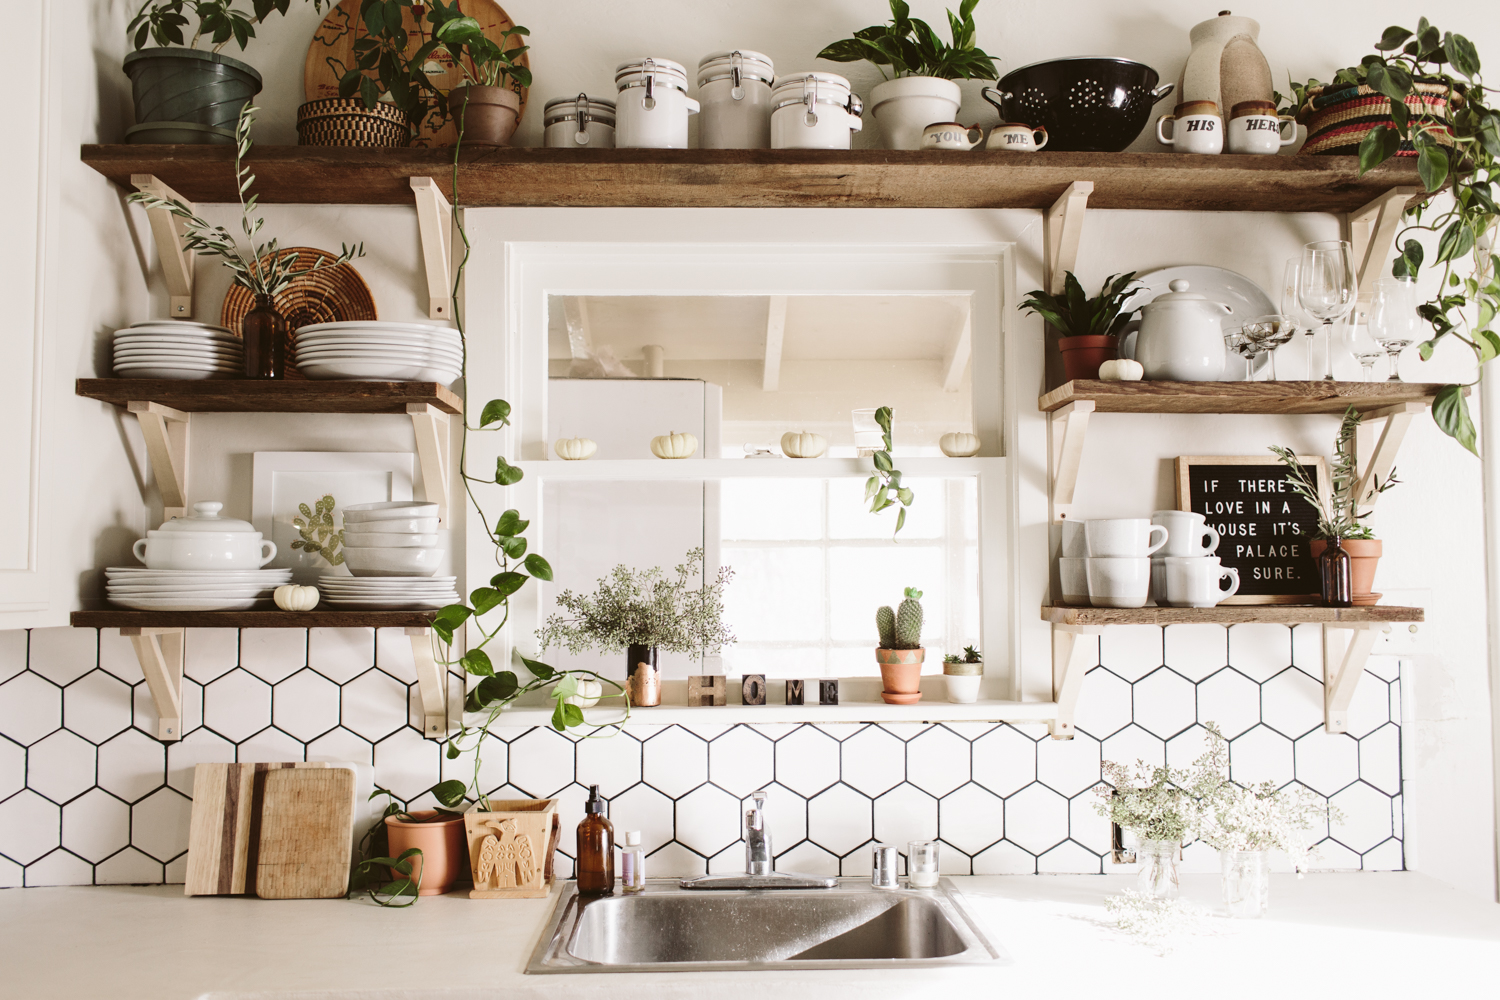
I still have a few odds and ends to button up on my kitchen remodel, but I grabbed these shots of the end result and I couldn’t resist sharing! (if you want to see my old kitchen before + after click here!)
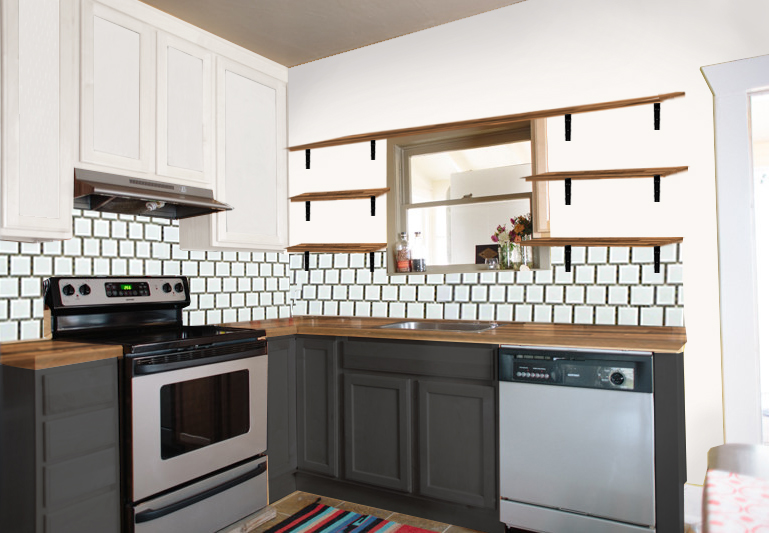
Below is the before, as well as my design plan. I ended up going with white concrete skim coat counters instead of the walnut butcher block which was my original plan. We simply skimcoated our existing formica counters with white concrete, which ended up being way more affordable, plus we wanted something durable and low maintenance, as we’re potentially going to turn this house into a rental in the near future. While I love me some butcher block counters, having something that needed regular upkeep and could get ruined by someone putting a hot pan on the counter seemed like not the best idea for a rental.
I took out the east wall upper cabinets and had to do quite a bit of wall repair, but it looks lovely now and I like how much more bright and open it is in here! The remaining upper cabinets I painted white (Glidden Cappuccino white, which is the white in my whole house), and the lowers were painted Behr Iron Mountain. None of the cabinets had pulls, so I added brass pulls from Target.
My original plan was to do white square 4x4 tiles in an offset subway tile pattern but I ended up going with hexagonal white tiles and I’m really glad I did, I love that they are white and neutral, but have a more interesting pattern than the standard subway look.
Anyway, scroll down to see the transformation and I’ll put links to the products I used at the bottom!

Dying to transform your own kitchen, but aren’t sure where to start, how to bring your vision to life, or need help figuring out how to make it all happen? I’ve got you covered! Head over here and let’s get started on working some design magic for you!
Want to recreate this design in your home? Get all the details and finishes on this design in my Design Kickstart! Moodboard, Budget Breakdown, and Source Links are all included so you can hit the ground running on transforming your own kitchen in to a bright + fresh space.
You may also like:
Hi, I’m Liz
I'm an artist, writer, designer, DIY renovator, and … well basically I like to do all the things. If it’s creative I’m probably doing it. I’ve spent over 30 years voraciously pursuing a life steeped in creativity and I wholeheartedly believe creativity and joy are inextricably linked.
Read more…
Explore The Archive
- January 2026
- July 2025
- May 2025
- January 2025
- December 2024
- August 2024
- July 2024
- May 2024
- April 2024
- January 2024
- December 2023
- October 2023
- September 2023
- July 2023
- June 2023
- May 2023
- April 2023
- March 2023
- February 2023
- January 2023
- December 2022
- November 2022
- October 2022
- August 2022
- June 2022
- May 2022
- April 2022
- March 2022
- November 2021
- October 2021
- August 2021
- July 2021
- May 2021
- January 2021
- November 2020
- October 2020
- September 2020
- August 2020
- July 2020
- June 2020
- May 2020
- April 2020
- February 2020
- January 2020
- November 2019
- October 2019
- August 2019
- July 2019
- June 2019
- May 2019
- April 2019
- February 2019
- January 2019
- December 2018
- November 2018
- October 2018
- September 2018
- August 2018
- July 2018
- June 2018
- May 2018
- April 2018
- February 2018
- January 2018
- November 2017
- September 2017
- August 2017
- July 2017
- June 2017
- May 2017
- April 2017
- March 2017
- February 2017
- January 2017
- December 2016
- November 2016
- October 2016
- September 2016
- August 2016
- June 2016
- May 2016
- April 2016
- March 2016
- February 2016
- January 2016
- December 2015
- November 2015
- October 2015
- September 2015
- August 2015
- July 2015
- June 2015
- May 2015
- April 2015
- March 2015
- February 2015
- January 2015
- December 2014
- November 2014
- October 2014
- September 2014
- August 2014
- July 2014
- June 2014
- May 2014
- April 2014
- March 2014
- February 2014
- January 2014
- December 2013
- November 2013
- October 2013
- September 2013
- August 2013
- July 2013
- June 2013
- May 2013
- April 2013
- March 2013
- February 2013
- January 2013
- December 2012
- November 2012
- October 2012
- September 2012
- August 2012
- July 2012
- June 2012
- May 2012
- April 2012
- March 2012
- February 2012
- January 2012
- December 2011
- November 2011
- October 2011
- September 2011
- August 2011
- July 2011
- June 2011
- May 2011
- April 2011
- March 2011
- February 2011
- January 2011
- December 2010
- November 2010
- October 2010
- September 2010
- August 2010
- July 2010
- June 2010
- May 2010
- April 2010
- March 2010
- February 2010
- January 2010
- December 2009
- November 2009
- October 2009
- September 2009
- August 2009
- July 2009
- June 2009
- May 2009
- April 2009
- March 2009
- February 2009
- January 2009
- December 2008
- November 2008
- October 2008
- September 2008
- August 2008
- July 2008
VISIT THE SHOP
PRIVACY POLICY & DISCLOSURE
We are a participant in the Amazon Services LLC Associates Program, an affiliate advertising program designed to provide a means for us to earn fees by linking to Amazon.com and affiliated sites.


